
Designing a school mascot is a sure-fire way to boost team morale. In this tutorial, you will learn how to design a school mascot by enhancing an existing clipart image with some basic shapes and artistic text to create an emblem.
Thanks for watching! We hope you found this tutorial helpful and we would love to hear your feedback in the Comments section at the bottom of the page.
Start your FREE 15-day trial and embark on a design journey with powerful tools for vector illustration, layout, photo editing, typography, and collaboration.
What’s New in CorelDRAW Graphics Suite
What you will Learn:
- How to use a stock clipart image from the content DVD.
- How to add and create basic shapes.
- How to use the artistic text tool.
Back to School – Show off your Mascot!!!
In this article, we look at enhancing an existing ClipArt image with some basic shapes and artistic text to create an emblem.
We will start by selecting a stock image located on the CorelDRAW installation DVD.
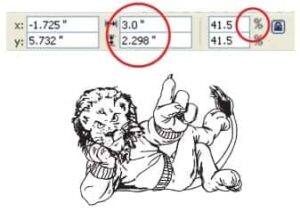
1. From the File menu, select Import. Assuming you have the Content DVD, browse the DVD to this location:\Extras\Content\Clipart\Sports\Mascots. Select the file called CGS07727. Once you have the image on the page, from the Interactive Property bar, resize the horizontal size to 3 inches. Ensure that the Aspect Ratio, symbolized by the small Lock icon is in the locked position.
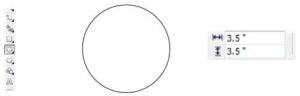
2. Before creating the ellipse, bring up the PANTONE Solid Coated color palette by going to Window > Color Palettes > PANTONE ® Solid Coated color. Now to create the ellipse. From the Toolbox on the left side of the CorelDRAW window, select the Ellipse tool. Hold down the Control key (Ctrl) while drawing the ellipse to ensure that you are creating a perfect circle. From the Interactive Property bar, set the horizontal size to 3.75 inches.
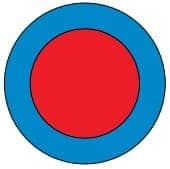
Next, tap the Spacebar to switch to the Pick too and then tap the “+” key on the numeric keypad, this will duplicate the ellipse that you just created. Note: If you are using a keyboard without a numeric keypad, such as a laptop, do a Ctrl+D to duplicate the object. With this ellipse selected, type a value of 2.5 inches in the Interactive Property bar and hit the Enter key. Left click on the red color swatch in the Color pallet. Similarly, select the outer ellipse and make it a light blue.
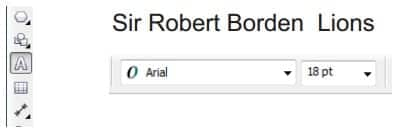
3. Select the Artistic Text tool from the toolbox . Click on the page and type the text Sir Robert Borden Lions From the Interactive Property bar, select the text and change the font to Arial and 18 point.
4. With the text still selected, select Text > Fit Text to Path and then drag the text cursor to the top section of the outer circle then left click to place it there.
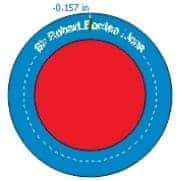
Next, left click on the white color in the Color palette and then right click on it. This will make both the text fill white and the text outline white.
5. Click and hold on the Basic Shapes icon and select Banner Shapes. In the Interactive Property bar, select the center banner option. Draw the banner, position it below the light blue ellipse and then resize it appropriately .
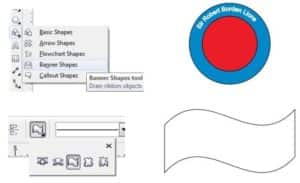
6. Next make the banner a solid white. Select the banner and then left click on the white color swatch in the Color Palette.
7. Using the artistic text tool, type “SRB Lions” and set the font to Arial Black and make the point size 48 points. This text will be black.
8. To position this text, we are going to Fit Text to Path, as we did before, but position this text on the bottom center of the banner shape.
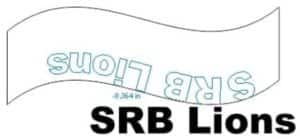
9. Since the text ends up reversed in the banner, the next step is to flip it over. With the text selected, using the Mirror Text functions in the Interactive Property bar, click once on Mirror text horizontally and then once on Mirror text vertically.

10. To center the text inside the banner. First select the text then select Arrange > Convert To Curves. Next, using the keyboard arrows position the text into the center of the banner.
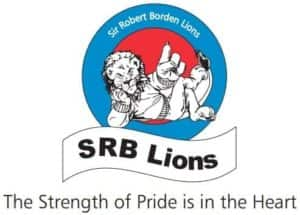
11. Drag the Clip Art image of the lion onto the ellipses. Since the lion was imported before the ellipses were created, it will end up underneath them. To bring the lion to the front (assuming it is still selected) press CTRL+PageUp repeatedly until the lion is visible.
12. The final step to creating the logo is to add the tag line below it. Using the Artistic text tool, click on the page and type this play on words, “The Strength of the Pride is in the Heart”. Resize and position the text and you are done.
Using a PANTONE Color palette to design our logo allows us to use it for a number of different purposes, such as: letterheads, business cards, screen printing or embroidery. All this is possible because of the power and flexibility of CorelDRAW.
 CorelDRAW Graphics Suite
 Ultimate Vector Bundle Vol. 1
 CorelDRAW Standard 2021
 Ultimate Vector Bundle Vol. 2
 Corel Vector
Start your FREE 15-day trial and embark on a design journey with powerful tools for vector illustration, layout, photo editing, typography, and collaboration.

Reader Interactions