
Watch this helpful tutorial to learn how to use CorelDRAW’s curve drawing tools, and how to use different types of nodes to edit and manipulate curves.
Artwork in this tutorial created by Francisco Marcos
Thanks for watching! We hope you found this tutorial helpful and we would love to hear your feedback in the Comments section below. You will find a written version of this tutorial below, and a printable PDF copy to download on the Download Resources tab above.
Watch this helpful tutorial to learn how to use CorelDRAW’s curve drawing tools, and how to use different types of nodes to edit and manipulate curves.
Artwork in this tutorial created by Francisco Marcos
Thanks for watching! We hope you found this tutorial helpful and we would love to hear your feedback in the Comments section below. You will find a written version of this tutorial below, and a printable PDF copy to download from the Download Resources tab above.
Start your FREE 15-day trial and embark on a design journey with powerful tools for vector illustration, layout, photo editing, typography, and collaboration.
Download these free resources:
Written tutorial for Windows (PDF, 723 KB)
Written tutorial for Mac (PDF, 580 KB)
Sample image (PNG, 140 KB)
CorelDRAW Graphics Suite Resources
Quick Start Guide (PDF, 2 MB)
Keyboard Shortcuts (PDF, 3.5 MB)
CorelDRAW and Corel PHOTO-PAINT user guides
For CorelDRAW Graphics Suite subscription and perpetual licenses (2018 to 2024), languages include English, Português do brasil, 简体中文, 繁體中文, Čeština, Deutsch, Español, Français, Italiano, 日本語, Polski, Русский
What’s New in CorelDRAW Graphics Suite
CorelDRAW Tools
 CorelDRAW Graphics Suite
 Ultimate Vector Bundle Vol. 1
 CorelDRAW Standard 2021
 Ultimate Vector Bundle Vol. 2
 Corel Vector
How to Design Curves
Curves in CorelDRAW can be as simple as a single straight line, or complex open or closed shapes comprised of curved or straight segments. In this tutorial, we’ll look at what defines a curve, the various curve drawing tools, and working with the nodes that comprise curves.
Introduction to Curves
A curve is an object that follows a specific path which gives it its defining shape. A curve can be a straight line, an open curved line, or a closed, multi-segment path. Every curve has nodes, which can be displayed and manipulated with the Shape tool.
Aside from spirals, freehand lines, and Bezier curves, most CorelDRAW objects are not created as curves.
Click on any of the images below to view full-size.
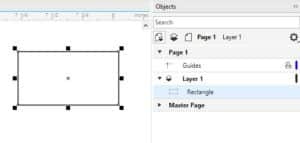
Here’s a rectangle, which is listed as such in the Objects docker.
This rectangle has nodes, which can be seen when activating the Shape tool and clicking the rectangle. But you can’t do much with these nodes except change the shape of the corners.

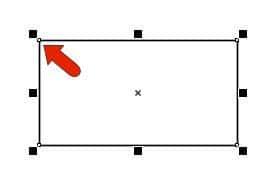
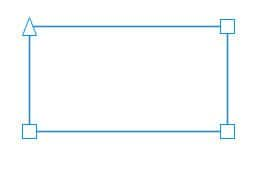
You can also see nodes when selecting the rectangle with the Pick tool – they are the tiny white squares. But again, you can’t use them to change the shape.
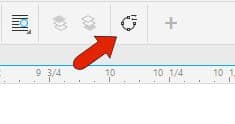
If you want to work with these nodes to change the shape, you first need to convert the rectangle to a curve. Do this by either clicking the Convert to Curve icon, by right-clicking and choosing Convert to Curves, or pressing Ctrl + Q.
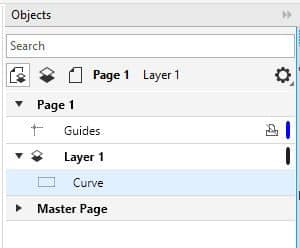
Now a curve is listed in the Objects docker.
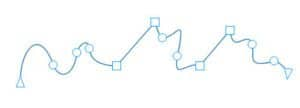
When you use the Shape tool now, you can access each node individually. Three nodes are white squares, and the arrowhead node at the start or end of the curve is a line node.
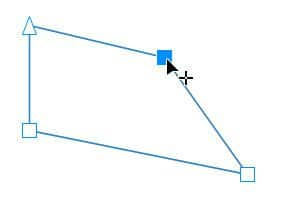
A node you select turns blue, and you can drag nodes to change the shape.
Manipulating Nodes
- You can marquee-select multiple nodes
- Delete a node by double-clicking on it
- Add a node by double-clicking along a line or curve
You can change the look of nodes by going to Tools > Options > CorelDRAW. On the Nodes and Handles tab, you can set node display size and colors. The three shapes represent the three types of nodes: cusp, smooth, and symmetrical.
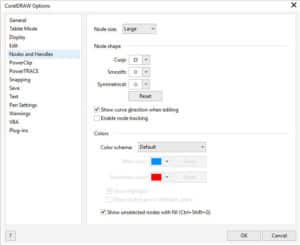
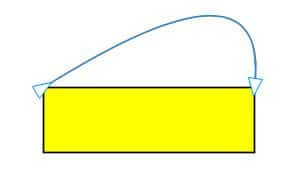
The square nodes of our rectangle-shaped curve are cusp nodes, which means nodes that hold a sharp corner.
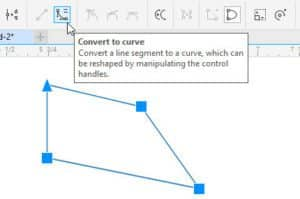
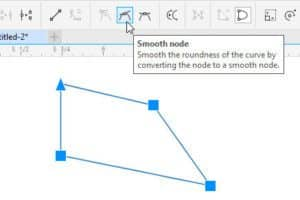
Let’s change these to smooth nodes. To do this, we need to convert the straight segments to curves. Select all nodes on this object and click Convert to Curve. Then click Smooth node.
Working with Nodes
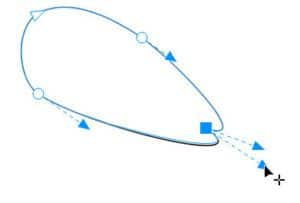
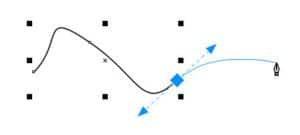
Now all segment transitions are smooth. In addition to moving nodes themselves, you can use a node’s control handles to control curvature. Right-clicking on a node enables you to change its type, such as changing a smooth node to a cusp.
For a cusp node, use the control handles to create a sharp corner.
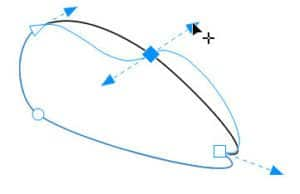
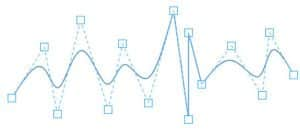
The last node type is symmetrical, which has a diamond shape. Symmetrical nodes have the same tangency and curvature on both sides of the node.
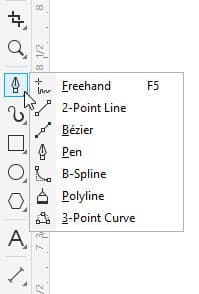
Now that we understand how nodes can be adjusted, let’s look at some of the curve drawing tools, which can be found in this flyout toolbar.
The most basic curve tool is 2-Point Line. You can drag out individual segments, and with the Shift key pressed you’ll snap to angles at 15-degree increments.
You can also start a next segment at the end node of an existing segment. Once a curve is closed, you can give it a fill.

This object is created as a curve, so you can go straight to the Shape tool to start node editing.
For any curve tool, look in the Property Bar to see additional options. For 2-Point Line, there are options to make perpendicular lines, or lines tangent to a curve.
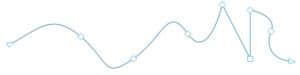
With Freehand you can drag to create a curve. If Shift is pressed while dragging, the segment will be straight. Nodes are placed where the curves change direction or angle.
Polyline is similar to Freehand, except that you can continue drawing multiple connected segments. If you move the mouse instead of dragging, you’ll create a straight-line segment. Double-clicking finishes the curve.
With the Bezier curve tool, you can click repeatedly to create continuous straight-line segments.
Creating Curves
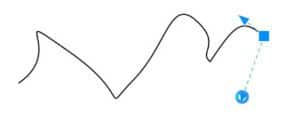
To create curves, start by dragging to define the starting direction, then click the next point and drag, and so on. Clicking without dragging adds a straight segment. Pressing the Spacebar finishes the curve.
While dragging to adjust curvature, if you press Shift you can snap to standard angles. When pressing Alt you can move the node itself.
By default, these nodes are smooth nodes. But pressing the C key while moving a control handle creates a cusp node.
Double-clicking the Bezier icon opens the options for this tool, which also apply to Freehand. Here you can adjust corners and straight lines, and control auto-join.
The Pen tool is similar to Bezier but has the Preview mode option. With preview, you can see how the segment will look before you draw it.
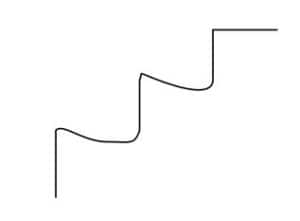
The B Spline tool enables you to draw smooth curves, by setting control points that shape the curve without breaking it into segments. By default, the nodes aren’t on the curve itself. But if you press the V key while clicking points, you’ll create straight segments. Double-clicking ends the curve.
The 3 Point Curve tool is great for drawing arcs without worrying about node control handles. Click and drag between the start and end points, then move the mouse and click the third point.
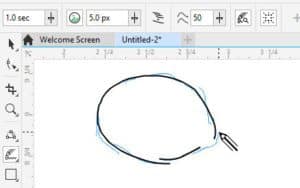
In the next flyout toolbar, Live Sketch is great for working with pen tablets, mimicking how you would hand-sketch lines and curves. You can set the timer after which strokes will be converted into curves, as well as the distance from the curve within which new strokes will be added to existing curves
Finally, the Smart Drawing tool tries to guess what you’re drawing when dragging the mouse. You can adjust the levels of shape recognition and smoothing.
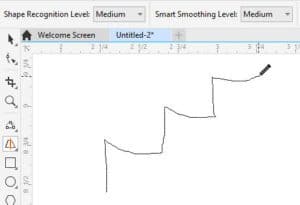
Your freehand curves are then converted into vector lines or curves.
Once you have a grasp of how curves and nodes work, it’s easy to create or trace the exact shape you want.
As an example, say you want to trace around the cat’s mask in this document. You can use the Bezier tool, setting a red color, and clicking and dragging all the way around, to make a smooth closed curve.
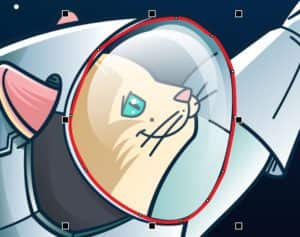

You don’t have to worry about being overly exact, because you can use the Shape tool to adjust nodes, or to add nodes where needed.
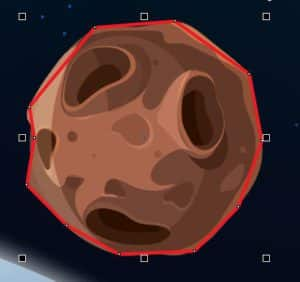
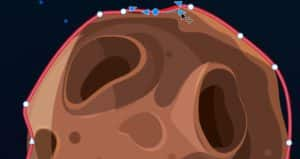
For another example here’s an asteroid imported into the document, which will also be traced. This time Freehand is used to trace with line segments, double-clicking after each segment to continue the next segment, and clicking once to close the curve.
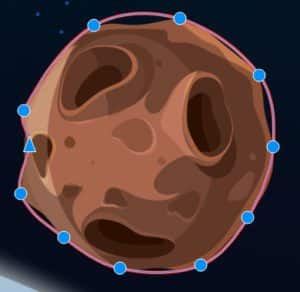
Then with the Shape tool, select all nodes and covert to curve, then make the nodes smooth.
Now the nodes can be adjusted to follow the outline.
Start your FREE 15-day trial and embark on a design journey with powerful tools for vector illustration, layout, photo editing, typography, and collaboration.

Reader Interactions