
By Pratik Shaw
There are two common types of digital color, RGB and CMYK. Industrial printers can generally only print in CMYK, so if you have an image in RGB, such as a digital photograph, you will have to convert it to CMYK. This may result in a loss of quality. This tutorial shows you how to avoid that loss.
You will learn about the following Corel PHOTO-PAINT tools and processes:
- Check the color gamut
- Reduce noise
- Change the image mode to CMYK
- Adjust the color cast and balance
- Enhance the exposure and sharpen the image
Start your FREE 15-day trial and embark on a design journey with powerful tools for vector illustration, layout, photo editing, typography, and collaboration.
What’s new in CorelDRAW Graphics Suite
PHOTO-PAINT corrections and enhancements
Introduction to PHOTO-PAINT
Retouching digital camera images for CMYK print jobs
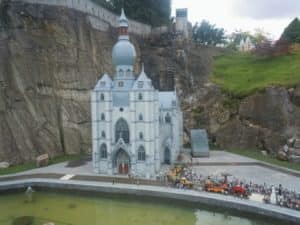
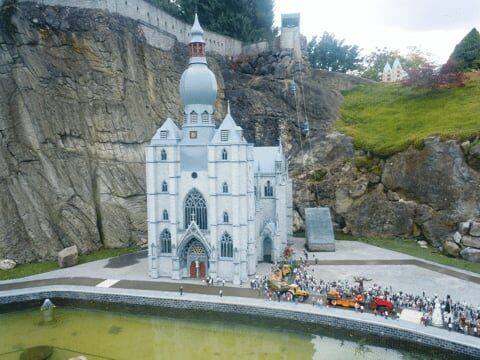
In this tutorial, we will be covering some important steps for retouching a digital camera image and processing it for use in a CMYK print job. Some settings/values may however, have to be altered to achieve the desired results depending on the image you have selected.
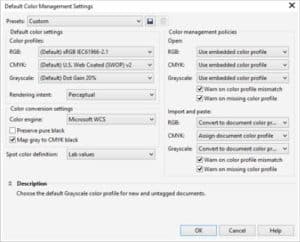
Before we start this tutorial, make sure you have the Color Management set up as shown in the screenshot below. Color Management settings can be accessed from Tools > Color Management > Default Settings. You can change the CMYK color profile to match with the color profile that your printing service provider will be using for the print job.
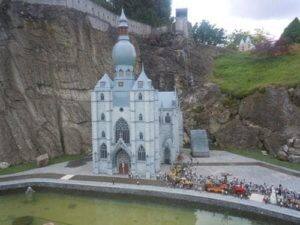
Open the image you want to work on in PHOTO-PAINT (File > Open). When you open the image, a Color Information dialog will pop up, suggesting that a color profile is missing (as shown below). In the Assign color profile drop-down list, select the default RGB profile (sRGB IEC61966-2.1) and click OK to close the dialog.

1. Check color gamut
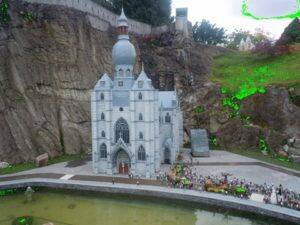
Let us first check if the image has colors that are out of gamut (which would be unprintable in CMYK press). Go to Window > Dockers > Color Proof Settings. This will open Color Proof Settings docker. Enable the Proof colors checkbox in the docker. Just below the checkbox, there is an arrow to expand Gamut Warning. Click the arrow and enable the checkbox of “Out-of-gamut colors”. By default it will show a gamut warning in a fluorescent green color. You can select any color for the warning that is suitable for the image. Under the Simulate environment drop-down, select the color profile that will be used by your printing service provider to print the job. In the image below, you can see the fluorescent green-colored areas that are out of the printable range in the CMYK color model. Later on in the tutorial we will learn how to fix this to avoid any undesirable results.
For now, we will just uncheck the Gamut Warning checkbox again.
2. Reduce noise
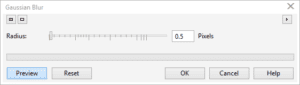
Most images captured by a digital camera will have some noise present; and in most cases, the noise is significantly noticeable in the Blue channel of an RGB image. Open the Channels docker by navigating to Window > Dockers > Channels. In theChannels docker, RGB channels is active by default. Try clicking on individual R-G-B channels one by one and look for the channel that has the maximum noise level. With that channel selected, apply very small amount of blur to the channel by navigating to Effects > Blur > Gaussian Blur. Start with a very small radius of say 0.5px. Change the radius as necessary in increments of 0.5px. You’ll have to settle at a value where the noise level is reduced but without significantly blurring the image. Once you are satisfied with the result, click OK to accept the changes. Re-activate the RGB channel to switch to all channel view.
3. Change image mode
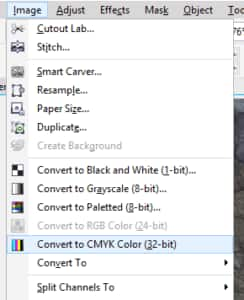
Most digital cameras capture images in RGB mode and save in JPEG format. The first step is to change the image mode to CMYK, which is our target output, so that we achieve desired results. To change the image mode, navigate to the Image menu and select Convert to CMYK Color (32-bit).
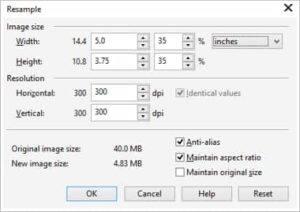
Depending on the image you have selected, you may see a significant change (or loss) in color information. This is obvious, because the RGB color model has a much wider color gamut than the CMYK color model. This will also make sure you get a print output very similar to what you see on screen. Also, make sure that the image you are using has a minimum resolution of 300 dpi. You can check the image resolution by navigating to Image > Resample…

Once the image mode has been changed to CMYK, this will take care of the Color Gamut warning that we saw earlier. This is because, during the conversion, all the out-of-gamut colors are replaced by closest matching CMYK color depending on the CMYK color profile, Rendering Intent & Color engine selected under the Color Management Settings dialog.
4. Adjust color cast
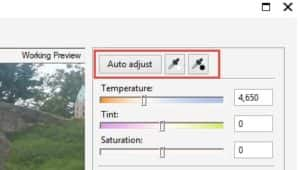
Many a time, the image has to be corrected for its color cast. Color cast in an image is caused by lighting conditions when the image was taken. To correct the color cast go to Adjust > Image Adjustment Lab and move the Temperature slider slightly towards orange (warming color) to correct blue cast. If your image has a yellow cast, you can move the slider towards blue color (cooling color).
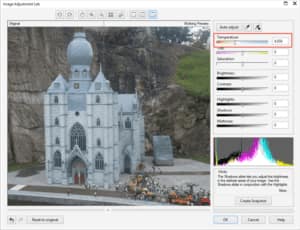
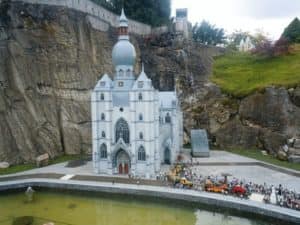
In this example, the image has a slight bluish color cast that needs to be corrected. We dragged the slider towards orange (Kelvin value 4,650) to reduce the blue color cast. See image below.
5. Adjust color balance
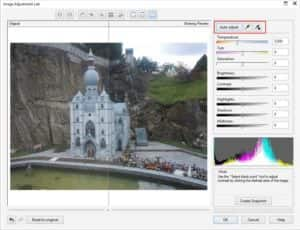
Next step is to adjust color balance of the image. Go back to: Adjust > Image Adjustment Lab…
In the Image Adjustment Dialog, you will see two eyedropper tools with a white and black dot (see image above). The eyedropper with white dot represents the White point selector whereas the eyedropper with the black dot represents the Black point selector. Next, click on the White point selector and click on the white color in your image. Similarly, select the Black point selector and click the black color in your image. You’ll see considerable change in color depth. (See images below).

6. Enhance the image exposure
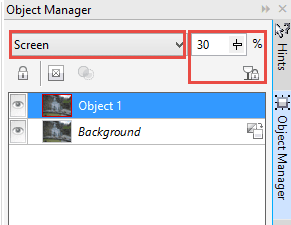
Open the Objects docker by pressing Ctrl+F7 (or Window > Dockers > Objects). Select the Background layer and make a copy of the layer by pressing Ctrl+D (or right-clicking and choosing: Object > Duplicate). Change the Merge mode of the copied layer to “Screen” and change the Opacity of the layer to 50%. You may need to play with the opacity value to get desired results. In some images, the “Color Burn” merge mode may give you a better result. In this tutorial, the “Screen” merge mode was used with layer opacity of 30%.
If you are satisfied with the results, press Ctrl+Shift+Down Arrow (or Object > Combine > Combine All Objects With Background) to combine the layers.

7. Sharpening the image
Next step is to apply some image sharpening. Make a copy of the Background layer by pressing Ctrl+D. With the copied layer selected, go to Effects > Sharpen > High Pass. Select a Radius value such that you can see distinguished edges in your image. Now, change the Merge mode of the layer to “Soft Light” and play with Opacity value of the layer to get desired results. In some cases where the image is very flat, a Merge mode of “Hard Light” may be required to enhance sharpening. Once satisfied with results, press Ctrl+Shift+Down Arrow to combine the layers. In the example below, a Merge mode of “Soft Light” was used with an opacity of 100%.
Finally, do not ever save the file in JPEG format for printing. Always save the file in TIFF format to maintain image quality.
Note! Not all images are similar. Depending on the image, different sets of commands and settings may have to be used to achieve desirable results. There are various tools & commands available in PHOTO-PAINT that can be used to tweak the image.
The steps shown above can generally be used on most images to retouch the image to the required quality.
 CorelDRAW Graphics Suite
 Ultimate Vector Bundle Vol. 1
 CorelDRAW Standard 2021
 Ultimate Vector Bundle Vol. 2
 Corel Vector
Start your FREE 15-day trial and embark on a design journey with powerful tools for vector illustration, layout, photo editing, typography, and collaboration.
