
Lenses in PHOTO-PAINT can be used to apply non-destructive effects or adjustments, either to an entire photo, or to an editable area within a photo. This tutorial will demonstrate a few examples of how you can apply effects using lenses.
Thanks for watching! We hope you found this tutorial helpful and we would love to hear your feedback in the Comments section at the bottom of the page. You will find a written version of this tutorial below, and a printable PDF copy to download on the Download Resources tab above.
Start your FREE 15-day trial and embark on a design journey with powerful tools for vector illustration, layout, photo editing, typography, and collaboration.
Download these free resources:
Written tutorial (PDF, 1.3 MB)
CorelDRAW Graphics Suite Resources
Quick Start Guide (PDF, 2 MB)
Keyboard Shortcuts (PDF, 3.5 MB)
CorelDRAW and Corel PHOTO-PAINT user guides
For CorelDRAW Graphics Suite subscription and perpetual licenses (2018 to 2024), languages include English, Português do brasil, 简体中文, 繁體中文, Čeština, Deutsch, Español, Français, Italiano, 日本語, Polski, Русский
Introduction to PHOTO-PAINT
What’s New in CorelDRAW Graphics Suite
 CorelDRAW Graphics Suite
 Ultimate Vector Bundle Vol. 1
 CorelDRAW Standard 2021
 Ultimate Vector Bundle Vol. 2
 Corel Vector
Adding Effects with Lenses in PHOTO-PAINT
Lenses in PHOTO-PAINT can be used to apply non-destructive effects or adjustments, either to an entire photo, or to an editable area within a photo. This tutorial will demonstrate a few examples of how you can apply effects using lenses.
Click on any of the images below to view full-size.
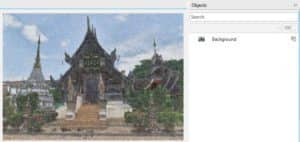
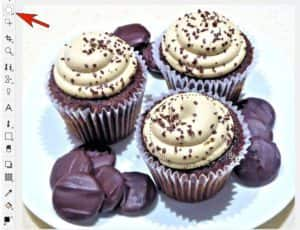
We’ll start with this photo, on which we’ll try out some effects.

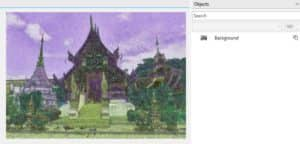
Under the Effects menu we’ll use the Art Strokes > Sketch Pad effect. Once we adjust the settings and apply the effect, the photo itself is changed. As a result, we no longer have the original photo, and we can’t go back and change effect settings.
If we then apply an adjustment, such as Adjust > Hue Saturation Lightness, the adjustment is applied on top of the Art Strokes effect, not to the original photo.
If you want to experiment with different effects or adjustments and still preserve your original image, a better way is to use lenses to apply the effects in a non-destructive manner.
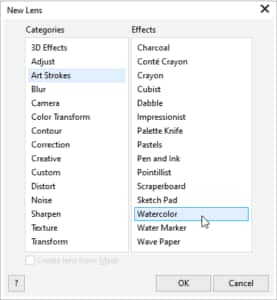
Go to Object > Create > New Lens. In the New Lens window that opens, the categories and effects are the same ones you would see in the Adjust and Effect menus. We’ll apply the Art Strokes > Watercolor effect and click OK.
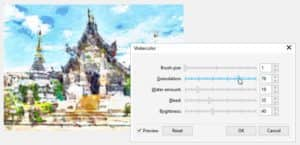
With Preview checked, you can see changes in real time. After adjusting the settings to your liking, click OK.
This adds a new object in the Objects docker (Window > Dockers > Objects). This new object is a lens, indicated by the Lens icon.
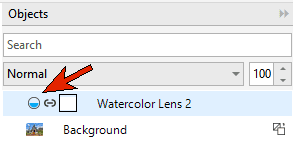
If you click on the Lens icon, the effect settings window will open again, and you can adjust the effect settings.
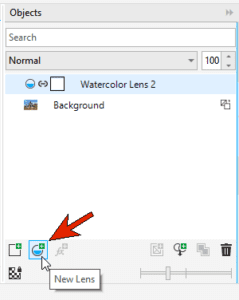
You can also add another lens on top of the first one. To add a new lens, click the New Lens icon at the bottom of the Objects docker or go to Object > Create > New Lens.
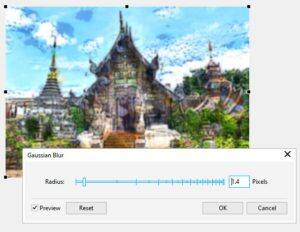
With this second lens, we will add a blur effect using Blur > Gaussian Blur and adjust the Radius to a low setting.
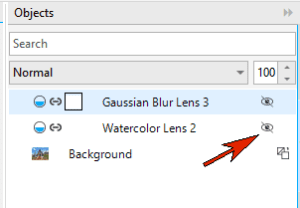
Now you will see both lenses listed in the Objects docker, and there are a few options you can explore:
- Use the Show/Hide (eye) icon to turn each lens effect on and off or turn off both to see the original photo.
- Change the order of the lenses by dragging up or down, to see how the image looks if the blur effect had been applied first and then the watercolor effect applied on top.

- Delete a lens effect by right-clicking and selecting Delete.
Adding a Lens Effect to an Object or Area in an Image
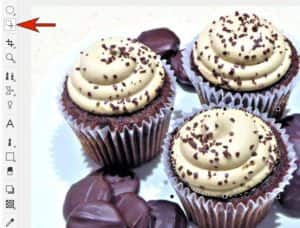
In our second example, we’ll use lenses to apply an effect to only a part of the photo. This means we first need to create an editable area in the form of a mask. From the Mask tool group on the left toolbar, we select the Ellipse Mask tool and drag to surround the icing of one cupcake.
To adjust the mask, we can use the Mask Transform tool and drag the nodes to adjust the shape, size and position.
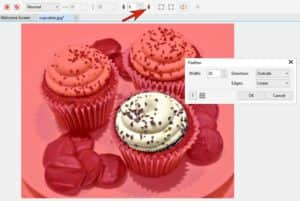
In this example, the icing is not perfectly symmetrical so we can soften the mask border to make the transition more gradual. We’ll switch back to the Ellipse Mask tool and click the Feather Mask icon on the Property bar. In the Feather window we’ll set the Direction to Outside and adjust the Width to 20. The red overlay shows the gradual transition along the mask border. Click OK to apply the feathering.
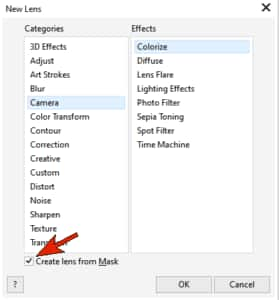
Because there is an active mask, when we go to Object > Create > New Lens, the Create lens from Mask box is checked, which means the lens will be applied only within the mask border. If this option were unchecked, the lens would be applied to the entire photo.
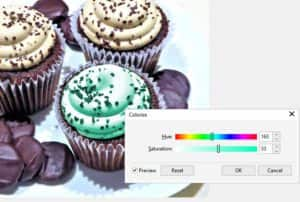
To add a color tint to the icing, we will use the Camera > Colorize effect.
In the Colorize window we can adjust the Hue and Saturation settings and click OK when we’re happy with the effect.
Moving and Copying Lenses
A nice feature of a lens is that it can be moved, and the effect will be applied wherever the lens is. We make sure that the lens is selected in the Objects docker, making it the active object, and use the Pick tool to move the lens to another cupcake and adjust its size.

We can also copy this lens and apply the copy to another cupcake. You can do this using your preferred copy/paste method:
- In the Objects docker, right-click on the lens and select Copy, right-click again and select Paste;
- Go to Edit > Copy and then Edit > Paste; or
- Use keyboard commands Ctrl + C to copy and Ctrl + V to paste.
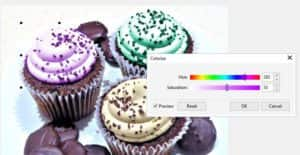
Once we have copied the lens, we use the Pick tool to move it on top of another cupcake icing and adjust it slightly to fit. Clicking on the Lens icon in the Objects docker opens the Colorize window where we can change the effect to a different hue.
Applying Different Lens Effects to Different Image Areas
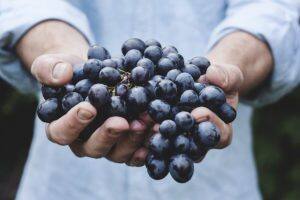
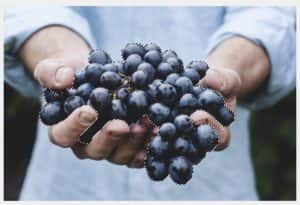
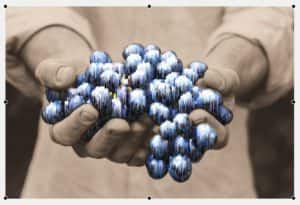
For the final example, we’ll apply one set of effects to the grapes and another set of effects to the rest of the photo.
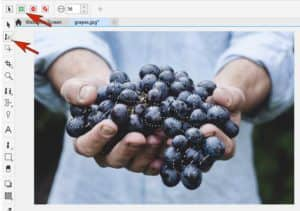
The first step is to mask just the grapes. We’ll use the Smart Selection Mask tool, which was introduced in PHOTO-PAINT 2020. On the Property bar we’ll set the mode to Additive, which allows us to add to the original selection area. Drag the mouse within the area you want to mask (in this case, the grapes) and when you release the mouse button the mask expands to select all, or most of the grapes. If there are any bits that were missed, click on them to add them to the selection. You can also use Mask > Mask Outline > Remove Holes to catch these missing bits.
TIP: if you accidentally select more than the area you want to mask, switch to Subtractive mode on the Property bar, then click on the bits you want to remove. You may need to lower the Tolerance setting for a more precise selection.
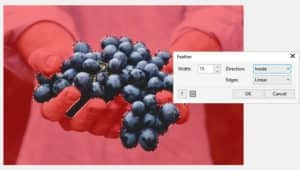
As before, we want to add some feathering to soften the mask border. Since there is no Feather Mask icon on the Property bar for the Smart Selection Mask tool, go to Mask > Mask Outline > Feather. This time we will set the Direction to Inside, with a Width of 15.
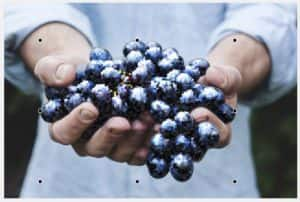
We’ll add a new lens and apply the Art Strokes > Pointillist effect.
Now we want to apply a second effect to grapes. To do this, we need to create a new lens from the same mask. Make sure the current lens is selected in the Objects docker then go to Mask > Load and select the active mask (Pointillist Lens Clip Mask).
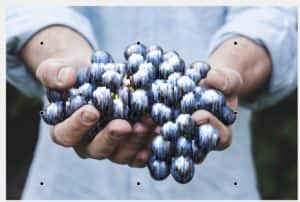
We’ll add a new lens and then apply the Distort > Wet Paint effect.
To apply a different effect to the rest of the image, we first need to mask that area. The simplest way is to invert the mask we already created for the grapes.
Click on either lens in the Objects docker to make it active, go to Mask > Load and select the active mask. Now go to Mask > Invert Mask and the entire image, minus the grapes, will be selected.
Now all that’s left is to add a new lens and then add an effect, following the same steps as before. This time we are using the Camera > Sepia Toning effect.
If you’re happy with the effects, your work is done. But don’t forget that you can experiment with the effects in any or all of the following ways:
- Use the Show/Hide icon in the Objects docker to turn lens effects on or off.
- Drag a lens up or down in the Objects docker to change the order in which they are applied to the image.
- Click on the Lens icon in the Objects docker to open the effect settings and make adjustments.
- Use Mask > Load Mask to add a new mask and apply a different lens effect.
And since we have used lens to apply the effects, the original image is still intact and if you save the file as a .CPT (PHOTO-PAINT) file you can make further edits in the future. Have fun applying, combining and experimenting with lens effects!

Applying effects with interactive lenses
Using masks in Corel PHOTO-PAINT
Start your FREE 15-day trial and embark on a design journey with powerful tools for vector illustration, layout, photo editing, typography, and collaboration.

Reader Interactions