
Start your FREE 15-day trial and embark on a design journey with powerful tools for vector illustration, layout, photo editing, typography, and collaboration.
What’s New in CorelDRAW Graphics Suite
Introduction to PHOTO-PAINT
PHOTO-PAINT Projects
Importing and editing RAW files in Corel PHOTO-PAINT
By Steve Bain
When you edit photos you’ve captured using a digital camera in PHOTO-PAINT, you have the option to import your images as RAW files. These files are like digital negatives, offering many more editing options than other image formats.
When you import RAW files into Corel PHOTO-PAINT, the Camera Raw Lab automatically appears.
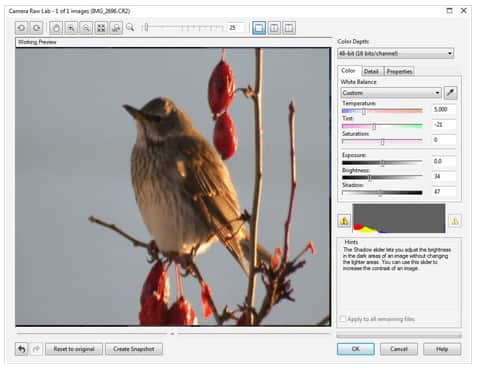
The White Balance list box offers choices for removing unnatural color casts from images so that image colors appear as they do in real life.

Settings on the Detail tab let adjust image sharpness, color noise, and luminance noise. On the Properties tab, you can view any of the properties that are available for the selected RAW file, such as color space, camera manufacturer and model, focal length, exposure time, and ISO speed ratings.
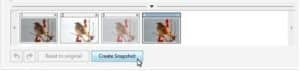
As you edit, you can capture the current version of your image by clicking Create snapshot. Thumbnails of the snapshots appear in a window below your image. Each snapshot is numbered sequentially and can be deleted by clicking the close button in the upper right corner of the snapshot title bar.
With the exception of the white-balance correction, you can make these adjustments on images of any format in the Image Adjustment Lab by clicking Adjust > Image Adjustment Lab.
 CorelDRAW Graphics Suite
 Ultimate Vector Bundle Vol. 1
 CorelDRAW Standard 2021
 Ultimate Vector Bundle Vol. 2
 Corel Vector
Start your FREE 15-day trial and embark on a design journey with powerful tools for vector illustration, layout, photo editing, typography, and collaboration.

Reader Interactions