
PaintShop Pro has a wealth of text options you can use to label, identify, or otherwise enhance your photos. In this tutorial, you will see how to create text with a variety of edges, fills, gradients, and patterns. You’ll also learn how to move, resize, and rotate text, as well as fit text to a selected shape. And for an especially fun feature, you’ll see how to fill text with an image.
Thanks for watching! We hope you found this tutorial helpful and we would love to hear your feedback in the Comments section at the bottom of the page. You will find a written version of this tutorial below, and a printable PDF copy to download on the Download Resources tab above.
Download these free resources:
Written tutorial (PDF, 1.4 MB)
Sample files (Zip file, 3 MB)
PaintShop Pro resources
Keyboard shortcuts (PDF, 173 KB)
PaintShop Pro User Guide (PDF, 25.4 MB)
Download your FREE 30-day trial and make every shot your best shot with PaintShop Pro 2023, your all-in-one photo editing and design software.
What’s New in PaintShop Pro
Getting Started in PaintShop Pro
Working with Text
Featured products
 PaintShop Pro 2023 Ultimate
 AI HDR Studio 3.0
 PaintShop Pro 2023
 Vision FX
How to Add Text to your Photos and Images
Any photo can be made extra special by adding the right words. This tutorial demonstrates some of the many text features available in PaintShop Pro.
Before you begin, you can download the free text preset that is used in this tutorial. Save this file (named Preset_TextEx_Spring.pspscript) to your PaintShop Pro Presets folder. Usually you can find this folder at file path C:\Users\YOURNAME\Documents\Corel PaintShop Pro\2022\Presets (if you are using an earlier version of PaintShop Pro, replace “2022” in the file path with your version number).
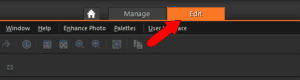
To get started working with the text tools, open your image in PaintShop Pro and make sure you are in the Edit workspace.
This is the photo that will be used in this example. You can find this photo in the Samples folder, located where you have PaintShop Pro installed. The file name of this photo is Spring.

Text Tool Settings
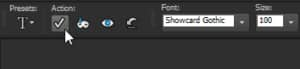
To activate the Text tool, click this icon on the Tools toolbar.

The Property Bar lists all of the text options. Here you can set the font and size, font color for text fill, stroke color for text outlines, and several other options. The stroke width in this example is 10, for bold edges that will be easy to see. And the text is created as a Vector so that it can easily be edited later.

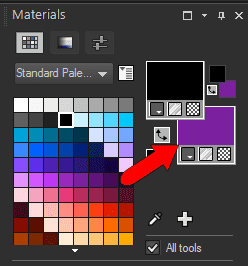
In addition to the font and stroke color swatches on the Property Bar, you can also use the swatches on the Materials palette. The swatch on the top left sets the stroke color; the one on the bottom right sets the font color (fill or pattern).
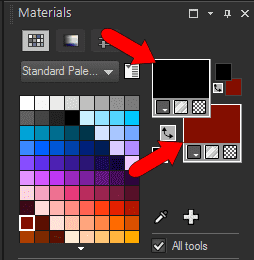
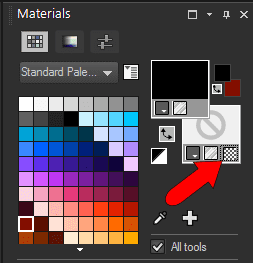
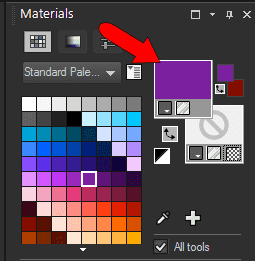
For a transparent fill, click the checkerboard icon on the fill swatch. For a stroke that matches the flowers in the photo, choose a purple color from the palette.
Adding and Editing Text
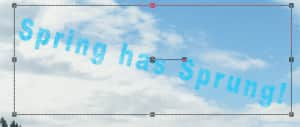
To add text, click on the photo where you want the text to start. Then type the characters Spring is Here!

After typing the text, click the Apply icon in the Property Bar, or double-click on the photo.
After the text is created, it is automatically selected.

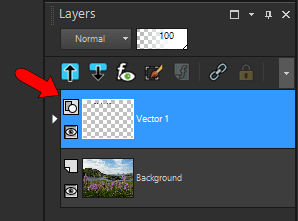
Because the text is a vector, it is placed on a new vector layer which you can see in the Layers palette.
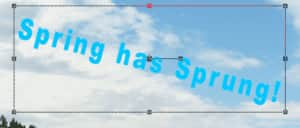
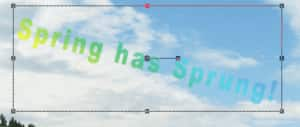
While the text is selected, you can use the corner handles to resize the text. And you can use the side handles to stretch or widen the text, but be aware that this will distort the characteristics of the font you are using. The best practice is to resize your text by adjusting the font size on the property bar.

You can also move the text by dragging the center handle, or rotate it by dragging the handle to the right of the center.

Moving, rotating, and resizing can also be done with the Pick tool.
Because the text is a vector, while the Text tool is active, all aspects of the text can be changed. For example, you can click in the text, highlight some or all of the words, and edit them.

After your changes are made, double-click to exit the editing.
You can also change the font of the entire text string, or of selected words, such as the last word in the string in this example.

Filling Text
To add a fill to the text, click the Font Color swatch on the property bar (or the Fill swatch in the Materials palette).

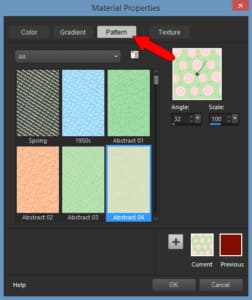
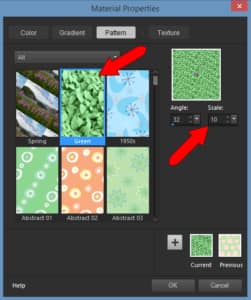
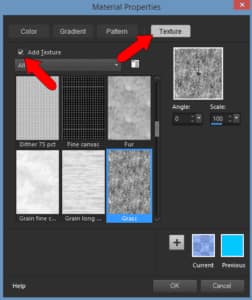
There are several fill options for text. You can click the Pattern tab and choose one of the preset images to use as fill.
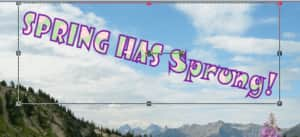
Here is what our text looks like with a pattern fill.
Any image that’s open in PaintShop Pro can be used as a fill for text. For example, you can open this Green photo in PaintShop Pro (from the same Samples folder that contains the Spring photo).
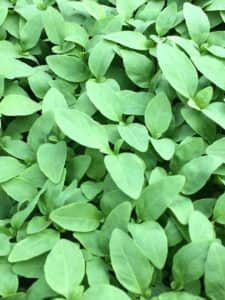
This image now appears in the Pattern tab. For any fill pattern, you can adjust its angle or scale.
Here is what our text looks like with the Green sample image used as a pattern for the text fill.

Other font color options are solid fill:
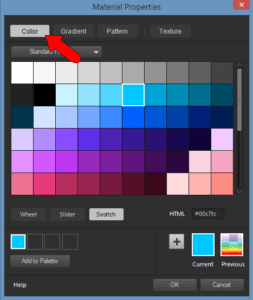
Here is what our text looks like with a solid color fill.
Or you can add a texture to a solid color.
Creating and Using Text Presets
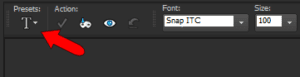
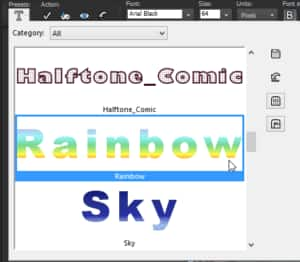
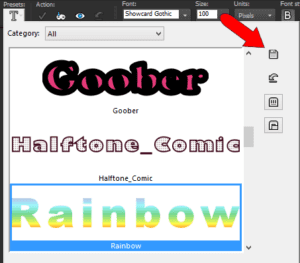
PaintShop Pro also comes with several preset text styles. As long as a text string is selected, any preset you choose will be applied to the text. To access text presets, click the Presets icon on the property bar:
There are several presets to choose from; in this example, the Rainbow preset is selected.
Here is what our text looks like when the Rainbow preset is applied. This preset has a color gradient for fill, and a zero stroke width so that no outlines appear.
Now say you want to save the original text style as a preset. Here’s the original text string we had earlier, with a gradient fill.

Make sure the text string is selected, and that its correct properties appear along the property bar. Click the Preset icon and be careful not to pass your cursor over any preset name, or that preset will be applied. Click the Save icon.
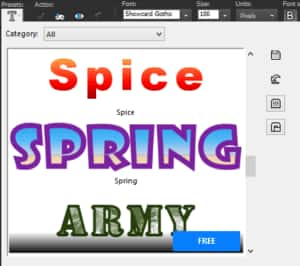
Assign a preset name such as “Spring,” and the new preset appears in the list.
How to Wrap Text
Now we’ll move on to another text feature called text wrapping. Wrapping text is when text automatically fits inside a vector shape.
We’ve deleted our vector text layer used in the previous section and now we’ll activate the Preset Shape tool.
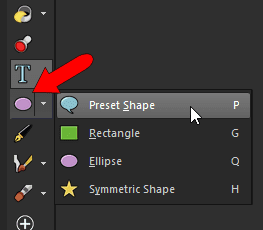
In the property bar, open the Shapes drop list and choose the Heart shape. Uncheck Retain Style, so that fill will be applied to the shape.

Use the fill swatch to set a solid fill.
Drag from corner to corner to create the heart shape.

To type in the wrapped text, activate the Text tool, set the font and size, and select a fill color that will contrast with the heart color.
When the Text cursor is inside the shape, its icon becomes a T surrounded by brackets; this indicates that the text will be wrapped.
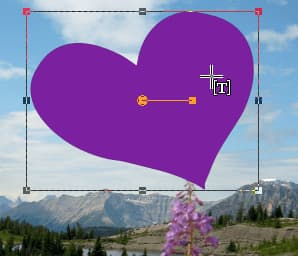
Click anywhere on the heart to start the text. The cursor automatically jumps to the top of the shape.
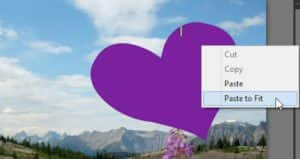
To paste in text that you’ve copied from another source, right-click in the heart and choose Paste or use Ctrl + V. The copied text fills the shape, and whatever doesn’t fit goes outside the shape.

From the right-click menu, you can also choose Paste to Fit, which adjusts the font size so that the entire text string fits inside the shape.

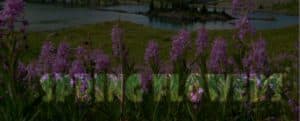
How to Fill Text with an Image
The final text feature in this tutorial is filling text with an image. In this example, a new text string using the “Spring” preset is added in the area of the flowers, at the bottom of the photo.

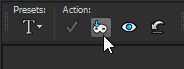
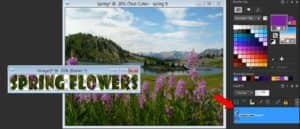
To see how the filled text will look, click the Cutter Preview icon.
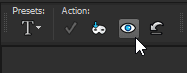
The text edges and fill disappear, leaving just the photo below. The rest of the image is grayed out.
Adjust the text size if needed, then click the Text Cutter icon.
This creates a new image with filled text on a transparent background.
TIP: you can save this new image with the filled text as a new file to use in other projects. Just make sure to save it as a PNG file if you want to preserve the transparent background.
The new text image can be added to the Spring photo, either by dragging it from one window to another, or by using Ctrl + C and Ctrl + V to copy and paste.

Once you have added your new text to the image, you can resize and reposition it with the Pick tool.

The original text is still part of the image, on a layer that was turned off when the text was cut.
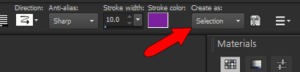
For another way to do something similar, create a new text string as a Selection, rather than a Vector.
After typing the text and double-clicking to complete, the text disappears except for a dotted outline.
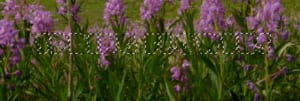
Then you can use the Pick tool to move this text selection to a new spot.

Download your FREE 30-day trial and make every shot your best shot with PaintShop Pro 2023, your all-in-one photo editing and design software.

Comments (4)
Reader Interactions
Comments
Text. Can you place the text below the image in the photo? Example: I print a 5 X 7 picture on 8 X 10 paper. Can I put a text saying below the photo image, to describe the photo?
Hi Dante,
Yes, you could do this. Probably the easiest way would be to start with a new document that is 8×10 and copy and paste your 5×7 photo as a new layer. Then you can use the text tool to add your text on the blank space below your photo. Alternatively, you can just open your 5×7 photo and then go to Image > Canvas Size. This allows you to add space to the canvas where you could put your text.
Hope this helps!
The Discovery Center team
Kann man die Schrift auch in Wellen oder Bogen formen?
Hallo Renate,
Ja, Sie können den Text einem Pfad wie einem Bogen oder einer Welle folgen lassen. Hier ist ein Tutorial, das Ihnen zeigt, wie es geht https://learn.corel.com/tutorials/paintshop-pro-fit-text-to-path/.
Hoffe das hilft!
Discovery Center team