
Here’s a fun video project for your summer vacation photos – create professional-looking videos with the free postcard and Polaroid overlays from our friends at Studio Backlot!

Studio Backlot offers hundreds of training videos for VideoStudio and Pinnacle Studio, from beginner tutorials on the basics of video editing, to advanced movie effects and projects. In addition to the first-class training, your Studio Backlot membership also gives you access to the stock library where you can download thousands upon thousands of free goodies – stock photos and videos, fonts, motion backgrounds, transitions, effects and overlays. Check out Studio Backlot and get started with your membership today!
If you are an experienced video editor, just download the free overlays and have fun creating your summer projects. If you are new to video editing, follow the simple steps below that will show you how to use the overlays.
Skip to the instructions for Pinnacle Studio
How to Use Overlays in VideoStudio
We’re going to start with the Postcard overlay, which is a static overlay. The process is the same for Polaroid overlay but because it is an animated overlay with 6 photo placeholders, there are a couple extra steps that we’ll cover at the end.
Step 1: Add your Media
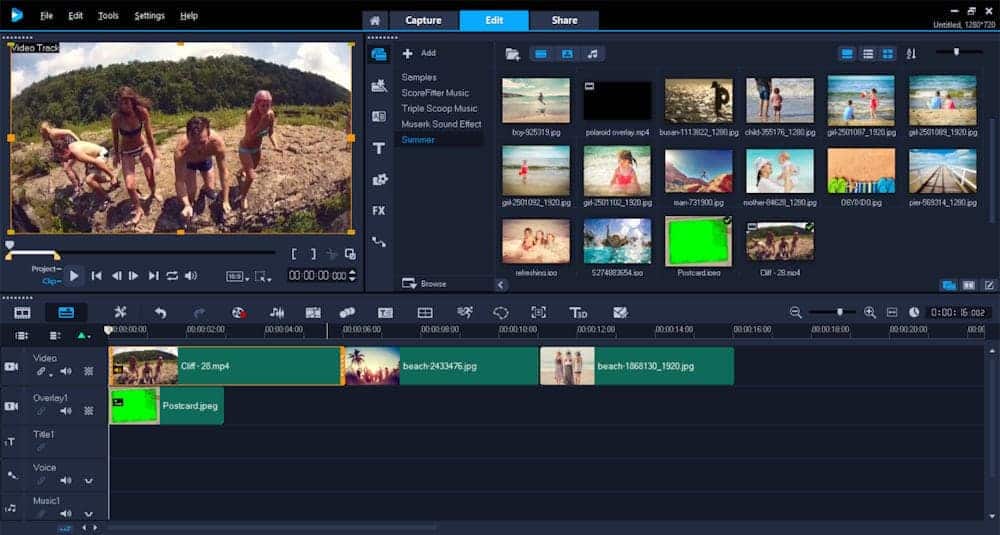
Open VideoStudio in the Edit tab. Add the photos or video clips plus the overlay files that you want to use into the Library. You can do this by
- dragging and dropping the files from your computer into the Library, or
- right-clicking in the Library window and selecting Insert Media Files, or
- going to File > Insert Media File to Library
Now drag the photos or videos clips onto the Video track on the timeline.
Then drag the postcard overlay file onto the Overlay track on the timeline.
Step 2: Adjust the size and duration
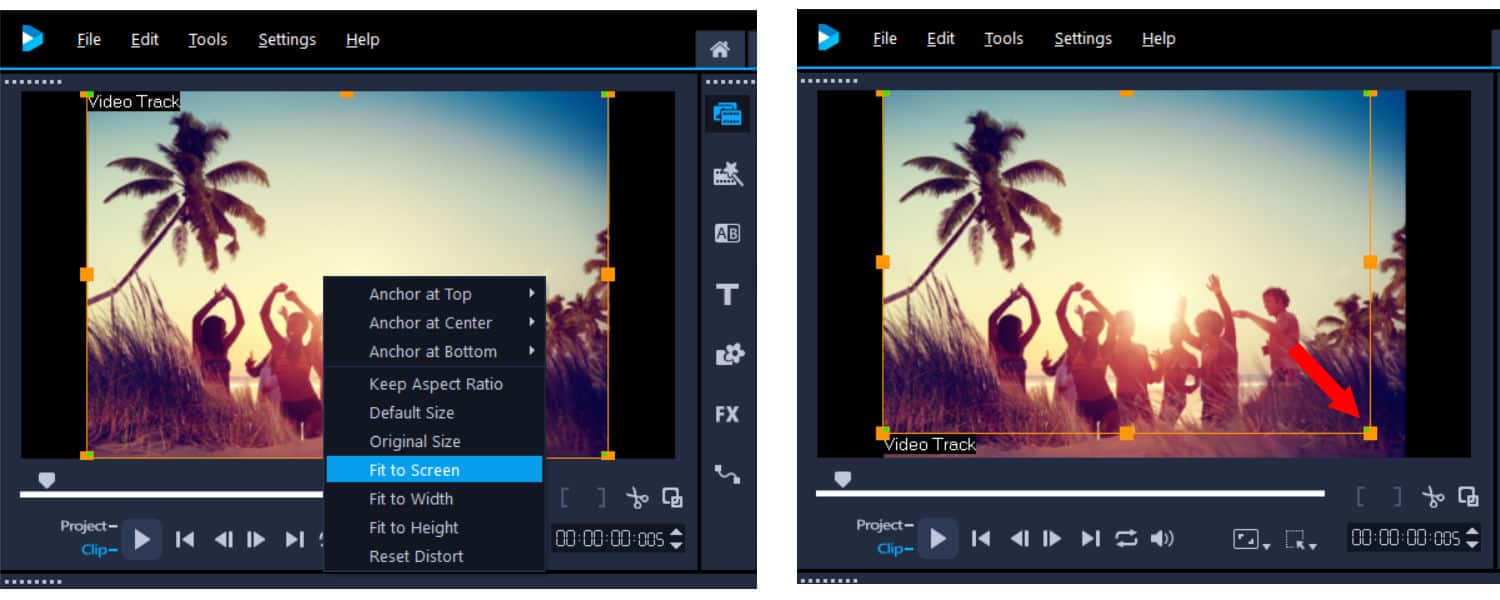
You can adjust the size and placement of your photos and videos on screen by right-clicking on the media in the Preview pane and selecting one of the options Fit to Screen (or Fit to Width, Fit to Height, etc.).
Do the same for the postcard overlay and select Fit to Screen. You can also use the orange handles in the Preview pane to adjust the size of the files to your liking.
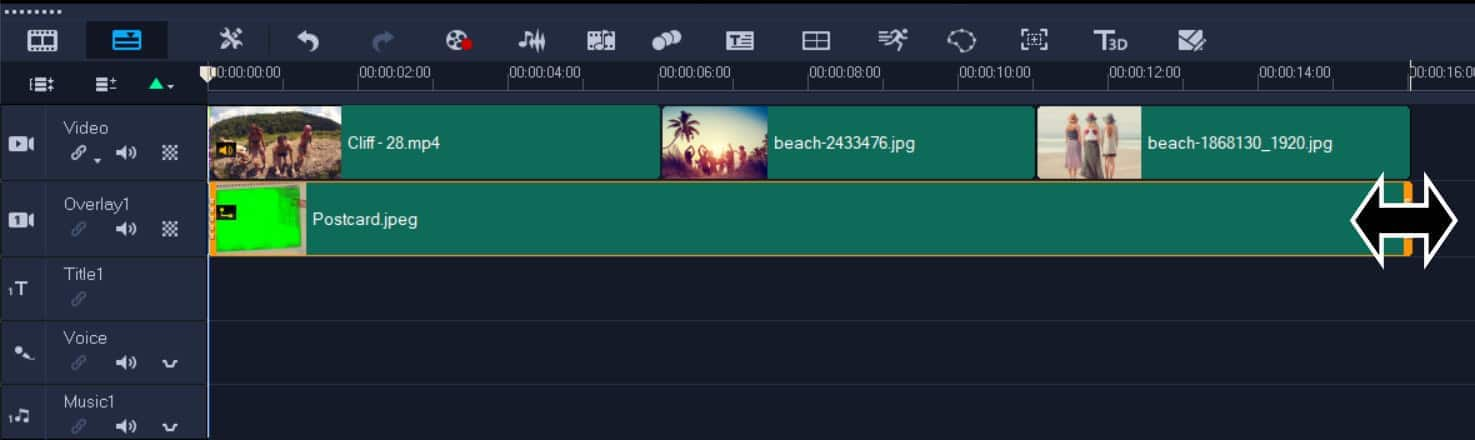
Hover your mouse over the right edge of the postcard overlay and drag it out on the timeline to match the end of your photos or video clips. If you only want the overlay to be visible for a portion of your video, adjust the duration and placement on the timeline accordingly.
Step 3: Apply the Chroma Key Effect
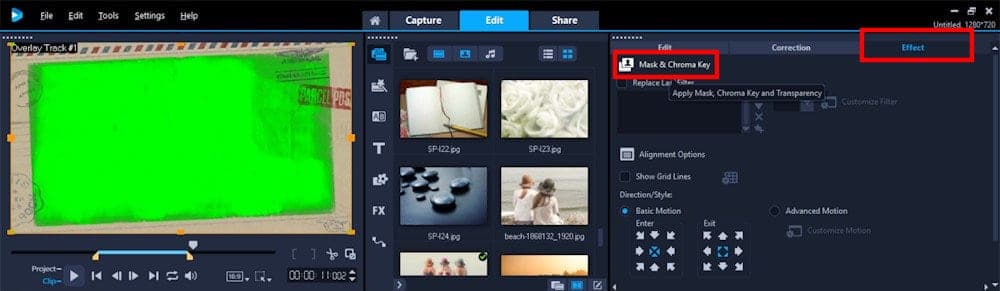
Now we need to get rid of the green fill inside the overlay. Double-click on the overlay in timeline to bring up the Options panel. On the Effect tab, click on Mask & Chroma Key.
Click the checkbox beside Apply Overlay Options, make sure the type is set to Chroma Key, and use the eyedropper to select the green color in the middle of the overlay.
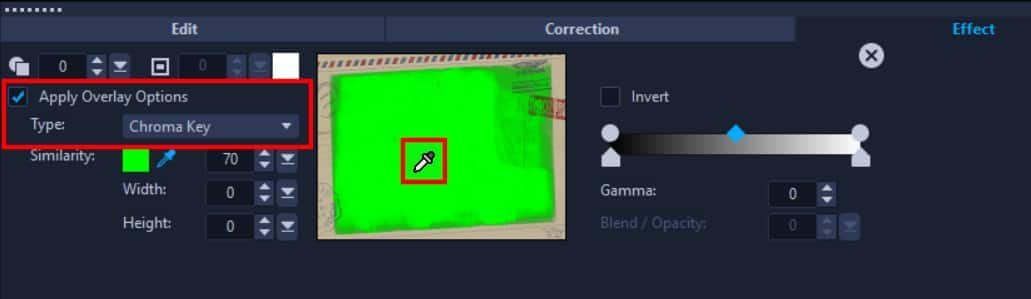
Now you will see your photos or video clips showing inside the border of the postcard overlay!

That’s all there is to it for the postcard overlay.
For the Polaroid overlay, follow the same steps 1-3 above:
- add your media onto the timeline
- adjust the size of your photos if necessary
- apply chroma key to get rid of the green inside the overlay
Step 4: Synching your Photos with the Animation
The Polaroid overlay is animated to give the effect of flashing through 6 different photos. So we need to adjust the duration of your photos so that they match with the “flash” effect between each photo. As a rough guide, you can set the duration to the first 5 photos to 02:005 but I’ll show you how to fine tune them as well.
You can adjust the duration of a photo or video clip by double-clicking on it in the timeline to bring up the Options panel, then entering the numbers in the Duration box on the Edit tab.
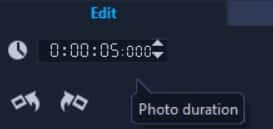
Tip: you can also adjust duration by right-clicking on the photo in the timeline and selecting Change Photo Duration, or by dragging the edge of the clip left or right on the timeline.
To make sure you have your photos lined up to match the flash effect, drag your scrubber along the timeline to the first flash, around 02:005 seconds. Use the Previous or Next buttons under the Preview pane to go frame-by-frame until you see the white flash fill the screen.
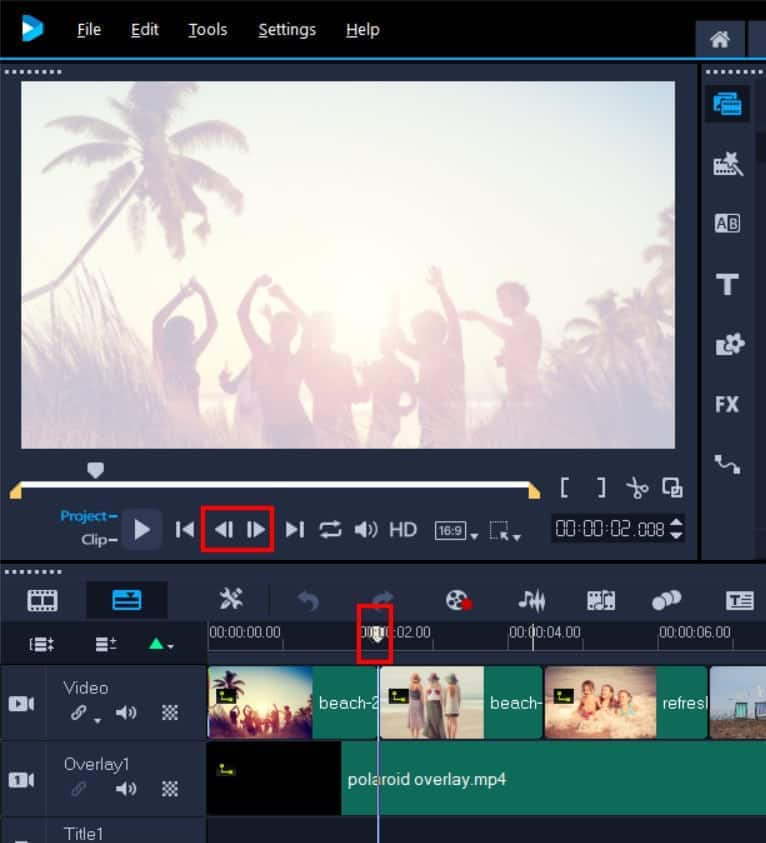
Leave your scrubber here. Now click on your photo in the timeline and drag the edge to match where your scrubber is. Repeat this process for the remaining photos and flash effects.
Here’s a quick sample of what it will look like:
Want to learn more about using overlays in VideoStudio? Watch these related tutorials:
How to Use Overlay Templates (includes free sample to download)
How to Use Chroma Key, Masks and Overlays (includes free sample and written tutorial to download)
Advanced Green Screen Effects (includes written tutorial to download)
How to Use Overlays in Pinnacle Studio
We’re going to start with the Postcard overlay, which is a static overlay. The process is the same for Polaroid overlay but because it is an animated overlay with 6 photo placeholders, there are a couple extra steps that we’ll cover at the end.
Step 1: Add your media
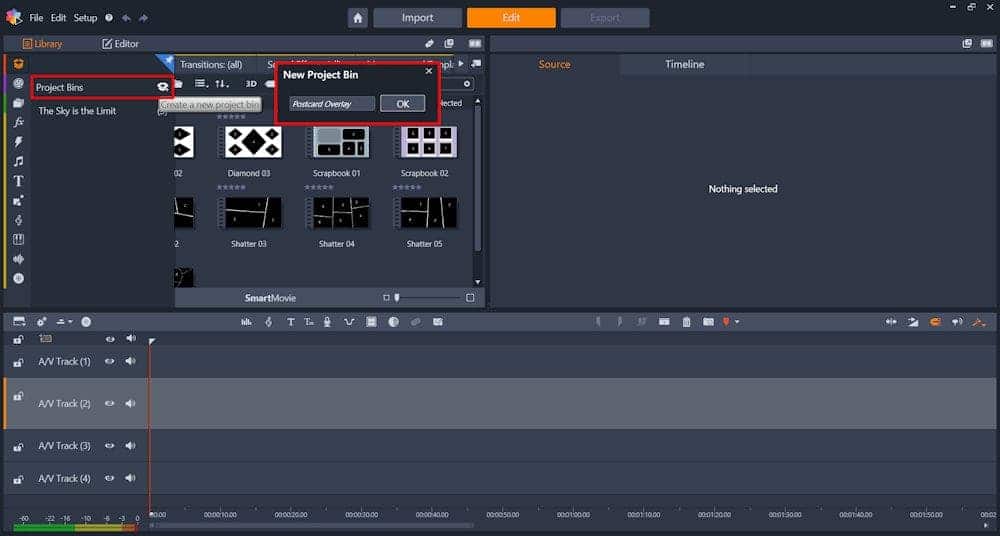
Open Pinnacle Studio in the Edit tab. Add the photos or video clips plus the overlay files that you want to use into the Library. Using a Project Bin is a handy way to keep your project files organized. Click on Create a New Project Bin and then give it a name.
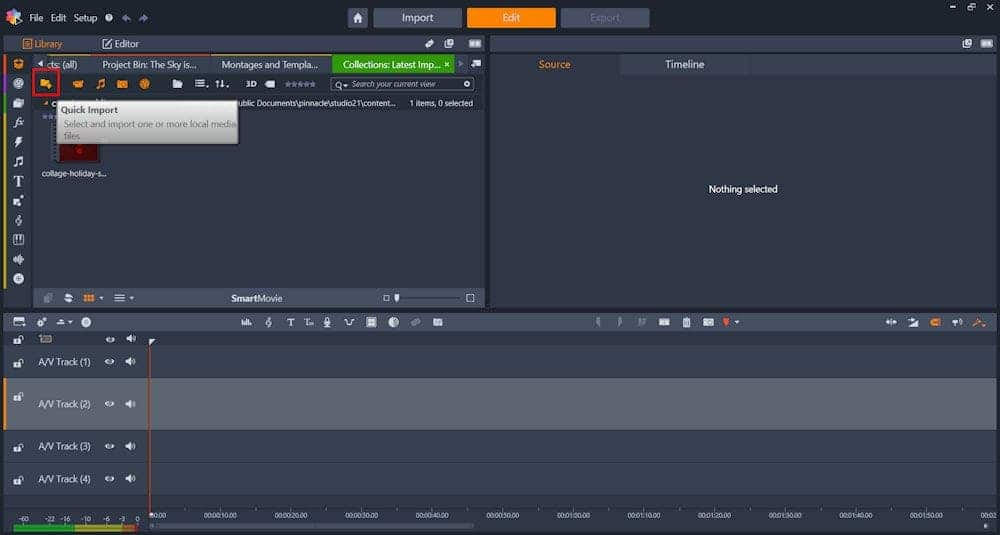
Now you can drag and drop your files from your computer into the project bin. You can also use the Quick Import button, or right-click in the project bin and select Quick Import to add your files.
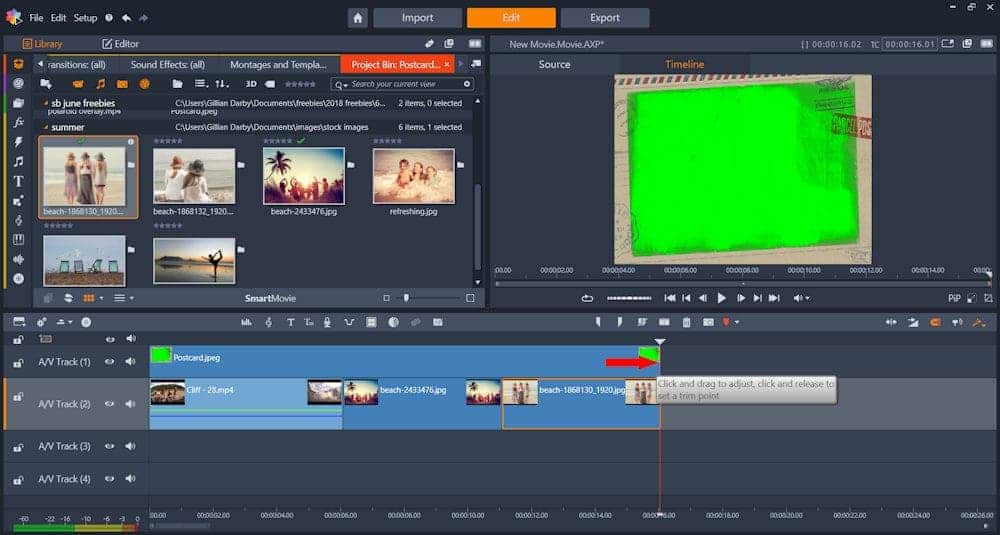
Once you have imported the files you want to use, drag the postcard overlay onto A/V Track 1. Drag your photos onto A/V Track 2.
Step 2: Adjust size and duration
You can adjust the size and placement of your photos and videos on screen by right-clicking on the media in the timeline and selecting Scaling > Fill. You can also use the orange handles in the preview window to adjust the size of the files to your liking.

Hover your mouse over the right edge of the postcard overlay and drag it out on the timeline to match the end of your photos or video clips. If you only want the overlay to be visible for a portion of your video, adjust the duration and placement on the timeline accordingly.
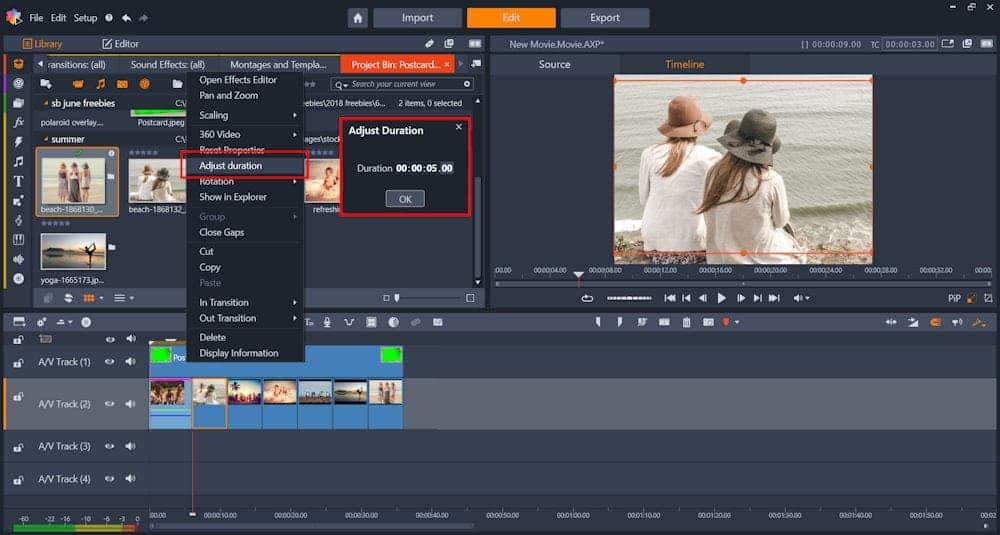
You can adjust the duration of your photos by right-clicking on one (or all) in the timeline and selecting Duration. Enter the length of time you want.
Step 3: Apply the Chroma Key Effect
Now we need to get rid of the green fill inside the overlay. Double-click on postcard overlay in timeline to bring up the Editor panel. On the Effect tab, click on Keyers and select StudioChromaKeyer.
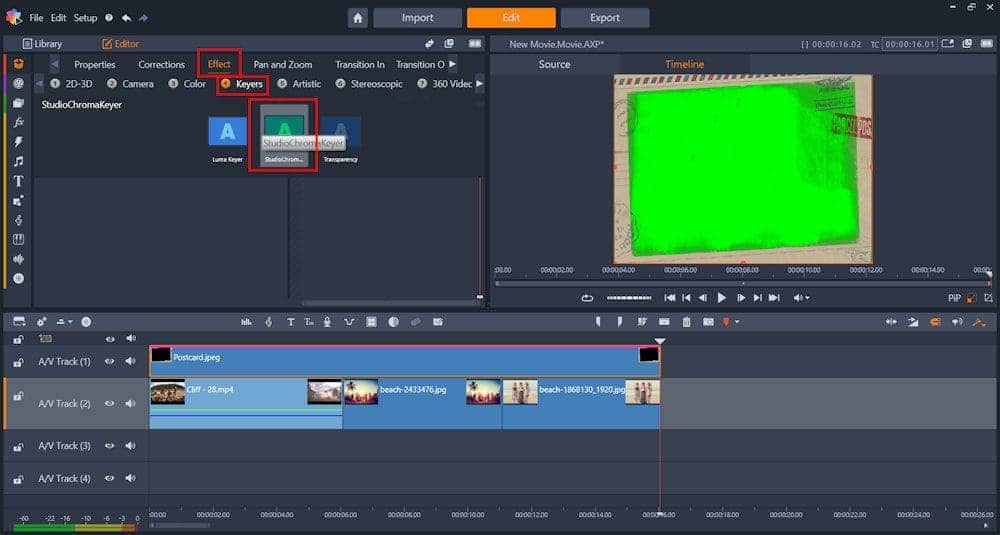
The Key Color should be set, by default, to the green inside the postcard overlay and now in your preview window you should see your photos showing inside the frame of the postcard. Note: you might need to make further adjustments to the scaling of your photos, if you find they don’t quite fill the inside of the postcard frame. And that’s all there is to it!
For the Polaroid overlay, follow the same steps 1-3 above to add your media onto the timeline, adjust the size of your photos if necessary, and turn on StudioChromaKeyer to get rid of the green inside the overlay.
Step 4: Synching your Photos with the Animation
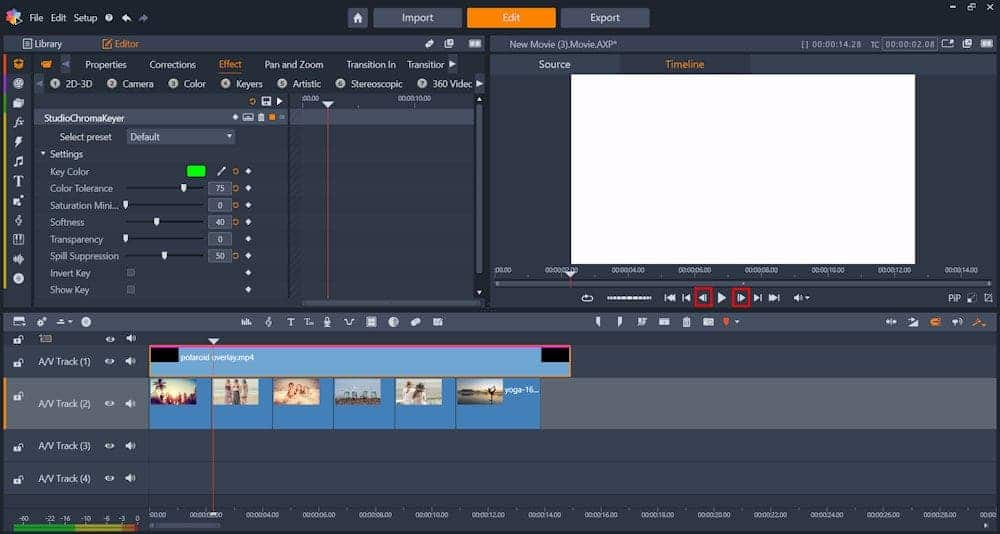
The Polaroid overlay is animated to give the effect of flashing through 6 different photos. So we need to adjust the duration of your photos so that they match with the “flash” effect between each photo. As a rough guide, you can set the duration to the first 5 photos to 02:05 but I’ll show you how to fine tune them as well.
Tip: if you need to zoom in on the timeline to make it easier to position your scrubber, just click on the ruler at the bottom of the timeline, hold down your mouse button and drag to the left to zoom in.
To make sure you have your photos lined up to match the flash effect, drag your scrubber along the timeline to the first flash, around 2 seconds. Use the Previous or Next buttons under the Preview window to go frame-by-frame until you see the white flash fill the screen.
Click on the Marker icon under the preview window to add a marker at this point. The marker will appear at the bottom of the timeline. Now drag the edge of your photo in the timeline to match up with the marker.
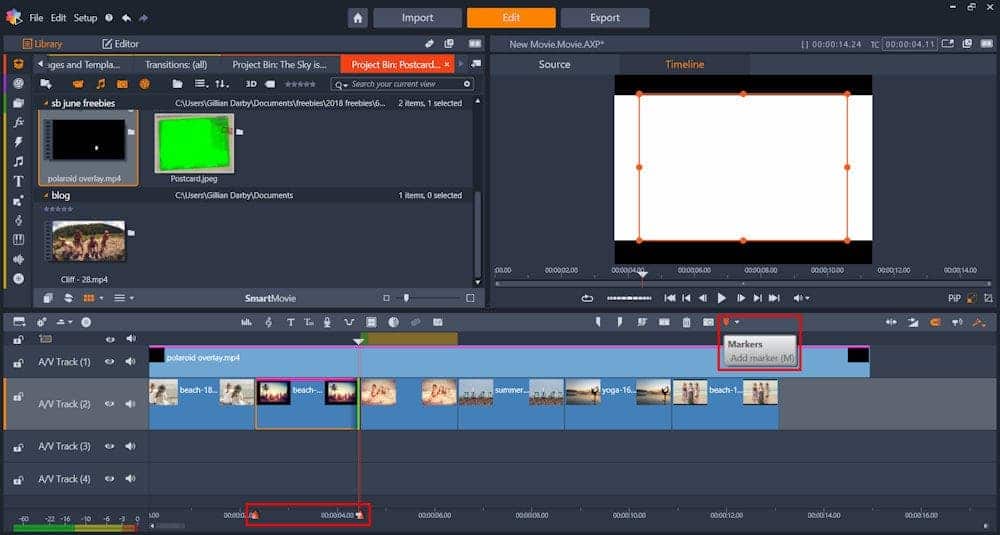
Repeat this process for the remaining photos and flash effects, and then you will have an animated Polaroid slideshow! Here’s a quick sample of what it will look like.
Want to learn more about green screen effects? Check out this video tutorial to see what else you can do.
Show us what you create with these free overlays!
We’d love to see what you can create with these free overlays. Upload your projects to our Video User Gallery and you could be featured on the Discovery Center!
And don’t forget to check out Studio Backlot to see all the perks and benefits you get with your membership.


0 Comments