
Learn how to add fog to your photos and create a misty morning landscape or add an air of mystery. In this tutorial we will show you how to use the Airbrush tool to create soft wisps and dense clouds of fog, and how to enhance the effect using different brush tips, blur and shadow.
Thanks for watching! We hope you found this tutorial helpful and we would love to hear your feedback in the Comments section at the bottom of the page. You will find a written version of this tutorial below, and a printable PDF copy to download on the Download Resources tab above.
Download your FREE 30-day trial and make every shot your best shot with PaintShop Pro 2023, your all-in-one photo editing and design software.
Download these free resources:
Written tutorial (PDF, 933 KB)
Sample image (JPG, 2.5 MB)
PaintShop Pro resources
Keyboard shortcuts (PDF, 173 KB)
PaintShop Pro User Guide (PDF, 25.4 MB)
What’s New in PaintShop Pro
Artistic Tools and Projects
Adding Effects
Featured products
 PaintShop Pro 2023 Ultimate
 AI HDR Studio 3.0
 PaintShop Pro 2023
 Vision FX
How to Add Fog to Photos
Follow this step-by-step tutorial to add fog to photos using the Airbrush tool in PaintShop Pro. Learn how to adjust layer properties and add effects like blur and shadows to create realistic looking fog, from a light mist to dense clouds.
Click on any of the images below to view full-size.
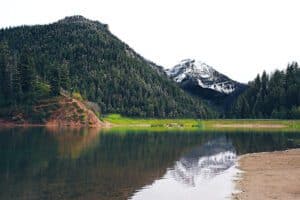
Setting Up Your Photograph
- Open your photograph on the Edit tab.
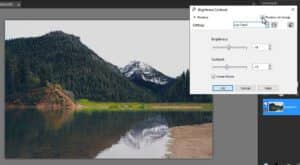
- Go to Adjust > Brightness and Contrast > Brightness and Contrast
- Decrease the brightness and contrast levels to make it look like an early morning, so we have a nice base image before adding our fog.
Adding Layers
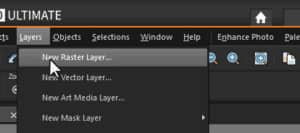
We need to add a new raster layer so that we can create fog on its own layer. This allows us to make adjustments to the fog effect without altering the main photo.
- Select Layers > New Raster Layer.
- Name this “Fog” and then click OK.
- On the Materials palette, set the Foreground (top) swatch to white.
Using the Airbrush Tool to Create Fog
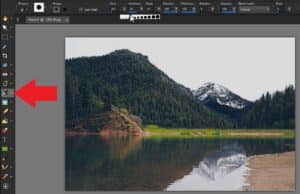
- Select the Airbrush tool from the toolbar on the left.
- On the Tool Options toolbar, select a round brush shape.
- Adjust the size of the brush depending on the size of your photograph.
- For this photo, we set the brush size to around 300.
There are several other brush settings on the Tool Options toolbar. You will need to experiment with these settings to get just the look you want. Here are the suggested settings to start with:
- Set the Hardness to 0.
- Set the Opacity to 100%.
- Set the Step Size to around 25.
- Set the Density to 35 or less.

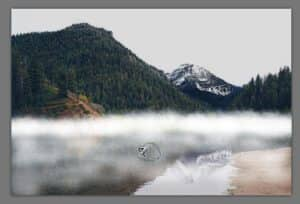
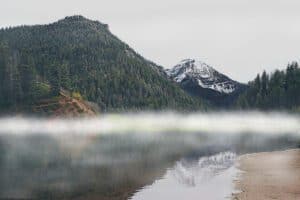
Begin to brush in the fog over the photo. You can either use long horizontal strokes for a floating fog effect or sporadic quick clicks for more of a hanging cloud effect.
Fog usually is thicker in the background, so brush thicker fog at the back of the lake. As you’re doing this, adjust settings like the Opacity or Density level to make the fog less dense in the foreground.

Using Other Brush Tips like Clouds or Crinkle
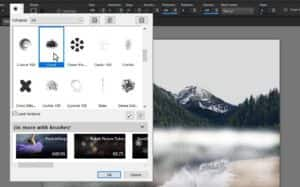
You can also experiment with different brush tips like “clouds” or “crinkle”. Use these on their own to create fog or combine with the default round brush tip to add more depth and detail to your fog effect.
- Create a new raster layer and name it Mist.
- Change the brush tip to Clouds and adjust the Tool Options settings as before.
- Begin painting thicker clouds of fog in the background to give it a misty quality and add more texture.
- Add in a few of the cloud brushes in the foreground too so the textures blend well.
- Select the original Fog layer from the Layers palette and drag it above the Mist layer.
Using Effects like Gaussian Blur and Drop Shadow
You can make the fog effect more realistic by applying additional effects, such as blur and shadows. Make sure that you have the Fog layer selected in the Layers palette.
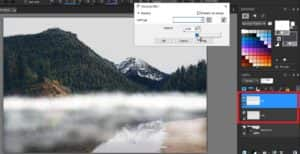
- Go to Adjust > Blur > Gaussian Blur.
- Adjust the Radius to around 10 and click OK.
- Repeat this step with the Mist layer.
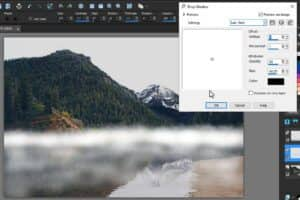
We’ll next add a drop shadow to the fog and mist layers to give them more dimension.
- Go to Effects > 3D Effects > Drop Shadow.
- Set the horizontal and vertical Offset values to 1.
- In the Attributes section, set the Opacity to 50% and the Blur amount to 40.
- Select Black as the shadow Color.
- Click OK.
- Repeat these steps for the Mist layer.
Adjusting Layer Opacity
As a final step for the fog effect, you can decrease the layer opacity if you want to lighten the fog.
- Select the Fog layer in the Layers palette.
- Click and drag the Opacity slider to around 75% depending on the desired density level you want for your fog.
- Repeat these steps for the Mist layer if you wish.
Duplicating and Adjusting Layers
Because the fog and mist have been created on their own separate layers, there are additional options you can try out.
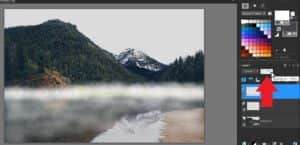
Adding a Foggy Layer Over Entire Image
- Right-click on the Fog layer and select Duplicate.
- Use the Pick tool to enlarge the duplicate layer and reposition it over the upper half of the image.
- Bring the Opacity level all the way down to around 20.

This will give us a very light fog to the overall image, so there isn’t such a sharp contrast between the fog on the lake against a clear sky on top.
Using the Eraser Tool to Clean Up Areas
We can use the Eraser tool to clean up any areas where we need to remove fog.
If some foggy areas are too dense, decrease the Opacity level of the Eraser tool, and lightly erase over these dense areas.
And just like that, we’ve transformed our daytime lake photo into what looks like a shot taken on a foggy early morning!
Download your FREE 30-day trial and make every shot your best shot with PaintShop Pro 2023, your all-in-one photo editing and design software.

Reader Interactions