
In this tutorial, you’ll learn how to create an inspirational animated file to use on social media using PhotoMirage and VideoStudio. The first part of the tutorial will demonstrate how to use the simple animation tools in PhotoMirage to add movement to a photo, artwork or graphic design image. Once your animation is created you can then bring that into VideoStudio (or Pinnacle Studio) and use the title tools to add a funny quote or inspirational message.
Thanks for watching! We hope you found this tutorial helpful and we would love to hear your feedback in the Comments section at the bottom of the page. You will find a written version of this tutorial below, and a printable PDF copy to download on the Download Resources tab above.
Download your FREE 15-day trial of PhotoMirage and start creating stunning animations from your photos, digital designs and artwork in just a few simple steps.
Download these free resources:
Written Tutorial (PDF, 834 KB)
PhotoMirage resources
User Guide (PDF, 4 MB)
Keyboard shortcuts (PDF, 518 KB)
PhotoMirage Tutorials
Tools and resources

PhotoMirage animation software
With PhotoMirage you can effortlessly transform any image into a captivating animation in only a matter of minutes.
PhotoMirage free trial
Download your FREE 15-day trial of PhotoMirage and start creating stunning animations from your photos and images.

PhotoMirage gallery
Visit the PhotoMirage gallery and upload your animations. Browse the gallery for inspiration and see what other users are creating.
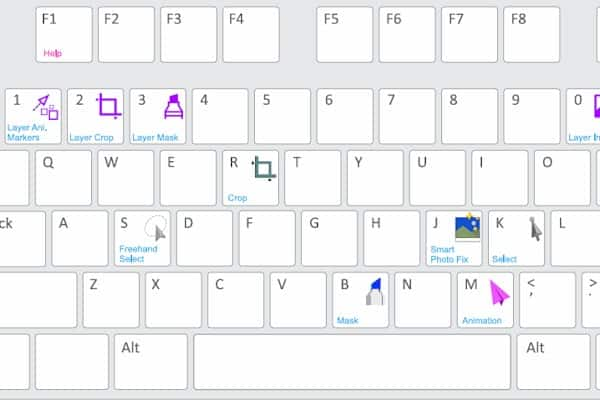
Keyboard shortcuts
Shave time off your most frequently performed tasks with this handy reference sheet for all the PhotoMirage keyboard commands.
How to Add Text to an Animated Image
In this tutorial, you’ll learn how to create an inspirational animated file to use on social media using PhotoMirage and VideoStudio.
We’ll create an animated file using a regular photograph with PhotoMirage. Next, we’ll use VideoStudio to add a title overlay so it’s ready to use as a social media image or as an intro to a video you’re creating.
Click on any of the images below to view full-size.
Animating a Photo with PhotoMirage
Open PhotoMirage and on the main screen, click on the Open button then browse to your computer to select the image that you want to animate. You can animate photos, artwork, illustrations or any kind of image.
Decide on what parts you want to animate and in what direction, then select the Motion Arrow tool in the Animation section.
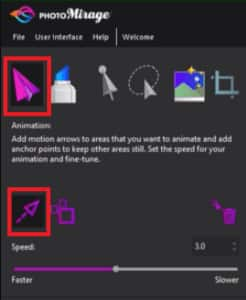
Holding down your mouse key, click on the first area on your photograph that you want to animate and drag the motion arrow in the direction you want the animation to go. Then let go of your mouse to release the arrow.
You can make the arrows longer or shorter depending on how dramatic you want the movement to be.

After placing all your arrows, press Play to preview what your animation will look like.
Now you can see that the child in the picture is moving as well and I don’t want that, so I’ll need to set some Anchor Points which will define the areas that I don’t want to animate.
Select the Anchor Point icon.
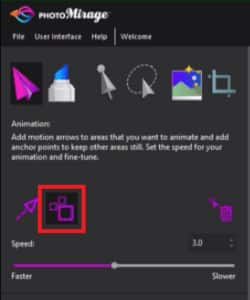
Click on the points around your image that you don’t want the animation to extend to, then press Play to preview.

You can also use the Mask tool instead of Anchor Points to block out the part of the image you don’t want to animate.
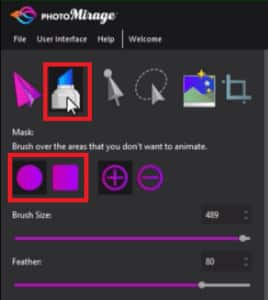
Activate the Mask tool then select a brush style and size. Use the brush to highlight red over the parts of the image you don’t want to animate.

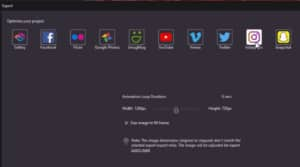
Once happy with your animation, go to File > Export and select the format you want to export it as. You can select the social media site where you plan on uploading the image to, so that the output is optimized for that platform. You can also customize your specifications.
Select OK and choose where you want to save your new file. Then click Save and PhotoMirage will transform your photo into an animated file.
Adding a Title and Background Music with VideoStudio
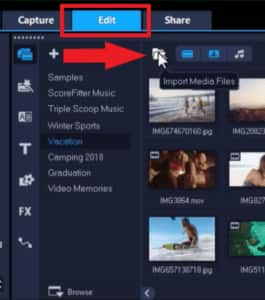
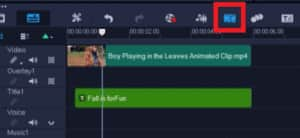
Open VideoStudio in the Edit tab, then click on the Import Media Files icon and select the animation file you just created.
Drag this file from the Library onto the Video Track.
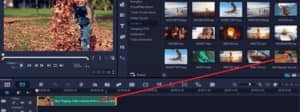
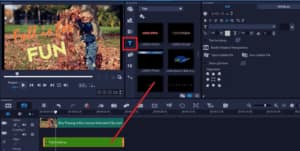
Click on the Title tab to add a text overlay then click on Title from the dropdown menu. There are a number of available title styles for you to choose from.
Drag the title of your choice from the library and place it on the Title track. Double-click on the title to type in your text and position it how you would like.
On the right, under the Edit tab, you can change the font type, size and formatting. You can also change the color and add a border or shadow to your title.
Once you’re happy with your title, you can add a background music track to complete the social media image.
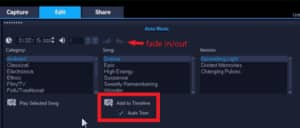
Click on the Auto Music tab to add in a background track and select your desired song style and version.
Ensure Auto Trim is enabled so the background track will automatically trim to your clip length and click the Fade Out icon at the top so the music will fade out when the clip ends.
You can preview your video and make any adjustments if needed. Then click on the Share tab to export your video.
Select Same as Project Settings to export in the same format that you input as. Choose where to save your video and click Start.

It’s just that easy to give life to your still images and create dynamic videos to share on social media or on your website!
Download your FREE 15-day trial of PhotoMirage and start creating stunning animations from your photos, digital designs and artwork in just a few simple steps.

Reader Interactions