
This tutorial will demonstrate some of the basic image editing and touch-up features of PHOTO-PAINT. We’ll cover how to straighten and crop a photo, how to adjust color and tone, and how to fix red eyes, blemishes, and scratches.
This tutorial will demonstrate some of the basic image editing and touch-up features of PHOTO-PAINT. We’ll cover how to straighten and crop a photo, how to adjust color and tone, and how to fix red eyes, blemishes, and scratches.
Thanks for watching! We hope you found this tutorial helpful and we would love to hear your feedback in the Comments section at the bottom of the page. You will find a written version of this tutorial below, and a printable PDF copy to download on the Download Resources tab above.
Start your FREE 15-day trial and embark on a design journey with powerful tools for vector illustration, layout, photo editing, typography, and collaboration.
Download these free resources:
Written tutorial (PDF, 747 KB)
CorelDRAW Graphics Suite Resources
Quick Start Guide (PDF, 2 MB)
Keyboard Shortcuts (PDF, 3.5 MB)
CorelDRAW and Corel PHOTO-PAINT user guides
For CorelDRAW Graphics Suite subscription and perpetual licenses (2018 to 2024), languages include English, Português do brasil, 简体中文, 繁體中文, Čeština, Deutsch, Español, Français, Italiano, 日本語, Polski, Русский
Introduction to PHOTO-PAINT
What’s new in CorelDRAW Graphics Suite
PHOTO-PAINT projects
 CorelDRAW Graphics Suite
 Ultimate Vector Bundle Vol. 1
 CorelDRAW Standard 2021
 Ultimate Vector Bundle Vol. 2
 Corel Vector
Basic image editing and touch-up
In this tutorial we’ll review some of the key PHOTO-PAINT tools that you can use fix common photography issues and touch up your photos.
Click on any of the images below to view full-size.
Straightening photos
Before you start adjusting or adding effects, it’s important to have a good base photo. Even if your photo is just slightly crooked, it is very noticeable and detracts from the overall image quality. Straightening a photo in PHOTO-PAINT is simple so there is no excuse for having crooked photos!

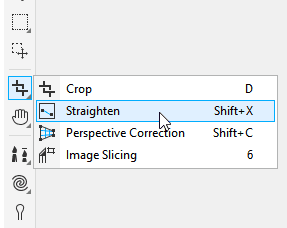
To straighten a photo, open the Crop tool group and activate the Straighten tool. This tool can also be found in the Adjust menu.
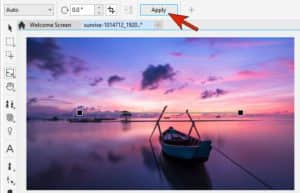
The straightening bar appears across the center of the photo, and you can drag its endpoints to be parallel with a horizontal feature, in this case the horizon. On the Property bar, you have the following settings:
- Straighten mode allows you to choose how the image is rotated: Auto rotates the image based on the position of the straightening bar, or you can choose Horizontal or Vertical mode as well.
- Angle of rotation can be entered manually to specify the angle of the straightening bar.
- Crop image will crop the image after straightening. You can also choose to disable the Crop image setting and fill the edges of the image with a background color after straightening.
- Clear rotation will reset the straightening bar.

Once you have positioned the straightening bar, click Apply and the image is straightened.
Cropping photos
Another popular tool in this tool group is the Crop tool. To crop a photo, activate the Crop tool and then drag around the area of the photo that you want to keep. You can adjust the crop area by using the corner or side handles. On the Property bar, you can enable the Crop overlay, which helps to see what parts of the image will be cropped.
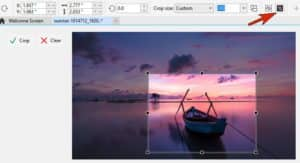
In the Crop size dropdown list, you can also choose a standard photo size and then position the crop area over the part of the photo you want to keep.

Once you are happy with the size and position of the crop area, click Crop or press Enter.
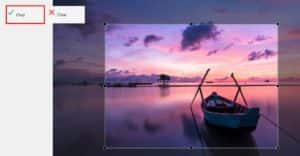
Image adjustment
PHOTO-PAINT also comes with robust image adjustment features. We’ll start with this slightly faded photo.

For a quick and easy fix, go to Adjust > Auto Adjust, which adds more color saturation and deeper shadows.

For more adjustment control, go to Adjust > Image Adjustment Lab. In the Image Adjustment Lab window, make sure Preview is checked so you can see changes in real time on you photo.
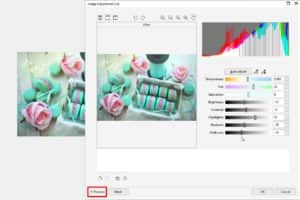
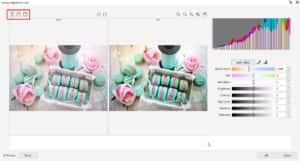
Alternatively, you can choose Before and After Full Preview or Before and After Split Preview mode in the top left corner and maximize the Image Adjustment Lab window. Now you can make precise adjustments to the various settings.
Once you have adjusted the settings to your liking, click OK to finish.
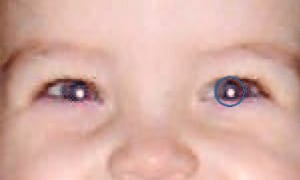
Red-Eye removal
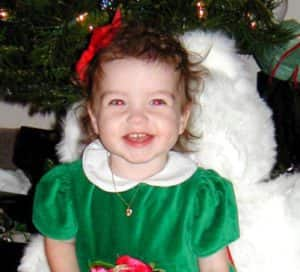
A common issue in portrait photos is red eyes from the flash. Luckily, PHOTO-PAINT has a tool specifically designed to correct this.
The Red-Eye Removal tool is part of the Clone tool group.
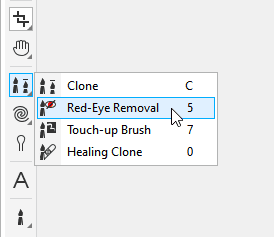
Activate the Red-Eye Removal tool and then drag with the Shift key held down to adjust the brush size, and a simple click over each eye gets the red out.
To adjust the correction transparency, you can left-click while holding the Alt key. With added transparency, each click has a reduced effect, but you can click multiple times to remove more of the red.
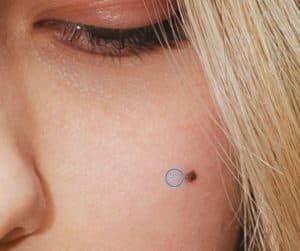
Removing blemishes and flaws
Sometimes a photo shows some minor flaws, like moles or beauty marks. The Healing Clone tool can fix these. This tool is also part of the Clone tool group.
When the Healing Clone tool is activated, your cursor will be a circle with a cross-hair symbol inside it. You can drag with the Shift key held down to adjust the brush size. Right-click to sample an area that will be used to cover the blemish…
… and now there is a second brush, which is placed where you want to replace the blemish. Clicking in this spot adds the color and texture you just sampled.
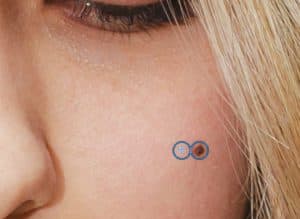
Repeat as needed, right-clicking to set the sample area, and left-clicking to cover each blemish. You can use single clicks in succession, or click and drag for a larger area.
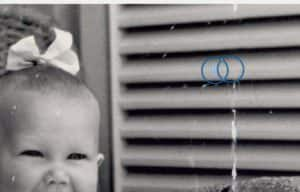
A similar tool in the Clone tool group is the Touch-up Brush. To cover the white spots in this old photo, we simply click with the Touch-up Brush to cover the spots.
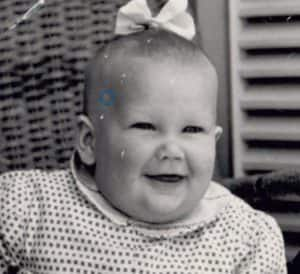
The Healing Clone tool can also be used on this photo to remove the scratches. Right-click to sample the area of one side of this scratch then carefully click your way down part of the scratch.
Then sample a new area and keep clicking, until the entire scratch is removed.
Start your FREE 15-day trial and embark on a design journey with powerful tools for vector illustration, layout, photo editing, typography, and collaboration.

Comments (2)
Reader Interactions
Comments
hy!
Great tutorial but why is it so hard to upload the photos used as resource files. If they are copyrighted, please use the ones that aren’t in the future!
Thanks, I keep reading your wonderful works!
Thanks for your comment. The purpose of this tutorial is to make you familiar with the basic editing tools in PHOTO-PAINT so you can use them to edit your own photos, but we’ll keep this in mind for future tutorials.
Best regards,
The Discovery Center team