
In this tutorial, we’ll review 2 CorelDRAW tools for drawing circles and ellipses: the Ellipse tool and the 3-Point Ellipse tool. Learn the basics of using these tools, plus how to make modifications such as resizing, adding fill and outline colors, and creating pie and arc shapes.
Thanks for watching! We hope you found this tutorial helpful and we would love to hear your feedback in the Comments section at the bottom of the page. You will find a written version of this tutorial below, and a printable PDF copy to download on the Download Resources tab above.
Start your FREE 15-day trial and embark on a design journey with powerful tools for vector illustration, layout, photo editing, typography, and collaboration.
Download these free resources:
Written tutorial (PDF, 325 KB)
CorelDRAW Graphics Suite Resources
Quick Start Guide (PDF, 2 MB)
Keyboard Shortcuts (PDF, 3.5 MB)
CorelDRAW and Corel PHOTO-PAINT user guides
For CorelDRAW Graphics Suite subscription and perpetual licenses (2018 to 2024), languages include English, Português do brasil, 简体中文, 繁體中文, Čeština, Deutsch, Español, Français, Italiano, 日本語, Polski, Русский
What’s New in CorelDRAW Graphics Suite
CorelDRAW Tools
 CorelDRAW Graphics Suite
 Ultimate Vector Bundle Vol. 1
 CorelDRAW Standard 2021
 Ultimate Vector Bundle Vol. 2
 Corel Vector
How to Use the Ellipse Tools in CorelDRAW
In this tutorial, we’ll review 2 CorelDRAW tools for drawing circles and ellipses: the Ellipse tool and the 3-Point Ellipse tool. Learn the basics of using these tools, plus how to make modifications such as resizing, adding fill and outline colors, and creating pie and arc shapes.
Click on any of the images below to view full-size.
Ellipse Tool Basics
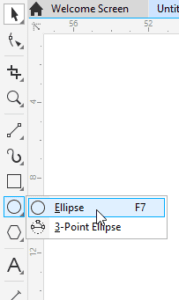
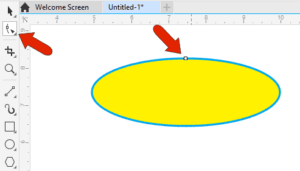
The Ellipse tool can be found on the Toolbox and can also be activated by the F7 key on a PC, or the E key on the Mac.
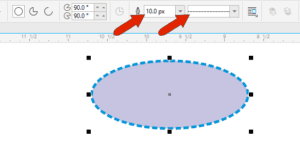
The property bar displays the default outline width and line style for all graphic elements, which can be changed for an ellipse once it’s created.

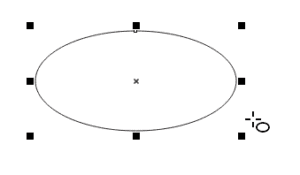
An ellipse is created by clicking and dragging from one corner to the opposite corner of the ellipse’s bounding rectangle. Once created, the ellipse has 8 sizing handles all around, and an X at its center.
- To draw an ellipse from its center, hold the Shift key while dragging the mouse.
- To draw a circle, hold the Ctrl key (Cmd key for Mac users) while dragging the mouse.
- To draw a circle from its center, hold the Shift and Ctrl/Cmd key while dragging the mouse.
Corner handles can be dragged to resize while maintaining the aspect ratio, and side handles can stretch or narrow. Clicking and dragging the X moves the ellipse, and keeping the Shift key pressed constrains the move to be horizontal or vertical.
When you click on the X, the sizing handles become rotation handles, which can be used to rotate or skew the ellipse.
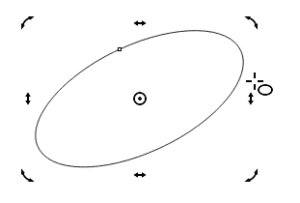
The ellipse center is now a circular pivot point, which you can click and drag to a different spot, and now this point is the center of rotation.
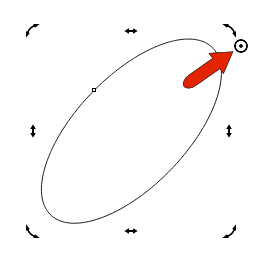
Clicking the pivot point brings back the X and the sizing handles.
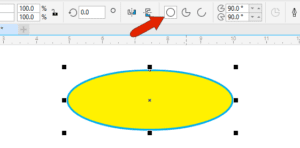
As long as an ellipse is selected, you can change outline width, line style, left-click a color swatch to add a solid fill, and right-click a color swatch to set the outline color.
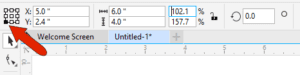
You can also use the Object Position fields on the property bar to place the ellipse. By default, the X and Y coordinates here define the location of the X at the ellipse center. But you can also choose a different reference point, like the lower left corner of the ellipse bounding box, and specify that point’s coordinates. When you use the Object Size fields to specify width and height, the reference point remains in place while other points move accordingly. The same applies for the Scale Factor fields, which reflect the change from the ellipse’s original dimensions. If you change either percentage, the reference point stays in place.
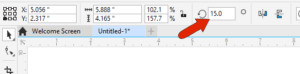
You can also enter a rotation angle.
Modifying an Ellipse
If you want to make changes to an ellipse that isn’t selected, you need to first select it. You can select any ellipse while the Ellipse tool is active, or you can press the Spacebar to temporarily activate the Pick tool, which you can use to select the ellipse.
The property bar features three ellipse drawing options, and Ellipse is active by default.
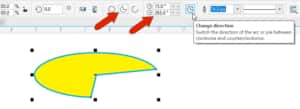
Switching to the Pie option produces an ellipse with a pie slice removed, whose start and end angles can be changed. If the part that remains isn’t the part you want, click Change direction.
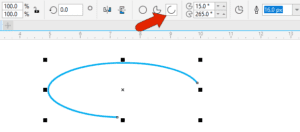
An Arc is similar to a pie, but is an open curve with no fill. Setting start and end angles, and changing direction, works the same way as for a Pie.
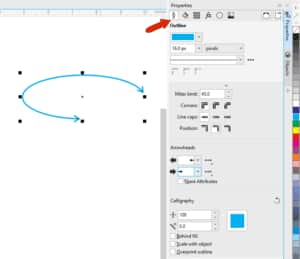
The Properties docker (Properties inspector for Mac users) can be opened by choosing Window > Dockers > Properties. When an ellipse or pie or arc is selected, this docker provides the full set of ellipse options, beyond those on the property bar. For example, on the Outline tab, you can add arrowheads to an arc.
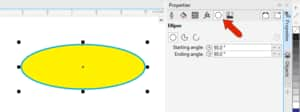
For an ellipse or pie, you can change Fill or Transparency properties, and the Ellipse tab has the pie, arc, and angle options.
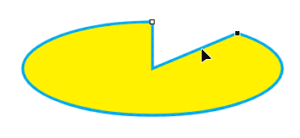
A selected ellipse can also be modified with the Shape tool, whose icon is just below the Pick tool. For an ellipse, one node appears.
When you click and drag this node, with the cursor outside the ellipse, you’ll create an arc, and now there are two nodes.

When dragging a node and the cursor is inside the ellipse, a pie is the result.
Double-clicking the Ellipse icon on the Toolbox opens the Options window to the Ellipse tab. This is where you can set the default start and end angle, and direction, for pies and arcs.

If you change the ellipse angles to zero, and create a new ellipse and activate the Shape tool, its node will be at angle zero. If you set new pie start and end angles, and draw a new pie, those new angles will be used.
The 3-Point Ellipse Tool
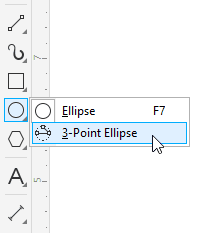
The 3-Point Ellipse tool can be found in the Ellipse tool group flyout.
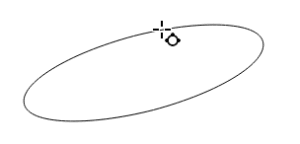
There are two steps in creating a 3-point ellipse.
- Step 1: click and drag to set the baseline, or ellipse width.
- Keeping the Shift key pressed constrains the baseline to specific angles, and without Shift pressed you can drag to any second point.
- Step 2: once you have dragged out the baseline, release your mouse button and drag your cursor perpendicular to the baseline to complete the ellipse.
When dragging to draw the rest of the ellipse:
- Keeping the Shift key pressed will cause the ellipse to be centered around the first point you clicked when setting the baseline.
- Keeping the Ctrl/Cmd key pressed will cause the ellipse to be a circle.
- Keeping both Shift and Ctrl/Cmd pressed will create a circle that is centered around the start point of the baseline.
As with any ellipse, all properties can be changed on the property bar or Properties docker/inspector, and pie and arc options are available here as well.
Start your FREE 15-day trial and embark on a design journey with powerful tools for vector illustration, layout, photo editing, typography, and collaboration.

Reader Interactions