
Learn how to create custom animated overlays and dynamic lower thirds to add interest and depth to branding, create unique titles, identify subjects in your video, create episode intro titles, and more. In this tutorial we will show you how to use the power of Pinnacle Studio keyframes to add movement and other effects to graphics, such as swivel and tilt, enter and exit, size and position, opacity, blur and shadows. You will also learn how to use masking tools for even greater creative options.
Animated overlays can be used to identify subjects in your video with their name and title in interviews or news broadcasts, providing additional information to your audience. Encourage your viewers to like and subscribe to your social media channels, even make your branding more dynamic by adding custom animation to your logo. Create unity across multiple videos or episodes by creating a unique opening title for your series!
Get started creating your own custom animated overlays and dynamic lower thirds to gain followers, enhance branding, and more with the powerful property controls of Pinnacle Studio.
Thanks for watching! We hope you found this tutorial helpful and we would love to hear your feedback in the Comments section at the bottom of the page. You will find a written version of this tutorial below, and a printable PDF copy to download on the Download Resources tab above.
Download these free resources:
Written Tutorial (PDF, 840 KB)
Download a FREE 15-day trial and discover all the essential and advanced video editing features that Pinnacle Studio delivers to make your videos look their best.
What’s New in Pinnacle Studio
Advanced Video Editing Projects
Templates and Overlays
Featured products
 Pinnacle Studio 26 Ultimate
 Studio Backlot Membership
 Pinnacle Studio 26
 Vision FX
Creating Custom Animated Overlays
You can use the powerful effects and property controls in Pinnacle Studio to create your own custom animated overlays and dynamic lower thirds, such as a subject’s name and title, logo animations to make your branding more dynamic and interesting in your videos, an episode number for a regular show, or an animated graphic to encourage your viewers to subscribe to your socials.
Click on any of the images below to view full-size.


And in this video, I’ll show you how I made each of these animations. Let’s dive in.
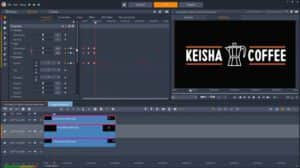
For coffee logo animation, I had a logo in PaintShop Pro, and I’ve split it into three different layers for each of the sections of the logo. I then export each layer separately, so that I can manipulate each section differently in Pinnacle Studio. I’ll double-click into the nested project so we can see the separate layers.
The coffee pot icon comes in first – if we look at the Properties, this is keyframed for size to grow from 0 to 100, and I also have a blur effect keyframed at the same time, which we can see in Effect. I like to use blur when there is movement, to simulate motion blur.
Staying on the coffee pot layer, I then have swivel keyframed to go from 0 to 360, so that the coffee pot flips round on itself a couple of times during the animation, just to add a bit of extra movement to the logo animation.
The other two layers have a few different keyframes going on at the same time. The size starts at 200, decreasing to 100, whilst opacity goes from 0 to 100, and both layers swivel outwards from 90 degrees, to give the impression that the logo is kind of unfolding. The layer on the left goes from -90 to 0, and the layer on the right from +90 to 0, so we get a mirrored, rather than identical movement.
If you create a nested project for your animation, then you can of course apply parameter changes to the group as well as individual elements within the group. If I go back to the main timeline, I’ve done just that for the outro of the animation – I wanted it to tilt on itself, so there’s a tilt keyframe going from 0 to 90 degrees, along with the size getting slightly smaller, the position moving down vertically a little, and the opacity fading out completely. We can see that the whole group is affected in this way, which is a lot quicker than keyframing each of the three elements INSIDE the group to all perform the same actions.
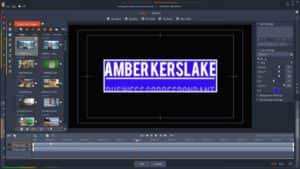
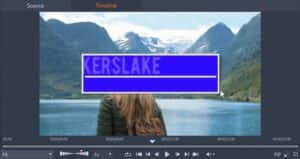
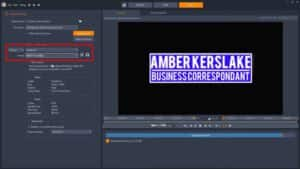
The presenter’s name animation is also in a group, and if I click into it, you can see that I haven’t used any PNGs or other transparent images for this, just four instances of the Text editor, and a couple of masks.
I started with the blue box, if we click into this – you might not be aware, but you can create shapes in the Text editor with the Shape tool. I just created a blue box, and instead of adding an outline detail to create the white edge for the box, I just created another box and made it slightly bigger.
I then don’t keyframe anything in here, but instead do it in the main Editor > Parameters location where we have size going from 80 to 100, swivel and tilt both from -90 to 0, and opacity fading in from 0 as well. There’s also some blur during this movement as well.
The next action is for this top layer, which is just the dividing line size growing from 0.
The title for the presenter, and the presenter’s role are both masked so that they can slide in from outside the box. I just have a mask covering the inner blue box, with the matte opacity set to 0. If I briefly turn off the top mask as the text is entering, you can see exactly what the mask does:
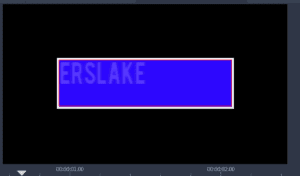
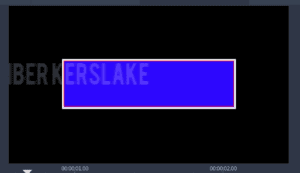
And there are also keyframes for the horizontal position, and for opacity. There’s also a blur effect.
For the presenter’s role, I just copied the mask I created for the presenter’s name, to save having to re-draw it, and pasted it into the mask track for this title. And this time we have vertical position keyframed, along with opacity, and the blur effect again.
Coming back to the main timeline, there’s also some keyframing and effects on the group itself – a swivel and tilt to provide the exit for the animation, and because the ending angle of the swivel and tilt makes the whole object virtually invisible, I didn’t need to add an opacity fade out in this case
There’s one effect applied to the group which we can’t see at present, but if I drag this video clip underneath, it is revealed – I’ve used the Real Shadows effect to help sell the 3D nature of the animation
And because the animation has swivel and tilt keyframed, the shadow will automatically update based on the new position of the group, which can really add more realism to your animations.
The episode number animation is a little complicated, as I used two different masks. It starts with a circle keyframed to increase in size – the circle is created in the Text editor, and although it has a shadow underneath it, this has also been added in the Text editor, by adding a shadow detail, and not via the Real Shadows effect.
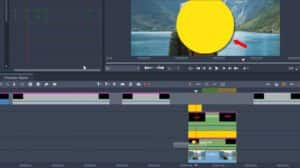
I then have another text layer with the word Episode. I wanted this to start behind the circle, so there is a circular mask hiding the text behind the circle, but the mask track ends once the Episode text is clear above the circle, so that the text can then drop down in front of the circle, and I’ve keyframed the size of the text to slowly increase as the text moves from behind the circle to in front of it, to give the illusion of depth. I’ve also added a shadow detail in the Text editor again, to help sell this effect some more.
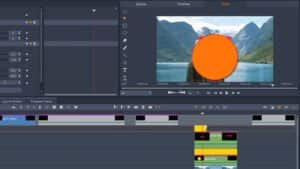
The circle also has a mask, in this case a text mask with the episode number inside it, and I’ve keyframed the mask’s opacity and feather at the same time, to reveal the number 8, which we can see is transparent if we move this video clip underneath.
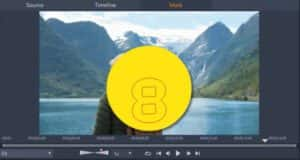
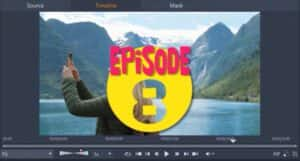
To exit the animation, I’ve just keyframed the text and the circle’s size to decrease.
And lastly, for the Socials Promo animation, I have two PNGs with size, swivel, tilt and opacity keyframed – and while the two layers are moving, I’ve also keyframed the blur effect to simulate some motion blur.
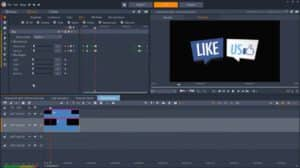
And to export these animations individually, I just need to set in and out points, and then export with Cineform MOV, to drop them into any projects that I need them for.
I’ve generally made all of these animations in the middle of the screen, but normally most of these would be used as a lower thirds, so you can maintain consistency of an animation’s positioning across your projects simply by ensuring the animation is in a group, reducing the size and changing the position to where you want the animation to be seen on screen, and then exporting. As my timeline is set to 1080p, if I export now, the animation will always occupy the same part of the screen whenever I import it into another project that is set to 1080p.
Hopefully this gives you some ideas of how you can use masks, as well as the properties and effects tabs, to create some dynamic and bespoke animations for your next video project.
Download a FREE 15-day trial and discover all the essential and advanced video editing features that Pinnacle Studio delivers to make your videos look their best.

Reader Interactions