
Expand your masking capabilities by learning how to add varying degrees and types of gradients to an image. When you apply gradient fills to your masks, you can create engaging transitions between two different photos. We will also show you how to apply effects, such as converting to black and white, to an image and then use a gradient mask to combine the before and after versions of the image.
Thanks for watching! You will find a written version of this tutorial below, and a printable PDF copy to download on the Download resources tab above.
Download your FREE 30-day trial and make every shot your best shot with PaintShop Pro 2023, your all-in-one photo editing and design software.
Download these free resources:
Written tutorial (PDF, 1.7 MB)
Sample images (Zip, 5 MB)
PaintShop Pro resources
Keyboard shortcuts (PDF, 173 KB)
PaintShop Pro User Guide (PDF, 25.4 MB)
What’s new in PaintShop Pro
Working with masks
PaintShop Pro tools
Featured products
 PaintShop Pro 2023 Ultimate
 AI HDR Studio 3.0
 PaintShop Pro 2023
 Vision FX
Creating gradient masks in PaintShop Pro
By combining PaintShop Pro’s masking capabilities with gradients you can create unique images using gradient masks as transitions. In this tutorial we’ll show you a few examples of how these advanced masks can be used with two versions of the same photo or to merge two different photos into one image.
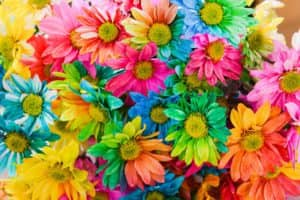
Start by opening the Blooms sample image in the Edit workspace. The goal in this example is to create a mask that will transition between this color image and a greyscale version of the same image.
Converting to greyscale
The first step is to create a greyscale version of this image.
- In the Layers palette, right-click on the photo layer and select Duplicate.
- Click on the duplicate layer in the Layers palette to make it the active layer.
- Go to Adjust > Hue and Saturation > Hue/Saturation/Lightness
- Leave the Hue and Lightness sliders at 0 but bring the Saturation slider all the way down to the bottom (-100)
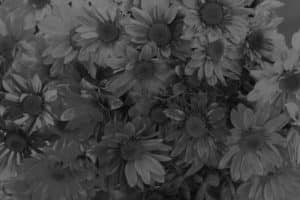
To make this effect more dramatic we can also adjust the brightness and contrast.
- Go to Adjust > Brightness and Contrast > Brightness/Contrast.
- Drag both sliders to the left to darken and wash out the layer.
- In this example we set the Brightness at -117 and the Contrast at -51.
This is the result:
Applying a gradient mask
Now we want to add a mask to this layer that will create a transition between the grayscale and color versions of this image.
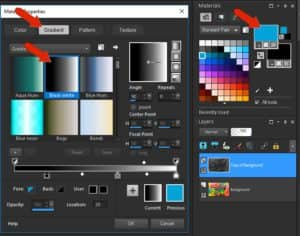
- In the Materials Palette, click on the Foreground (top) swatch.
- In the Material Properties window click on the Gradient tab
- Choose the Black-white gradient, make sure the gradient type is Linear and set the Angle to 90.
- Click OK.
To apply a blank mask, click the New Mask Layer icon in the Layers palette, and choose either Hide All or Show All. Either will work since you’ll be painting over it.
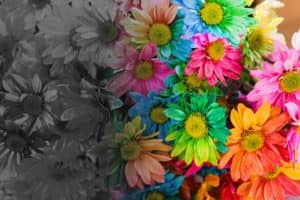
Activate the Flood Fill tool and use it to fill the mask layer with the gradient. Because the gradient has black on the left, the left side of the grayscale layer is blocked, allowing the color image to show through.

Tip: if you want the gradient transition to go the other way, open the Material Properties window again and enable the Invert check box (under the Angle setting). Now use the Flood Fill tool to fill the mask layer with the reversed gradient.
This is a good start, but the transition from the left starts too soon and ends too far to the right. We can adjust the transition effect by adjusting the gradient itself.
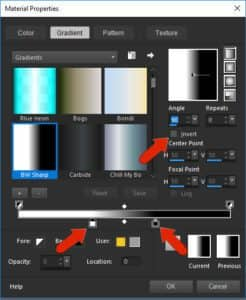
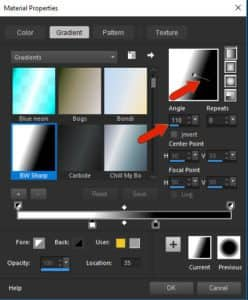
- Open the Material Properties window again and select the Gradient tab.
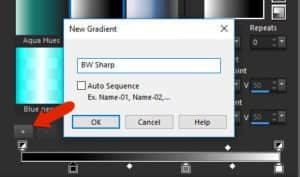
- Click the + icon to create a new gradient, so as not to replace the current gradient. Name this new gradient “BW Sharp.”
We can create this gradient by adjusting the Color Stop icons along the slider. This new gradient starts out entirely black, so click the Color Stop icon on the left and change it to white.
- The Fore and Back colors you see are determined the Foreground and Background colors currently in the Materials Palette.
- If either of these matches with what you want your Color Stop to be (in this case white) then you can click on the Fore/Back color to change the Color Stop color.
- You can also click the User color swatch to select a color.
The bottom sliders control where the transitions start and end. Slide the left and right Color Stops closer to the center. And to keep white at the left of the gradient, uncheck Invert.
Click OK then Yes to save changes to the new gradient. With the Flood Fill tool, you can now fill the mask layer with the new gradient.
You can even create a gradient that has more than one transition, for example white to black to white.
- Follow the previous steps to create a new gradient and name it WBW.
- Set the left and right Color Stops to white.
- Double-click just below the transition slider to create two new Color Stops and set their color to black.
- Slide all Color Stops in toward the center to create sharp transitions.

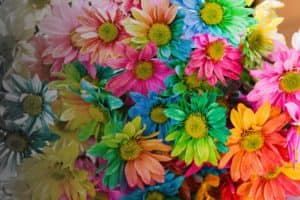
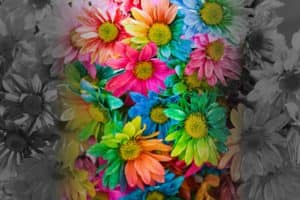
Save this new gradient and then use the Flood Fill tool to fill the mask layer and here’s the result – a strip of colorful flowers down the center of a greyscale image.
Now that you know how to apply gradients as a mask, have fun exploring the different gradient options such as changing the type to Rectangular, Sunburst or Radial, changing the Angle or number of Repeats, or moving the Center Point or Focal Point.
You can also adjust your gradient masks by using the Pick tool to rotate, resize or reposition the mask on your image.
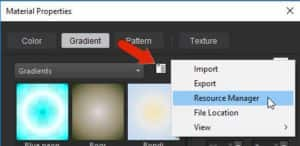
Note: On the Material Properties > Gradient tab click the More Options icon and select Resource Manager. Here you can delete, rename, copy, or move gradients.
Merging photos with gradient masks
Gradient masks are also great for merging two separate photos into one image. In this example we are going to blend photos of 2 soccer players to have one on each side with a gradient transition in between them.
- Open the two soccer images.
- Click on the image of the soccer player kicking the ball and go to Image > Flip > Flip Horizontal.
- Copy the image (Ctrl + C or Edit > Copy), click on the other soccer image and paste (Ctrl + V or Edit > Paste as New Layer).
- Click the New Mask Layer icon at the bottom of the Layers palette and choose Hide All.
- Go to your gradients again, set the type to Linear and choose the BW Sharp gradient.
- Change the angle by dragging the angle line on the gradient itself or entering a number in the Angle field.
- Uncheck Invert so that the left side of the gradient is white
Click OK then activate the Flood Fill tool and fill the mask layer with the gradient. This is the result:

If you want to adjust the placement of the photos:
- Click on the photo in the Layers palette to make it the active layer.
- Activate the Pick tool and use it to reposition the photo.
- To adjust the photo inside the mask group, select its layer within the group.
Here is one last example to inspire you! We will be using the Pic-to-Painting plugin introduced in PaintShop Pro 2019. If you don’t yet have this free plugin installed, open the Welcome Book and go to Get More > Creative Content.
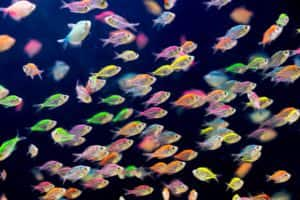
Open the sample image Swimmers. In the Layers palette, right-click on the background layer and select Duplicate.
With the duplicate layer active, go to Effects > Plugins > PicToPainting > PicToPainting.
In the Pic to Painting window you will see a number of paint styles available to choose from along the bottom. For this example, we are using the Watercolor style, with Strength set to Medium.

If you like this look, click Send and Close (if not, try another painting effect). This effect is applied only to the active layer.
- Go back to your gradients and select the original Black-white gradient.
- Set the Angle to 90.
- Check the Invert box so that white is on the left.
- Click OK.
- Click the New Mask Layer icon at the bottom of the Layers palette and choose Hide All.
- Activate the Flood Fill tool and fill the mask layer with the gradient.
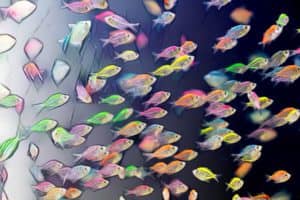
Now it looks as if the fish are swimming out of a painting into the ocean!
We hope these examples have given you a good understanding of how to use gradients in combination with masks to create some truly unique images!
Download your FREE 30-day trial and make every shot your best shot with PaintShop Pro 2023, your all-in-one photo editing and design software.
