
With PhotoMirage you can transform your photos, images and artwork into captivating animations with just a few easy steps. This tutorial will give you a tour of the PhotoMirage interface and introduce you to the key tools and features. Get a quick demonstration of how to use the Motion Arrows and Anchor Points to create the animation effects, and how to save your finished animations. We will also touch on other tools for cropping, masking, selections, and Visibility Layers.
Thanks for watching! We hope you found this tutorial helpful and we would love to hear your feedback in the Comments section at the bottom of the page. You will find a written version of this tutorial below, and a printable PDF copy and sample image to download from the Download Resources tab above.
Download your FREE 15-day trial of PhotoMirage and start creating stunning animations from your photos, digital designs and artwork in just a few simple steps.
Download these free resources:
Written tutorial (PDF, 951 KB)
PhotoMirage resources
User Guide (PDF, 4 MB)
Keyboard shortcuts (PDF, 518 KB)
PhotoMirage Tutorials
Tools and resources

PhotoMirage animation software
With PhotoMirage you can effortlessly transform any image into a captivating animation in only a matter of minutes.
PhotoMirage free trial
Download your FREE 15-day trial of PhotoMirage and start creating stunning animations from your photos and images.

PhotoMirage gallery
Visit the PhotoMirage gallery and upload your animations. Browse the gallery for inspiration and see what other users are creating.
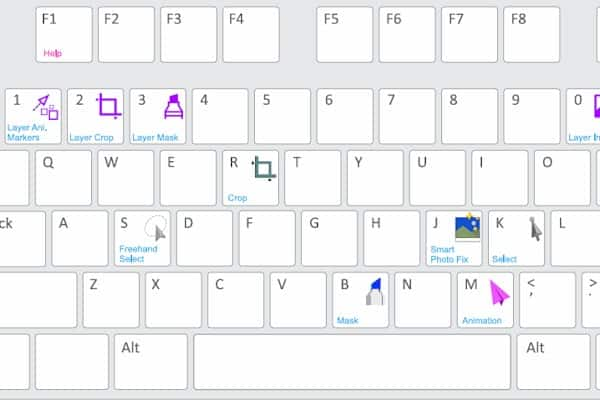
Keyboard shortcuts
Shave time off your most frequently performed tasks with this handy reference sheet for all the PhotoMirage keyboard commands.
Getting Started with PhotoMirage
Getting started with PhotoMirage is incredibly easy and addictively fun. In this tutorial, you’ll learn how to transform an image into a captivating animation in just a few quick steps, with PhotoMirage’s intuitive tools.
Click on any of the images below to view full-size.
When you first open up PhotoMirage you’ll be greeted by a handy Welcome Guide, packed with helpful video tutorials and other learning content, as well as a gallery of user photo animations to inspire you.
Step 1: Opening Images
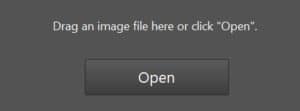
The first thing you want to do once you have PhotoMirage open is bring an image in. You can work with any JPEG, GIF, PNG, BMP, TIFF or RAW image. There are a few ways to do this:
- Click the Open button in the middle of your workspace to browse for an image on your system.
- Go to the File menu and choose New or Open.
- Drag and drop your photo right into your working area, to get started in no time.
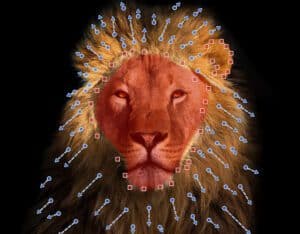
Step 2: Adding Motion Arrows
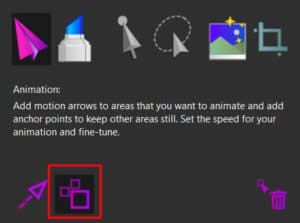
The first set of tools you’ll use are the Animation tools, found under the Animation icon, which is clicked by default when you first start.
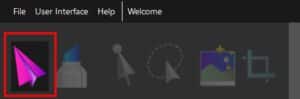
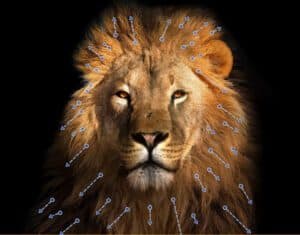
Now, click, drag and release to draw Motion Arrows over the parts of the image you want to animate. Make sure you draw the arrows in the direction you want to see movement.
Step 3: Adding Anchor Points
Next, click the Anchor Point icon, and click to plot Anchor Points around the parts of the image you want to keep still.

Click the Play button in the Control bar along the bottom when you are ready to preview your animation.

Step 4: Refining your Animation
Of course, you may want to refine your animation if your first attempt isn’t perfect, and that’s where a number of other handy tools will come into play.
Under the Animation icon, you can edit and delete Motion Arrows and Anchor Points you’ve previously plotted, as well as adjust the speed of your animation.
With Motion arrow icon selected, click on an already plotted Motion Arrow on your image, and move it. Click the Delete icon to delete a Motion arrow or Anchor Point by clicking on it.

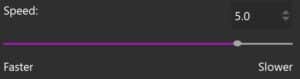
And then drag the Speed slider back and forth to adjust the speed of your animation.
Step 5: Using the Mask Tool
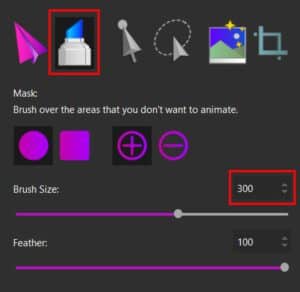
The Mask tool is an alternative way to isolate the regions of your photo that you want to keep still.
Click the Mask tool. Increase your brush size using the brush slider and then click and hold to mask the area to remain motionless.
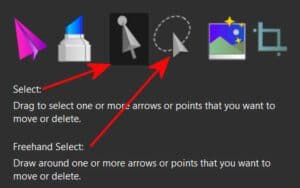
Step 6: Using the Selection Tools
Selection tools enable you to move and manipulate multiple Motion Arrows and Anchor Points at the same time.
Click on the Select icon and drag around multiple Motion Arrows and Anchor Points to select them. Or click on the Freehand Select icon and draw around a number of Motion Arrows and/or Anchor Points to select them.
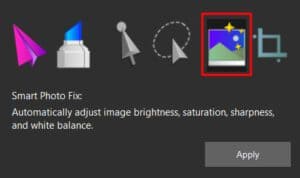
Step 7: Smart Photo Fix
Smart Photo Fix will automatically adjust the image brightness, saturation, sharpness, and white balance of your image. Click the Undo button on the Control bar if you want to remove the changes.
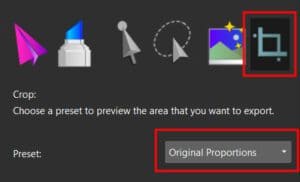
Step 8: Cropping your Animation
Click a crop preset and drag the crop box across the image to set the crop area. Using a crop preset lets you prepare for export—in many cases, the crop preset aligns with the export preset.
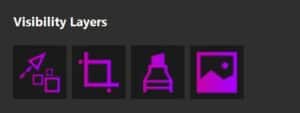
Step 9: Using Visibility Layers
Visibility Layers show and hide different elements of your photo animation project, including Motion Arrows and Anchor Points, your crop box, mask and your image file, so you can see what you are working on more clearly. Click on each of the icons to turn on or off that visibility layer.
Step 10: Additional Tools
Along the bottom of the PhotoMirage workspace are a number of additional tools in the Control bar that help you view and share your image, as well as undo and redo changes that you make.

EMAIL: You can email your animation directly from PhotoMirage if you use a default e-mail application that supports the MAPI Standard (such as Microsoft Outlook).
EXPORT: Opens the Export window where you can choose from a variety of export presets or choose custom settings.

UNDO: Undoes the last action.
REDO: Cancels the last undo.

ZOOM TO 100%: Sets the image zoom level to 100% of the actual image size.

ZOOM TO FIT: Fits the longest side of the image to the Preview area so the full image can be viewed.

PAN: Click Pan and hold to choose the portion of the image that you want to view when the current zoom settings result in hidden image areas.

ZOOM LEVEL: Drag the Zoom slider to set the zoom level or click the zoom icons at either end of the slider to decrease or increase the zoom level.
In the File menu at the top, you’ll see a number of self-explanatory commands, including Save and Save As. Saving your photo animation in PhotoMirage’s native .cpm file format means you can always come back to edit a project at a later time.
Also in the File menu, you can change the user interface language if you installed other languages when you installed the application.
In the User Interface menu, you can select your preferred color theme.
In the Help menu, you have access to all kinds of helpful resources to ensure you are successful with PhotoMirage.
Well, that’s really all you need to know to get started. Remember to have fun experimenting and you’ll be a Pro in no time.
Download your FREE 15-day trial of PhotoMirage and start creating stunning animations from your photos, digital designs and artwork in just a few simple steps.

Reader Interactions