
The first step in masking is learning how to apply simple masks, from PaintShop Pro’s collection of pre-installed masks. This tutorial will show you how to apply masks, then explore the different ways to manipulate and adjust masks once applied. Expand your creativity possibilities by downloading free content, including masks, from the Welcome Book in PaintShop Pro.
Thanks for watching! We hope you found this tutorial helpful and we would love to hear your feedback in the Comments section at the bottom of the page. You will find a written version of this tutorial below, and a printable PDF copy to download on the Download resources tab above.
Download your FREE 30-day trial and make every shot your best shot with PaintShop Pro 2023, your all-in-one photo editing and design software.
Download these free resources:
Written tutorial (PDF, 800 KB)
Sample image (JPG, 2.3 MB)
PaintShop Pro resources
Keyboard shortcuts (PDF, 173 KB)
PaintShop Pro User Guide (PDF, 25.4 MB)
What’s New in PaintShop Pro
Working with Masks
PaintShop Pro Tools
Featured products
 PaintShop Pro 2023 Ultimate
 AI HDR Studio 3.0
 PaintShop Pro 2023
 Vision FX
How to apply masks in PaintShop Pro
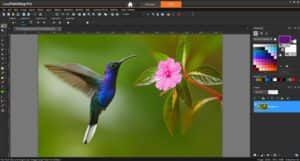
To begin, open PaintShop Pro in the Edit workspace and open the hummingbird photo (or any other photo you want to use).
- Right-click on the Background layer in the Layers palette and select Promote Background Layer.
- Click on the New Layer icon in the Layers palette and select New Raster Layer.
- Activate the Flood Fill tool and fill the layer with purple
- In the Layers palette drag the purple layer below the hummingbird photo layer.
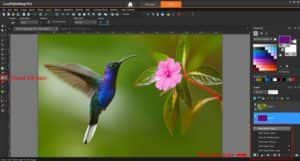
Click on the photo layer in the Layers palette, to make that the active layer. Now we are ready to apply the first mask.
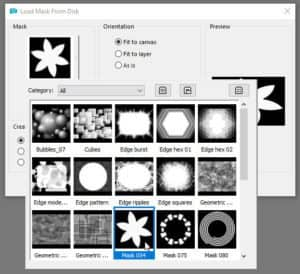
PaintShop comes with several masks pre-installed. To see these, go to Layers > Load/Save Mask > Load Mask from Disk. Click on the mask in the preview window to see the others that are available.
Note: the additional masks in the image below are those included in Corel’s Creative Content Pack. Getting these masks will be covered at the end of this tutorial.
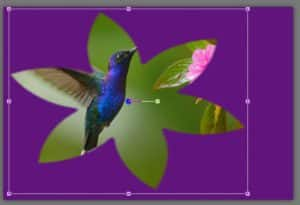
Choose the flower-shaped mask, which has an overall square shape. The black areas of the mask will become blocked; remember black equals block.
There are several options on this window. First, the Toggle Transparency button can be clicked to better show how the masking will work. Instead of black representing the blocked areas, these parts are now shown as transparent.
The Orientation options control where the mask is applied. Choose Fit to Canvas, so that the square mask will stretch horizontally to fit the rectangular image.
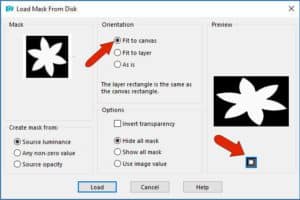
Click Load. The solid purple color from the bottom layer is now exposed in the black areas of the mask.

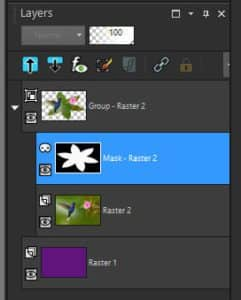
When a mask is applied, the layer structure of the image changes. The mask is applied to the active layer – in this case, the photo layer. That layer and its mask become a group, with the mask above and the photo below. To hide the mask, you would need to turn off the mask layer within the mask group.
Press Undo (or Ctrl + Z) to remove the mask and get back the original 2 layers. We will now look at another Orientation option.
Go to Layers > Load/Save Mask > Load Mask from Disk. This time select the Orientation option As Is, which keeps the mask at its original size. Click Load.
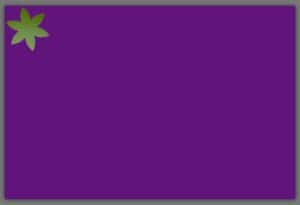
You can see the mask is placed in the top left corner. And if the mask image is smaller than the photo, as in this case, it’ll take up only part of the photo.
To adjust the mask size and placement, first click on the Mask layer in the Layers palette to make the mask layer active. Then activate the Pick tool to move, resize, or even rotate, the mask.
Press Undo again to return to the original two layers with no mask.
Go to File > New to create a new image. If you’re using the hummingbird photo, then a new image with dimensions of 1600 x 400 pixels will have the correct relative size. Flood fill this new image with a different color.
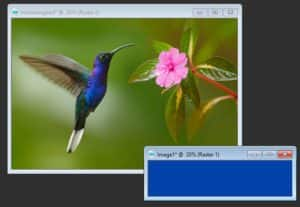
Copy this new image (Ctrl + C or go to Edit > Copy). Return to the hummingbird photo and paste the new image (Ctrl + V or Edit > Paste as New Layer).
Its layer should be placed at the top of the layer list, and that layer should be active.
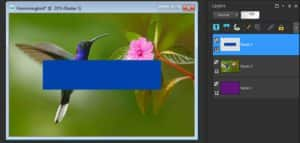
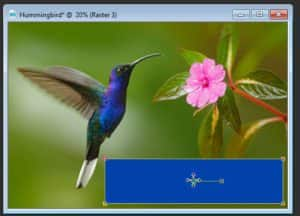
Using the Pick tool, move the rectangle toward the lower right corner, perhaps to contain a caption or quote.
Go to Layers > Load/Save Mask > Load Mask from Disk again. This time select the Edge Burst mask and choose the Fit to Layer option.
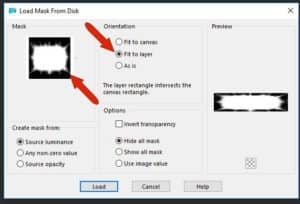
This applies the mask only to the active layer, which is the colored rectangle.
When using Load Mask from Disk, the three options at the bottom are relevant when using the As Is option. With Hide all mask, the parts of the photo outside the mask will be blocked. Show All mask does the opposite – parts of the photo outside the mask will not be blocked. With Image Value, the masking depends on how the original mask was created.
To demonstrate the Invert transparency option, let’s remove the rectangle and mask.
- In the Layers palette, right click on the mask layer group (top layer) and select Delete.
- Click Yes to remove the layer group and all the layers it contains.
- Drag the purple layer to the top of the Layers palette.
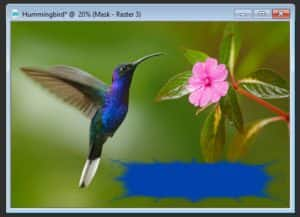
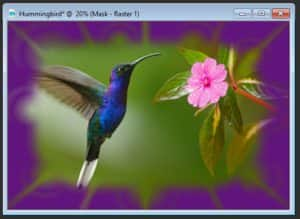
- Load the Edge Burst mask again, choose Fit to canvas, and check Invert transparency.
When applied, the center of the purple layer is now blocked, and the photo shows through.
There are a few masks available in PaintShop Pro, but you can get more from the Welcome Book. Click the House icon to open the Welcome book. On the Get More tab, choose the Creative Content category and scroll down to the Creative Content Pack. This is free to download and includes line styles, picture tubes, preset shapes and of course, masks!
Download your FREE 30-day trial and make every shot your best shot with PaintShop Pro 2023, your all-in-one photo editing and design software.

Reader Interactions