
With the Fill tools in CorelDRAW, you can add colored, patterned, textured, and other fills to the inside of objects or other enclosed areas. In this tutorial, we’ll show you how to use the Interactive Fill tool to fill objects with uniform fills, fountain fills, pattern fills and texture fills. You’ll also learn how to use the Smart Fill tool to fill an enclosed area, for example an area created by overlapping lines or curves.
Thanks for watching! We hope you found this tutorial helpful. You will find a written version of this tutorial below, and a printable PDF copy to download on the Download Resources tab above.
Start your FREE 15-day trial and embark on a design journey with powerful tools for vector illustration, layout, photo editing, typography, and collaboration.
Download these free resources:
Written tutorial (PDF, 875 KB)
CorelDRAW Graphics Suite Resources
Quick Start Guide (PDF, 2 MB)
Keyboard Shortcuts (PDF, 3.5 MB)
CorelDRAW and Corel PHOTO-PAINT user guides
For CorelDRAW Graphics Suite subscription and perpetual licenses (2018 to 2024), languages include English, Português do brasil, 简体中文, 繁體中文, Čeština, Deutsch, Español, Français, Italiano, 日本語, Polski, Русский
What’s New in CorelDRAW Graphics Suite
CorelDRAW Tools
Color, fills and transparency
 CorelDRAW Graphics Suite
 Ultimate Vector Bundle Vol. 1
 CorelDRAW Standard 2021
 Ultimate Vector Bundle Vol. 2
 Corel Vector
How to use the Fill tools
This tutorial will introduce you to two of the Fill tools in CorelDRAW: the Interactive Fill tool and the Smart Fill tool.
The Interactive Fill tool
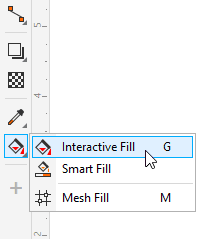
The Interactive Fill tool can be found on the toolbox, by default in the last icon.
When using this tool, you can either select one or more objects to fill in advance, or activate the Interactive Fill tool and click the object you want to fill.
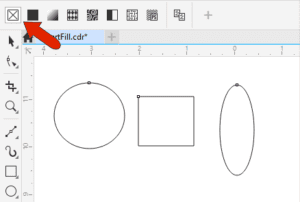
There are several types of fills, which can be selected from the property bar.
The Uniform Fill option applies the current fill color. You can click the Fill Color dropdown and choose a different color or use the eyedropper to sample a color anywhere in CorelDRAW or on your desktop.
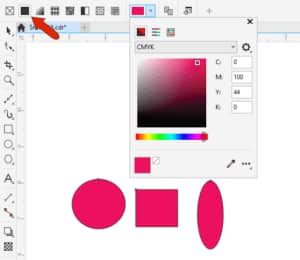
The Uniform Fill option is equivalent to left-clicking a color swatch from any palette or dragging a swatch inside the object.
The equivalent to applying the “no color” fill is the No Fill option in the property bar.
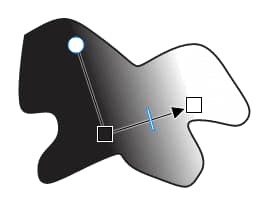
With the Fountain Fill option, you can apply a gradient, which proceeds by default from the last-used uniform fill color to white, along a horizontal line.
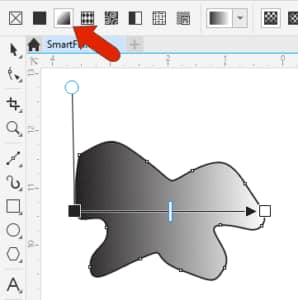
You can also apply a fountain fill by clicking and dragging. This way you choose where to start the gradient from the original fill color, where the gradient should end at the second color, and the angle between the two colors.
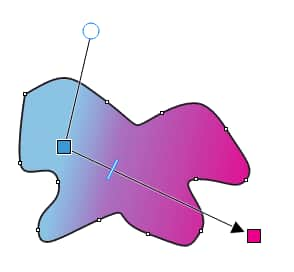
Clicking a color swatch replaces the white color, or you can click either fountain fill control handle to change its color or reduce its transparency.
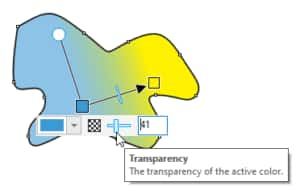
You can also drag a swatch from a palette directly onto a control handle, drag either control handle to move the gradient start or end, drag the slider to adjust the rate of change, or drag the circular handle to change the gradient angle.
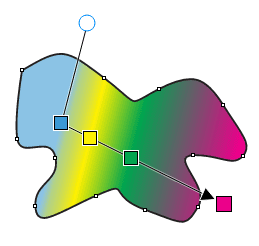
To add more colors changes, you can drag swatches directly onto the control bar. Any of these new handles can be dragged to adjust the color progression. Double-clicking a handle along the control bar removes the handle.
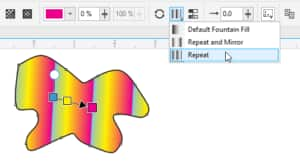
The property bar has options to reverse gradient direction, repeat or repeat and mirror, and smooth transitions.
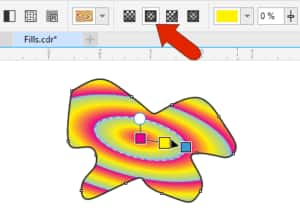
You can also switch to Elliptical, Conical, or Rectangular fill.
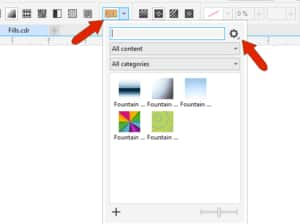
There are also several pre-set fills in the Fill Picker drop-down, any of which can be adjusted. More fountain fills can be downloaded by clicking the Get More icon. In the window that opens, in addition to fountain fills, there are also downloads for bitmap and vector fill bundles.
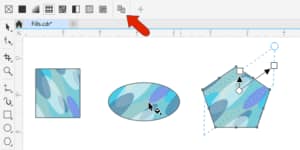
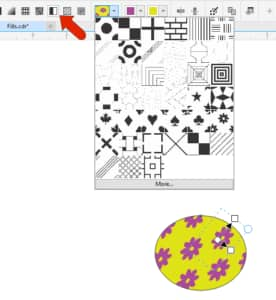
To apply a vector fill, choose one of the patterns from the drop down.

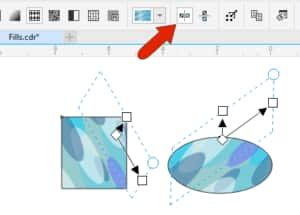
You can use the handles to change pattern size and angle, and there are options to mirror tiles horizontally or vertically.
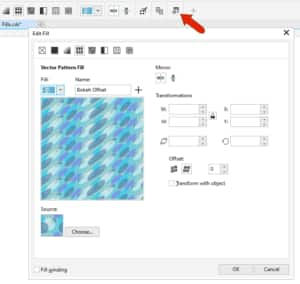
The Edit Fill icon opens a window in which you can set exact pattern values or choose your own pattern image. This window is available for all fill types, each of which have their own settings.
To copy a fill from one object to another, first click the object you want to fill, then click the Copy Fill icon, and click the fill you want to apply.
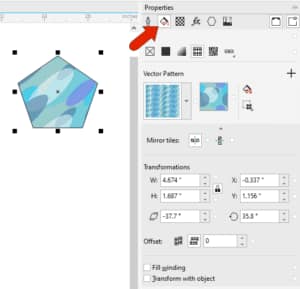
The Properties docker, or Properties inspector on the Mac, can be opened by choosing Window > Dockers/Inspectors > Properties. While an object is selected, the Fill tab displays all fill properties that can be edited – the same properties that appear in the Edit Fill window.
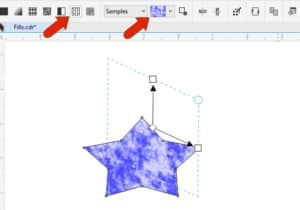
Bitmap fill is similar to Vector Pattern, with similar handles for adjusting the pattern.
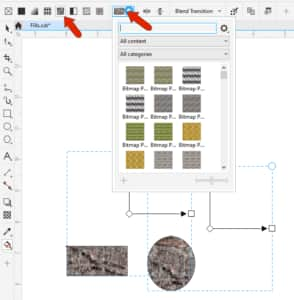
You can use your own bitmap image via the Edit Fill window.
There is a variety of two-color fill patterns you can choose from, and the two colors can also be set in the property bar.
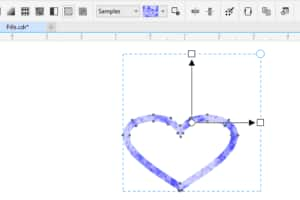
There are several texture fills which work like bitmaps and vectors, and textures can be mirrored and regenerated.
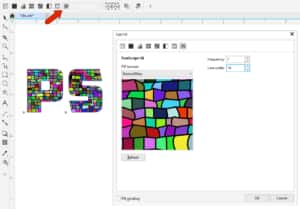
For PostScript fills, there are a number of patterns to choose from, and the Edit Fill window for each PostScript fill has options depending on the pattern itself.
For objects with thick outlines, fills can be applied to the outline if it’s converted to an object. This can be done by choosing Object > Convert Outline to Object. Once converted, you can use the Interactive Fill tool to fill the outline.
The Smart Fill tool
The Smart Fill tool can be found in the same tool group flyout as the Interactive Fill tool.
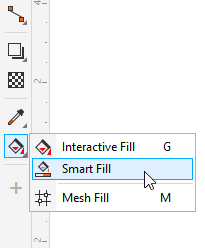
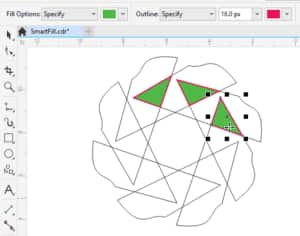
The Smart Fill tool is used to fill in an enclosed area, and also can be used to create new objects. In the property bar you can use a default fill color or specify the color, and specify outline width and color as well. Clicking within an enclosed area applies the solid fill and outlines.
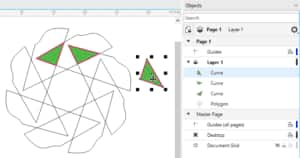
Each filled area is a new object, which can be seen in the Objects docker. Selecting and moving these object shows that the original objects remain intact.
Start your FREE 15-day trial and embark on a design journey with powerful tools for vector illustration, layout, photo editing, typography, and collaboration.

Reader Interactions