
The Paint tool in PHOTO-PAINT can be used to apply brush strokes and effects to your images. In this tutorial, we’ll use several project examples to demonstrate the various features of the Paint tool, explore the different brush categories and show you how to adjust brush properties such as size, nib shape and transparency.
Thanks for watching! You will find a written version of this tutorial below, and a printable PDF copy to download on the Download resources tab above.
The Paint tool in PHOTO-PAINT can be used to apply brush strokes and effects to your images. In this tutorial, we’ll use several project examples to demonstrate the various features of the Paint tool, explore the different brush categories and show you how to adjust brush properties such as size, nib shape and transparency.
Thanks for watching! You will find a written version of this tutorial below, and a printable PDF copy to download on the Download Resources tab above.
Start your FREE 15-day trial and embark on a design journey with powerful tools for vector illustration, layout, photo editing, typography, and collaboration.
Download these free resources:
Written tutorial (PDF, 1.3 MB)
If you want to follow along with the same images used in this tutorial, you can download them from Pixabay:
https://pixabay.com/photos/cafe-building-greece-3537801/
https://pixabay.com/photos/street-lamp-historical-light-4668310/
https://pixabay.com/photos/school-board-empty-slate-916678/
https://pixabay.com/photos/mardi-gras-mask-costume-carnival-4238474/
https://pixabay.com/photos/musician-country-song-banjo-guitar-349790/
CorelDRAW Graphics Suite Resources
Quick Start Guide (PDF, 2 MB)
Keyboard Shortcuts (PDF, 3.5 MB)
CorelDRAW and Corel PHOTO-PAINT user guides
For CorelDRAW Graphics Suite subscription and perpetual licenses (2018 to 2024), languages include English, Português do brasil, 简体中文, 繁體中文, Čeština, Deutsch, Español, Français, Italiano, 日本語, Polski, Русский
What’s new in CorelDRAW Graphics Suite
Introduction to PHOTO-PAINT
PHOTO-PAINT projects
 CorelDRAW Graphics Suite
 Ultimate Vector Bundle Vol. 1
 CorelDRAW Standard 2021
 Ultimate Vector Bundle Vol. 2
 Corel Vector
Using the Paint tool in Corel PHOTO-PAINT
The Paint tool in PHOTO-PAINT can be used to apply brush strokes and effects to your images. In this tutorial, we’ll use several project examples to demonstrate the various features of the Paint tool, explore the different brush categories and show you how to adjust brush properties such as size, nib shape and transparency.
Click on any of the images below to view full-size.
The basics of the Paint tool
In our first example, we’ll do some painting on this blackboard image to introduce you to some brush basics.

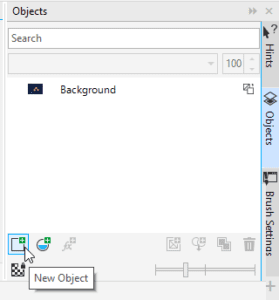
First, we need to create a new object so that the paint will be its own object, and not part of the background. To do this, go to Object > Create > New Object. Or you can click on the New Object icon at the bottom left of the Objects docker (Window > Dockers > Objects).
Let’s start by “washing” the center of the blackboard. Activate the Paint tool or press the P key. On the Property bar, click the Brush dropdown for a list of brush categories and the brushes they contain. For example, select the Watercolor category and then click on each brush for a preview of the default nib shape.

Once you choose a brush, such as Wispy Light Wash, you can change the nib size by holding the Shift key and dragging the mouse. Note that when any brush property is changed from the default, the brush becomes a custom brush.
Next, select a color that you want to paint with from the palette on the right. We’re using a dark grey to “wash” the center of the blackboard. Drag the mouse to create the paint strokes. Just like with a real brush, applying repeatedly adds more paint.
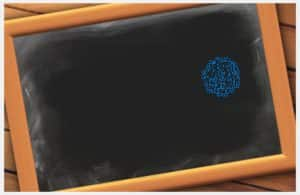
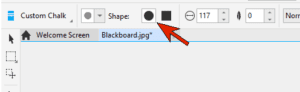
To add a different type of brush stroke, select a new category and brush from the Brush dropdown. We are using the Square Chalk brush from the Chalk category. Set the nib size, and you can hold the Alt key while dragging to add transparency. On the Property bar you can switch to a round shape instead of square.
You can also choose a new color, in this case we switched to a light gray color to paint some letters.

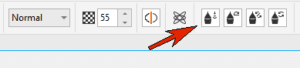
This would be an ideal use of a tablet and stylus, but you can get great results with a mouse as well. For stylus users, enabling these four icons in the Property bar means that pressure, tilt, bearing, and rotation of the pen will affect paint strokes.
To set the default pen pressure for your stylus, go to Tools > Options > Corel PHOTO-PAINT. Click on Pen Settings on the left and then follow the instructions in the dialog box.
We’ll demonstrate one last brush for this example. To soften the chalk a bit, we selected the Medium Soft Bleed brush from the Watercolor category and used it to smear some of the edges of the letters.

Adding effects with the Paint tool
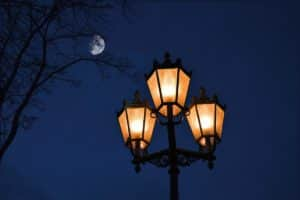
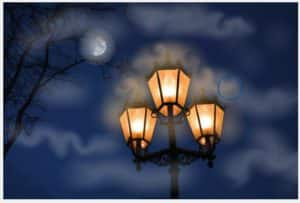
In this example, we’ll use the Paint tool to add a foggy effect to this night scene.
First, click the New Object icon in the Objects docker to create a new object for the paint effects.
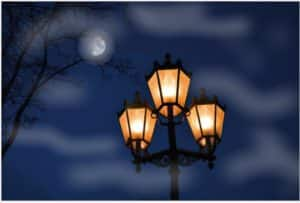
To create the fog, we are using the Soft Wide Cover brush from the Airbrush category. We’ve increased the nib size to around 250, set the transparency around 50, and selected a gray color. You can use a combination of dragging the brush in some spots and clicking in other spots to add some random-looking fog.
To create a halo around the moon, you can click and hold down your mouse key to increase the amount of paint that is applied in the same spot.
To create a halo effect around the lights, first add a new object, and then use the Eyedropper tool to sample the orange of the lights.
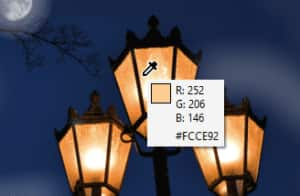
Press P to switch back to the Paint tool with the same brush as before, and paint around the lights.
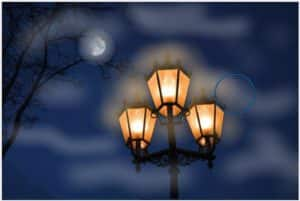
You can use the Effects tools to add extra effects to whatever you create with the Paint tool. For example, we used the Smear tool to add some motion to the fog, and the Twirl tool to add effects to the orange halo around the lights. Just make sure that you select the correct object in the Objects docker before applying the effects.
Advanced brush settings
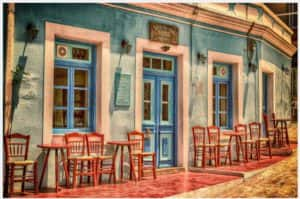
In addition to the basic brush properties we reviewed on the Property bar, there are several advanced brush properties and settings available in the Brush Settings docker. To demonstrate these settings, we’ll transform this cheery daytime scene into a rainy evening scene.
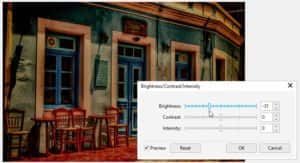
Before we begin painting, we’ll use a lens to darken the whole image. Go to Object > Create > New Lens or click on the New Lens icon at the bottom of the Objects docker.
In the New Lens window, select the Adjust category on the left and the Brightness/Contrast/Intensity effect on the right and click OK. Now use the sliders to reduce the Brightness to around -30.
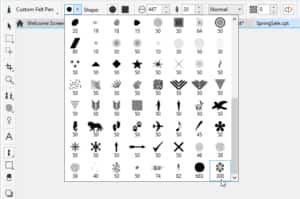
Then add a new object, making sure that it is above the lens in the Objects docker. Activate the Paint tool and open the Brush Settings docker by going to Window > Dockers > Brush Settings or press Ctrl + F8.
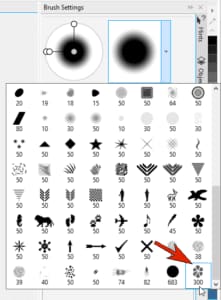
In the Brush Settings docker you will see all of the nibs, and the numbers listed with each brush indicate the default nib size.
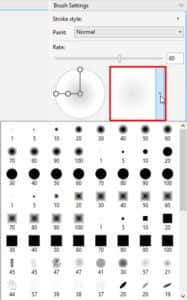
To create a rain effect, we’ll start with a dotted brush nib. You can use the nodes on the preview to the left to both rotate and elongate the nib.
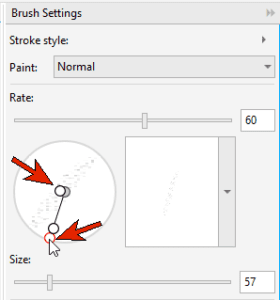
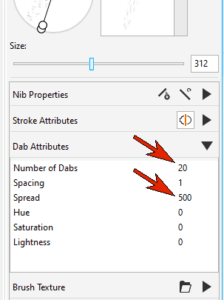
Further down in the Brush Settings docker, click on the arrow beside Dab Attributes to expand this section. Here we can increase the number of dabs per click as well as the spread between dabs.
Now with a large nib size and low transparency, you can paint in a storm.

Explore the many different nib shapes that you can use to add accents to an image, such as these shiny brush marks placed in this holiday scene.

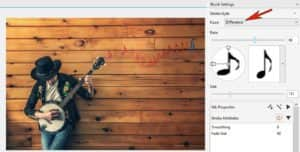
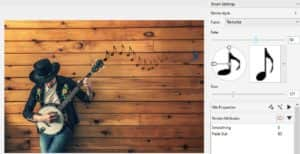
Or we can add music note brush marks to the background in this photo.
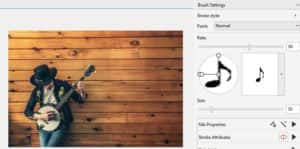
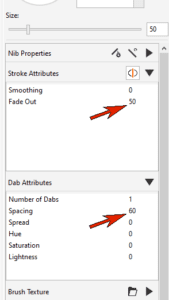
Under Dab Attributes increase the spacing between dabs, and under Stroke Attributes, set a Fade Out value.
Then choose a color and drag out a line of notes.

Or you can undo, and try different blend modes, such as Difference . . .
. . . or Texturize, which looks perfect against the wood background.
Creating a brush nib
You can also create your own brush nib. In a new document, with a new object, activate the Paint tool with a round opaque nib, and a bit of feathering around the edges, and dab some circles to create a flower pattern.
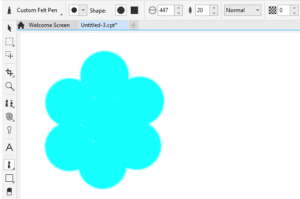
Then use the Eraser (X shortcut key), which has its own brush settings, to remove some of the paint.

In order to mask this pattern, first use the Pick tool to select the entire object, then choose Mask > Create > Mask from Object.
Then go back to the Paint tool, and in the Brush Settings docker open Nib Options and choose Create from Contents of Mask.
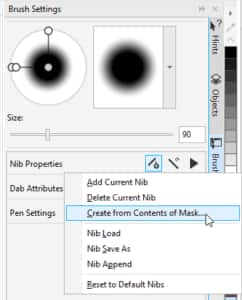
Set the nib to a reasonable size and click OK. Now you can find this nib in the drop-down list.
Now in a new document, we have a text object above an empty object, which is active.
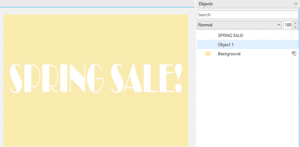
Activate the Paint tool and choose the nib you saved.
To modify this brush before you use it, open Brush Settings. In Nib Properties, add some transparency and enable nib rotation. Under Dab Attributes, increase the spacing between dabs.
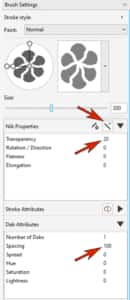
Next, open the list of Brush Textures and choose a texture.
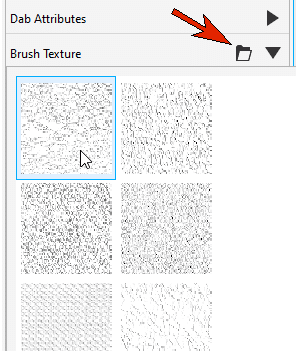
You’ll also need to assign a Brush Texture value in order for the texture to appear.
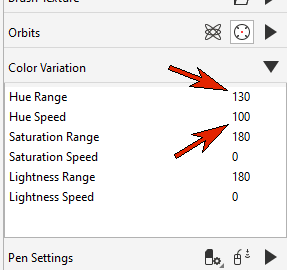
Finally, under Color Variation, increase the Hue Range so that the color will deviate from the color you start with. Also increase the Hue Speed, which is the speed at which the hue changes.
Start with a large brush size starting from red hues, and paint in a set of textured flowers.

Then add some smaller dabs starting from green . . .

. . . and finally add some tiny flowers in white and grays, adding a bit of spread so that flowers will scatter from the paint path.

Start your FREE 15-day trial and embark on a design journey with powerful tools for vector illustration, layout, photo editing, typography, and collaboration.
