
Want to make your own Instagram template for the holiday season? PaintShop Pro has tons of tools and effects you can use to design professional-looking custom templates. In this tutorial, we’ll show you all the steps including how to create the background, photo opening, decorative elements, and text.
Thanks for watching! You will find a written version of this tutorial below, and a printable PDF copy to download on the Download resources tab above.
Download your FREE 30-day trial and make every shot your best shot with PaintShop Pro 2023, your all-in-one photo editing and design software.
Written tutorial (PDF, 827 KB)
VectorStock design elements (Zip file, 8.7 MB)
PaintShop Pro resources
Keyboard shortcuts (PDF, 173 KB)
PaintShop Pro User Guide (PDF, 25.4 MB)
What’s new in PaintShop Pro
Holiday projects
Artistic tools and projects
Featured products
 PaintShop Pro 2023 Ultimate
 AI HDR Studio 3.0
 PaintShop Pro 2023
 Vision FX
How to make an Instagram template
In this tutorial, you’ll learn how to make an Instagram template in PaintShop Pro. We’ll show you how to create a background, add design elements, custom photo frames, add text, and other creative effects. The example we are using is holiday-themed, but you can use these techniques for any type of template.
Document setup
Open PaintShop Pro and then go to File > New to create a new document. In the New Image window:
- Set the Units to Pixels.
- Set the Image Dimensions as the default square size for an Instagram Post at 1080x1080px.
- Optional: to save this as a preset, click on the Add icon. Then name your preset and press OK. Now this new file preset will be available in the User Preset section to use in future projects.

Make sure you have the Materials palette and Layers palette open. If they are not open, you can enable them from the Palettes menu.
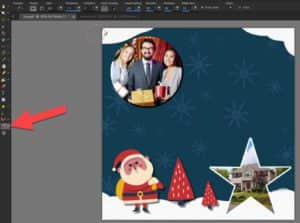
Adding a background and photo opening
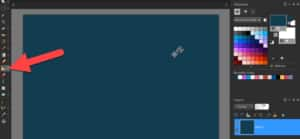
To add a solid color background, click on the Flood Fill tool icon and choose a color from the Materials palette. Then click on the document to fill the background with your desired color.
Next, we’ll demonstrate two methods to create the photo opening in our template.
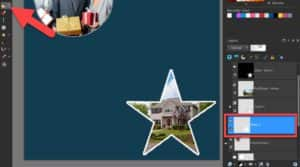
Method 1: Using the Frame tool
The Frame tool, introduced in PaintShop Pro 2022, makes it easy to place your photos into frames.
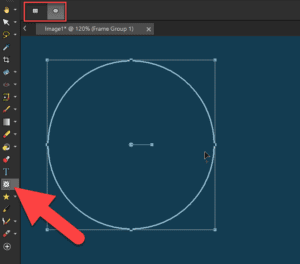
- Click the Frame tool icon on the Tools toolbar.
- Select either the Rectangle or Ellipse shape on the Tool Options palette.
- Draw your frame wherever you’d like to place an image.
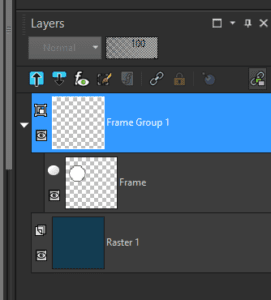
If you look in the Layers palette, you will see that the Frame tool has created a Frame Group layer, which holds a layer for the frame itself, and for your image once you place one inside the frame.
To place an image in the frame, you can go to File > Embed Image and locate your desired image or drag one in directly from Windows File Explorer. The image will automatically scale to fit your frame.
To adjust the image within the frame, make sure the image layer is selected in the Layers palette. Then use the nodes on the bounding box to adjust the size, position, or rotation.
To move or adjust the frame and the image together, make sure the Frame Group layer is selected first.
Method 2: Using a mask
If you’re using PaintShop Pro 2021 or lower, and don’t have the Frame tool, you can use a mask to create the photo opening. This produces the same results but with a few more steps.
- From the Shape tool flyout on the Tools toolbar, select a Shape tool and use it to draw your desired shape. Then use the Pick tool or alignment commands to place it where you want.
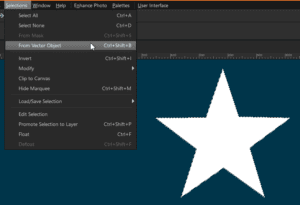
- Create a selection. Since the shape is a vector object, go to Selections > From Vector Object (alternatively, you could use the Magic Wand tool to select the shape).
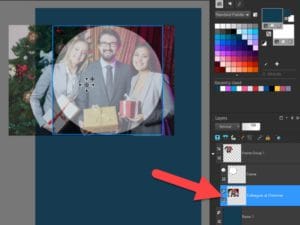
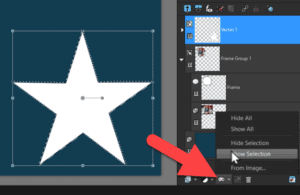
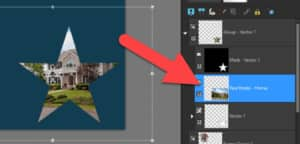
At the bottom of the Layers palette, click New Mask Layer > Show Selection. This will create a mask group and you can drag your photo right into the Layers palette under the mask layer.
If you need to adjust the size or position of your image within the mask, first press Ctrl + D to remove the selection marquee. Then, with the image layer selected in the Layers palette, you can use the Pick tool to adjust the size and position of the image under the mask layer.
Adding a border
To make your photo stand out, you can choose to add a border around the photo opening.
- In the Layers palette, select the vector layer that has your shape then go to Selections > From Vector Object to create the selection again.
- With the selection still active, click on New Raster Layer at the bottom of the Layers palette and press OK.
- In the Layers palette, drag the new raster layer down and out, so it is under the mask group and on its own layer.
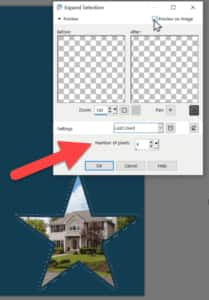
- Then go to Selections > Modify > Expand and set the Number of pixels to create the width of frame that you want. Enable Preview on Image to see the border width as it will be applied to your shape and press OK when you’re happy with it.
- With the selection still active, click on the Flood Fill tool, select a color in the Materials palette, and click inside the selection marquee to fill the border with your chosen color.
- Then press Ctrl + D to remove the selection marquee.
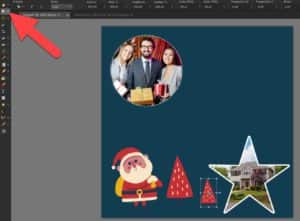
Adding design and decorative elements
Now we are going to add some design elements. These files are available to download from the Download Resources tab at the top of the tutorial page. They were provided by our friends at VectorStock.
There are a number of different file formats included in the download file. We have extracted each item and saved as an individual PNG file with transparent background. To use a transparent PNG, open it in PaintShop Pro, copy and paste onto your Instagram template, and use the Pick tool to resize and reposition.
VectorStock has many other royalty-free designs that you can use, however these files usually only have one PNG file with all the elements on it. So here is how you can extract individual design elements if necessary:
- Open the PNG file in PaintShop Pro.
- Choose one of the Selection tools from the Tools toolbar, such as the Freehand Selection tool.
- On the Tool Options palette, set the Selection Type to either Freehand or Point-to-Point, then draw or click multiple points around the design element to select it.

- Then go to Edit > Copy (or Ctrl + C), switch to your template and go to Edit > Paste as New Layer (or Ctrl + V).
- Use the Pick tool to adjust the size and positioning of the design element.
Adding effects
This is an optional step but here are some ideas to apply effects that will make your template look more professional.
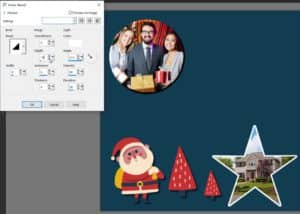
3D effects
- To add a drop shadow to some of the elements, click on the element and then go to Effects > 3D Effects > Drop Shadow. Adjust the settings to your liking and then press OK.
- Experiment with other 3D effects like Effects > 3D Effects > Inner Bevel to make the elements pop out even more.
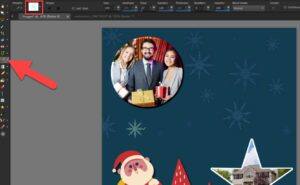
Artistic effects
There are many possibilities when adding artistic effects. In this example we will use the Paint Brush tool to add snowflakes to the solid color background, and the Oil Brush tool to add a layer of snow.
First, go to Layers > New Raster Layer to create a new layer for your artistic effects.
- Select the Paint Brush tool on the Tools toolbar.
- On the Tool Options palette, select a brush tip such as Snow in the Brush Tip drop-list and click OK.
- On the Tool Options palette, you can also adjust the Size, Opacity and other brush settings if you wish.
- Choose a color in the Materials palette and click around the image to sprinkle snowflakes as part of the background.
To add a bed of snow, we will use one of the Art Media tools such as the Oil Brush. When you use an Art Media tool, a new Art Media layer will automatically be created in the Layers palette.
- Select the Oil Brush from the Art Media tool group on the Tools toolbar.
- On the Tool Options palette you can set the Shape, Size, and other brush options.
- Choose a color in the Materials palette.
- Use the brush to add a bed of snow along the borders, or wherever you want on your template.
- Since this effect is on its own Art Media layer, you can adjust it with the Pick tool, reduce the Layer Opacity, change the Layer Blend Mode, or even convert it to a raster layer to make further changes.
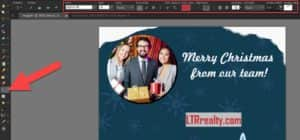
Adding text
- Click on the Text tool on the Tools toolbar and then click on your image and type out your desired text.
- On the Tool Options palette, use the settings to adjust the Font, Size, Style, and Color. You can even add a text border by adjusting the Stroke width and color.
- Use the Pick tool to reposition your text if necessary.
TIP: You may need to drag your text layer up or down in the layer order in the Layers palette to ensure your text is visible above the other images and design elements, for example the snowflakes on the background.

Once your template is complete, we suggest you save a copy in PSPIMAGE format. This will preserve all the layers for your design elements, text, and photo opening so you can make changes or swap out the photo. Then save a copy in JPG or PNG format for posting online. These are a few of the many ways you can have fun designing and creating your own holiday projects in PaintShop Pro!
Download your FREE 30-day trial and make every shot your best shot with PaintShop Pro 2023, your all-in-one photo editing and design software.
