
The CorelDRAW Toolbox is the main toolbar that contains the collection of key tools used for drawing and editing images. In this tutorial, we’ll review the features of the Toolbox, tool groups and the interactive property bar, plus show you how to move the Toolbox and customize the tools that are displayed on it.
Thanks for watching! You will find a written version of this tutorial below, and a printable PDF copy to download on the Download Resources tab above.
Start your FREE 15-day trial and embark on a design journey with powerful tools for vector illustration, layout, photo editing, typography, and collaboration.
Download these free resources:
Written tutorial (PDF, 185 KB)
CorelDRAW Graphics Suite Resources
Quick Start Guide (PDF, 2 MB)
Keyboard Shortcuts (PDF, 3.5 MB)
CorelDRAW and Corel PHOTO-PAINT user guides
For CorelDRAW Graphics Suite subscription and perpetual licenses (2018 to 2024), languages include English, Português do brasil, 简体中文, 繁體中文, Čeština, Deutsch, Español, Français, Italiano, 日本語, Polski, Русский
What’s new in CorelDRAW Graphics Suite
CorelDRAW tools
Introduction to CorelDRAW
 CorelDRAW Graphics Suite
 Ultimate Vector Bundle Vol. 1
 CorelDRAW Standard 2021
 Ultimate Vector Bundle Vol. 2
 Corel Vector
An overview of the CorelDRAW Toolbox
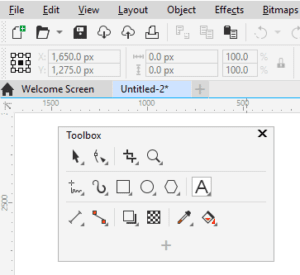
The CorelDRAW Toolbox is the toolbar located, by default, vertically to the left of the workspace. The Toolbox below is what you’ll see when using the Default workspace, but will vary a bit in other workspaces, such as Lite or Touch.
Click on any of the images below to view full-size.
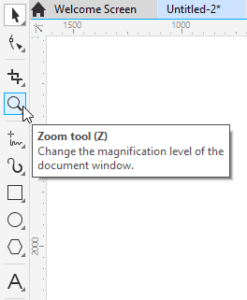
You can hover over any tool button to get a tooltip popup, which identifies the tool name and describes what it does. If the tool has a keyboard shortcut, such as Z for the Zoom tool, its shortcut is also listed in the popup.
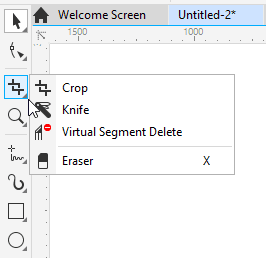
The small arrow in the lower right corner of an icon indicates that the tool is part of a tool group. Clicking this arrow opens the flyout of related tools.
Clicking an icon activates that tool, and in most cases, the cursor icon changes to match the tool icon.
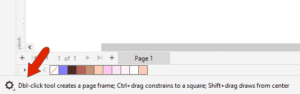
When a tool is active, the status bar at the lower left provides some guidance or tips on how the tool works. As an example, if you click the Rectangle tool, the status bar lists what double-clicking or the modifier keys do.
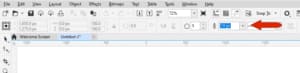
The Property Bar is the horizontal toolbar located above the drawing window, and below the Menu bar and Standard toolbar. This toolbar contains icons or fields that are relevant to the active tool. For example, if you activate the Polygon tool, the property bar will change to provide options for adjusting the coordinate or size fields, choosing the number of sides, setting outline width, etc.
For some of the drawing tools, such as the Ellipse tool, you can double-click the icon to open the tool’s Options window.
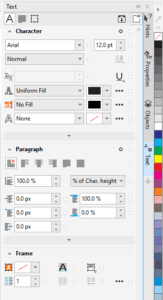
Many of the tools have more options than those presented in the property bar. For those tools, Dockers are the place to look for the full set of options. These are called Inspectors for Mac users. The Window > Dockers menu lists all available dockers. As an example, the Text docker contains all the standard options from the property bar, as well as many more character, paragraph, and frame options.
The Learn docker is another place to check for more information on the currently active tool. You can read about how to use the tool, see what the modifier keys do, or how to make edits. There are also links to help articles and videos. For more information, watch the full tutorial on CorelDRAW’s learning tools.
The Toolbox and other toolbars are docked by default, which means they stick to an edge. They also don’t move because they’re locked. If you want to move the Toolbox, choose Window > Toolbars and toggle off Lock Toolbars. Now each toolbar has a dotted line at the top.
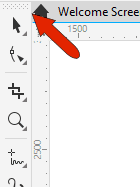
You can drag this line to place the Toolbox where you want, and even resize it. This is called a floating toolbar.
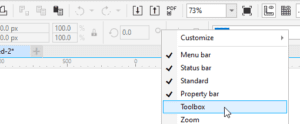
You can close the Toolbox with the X icon, and to get it back you can go back to Window > Toolbars and choose Toolbox. Or you can bring up the Toolbars menu by right-clicking in the blank space of any toolbar, and Toolbox is here as well.
If you move the Toolbox to the top of the workspace it will dock there horizontally, and if you move it back to its original spot to the left, it will go back to vertical. And you can lock the toolbars again to keep them from moving.
The Add icon at the end of the Toolbox can be used to add more tools. Choosing Customize opens the entire list of commands in the Options window, from where you can drag additional tools into the Toolbox.
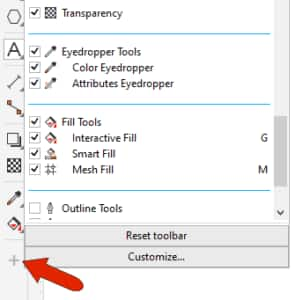
The Options window is also where you can change tool names, tooltip text, and change or add shortcut keys. While the Options window is open, you can rearrange icons, or drag unneeded icons that out of the toolbar.
To get back to the Toolbox defaults, click Add again and choose Reset toolbar.
Start your FREE 15-day trial and embark on a design journey with powerful tools for vector illustration, layout, photo editing, typography, and collaboration.

Comments (2)
Reader Interactions
Comments
awsome
Object>Insert> MathType 07 does not reproduce Greek letters correctly. The precious version CorrelDraw7 did that. It is disappointing.