
In this tutorial, you’ll learn how to make before and after images for social media using two different methods in PaintShop Pro. The first method is a side-by-side comparison, which is a great way to show off before and after shots of home makeovers and renovations, weight loss or fitness progress or even if you want to have fun recreating a childhood pose 20 years later. The second method is a split image, which is an artistic way to show off your image editing skills in adding effects and enhancements to your photos.
Thanks for watching! We hope you found this tutorial helpful and we would love to hear your feedback in the Comments section at the bottom of the page. You will find a written version of this tutorial below, and a printable PDF copy to download on the Download Resources tab above.
Download your FREE 30-day trial and make every shot your best shot with PaintShop Pro 2023, your all-in-one photo editing and design software.
Download these free resources:
Written tutorial (PDF, 1.03 MB)
Sample images (Zip file, 3.13 MB)
Free templates (Zip file, 305 KB)
PaintShop Pro resources
Keyboard shortcuts (PDF, 173 KB)
PaintShop Pro User Guide (PDF, 25.4 MB)
What’s New in PaintShop Pro
Getting Started in PaintShop Pro
Photo Editing Projects
Featured products
 PaintShop Pro 2023 Ultimate
 AI HDR Studio 3.0
 PaintShop Pro 2023
 Vision FX
How to Make Before and After Images
In this tutorial, you’ll learn how to create before and after images for social media using two different methods in PaintShop Pro.
Click on any of the images below to view full-size.
It is always best to check your preferred social media platform for the most up to date requirements for image sizes, but here are some common dimensions:
- Facebook post image size – 1200 x 630px (3:2 aspect ratio)
- Instagram post image size – 1080 x 1080 px (1:1 aspect ratio)
- Twitter post image size – 1024x 512 px (2:1 aspect ratio)
Method 1: Side-by-Side Before and After Images
This method is a great way to show off before and after shots of home makeovers and renovations, weight loss or fitness progress or even if you want to have fun recreating a childhood pose 20 years later.
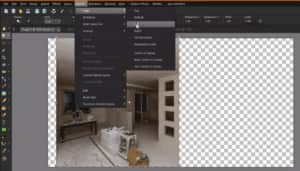
- Open up PaintShop Pro in the Edit workspace and click the New Image
- Enter desired width and height, set the color to transparent and click OK.

NOTE: If you often create a certain image size, you can click on the plus sign in the New Image window to create your own preset.
Open the before and after images you want to use.
To place them side by side evenly, each image will need to be resized or cropped to fit the full height but only half the width of your canvas. In this example, we’ll use the Facebook image size, so each image will need to be 600 x 630px.
TIP: If you don’t already know the size of your images, you can check out the image information by going to Image > Image Information or by right-clicking on the image and selecting Image Information.
Depending on the original images, you can choose to crop or resize, or both.
- Resize the before and after images by clicking on Image > Resize, adjust the height to 630px, then click OK.
- Click on the Crop Tool icon and add your width dimensions. Adjust the position to where you want to crop your image and click Apply.

- Go to Edit > Copy, then go to the new blank image.
- Go to Edit > Paste as New Layer.
From here, use the Pick tool to align your image or go to Objects and use the Align commands to place it exactly on the left side of the canvas.
- Repeat these same steps with the after image and place it on the right side.

- Use the Text tool on the left toolbar to add “Before” and “After” text to your images.

Method 2: Before and After Split Images
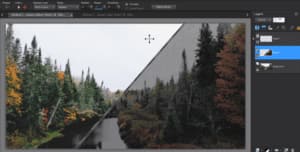
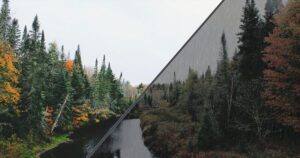
In this method, you’ll learn how to create a before and after split image which is a creative way to show off your image editing skills. In this example we are using the Rainy Day script to add a falling rain effect to a fall landscape image.
- Open the original image and the after image if you’ve already done the image editing.
- If you haven’t yet created the after image, make sure you are working on a duplicate copy to preserve your original as you go ahead and add the effects and enhancements to your image.
- Copy the after image and paste it as a new layer on the before image.
- Make sure to crop and resize the image to your desired dimensions as we did in the first method.

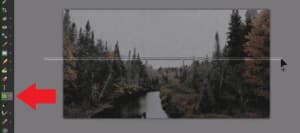
- Use the Rectangle tool to draw a thin vertical rectangle as a divider.
TIP: Zoom out so your image isn’t full screen and draw the rectangle to extend off the canvas a bit on the top and bottom which is helpful if you want to rotate it on an angle later.
- Decide where you want to split the image in half, whether that be horizontally, vertically or on an angle. Or you can place the divider off-centre for an asymmetrical look.
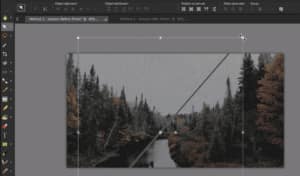
- After placing the divider, click on one of the selection tools.
The regular selection tool will work fine if your divider not on an angle, but if your divider IS on an angle, choose the Freehand selection tool and set the selection type to Point to Point.
- Draw a selection around the part the image on the left side of the divider, that will be the “before” side.
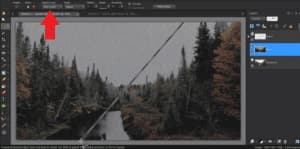
- In the Layers palette, click on the layer that has your after image to make sure it is the active layer, then press the Delete key. This will delete the selection area you created, allowing the before image to show through.
And now you have a cool split image to show off your image editing skills on social media!
Download your FREE 30-day trial and make every shot your best shot with PaintShop Pro 2023, your all-in-one photo editing and design software.

Reader Interactions