
Turning your photos into stunning high key monochrome images is now very easy to do, using the High Key Monochrome scripts. In this tutorial we’ll review how to use the scripts and show you some options for customizing the results by using layer blend modes, changing colors and adjusting levels to increase or decrease the amount of detail.
You can purchase the High Key Monochrome Script Bundle from the Store of the PaintShop Pro welcome screen.
Thanks for watching! We hope you found this tutorial helpful. You will find a written version of this tutorial below, and a printable PDF copy to download on the Download resources tab above.
Download your FREE 30-day trial and make every shot your best shot with PaintShop Pro 2023, your all-in-one photo editing and design software.
Download these free resources:
Written Tutorial (PDF, 824 KB)
PaintShop Pro resources
Keyboard shortcuts (PDF, 173 KB)
PaintShop Pro User Guide (PDF, 25.4 MB)
What’s new in PaintShop Pro
Artistic tools and projects
Adding effects
Featured products
 PaintShop Pro 2023 Ultimate
 AI HDR Studio 3.0
 PaintShop Pro 2023
 Vision FX
How to apply and customize the High Key Monochrome scripts
In this tutorial we’ll review how to apply and customize the High Key Monochrome scripts. This bundle of scripts can be purchased from the Store tab of the PaintShop Pro welcome screen.
Running the scripts
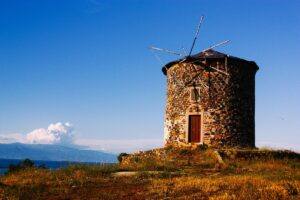
To begin, open PaintShop Pro in the Edit workspace and open the photo you wish to use. In this example we are using a photo of an old windmill.
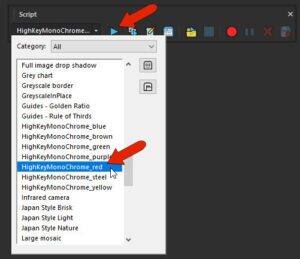
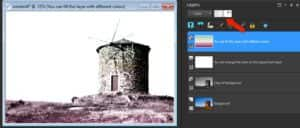
Make sure the Script toolbar is open (View > Toolbars > Script). In the Script toolbar, open the dropdown list of scripts and choose a High Key Monochrome script and then click the Run icon (blue arrow).
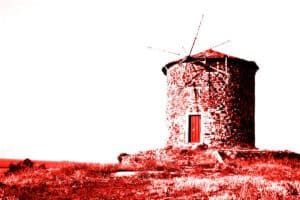
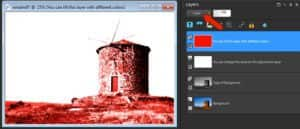
After a couple seconds of run time, we now have a high key monochrome version of the photo.
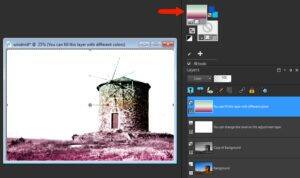
In the Layers palette you will see that there are now three new layers above the Background (photo) layer, and the visibility of the Background layer itself has been turned off.
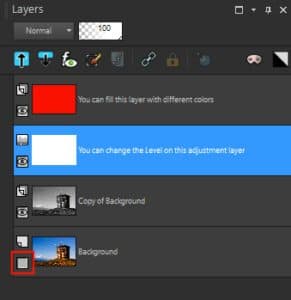
If we turn off the visibility (click the eye icon) for the top two layers we can check out these new layers one by one.
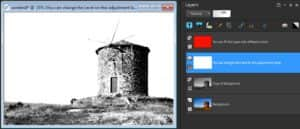
The first layer above the background is a grayscale version of the original image.
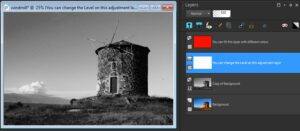
Above that is a Levels adjustment layer, whose default settings have lightened the foreground objects and removed the sky background. This layer contains the same effects that can also be applied by choosing Adjust > Brightness and Contrast > Levels. The advantage of these effects being on their own layer is that the adjustment values can be changed, which we’ll see farther on.
The top layer contains the red overlay – it’s a raster layer with a simple red fill, whose blend mode is set to Color. For this particular photo, some other blend modes work nicely as well, such as Lighten, Screen, Overlay or Soft Light. Try changing the blend modes to see which ones work best on your photo.
Changing the monotone fill color
As instructed by the layer name, you can easily change the overlay color by activating the Flood Fill tool and choosing a new color in the Materials palette. Before filling with a new color, uncheck the Use all Layers setting in Tool Options palette so that the fill will be applied based on the pixels of this layer only.
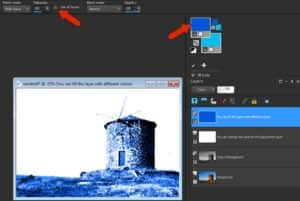
When changing the color, you are not limited to single color swatches only. To go from a monochrome to a more colorful look, click on the color swatch to open the Material Properties window, choose the Gradient tab and select a gradient fill to apply.
If the overlay is too strong, you can adjust the Opacity slider at the top of the Layers palette to reduce the layer opacity a bit.
Adjusting the levels
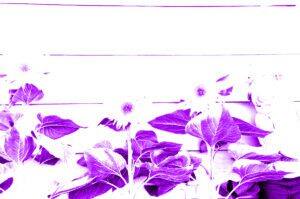
Depending on your photo, the High Key Monochrome scripts will sometimes produce results that are too light. As you can see in this example, too much of the photo’s detail is lost after running the script.

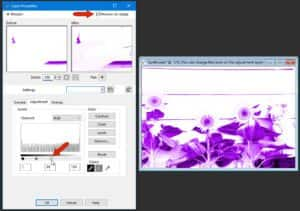
But you can easily adjust the Levels settings to bring back more detail. To do this, double-click on the layer in the Layers palette to open the Layer Properties window. Make sure Preview on Image is checked to see the pixels update.
Click on the Adjustment tab and move the white node on the slider to the right to increase the level of detail. You can also try moving the grey and black sliders to see how they affect your image.
As you can see, by experimenting with the different blend modes, layer opacity, color fills and levels, the High Key Monochrome scripts can product an endless number of creative possibilities. Give them a try today and share your results in our user gallery.
Download your FREE 30-day trial and make every shot your best shot with PaintShop Pro 2023, your all-in-one photo editing and design software.
