
With Pinnacle Studio, you can create unique custom titles for your videos or for your picture slideshows. In this tutorial, you’ll learn how to create more advanced titles, working with shape and text layers. You’ll also learn how to add motion and effects to your titles to make more exciting and animated videos or slideshows! If you are not familiar with the title options in Pinnacle Studio, check out our tutorial on Adding Basic Titles for some background.
Thanks for watching! We hope you found this tutorial helpful and we would love to hear your feedback in the Comments section at the bottom of the page. You will find a written version of this tutorial below, and a printable PDF copy to download on the Download Resources tab above.
Download these free resources:
Written Tutorial and the Project File ( Zip, 12 MB)
Download a FREE 15-day trial and discover all the essential and advanced video editing features that Pinnacle Studio delivers to make your videos look their best.
What’s New in Pinnacle Studio
Text and Titles
Intermediate and Advanced Editing Techniques
Featured products
 Pinnacle Studio 26 Ultimate
 Studio Backlot Membership
 Pinnacle Studio 26
 Vision FX
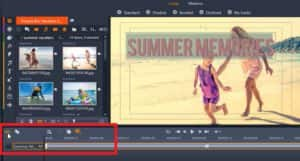
Creating Advanced Title Effects in Pinnacle Studio
With Pinnacle Studio, you can create unique custom titles for your videos or for your picture slideshows. In this tutorial, you’ll learn how to create more advanced titles, working with shape and text layers. You’ll also learn how to add motion and effects to your titles to make more exciting and animated videos or slideshows!
Click on any of the images below to view full-size.
Adding Text Layers
Double-click on the first title on A/V Track 1 to bring up the Title Editor. To add a secondary title to appear simultaneously, you can create multiple layers.
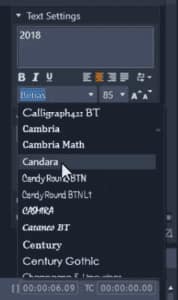
Click on Add Text Layer and a new text box will pop up. Type in the text that you want.
To make adjustments to a layer, click on the text layer you want to edit and you’ll see it is highlighted in orange. You can change the font type by making adjustments under Text Settings on the right.
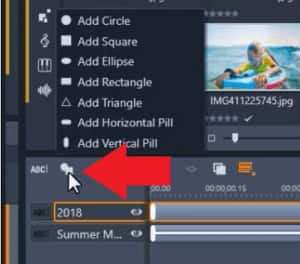
Adding Shape Layers
To add a shape layer, click on the Shape tool icon and select your desired shape.
To change the color of the shape, head to the right of the screen under Look Settings.
- Click on the drop-down arrow beside Face to open the options.
- Click on the Fill box to change the color.
- Click Apply.
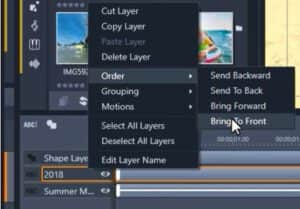
Adjusting Layer Order
If you want to use a shape layer as a text background, drag the shape to where you want it placed. Then right-click on the text layer and select Order > Bring to Front.
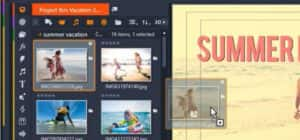
Adding Image Layers
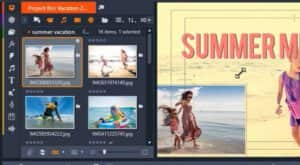
Drag the image you would like to add from your project bin on the left and drop it onto the preview pane.
Resize the image by dragging on the corner of the picture.
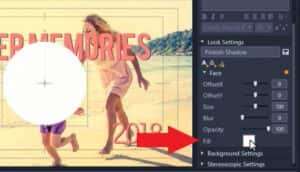
To add a shadow, click on Add Shadow details.

Click on the Fill box to change color and click Apply. If you want to change the shadow location, adjust the Offset bars.

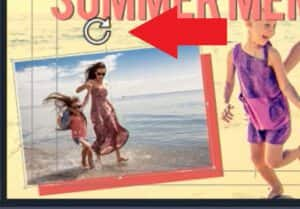
To rotate the image, hover your mouse over the circle above your image and rotate it to your desired position.
Adding and Customizing Motion
If you want to add some motion to your image shape layer, click on the Motions tab at the top and select Enter. In this tutorial we are using #3 Page from Infinity. Click Play to preview the added motion.

On the timeline, the dotted line over the shape layer indicates the added motion. If you want to delete this motion, simply click on the X in the middle.
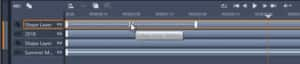
You can also adjust the duration of the motion by dragging the edge to make it longer or shorter. If you click preview, you’ll see the effects now happen at a faster speed.
To make this image to appear onscreen a few seconds later, adjust the start and end point of each layer by dragging on either end.
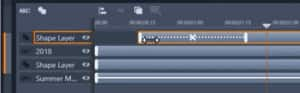
To add motion to your background shape layer and text layer at the same time:
- Click on one of the layers you want to add motion to.
- Hold down Ctrl on your keyboard and click on the second layer you want to add motion to.
- You can see that both layers have now been highlighted.
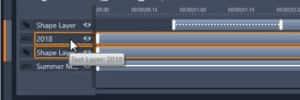
- Go up to Motions and select Enter, then #12 Barrel Roll.
- Preview the titles, and you’ll see both the background shape and the text enter with the same motion effect.
- Click OK to apply these changes.

Adding Special Effects to Text
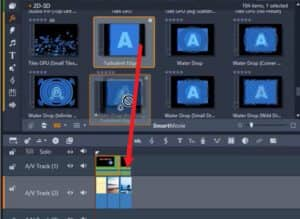
Click on the FX icon on the left of the screen and select 2D-3D.

Scroll down through the FX library and click on Turbulent Edges. Now drag this effect down over top of the title on the timeline.
If you want to make adjustments to the effect, right-click on the title and select Effect > Edit > Turbulent Edges.
The Effect Editor dialog box will pop up. For this particular effect, we will decrease the Gain to about 17 and increase the Scale to 86.

Preview the title and you’ll now have a fun turbulent effect to your text.

Download a FREE 15-day trial and discover all the essential and advanced video editing features that Pinnacle Studio delivers to make your videos look their best.

Reader Interactions