
Do you have old photos that have become damaged over time? Perhaps a corner has been bent, or there are imperfections such as scratches and dust spots on the surface. In this tutorial, we’ll show you how to use PaintShop Pro’s photo restoration tools to remove the scratches, cracks, and dust from scanned copies of old photos.
Thanks for watching! We hope you found this tutorial helpful and we would love to hear your feedback in the Comments section at the bottom of the page. You will find a written version of this tutorial below, and a printable PDF copy to download on the Download Resources tab above.
Download your FREE 30-day trial and make every shot your best shot with PaintShop Pro 2023, your all-in-one photo editing and design software.
Download these free resources:
Written Tutorial and Sample Images (Zip, 2 MB)
PaintShop Pro resources
Keyboard shortcuts (PDF, 173 KB)
PaintShop Pro User Guide (PDF, 25.4 MB)
What’s New in PaintShop Pro
Photo Restoration
Corrections and Enhancements
Featured products
 PaintShop Pro 2023 Ultimate
 AI HDR Studio 3.0
 PaintShop Pro 2023
 Vision FX
Remove Scratches, Cracks and Dust from Old Photos
If you have scans of old photos, chances are that some of your scans will show some cracks, scratches, or dust. PaintShop Pro has many tools to remove or minimize signs of wear or damage. In this tutorial, you’ll learn how to use these photo restoration tools:
- Scratch Remover
- Clone Tool
- Blemish Fixer
Open PaintShop Pro and open the Edit workspace.

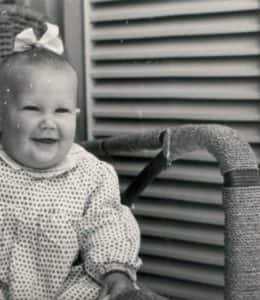
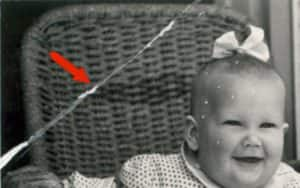
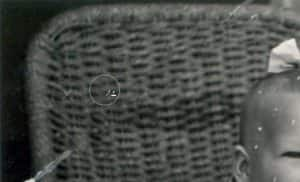
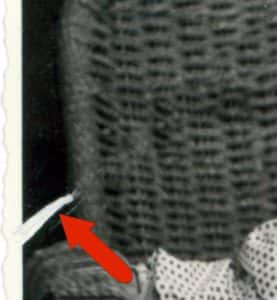
Here is the image that will be used in this tutorial. The original photo has two large cracks – one diagonal and one vertical. And there are also some dust spots scattered around, most noticeably on the baby’s face.

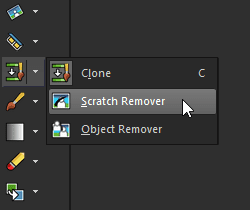
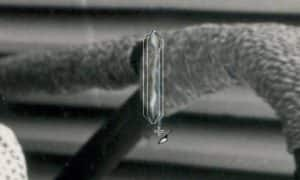
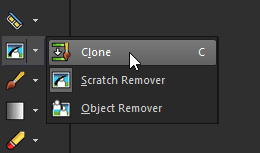
First we’ll fix the vertical scratch. The best tool for this is Scratch Remover, which is part of the Clone tool group.
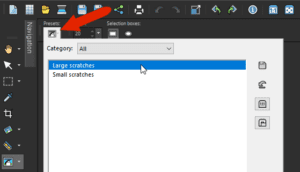
This tool has two presets, which you can access by clicking the Presets icon in the Property Bar. The vertical scratch is rather wide, so choose the Large scratches preset.
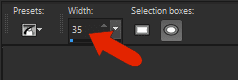
This preset has a width of 35 pixels. You can also choose between tapered or square brush edges.
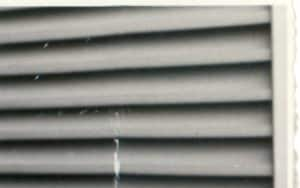
Starting at the top of the scratch, click and drag a short distance along the crack. This tool works with zones – an inner zone where the crack is, and an outer zone on either side. When you release the mouse button, what appears in the outer zones gets copied into the inner zone.
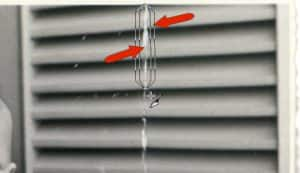
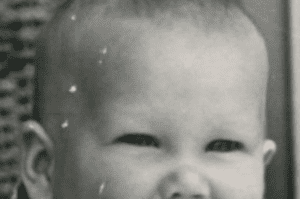
Here is this section of the crack, now effectively painted over.
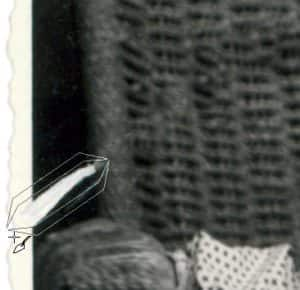
Continue dragging short sections along this crack, skipping the part where the crack meets the chair – this area needs a narrower brush.
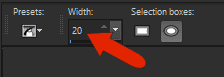
For the crack along the chair, zoom in a bit with your scroll wheel.
Reduce the brush width; a setting of 20 pixels works pretty well here.
Drag along the whole crack in this area, or you can try dragging a few sections.
Here is this area of the photo after removing the scratch.

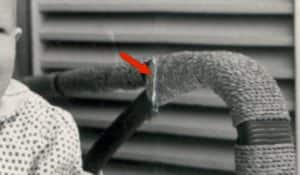
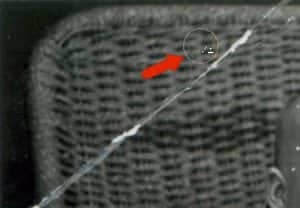
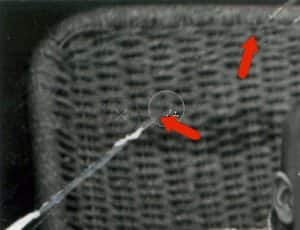
Next, we’ll tackle the long diagonal scratch.
If you try the Scratch Remover here, you’ll get a wavy pattern over the crack. What’s needed here is a tool that can reproduce the pattern of the chair back. A better tool for this scratch is the Clone tool.
What appears is a single circle, which you should place above the area containing the pattern you want to clone. The brush size can be adjusted by holding the Alt key while you drag your mouse up or down.
The brush size should be large enough to contain a repeating section of pattern. To define this area as what you want to clone, right-click.
Once the clone area is set, you can either click or drag to paint that area over the scratch. For areas that are relatively uniform, such as this part of the scratch, dragging works pretty well.
In other parts of the scratch, along the chair back, clicking piece by piece does a nice job.
Along the chair border, however, you’ll need to set a different area to clone. Move your mouse over a bit of the chair border, adjust the brush size, and right-click to set this new clone area.
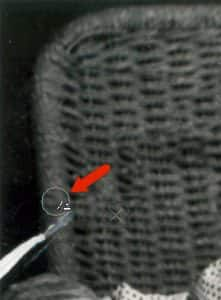
Then click over where the scratch appears.
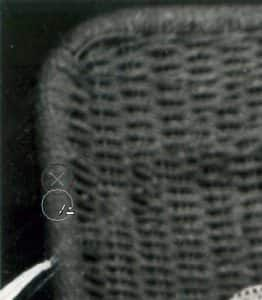
The same steps can be used at the top of the chair: right-click where shown to set the new clone area.

Then click over the scratch.

Now the entire diagonal scratch is covered, except for this part at the bottom:
For this area, go back to the Scratch Remover, using a width around 45 pixels.
Now the entire diagonal scratch is removed.
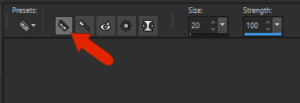
The last tool we’ll use on this photo is Blemish Fixer, which is part of the Makeover tools. Blemish Fixer is the first icon on the Property Bar.

Blemish Fixer works in a similar way to the two-zone Scratch Remover, but using a circle rather than a straight line. Adjust the brush size with the Alt key and the mouse, making the inner zone just large enough to contain the blemish – in this case, a dust spot. Then click.
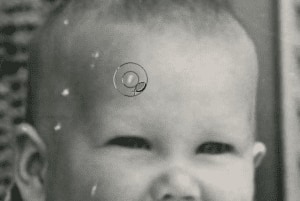
The inner zone is covered with what was in the outer zone.
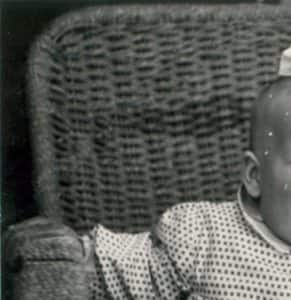
The rest of the this photo can be touched up with the Blemish Fixer: the remaining spots on the face, as well as a few spots throughout the rest of the photo.

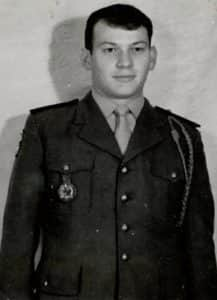
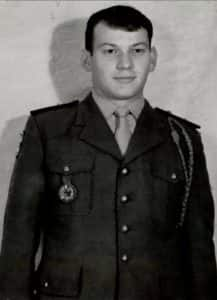
For an example of another photo restoration tool, we’ll use this photo of a soldier. Along most of the dark jacket, there are quite a few light spots: dust spots or small scratches.
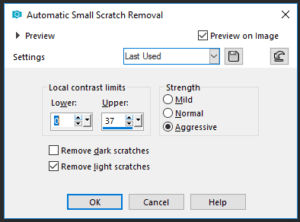
To remove several of these spots at once, choose Adjust > Add/Remove Noise > Automatic Small Scratch Removal.
Check the box to remove light scratches, set the strength to Aggressive, and adjust the upper contrast limits. As this limit is increased, you should notice many of the scratches disappearing.
Now there are still several spots, but fewer than before.

To fix the rest of the photo, Blemish Fixer does a great job.
Download your FREE 30-day trial and make every shot your best shot with PaintShop Pro 2023, your all-in-one photo editing and design software.

Reader Interactions