In this tutorial, CorelDRAW Master Ariel Garaza Diaz demonstrates four methods for removing the backgrounds from images in CorelDRAW Graphics Suite. You will learn how to use the PowerClip and PowerTRACE tools in CorelDRAW, and how to use the mask tools and Cutout Lab in Corel PHOTO-PAINT.
Start your FREE 15-day trial and embark on a design journey with powerful tools for vector illustration, layout, photo editing, typography, and collaboration.
Download these free resources:
Written Tutorial (PDF, 1.8 MB)
CorelDRAW Graphics Suite Resources
Quick Start Guide (PDF, 2 MB)
Keyboard Shortcuts (PDF, 3.5 MB)
CorelDRAW and Corel PHOTO-PAINT user guides
For CorelDRAW Graphics Suite subscription and perpetual licenses (2018 to 2024), languages include English, Português do brasil, 简体中文, 繁體中文, Čeština, Deutsch, Español, Français, Italiano, 日本語, Polski, Русский
What’s new in CorelDRAW Graphics Suite
Working with bitmaps
Introduction to PHOTO-PAINT
Removing backgrounds from images with CorelDRAW and PHOTO-PAINT
In this tutorial, we are going to explore different methods for removing backgrounds from images in CorelDRAW and Corel PHOTO-PAINT.
Click on any of the images below to view full-size.
Method 1: Removing backgrounds with PowerClip in CorelDRAW
This is one of the easier and most popular ways to remove the background of an image. Here you will be placing one or more objects “inside” a vector object. This is especially useful if the image that you want to remove the background from has well defined edges. A good example would be a photo of the Earth.

Using the Ellipse tool, we can easily to draw an ellipse and then use the Pick tool to adjust it precisely to the shape of the planet.
Next, select the Earth image and go to Object > PowerClip > Place inside frame. An arrow will appear, then click on the ellipse to make it the PowerClip frame/container.
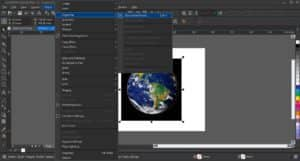
When you click, it will remove everything outside of the object you created. From here you can delete the ellipse outline and add another image to use as the new background.

The Earth image is a simple geometric shape with a single-color background, making it easy to remove the background. Now let’s look at an image that is not geometric, like this flower.

The easiest way to create an outline around the flower is to draw it. You can use the Freehand tool (F5) and trace it. Within this tool group there are different tools you can use (Freehand, Bézier, Pen, etc.), but the final result will be the same for each option, so feel free to use the tool you’re the most comfortable with.
To learn more about these drawing tools, watch the full tutorial How to Design Curves.
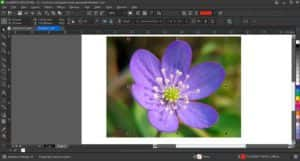
Once you have created the outline, follow the same steps as the previous example:
- Select the flower image.
- Go to Object > PowerClip > Place inside frame.
- Use the arrow to click on the outline you’ve drawn.
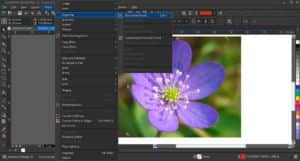
Now just like before you can add a new background to the image.

Learn more about the PowerClip tool in this tutorial Clipping Objects into Other Objects with PowerClip.
However, it is not always so easy. Drawing the outline can sometimes take a lot of time and effort, especially for beginners. In that case, I have a little trick: vectorize the image using the PowerTRACE tool and then use the vector as a frame to create your PowerClip.
Method 2: Removing backgrounds with PowerTRACE in CorelDRAW
To open PowerTRACE you can right-click on the image and select Outline Trace > High Quality Image, or on the property bar use Trace Bitmap > Outline Trace > High Quality Image.
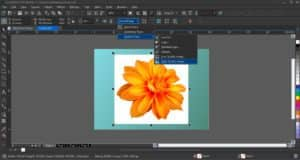
There are different configurations according to the type of image, from a high-contrast image (Line Art), a logo, clipart, etc. to a high-quality image. In this case you are only using the vector to create your frame, so you could also use Quick Trace. You can find it by right-clicking and selecting Quick Trace, or on the property bar Trace Bitmap > Quick Trace. I recommend using the High-quality image option because it gives you more flexibility and it can remove the background, either automatically or by selecting the color to eliminate.
On the Settings tab of the PowerTRACE window you have the option to remove the background automatically, or by specifying a color with the Eyedropper tool.
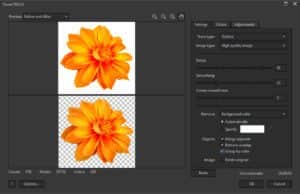
Once the background is removed, click OK to exit the PowerTRACE window. The PowerTRACE result is a group of objects that are on top of the original image – use the Pick tool to move the group off to the side. With the group still selected, go to Object > Shaping > Boundary to automatically draw the outline of your image.
The result will be an object in the shape of your image, it can be adjusted if you need to make corrections or modifications.
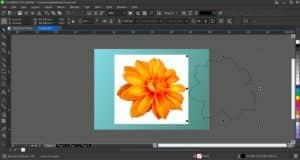
With the Pick tool, move the outline object over top of the original image. Select the original image, go to Object > PowerClip > Place inside frame, then use the arrow to click on the outline you created.
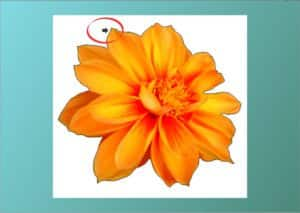
With that you will have eliminated the background of the image, but also perfected the edges of it, helping to increase the quality. You can delete the outline if you wish.
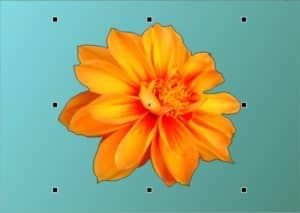
To learn more about PowerTRACE, watch the full tutorial How to Convert JPG to Vector with PowerTRACE.
Method 3: Removing backgrounds with Mask tools in PHOTO-PAINT
PHOTO-PAINT is a powerful image editor that is included in CorelDRAW Graphics Suite. It has some helpful tools for removing backgrounds from more complex images.
You can open your image in PHOTO-PAINT directly from CorelDRAW. Select the image and click on the Edit Bitmap icon on the property bar. The advantage of doing it this way is that when you finish the editing the image in PHOTO-PAINT and return to CorelDRAW, the image will be in its original position, at its original size.
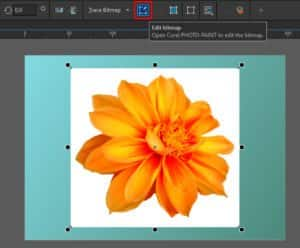
Once your image is open in PHOTO-PAINT, select the Magic Wand tool, which can be found in the Mask Tools group on the toolbar.
TIP: if you press the W key, the Magic Wand tool is automatically activated.
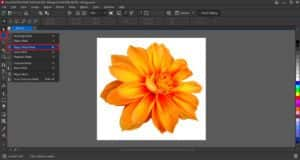
In this example, we want to mask the flower. But since the background is a uniform color, it is much easier to select than the flower, which is made up of many colors. Once the background is selected, all we need to do is invert the mask using Mask > Invert Mask (Ctrl + Shift + I).
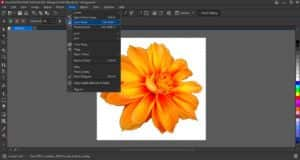
You can refine the selection using the different Mask tools if necessary. Once you’re happy with your selection, simply click the Finish Editing button on the property bar to exit PHOTO-PAINT. You will be prompted to save your changes, click Yes.
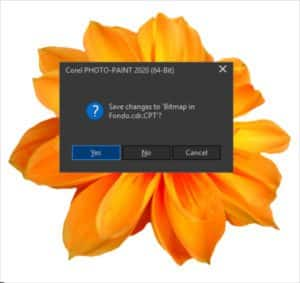
That will return you to CorelDRAW, with your edited image ready to add a new background or apply other effects (for example, with the Drop Shadow tool). It’s important to remember that the weight of the image does not change, since the background is no longer visible, but the image has been cropped.
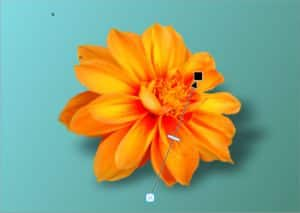
Now, as you know, it is not always so simple nor is the background always a uniform color. If the background is clearly separated from the object you want to crop, as in the example below, we can still use the above method.

As in the previous example, we select the image in CorelDRAW and click on the Edit Bitmap icon, and that will open the image in PHOTO-PAINT. Unlike the previous example, if you click with the Magic Wand tool, it does not select the entire background.
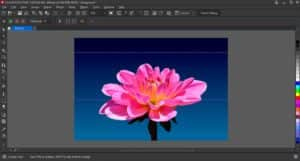
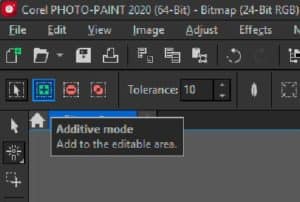
In this case, you can use the Magic Wand tool in Additive mode, which means that each new color you click on will be added to your selection. Click on the Additive mode icon on the property bar and then click on all the colors in the background to complete your selection.
TIP: You can increase or decrease the tolerance (the degree of difference between one color and another) that the Magic Wand tool identifies. Just be careful that when you select colors in the background that they aren’t also included in the object you want to keep.
Once you have finished your selection, follow the same process as before: Mask > Invert Mask, then click the Finish Editing button. You can now save and close the file.
To learn more about PHOTO-PAINT’s mask tools, watch the full tutorial Using Masks in PHOTO-PAINT.
Method 4: Removing backgrounds with the Cutout Lab in PHOTO-PAINT
What about more complex selections, like hair? Or when it is very difficult to select the background? The answer is PHOTO-PAINT’s Cutout Lab.

Again, select the image in CorelDRAW and click the Edit Bitmap icon. When your image opens in PHOTO-PAINT, go to Image > Cutout Lab. The Cutout Lab will open in a new dialog box. By default, the Highlighter tool is activated (top right).
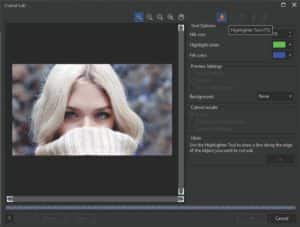
Use the Highlighter tool to trace the edge of the area you want to separate. It doesn’t have to be exact, but the better defined, the better the result. We can change the thickness by adjusting Nib size, and you will also have an Eraser tool to correct the selection.
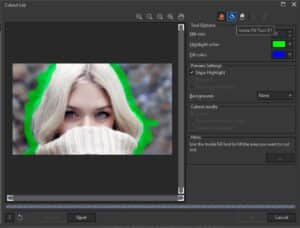
NOTE: It’s important that the selected area is a “closed” area, since next you are going to be filling it in. If there is an open area, the fill won’t apply correctly.
Once you’re happy with your outlined area, select the Inside Fill tool and click in the interior of the area, which will fill it with blue.
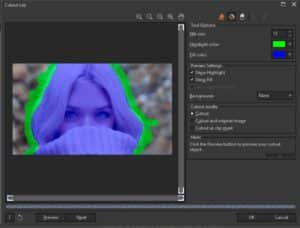
TIP: You can change the Highlight color and Fill color to fit your preference. For example, if your image has a lot of blue and green, you might want to change the Highlight or Fill color so that it is easier to see.
The Cutout results section offers a few options:
- Cutout (default option) will cut the image and discard the original so the actual size in pixels will be smaller and therefore the image file size will be lower.
- Cutout and original image will create an object from the cutout and preserve the original image, keeping the image size the same.
- Cutout as clip mask will make the cut by generating a layer mask (similar to what you get with the Mask tools).
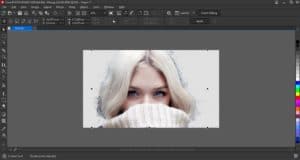
Click Ok in the Cutout Lab to apply your changes. Then like in the previous examples, just select the Finish Editing button or close the program. If you have not saved your image, the program will prompt you to do so, in which case click Yes.
And now your image is ready to be applied on a different background in CorelDRAW, which can be vector or it can be another image.

However, if you want the result to be more realistic, the best option is to use PHOTO-PAINT to apply the background. Select the whole image (Mask > Select Entire Image or Ctrl + A), then copy it (Edit > Copy or Ctrl + C). Open your new background image (File > Open or Ctrl + O) and paste the cutout image (Edit > Paste or Ctrl + V). That will place it as a new object, and you can adjust the size and position as needed.
TIP: I recommend that you select images that are as close in size and resolution as possible, so that the fusion of images is more realistic.

To learn more about the Cutout Lab, watch our full tutorial Photo Background Removal in PHOTO-PAINT.
As you can see, CorelDRAW Graphics Suite gives you multiple options for removing backgrounds, from the simplest to the most exact. There are a wide range of options available to solve all kinds of problems and situations with professional results.
 CorelDRAW Graphics Suite
 Ultimate Vector Bundle Vol. 1
 CorelDRAW Standard 2021
 Ultimate Vector Bundle Vol. 2
 Corel Vector
Start your FREE 15-day trial and embark on a design journey with powerful tools for vector illustration, layout, photo editing, typography, and collaboration.


Comments (11)
Reader Interactions
Comments
Nice
Removing backgrounds from a picture, logo or stickers. That’s all I want to know in coreldraw
merci
Gracias
Good up-to some limit.
My name is sin shar. I want to know.
What is corel PHOTO-PAINT?
Hi Sin Shar,
Corel PHOTO-PAINT is an image editing and pixel design software program that is included in CorelDRAW Graphics Suite. To learn more, we have a collection of tutorials:
https://learn.corel.com/graphics-tutorials/photo-paint-tutorials/
Best regards,
The Discovery Center team
nice
I have learnt alot! Thanks sir/ma
cool
thank you for this tutorial.