
Although most photos taken these days are digital, you may have older printed photos that you want to bring onto your computer. Here are some tips for scanning photos into PaintShop Pro, including recommended scanner settings and image formats that will ensure your scanned images are the best quality. You’ll also learn how to quickly use the Crop and Straighten tools to fix the common scanning problems of upside-down or crooked photos.
Thanks for watching! We hope you found this tutorial helpful and we would love to hear your feedback in the Comments section at the bottom of the page. You will find a written version of this tutorial below, and a printable PDF copy to download on the Download Resources tab above.
Download your FREE 30-day trial and make every shot your best shot with PaintShop Pro 2023, your all-in-one photo editing and design software.
Download these free resources:
Written Tutorial and Sample Images (Zip, 1 MB)
PaintShop Pro resources
Keyboard shortcuts (PDF, 173 KB)
PaintShop Pro User Guide (PDF, 25.4 MB)
What’s New in PaintShop Pro
Photo Restoration
Corrections and Enhancements
Featured products
 PaintShop Pro 2023 Ultimate
 AI HDR Studio 3.0
 PaintShop Pro 2023
 Vision FX
Scanning Photos into PaintShop Pro
If you have boxes or albums of printed photos, PaintShop Pro makes it easy to save them as digital images. You just need a scanner and a few basic PaintShop tools.
Click on any of the images below to view full-size.
Scanning options naturally depend on your specific scanner, but most scanners have the same basic output options. As an example, here are the settings for a Canon scanner. For a photo scan, choose to scan in full color, at a resolution of at least 300 dpi.
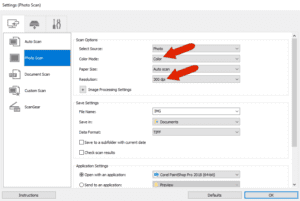
You may be tempted to use black and white, or grayscale, when scanning old photos. But keep in mind that most plugins are designed to work with color images (except for those plugins designed specifically for black and white). There’s really no need to scan in anything but full color, since the resulting scan will still look just like the original, and you can always adjust the level of color later.
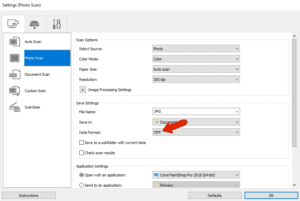
In this example, the scan output format is TIFF. This is an uncompressed format that provides the highest quality, but also produces large files. You can also scan to JPG or PNG, both of which use compression and result in lower file sizes. The PNG format supports transparency, which can be nice, for example, if you want to place the image over a different background. And some scanners offer different levels of quality for JPG output. But when in doubt, you can’t go wrong with TIFF.
Your scanner options may enable you to choose the default application that will open the scans when finished; which in this example is PaintShop Pro.

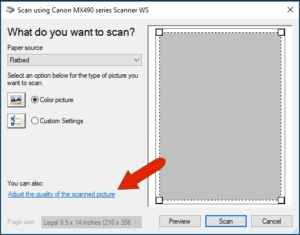
If you want to skip the intermediate step of producing and saving a scan before opening it in PaintShop Pro, you can import directly from your scanner. Choose File > Import > From Scanner or Camera. PaintShop Pro should link to your scanner, and you can click the link shown below to adjust output quality.
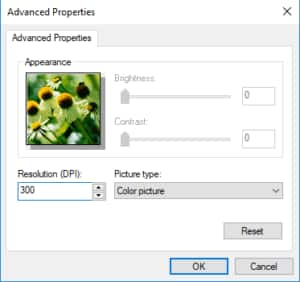
In this example, 300 dpi resolution is selected, and the scan will be in color.
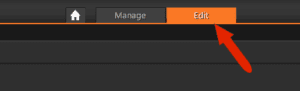
If you’re not importing directly from your scanner, you’ll need to start with a saved scan. In PaintShop Pro, make sure you’re in the Edit workspace, and open your scanned image.
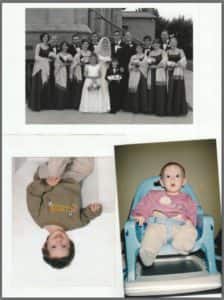
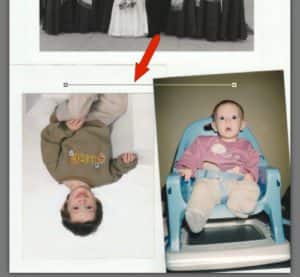
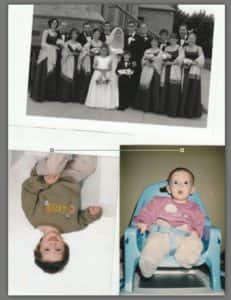
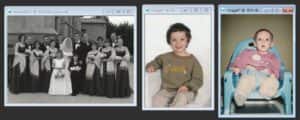
Here’s the scan that will be used in this example. It was saved as a US-letter sized TIFF file and contains three photos. The black and white image at the top looks good, but another photo is upside-down, and the last one is a bit crooked. It’s easy to make errors like this when placing photos face-down on scanner glass.
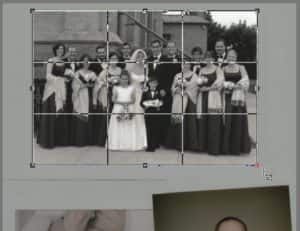
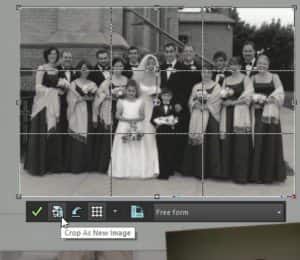
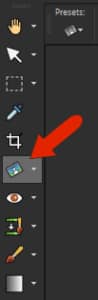
In order to save each of these three photos as a separate image file, the best tool to use is the Crop tool.

The default crop size is Freeform, which means that you can set any size you want simply by dragging from corner to corner.
Once the crop size is established, there are several options on the Crop toolbar. If you click Apply, the rest of the image will be cropped out, leaving just the photo. This is fine if you only need to save the one photo.
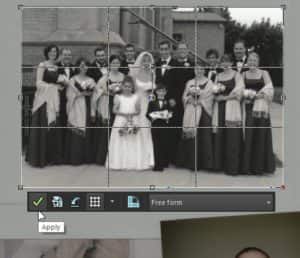
If you want to preserve the original scan, click Crop as New Image. This creates a separate image file for just the cropped photo.
If you’re viewing files as tabbed documents, which is set in the Window menu, you can easily switch back and forth between the original scan and individual images.
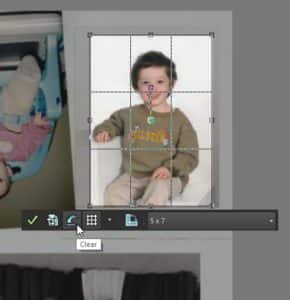
Returning to the original scan, the next photo can be cropped. The Crop tool enables you to crop to standard sizes; in this example 5×7 is selected.
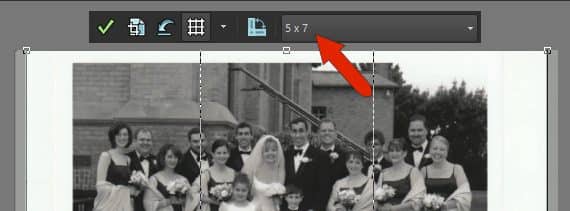
The photo to crop now is the upside-down one. So before cropping, the entire scan should be flipped upside-down by clicking and dragging the rotation handle.
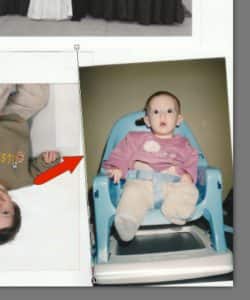
When the photo is right side-up, position the crop rectangle on it. Because the crop size is set as 5×7, the crop rectangle maintains its proportions as you resize and move.
As before, select Crop to a new image.
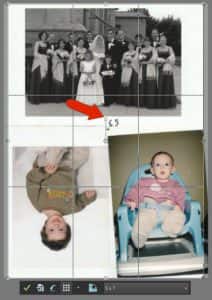
Then return to the original scan where the final photo can be cropped and saved. Click Clear to remove the crop rectangle and reposition the scan back to where it was.
The last photo is the slightly crooked one. The tool to fix this is the Straighten tool.
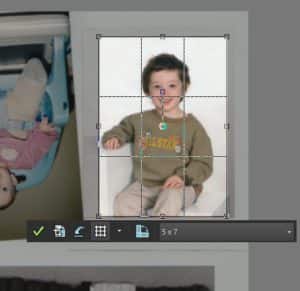
A straight line appears on the image, which you can use to set a horizontal or vertical reference line on the photo.
Drag the endpoints of the reference line so that it follows the left edge of the photo.
Click Apply in the Property Bar.

The entire scan straightens, relative to this photo.
Now you can crop this photo. If you no longer need the entire scan, you can use Apply instead of Crop to New Image.
For each of these images, use File > Save As, then decide how you want to use your new photos.
Download your FREE 30-day trial and make every shot your best shot with PaintShop Pro 2023, your all-in-one photo editing and design software.

Comments (2)
Reader Interactions
Comments
I have hundreds of photos to scan. In older versions of Paint Shop Pro I was able to set parameters for the scanner and scan many photos into individual objects in the program, then save the bunch with individual file names. Paint Shop Pro 2022’s “import” from scanner seems to scan one photo at a time, then forget all the scan parameters for the next photo import. I won’t live long enough to scan my photos this way. I could not find any information in the current help file relating to a better way. Thanks in advance for any help you can provide.
Hi David,
Can you let us know what older version(s) are behaving differently than PaintShop Pro 2022 in regards to scanning? Our product QA team has tested versions 2019 to 2023 and have not been able to detect any bugs or differences in the functionality. If you can provide some more details that would be helpful.
Best regards,
The Discovery Center team