
Adding advanced picture-in-picture effects will give your VideoStudio projects a professional and dynamic look. In this tutorial, we will build on a basic picture-in-picture window by adding a pan and zoom effect, using the color controls to balance the warm and cool tones of our clips, and using keyframes to add some custom motion to a picture-in-picture windows.
Thanks for watching! We hope you found this tutorial helpful and we would love to hear your feedback in the Comments section at the bottom of the page. You will find a written version of this tutorial below, and a printable PDF copy to download on the Download Resources tab above.
Download a FREE 30-day trial and turn your best moments and life experiences into unique movies with this easy and fun video editor packed with intuitive tools and creative effects.
Download these free resources:
Written Tutorial (PDF, 717 KB)
Sample videos Part 1 (Zip file, 22 MB)
Sample videos Part 2 (Zip file, 28 MB)
VideoStudio User Guides and Help files
For VideoStudio X9 to 2023, languages include English, Deutsch, Français, Italiano, Nederlands, 简体中文, 繁體中文, 日本語
What’s New in VideoStudio
Effects, Filters and Transitions
Featured products
 VideoStudio Pro 2023
 Studio Backlot Membership
 VideoStudio Ultimate 2023
 Vision FX
Advanced Picture-in-Picture Effects
In this tutorial, you’ll learn how to create advanced picture-in-picture effects in your videos. You’ll learn how to pan and zoom within your video overlays, how to adjust color, and how to keyframe the movement of your picture-in-picture windows.
Click on any of the images below to view full-size.
How to Add Pan & Zoom to a Picture-in-Picture Window
In this first example, we’ll add a video of a man skiing as a picture-in-picture window over top of some video footage of a mountain.
- Add the video you’ll use as the background onto the Video Track on your timeline.
- Drag the video you want to use as the picture-in-picture onto the Overlay
- Double-click on the overlay on the timeline then click on Apply Pan & Zoom.

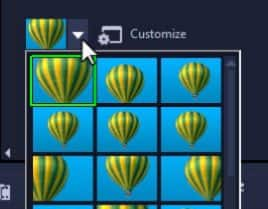
- Select from any of the pan and zoom presets from the dropdown menu.
- Click Customize to adjust the pan and zoom preset you’ve selected.
- Select the first keyframe and then click and drag the red cross icon on the preview pane to adjust the starting position of the video.
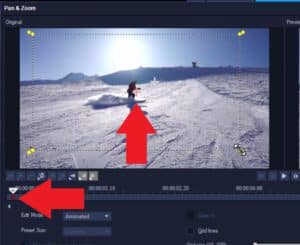
- You can adjust the size of the window by dragging on the yellow nodes.
- Then click on the end keyframe and adjust the position of the window to zoom up on the subject to indicate where you want to position the final frame.

- Press play to preview and then click OK if you are happy with the results.
How to Adjust the Color of Picture-in-Picture Windows
If your picture-in-picture clip doesn’t match the color tones of your background – for example the background is washed out but the overlay is very saturated – you can use the color grading controls to make adjustments to ensure both clips match.
In this example, our picture-in-picture clip has cool color tones that don’t match the warm tones of the background video. To adjust the color, click on the Color tab.
- Click on White Balance and select the Overcast preset to make the video clip warmer in tone.
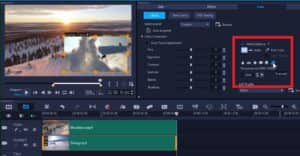
- You can also use any of the Color Correction settings to adjust the color. In this example, we set the Exposure to -5 and this is the result.

How to Customize the Motion of Picture-in-Picture Windows
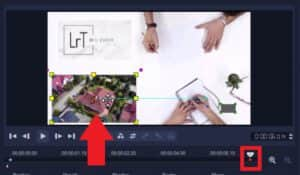
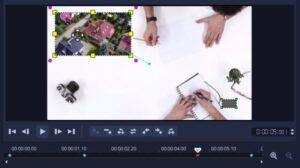
In this next example we will show you how to add movement to your picture-in-picture windows. We have a business-themed video as a background on the Video track, and a real estate video as the picture-in-picture window on the Overlay track.
Basic Technique: from Right to Left
- Right-click on the overlay and go to Motion > Customize Motion.
- In the Customize Motion window, click on the end keyframe.
- Then click and drag the picture-in-picture window on the preview pane to the left of the screen.
- Press play to preview. The picture-in-picture window will now move from right to left as the video plays.
Advanced Technique: Adjusting Position and Size
With this technique, we will make the picture-in-picture window decrease in size and fade away as it moves from the center to the top left corner.
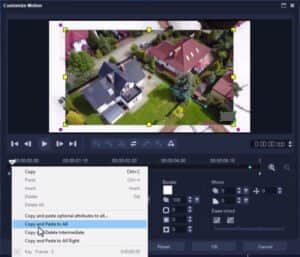
- First, click on the Reset button to clear the basic right-to-left custom motion.
- Click on the first keyframe and then readjust the size and position of the overlay on the preview pane so that it is large and centered in the middle.
- Right-click on the first keyframe and select Copy and Paste to All.
- Drag the scrubber a few seconds in then click the Add Key Frame icon to have the video remain in this position for a few seconds.
- Drag the scrubber to a few seconds before the last keyframe and click the Add Key Frame icon.
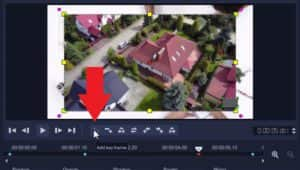
- Adjust the size of the overlay on the preview pane and click and drag the overlay to the top left-hand corner.
Optional: You can adjust the Opacity level of the overlay to 0 so the overlay slowly fades away at the end of the video.
- Right-click on the third keyframe and select Copy and Paste to All Right so that these attributes remain the same until the end of the clip.
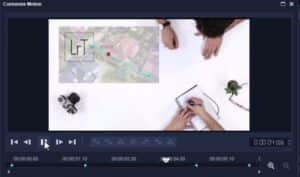
Press play to preview, and the video overlay will shrink into the corner of the video clip and slowly fade to blend with the background.
TIP: You can also select Reverse Keyframes to reverse the effect and now you’ll see the picture-in-picture window fades in and expands to the center.

These are a few of the ways you can add advanced picture-in-picture effects to make your videos look more professional and dynamic.
Download a FREE 30-day trial and turn your best moments and life experiences into unique movies with this easy and fun video editor packed with intuitive tools and creative effects.

Reader Interactions