
Creating an original character is something very common in the design and illustration world. Whether it’s creating a simple design or creating a complex illustration for an animation, creating your character with Corel Vector is easy.
Know your creation
You want to create your character for a purpose. Could be for a game, an animation, a comic or even just because that’s your hobby. The best approach is always the same: you need to know who your character is going to be. In which universe does it live? Which kind of audience is it aimed at? What does it do?
It might sound complex (and it can be complex, if you’re producing for a big animation, for example), but these are just guidelines to help you when the time of creation comes. Even coming up with just a few simple key words can help.
What I wanted for my character, as I began to sketch for this article, was already defined in my head: a cute astronaut cat. That’s enough to get started for this simple example.
Inspiration
The basic of the basics: inspiration! To come up with ideas and concepts for your character, don’t hesitate to look for things that inspire, be it great resources like Dribbble, Behance or Artstation or even movies, series, cartoons … whatever gets your creative juices flowing!
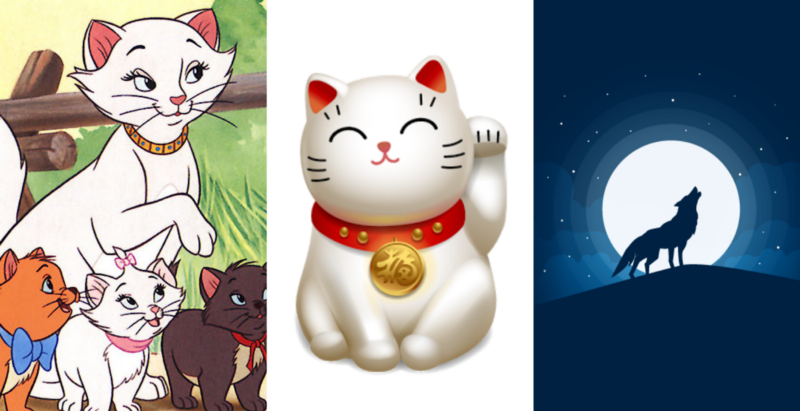
This is just part of my inspiration for my Space Cat: The cats from Disney’s Aristocats, the traditional Japanese Lucky Cat and a beautiful illustration by Marko Stupic.
Sketching
After gathering some inspiration, it’s time to let your ideas flow. You can do this in any way you like, but from my personal preference the good old pencil and paper work best. Just put your ideas there, experiment, erase and start over again. Add details and create a style until you’re satisfied with the result.
TIP: Let your final creation rest for some hours (or even overnight) and then look at it again. With this resting time, you might see a lot of things you could possibly improve or change that you didn’t notice before.
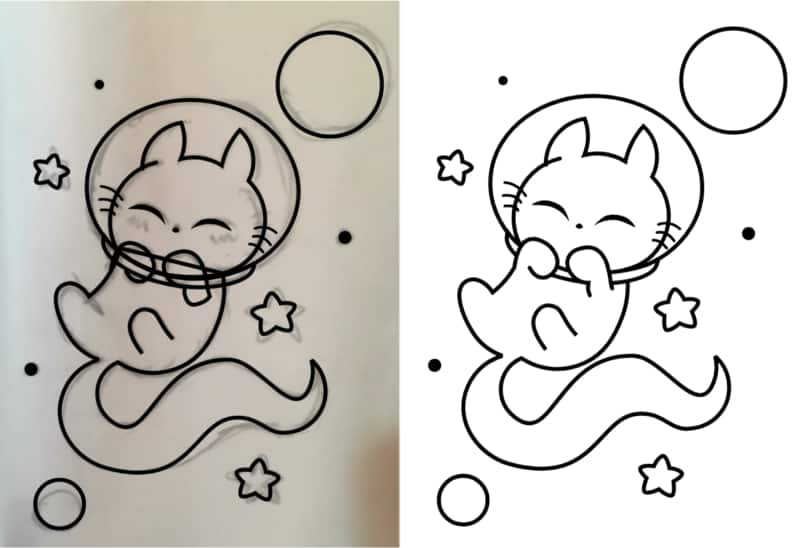
After you have your final sketch, you can scan it or take a nice picture and open it in Corel Vector. Here is my final Space Cat sketch:
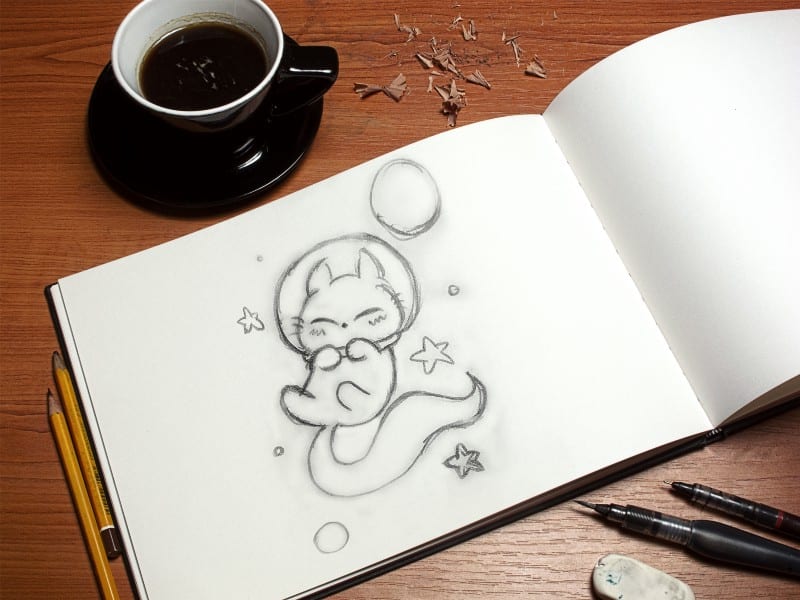
Remember, it’s a concept, so it doesn’t need to be perfect. It’s just a guideline!
Vectorizing the sketch
There is no right or wrong way to continue with your creation, but what I particularly like to do is to first create the line art, which means creating the vector contours over my pencil sketch. Let’s do that!
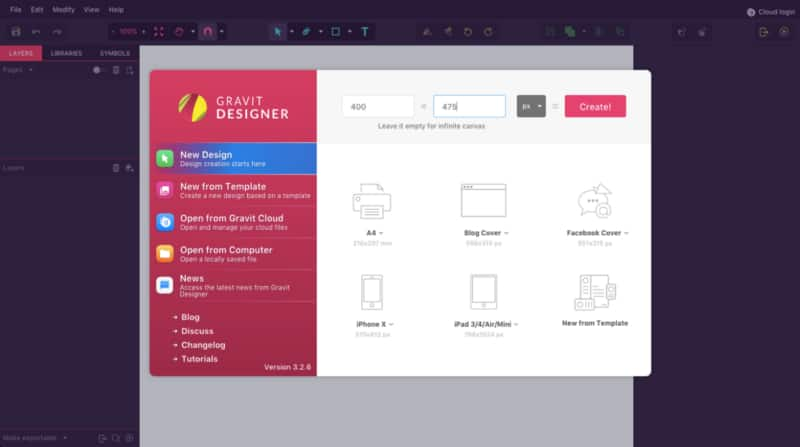
Open Corel Vector and create a new file (my example is 400 x 475 pixels).
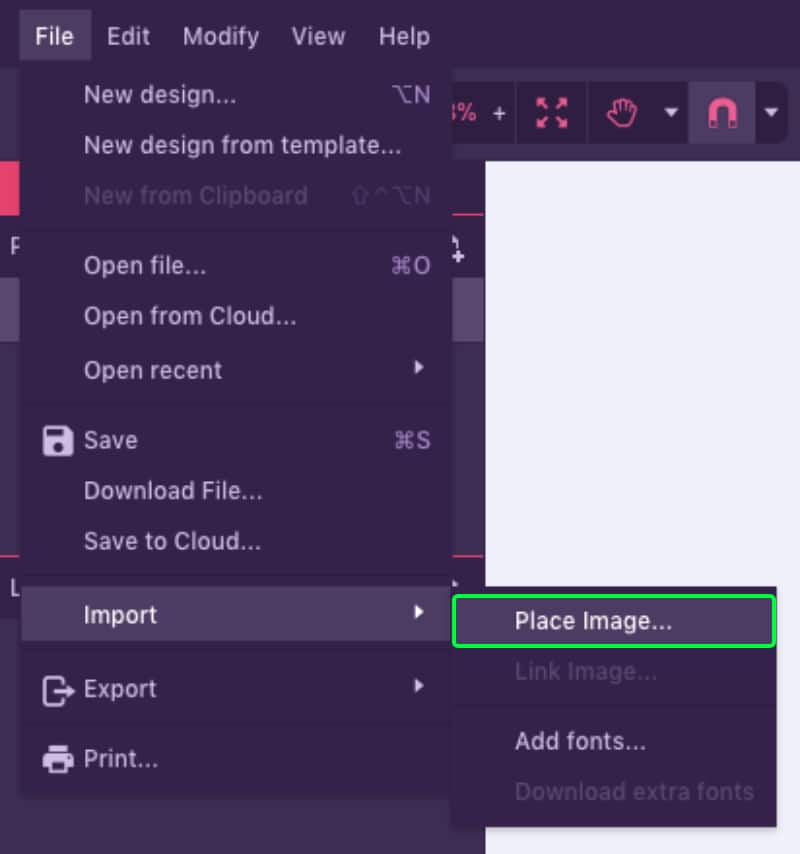
Now you can import your sketch to Corel Vector. Go to File > Import > Place Image and choose your sketch, or simply drag it from your folder to the canvas inside Corel Vector.
Place your drawing centered on the canvas, then lock the layer on the left panel (with the lock icon, so that you don’t move it by accident). You can also lower the image’s opacity in the right panel, to have a better contrast for the lines you are about to make. I set mine to 70%.
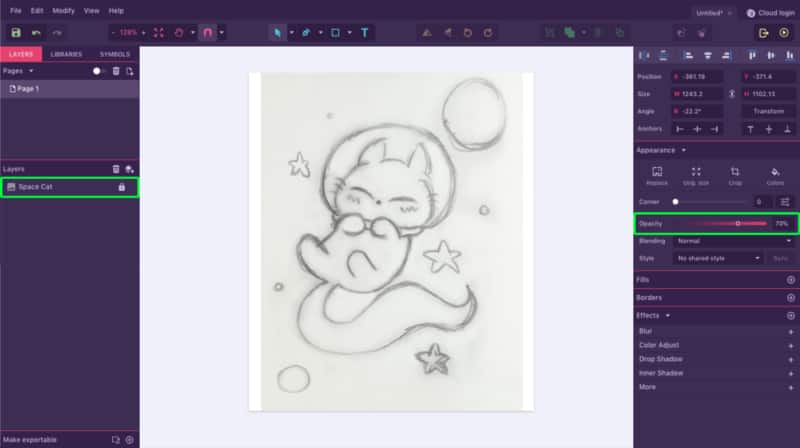
I use the basic shapes whenever I can, and if not, I trace over my sketch using the Pen or Bezigon tools. To make the helmet, planets, the smaller stars, and part of the cat’s head, I used the Ellipse tool, located in the toolbar (shortcut E).
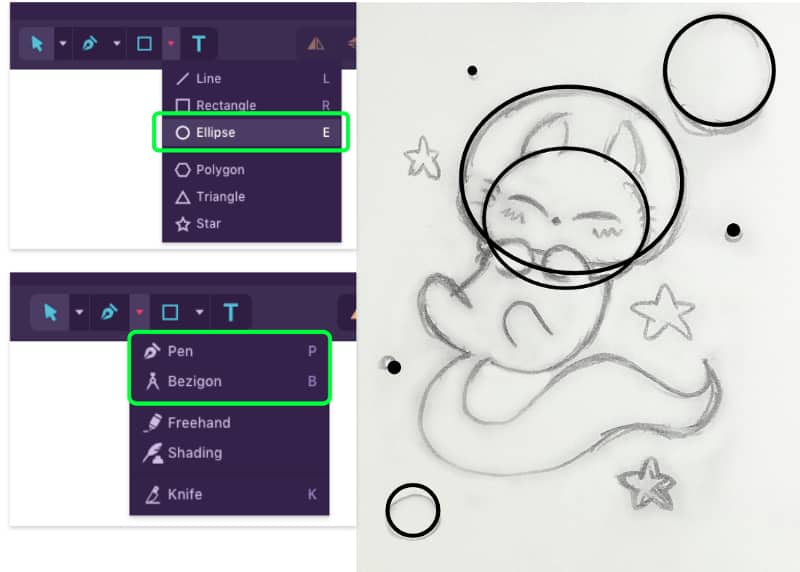
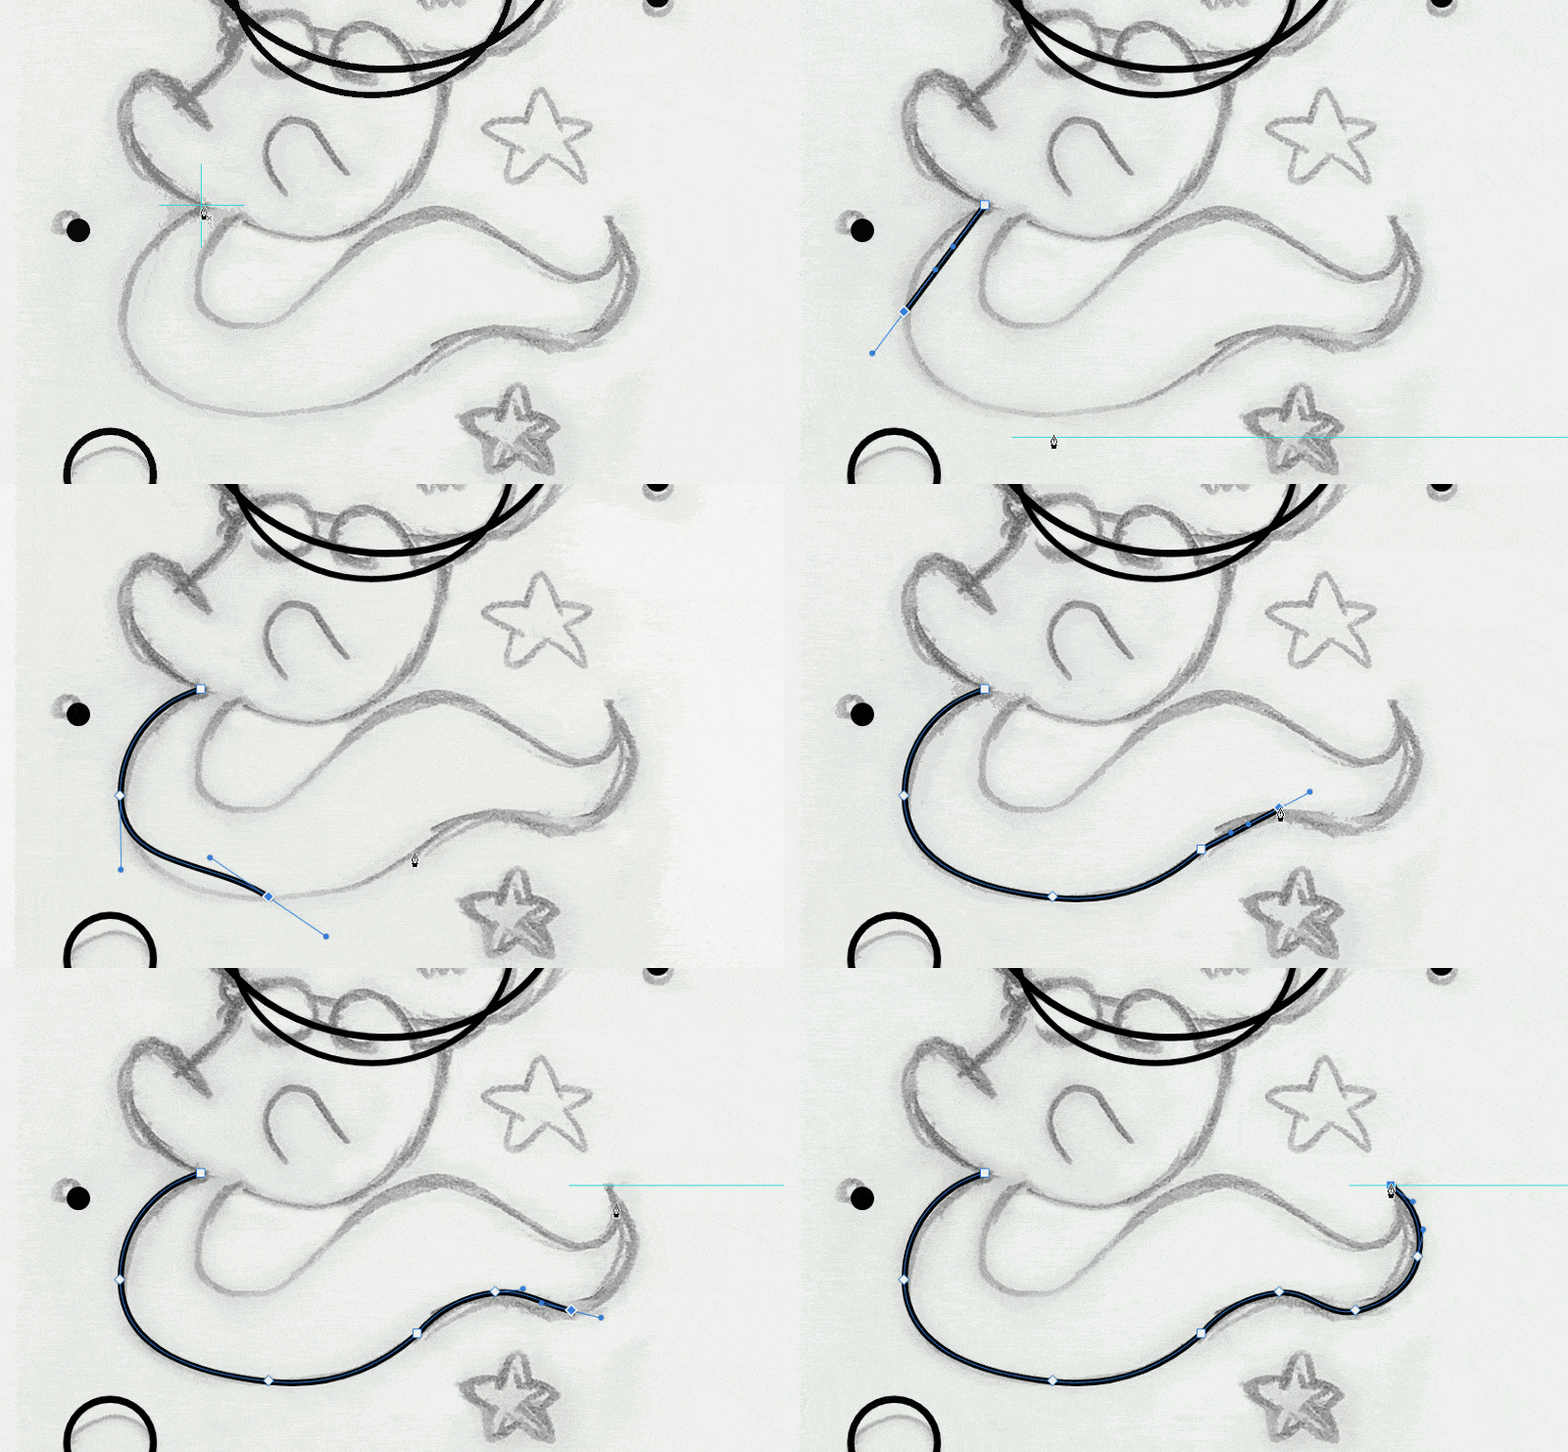
For the rest of the outline I used the Pen and Bezigon tools to trace freely on top of the image. The Pen tool allows more freedom to your path, while the Bezigon makes perfect curves, so it’s really your choice!

After creating a path with the Pen or Bezigon tool, you can always adjust it with the Subselect tool (shortcut D).
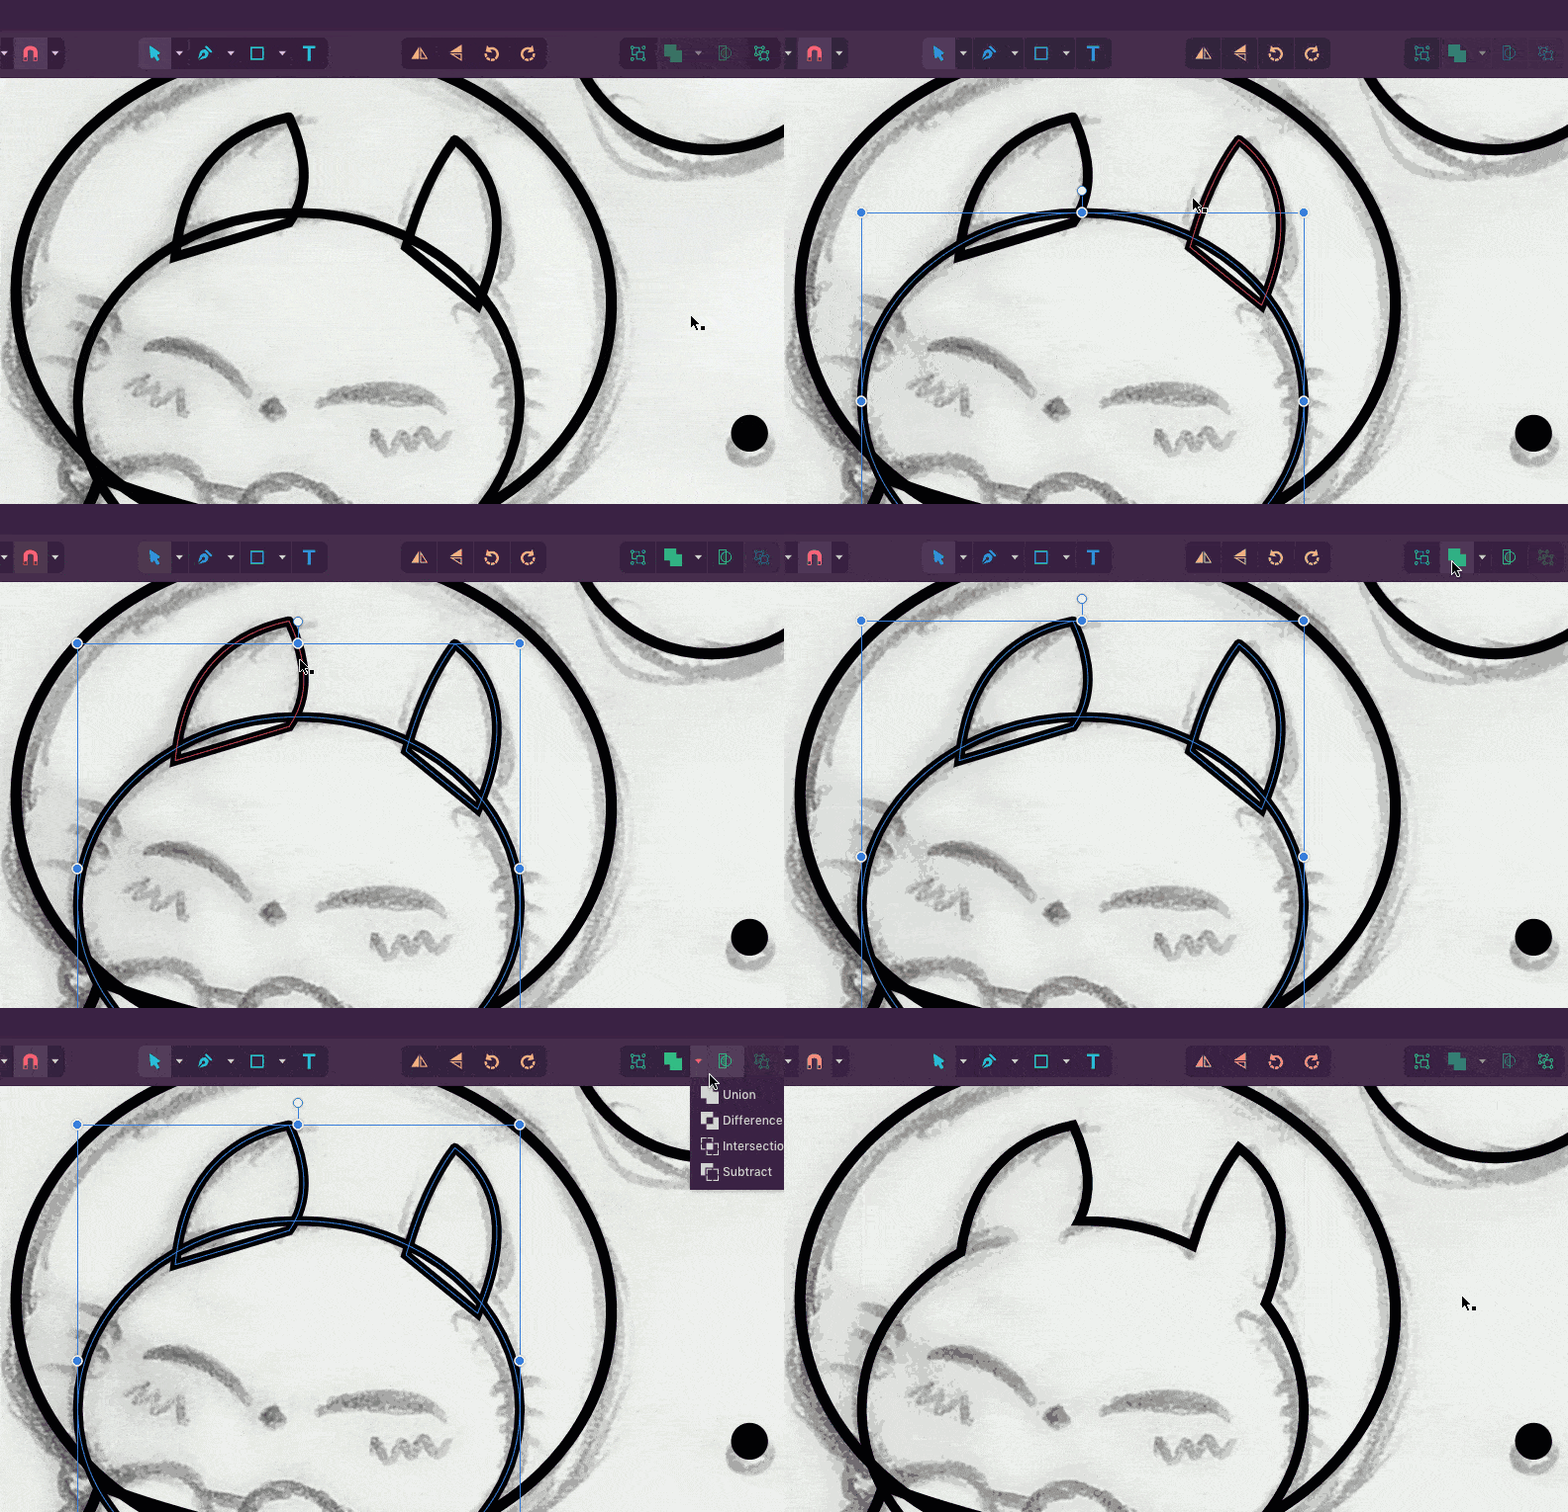
To create continuous shapes for the whole head you will need some compound shapes. After creating the closed paths for both ears, select them together with the ellipse of the head (by holding Shift on your keyboard and clicking on the elements) and choose Union at the Merge options in the toolbar.
With your line art ready, you can get rid of the pencil sketch (delete the image layer or just hide it in the left panel) and move on with the colors.
Color Palette
Before you start filling everything, choose a base color palette. This will be your guideline so you don’t get lost and start adding too many colors.
I chose this palette for my character, to go along with the “cute space thing” theme.

Coloring, gradients and blending modes
Now you can start filling your shapes and work on the borders. I went for a style without borders, so I just set them to invisible after I add a fill.
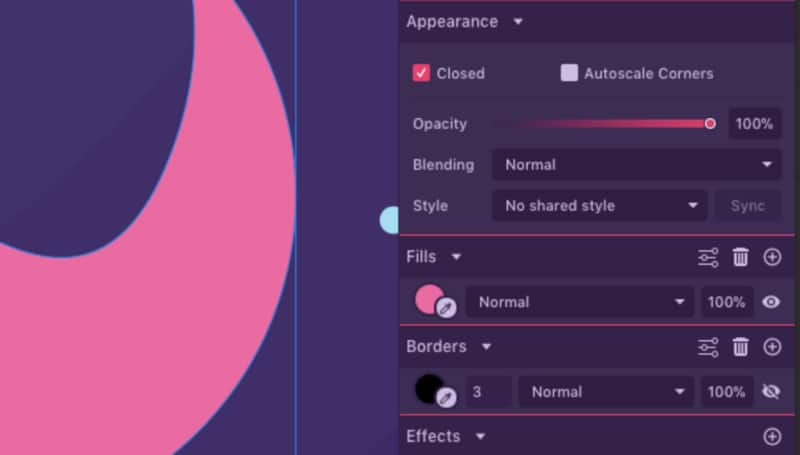
Select the shapes and add a fill for each one on the right panel, then set its border to invisible (by clicking on the eye icon).

This is the filled line art, with no details. Looks like it’s missing is something, right? So now it’s time to add more sparkle to the work!
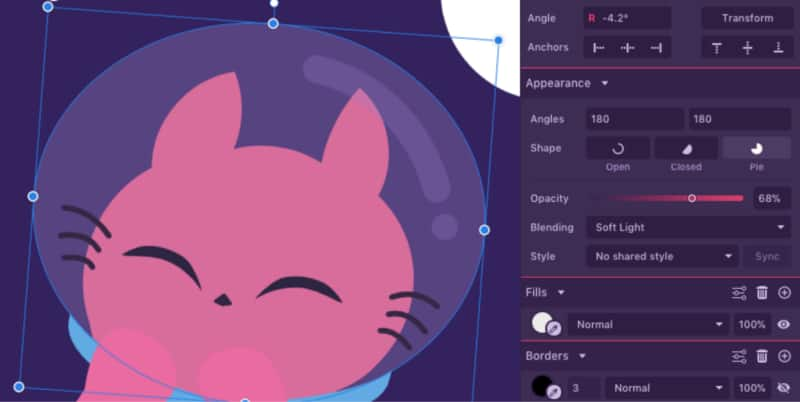
For the astronaut’s helmet I used white, with a Soft Light blending mode, and set the Opacity to 68%. I added the blending mode instead of just lowering the opacity because that gives a better visual effect.
Since I don’t have borders, I had to use something to delimit the paws, so I used gradients with a darker pink for contrast.
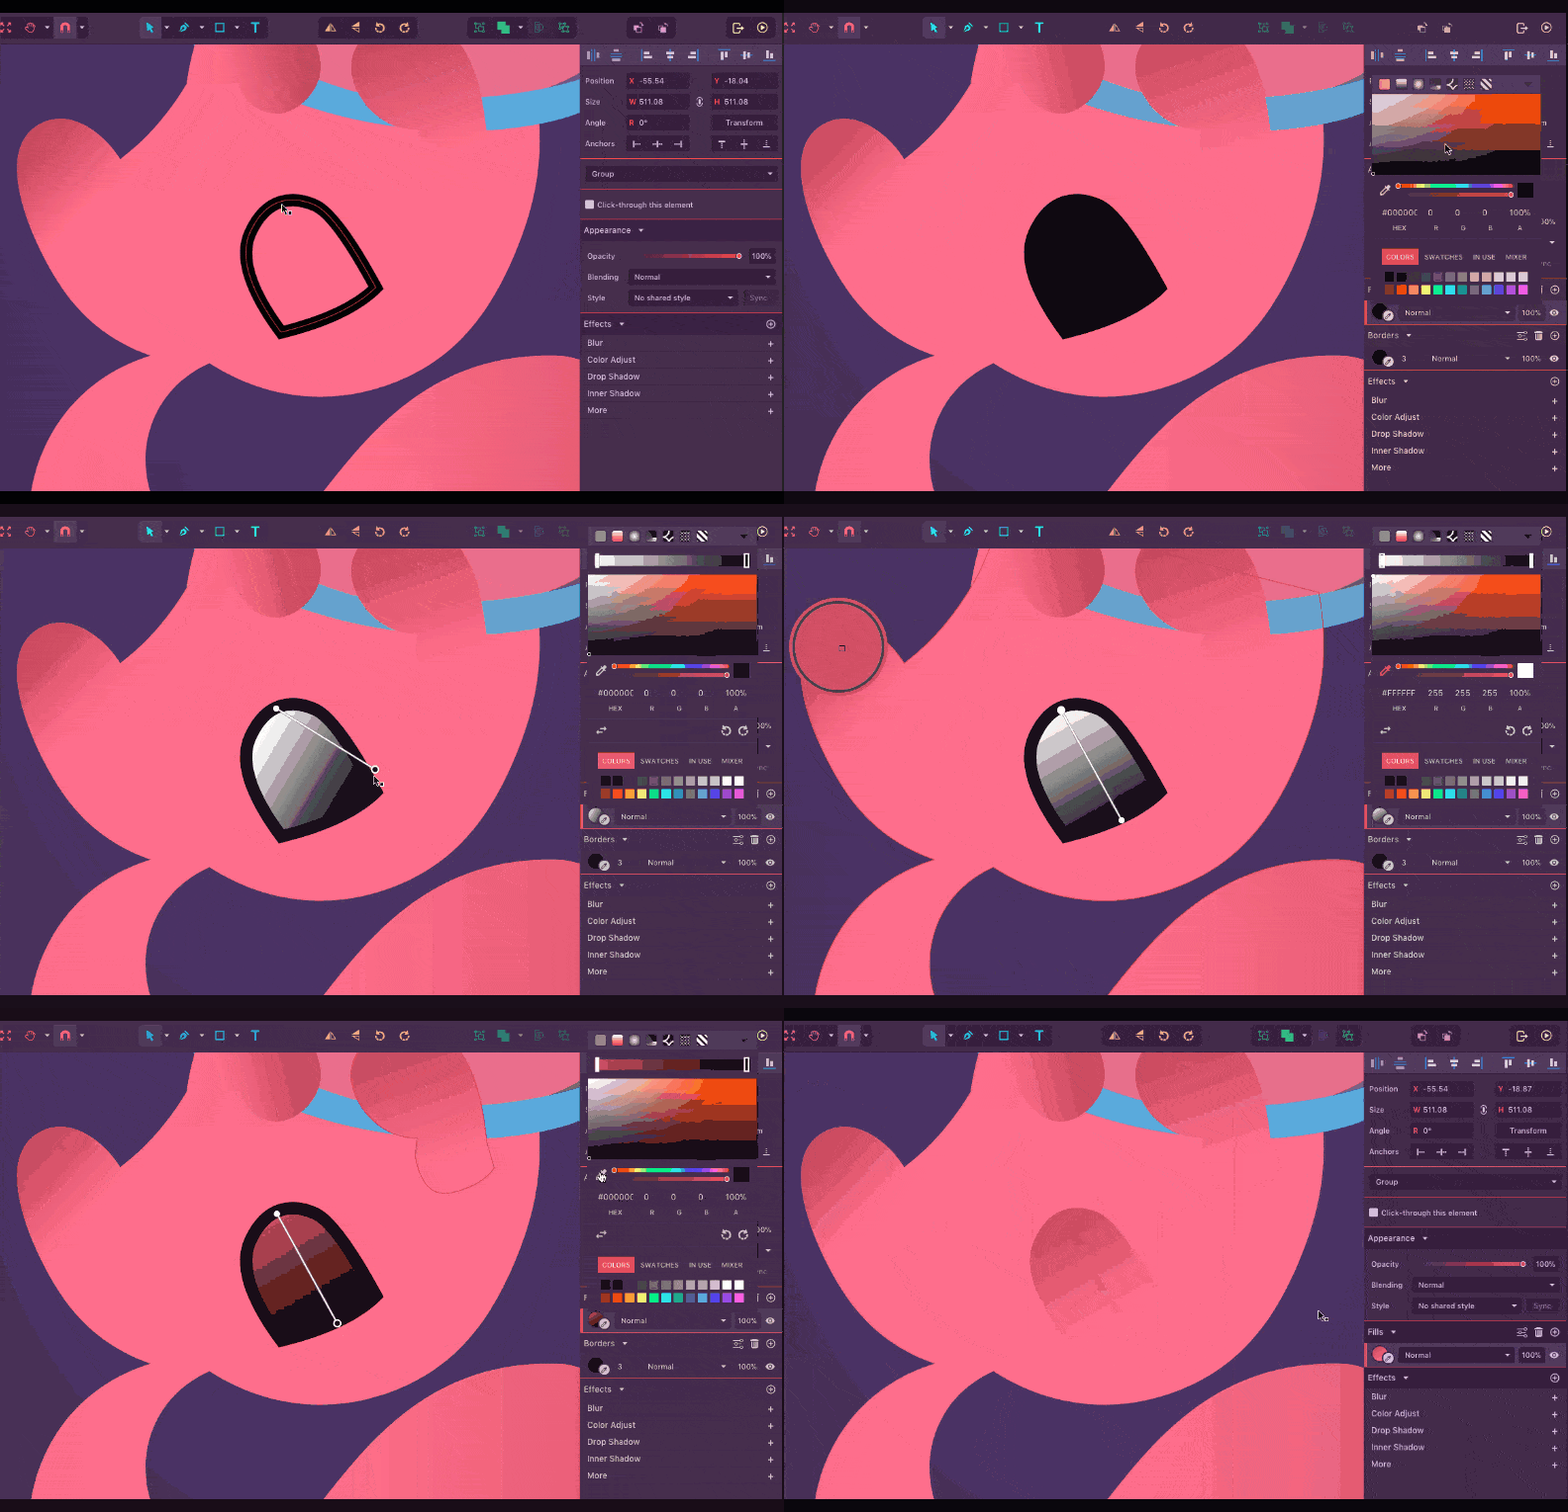
To add more detail, I did the same thing with the ears and tail, clipping a shape with the gradient to it. Simply drag it over the tail in the left panel.
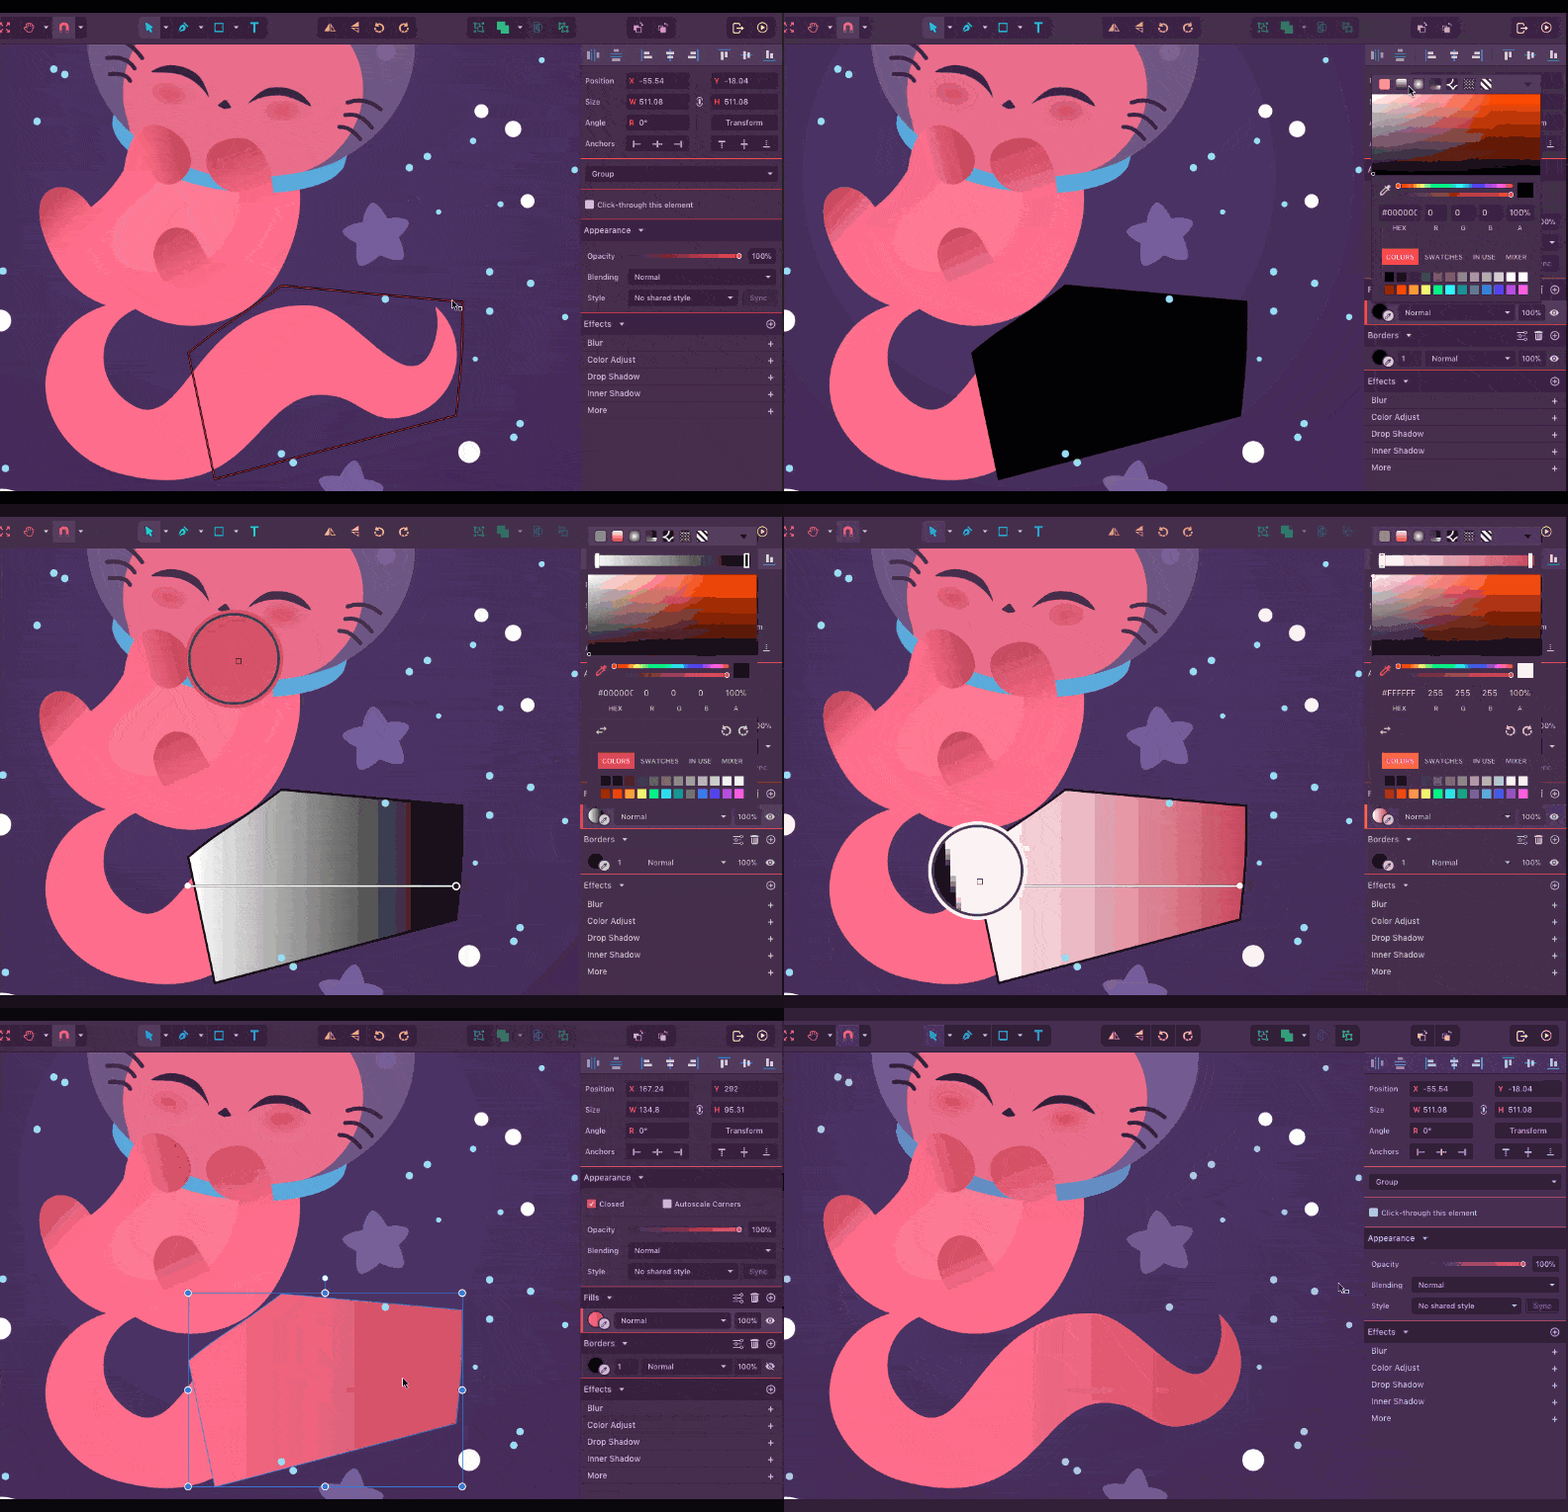
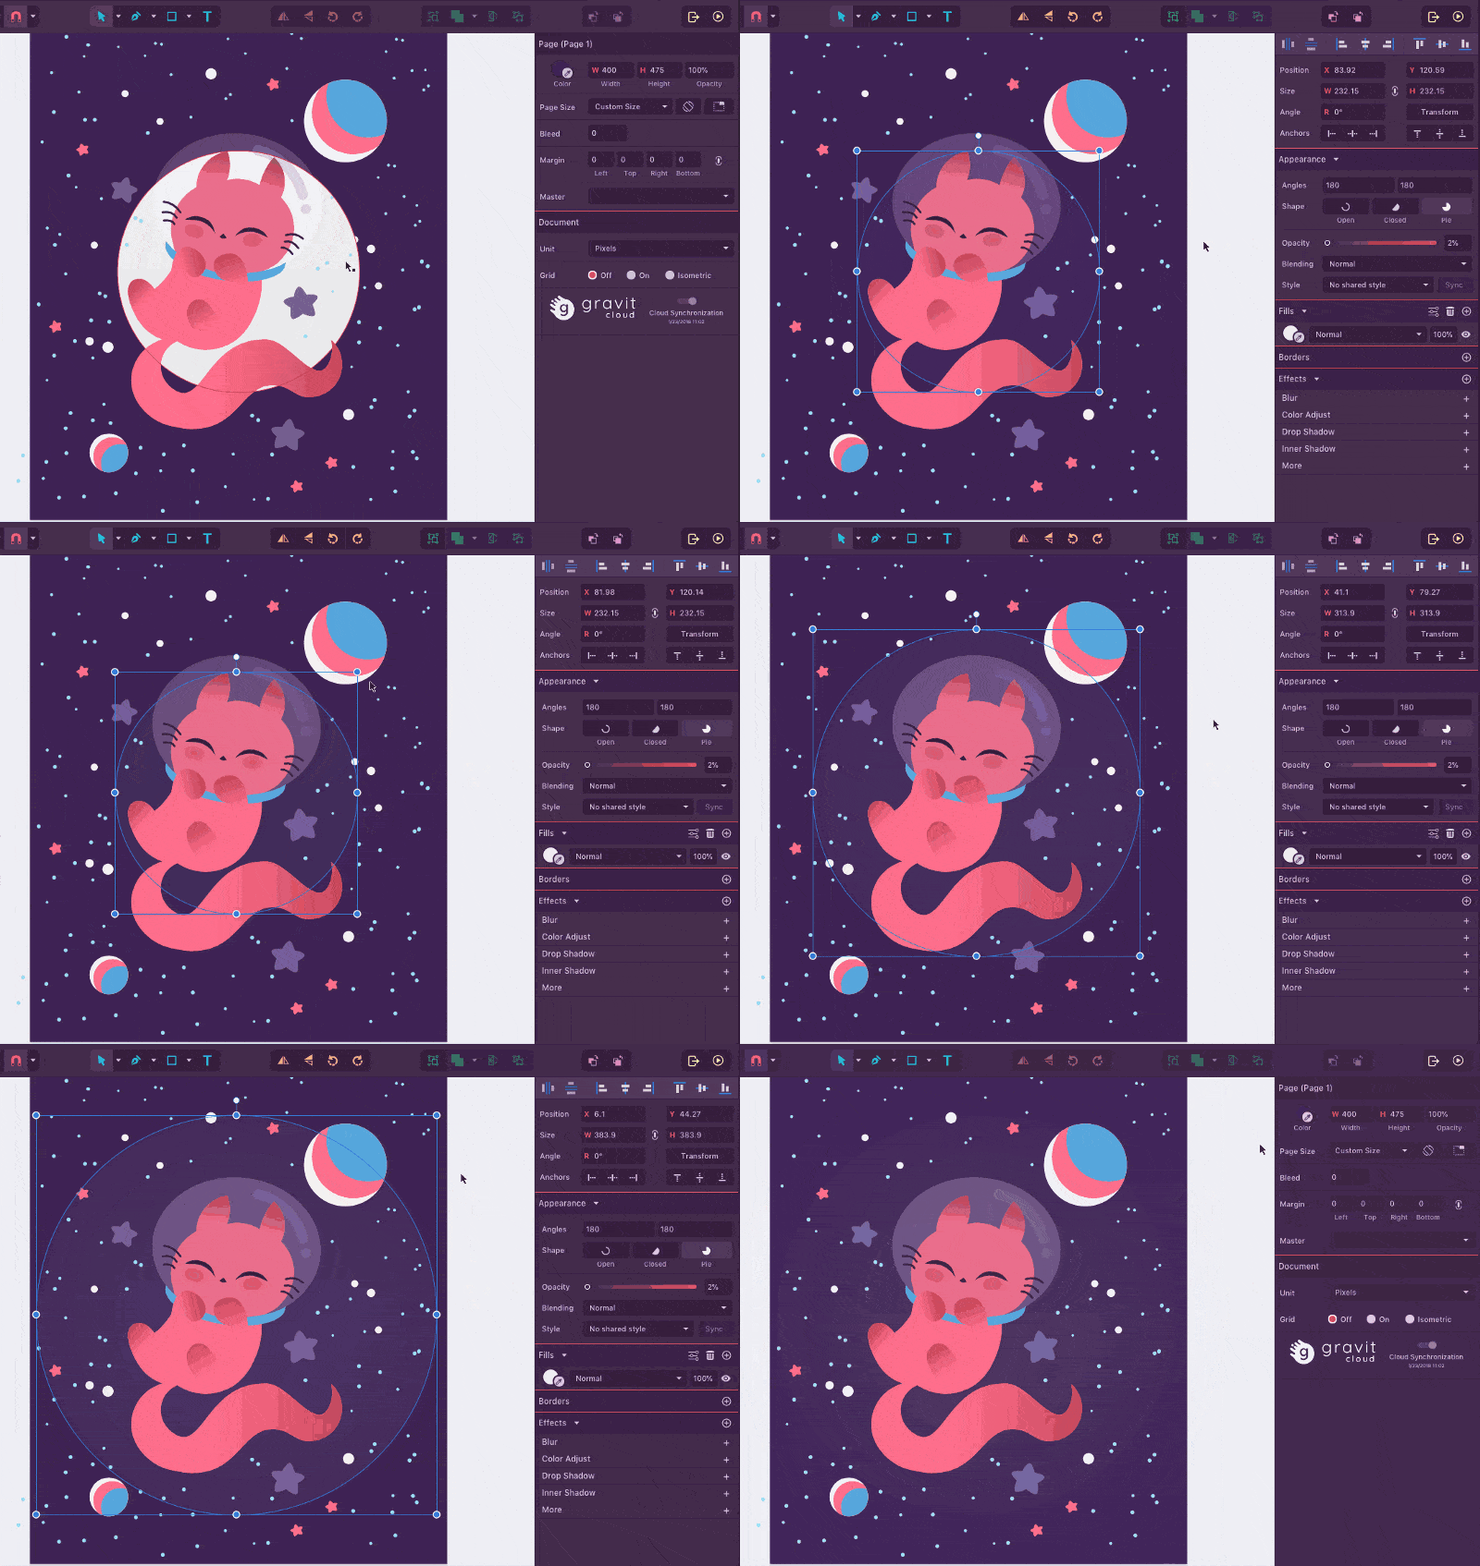
You don’t need to limit yourself to the sketch, of course. I added a lot more stars in the background (more ellipses, then a lot of copy and paste), details to the planets and concentric ellipses.
For the planets I just made two copies of the white ellipse, changed the colors, and positioned and clipped them.
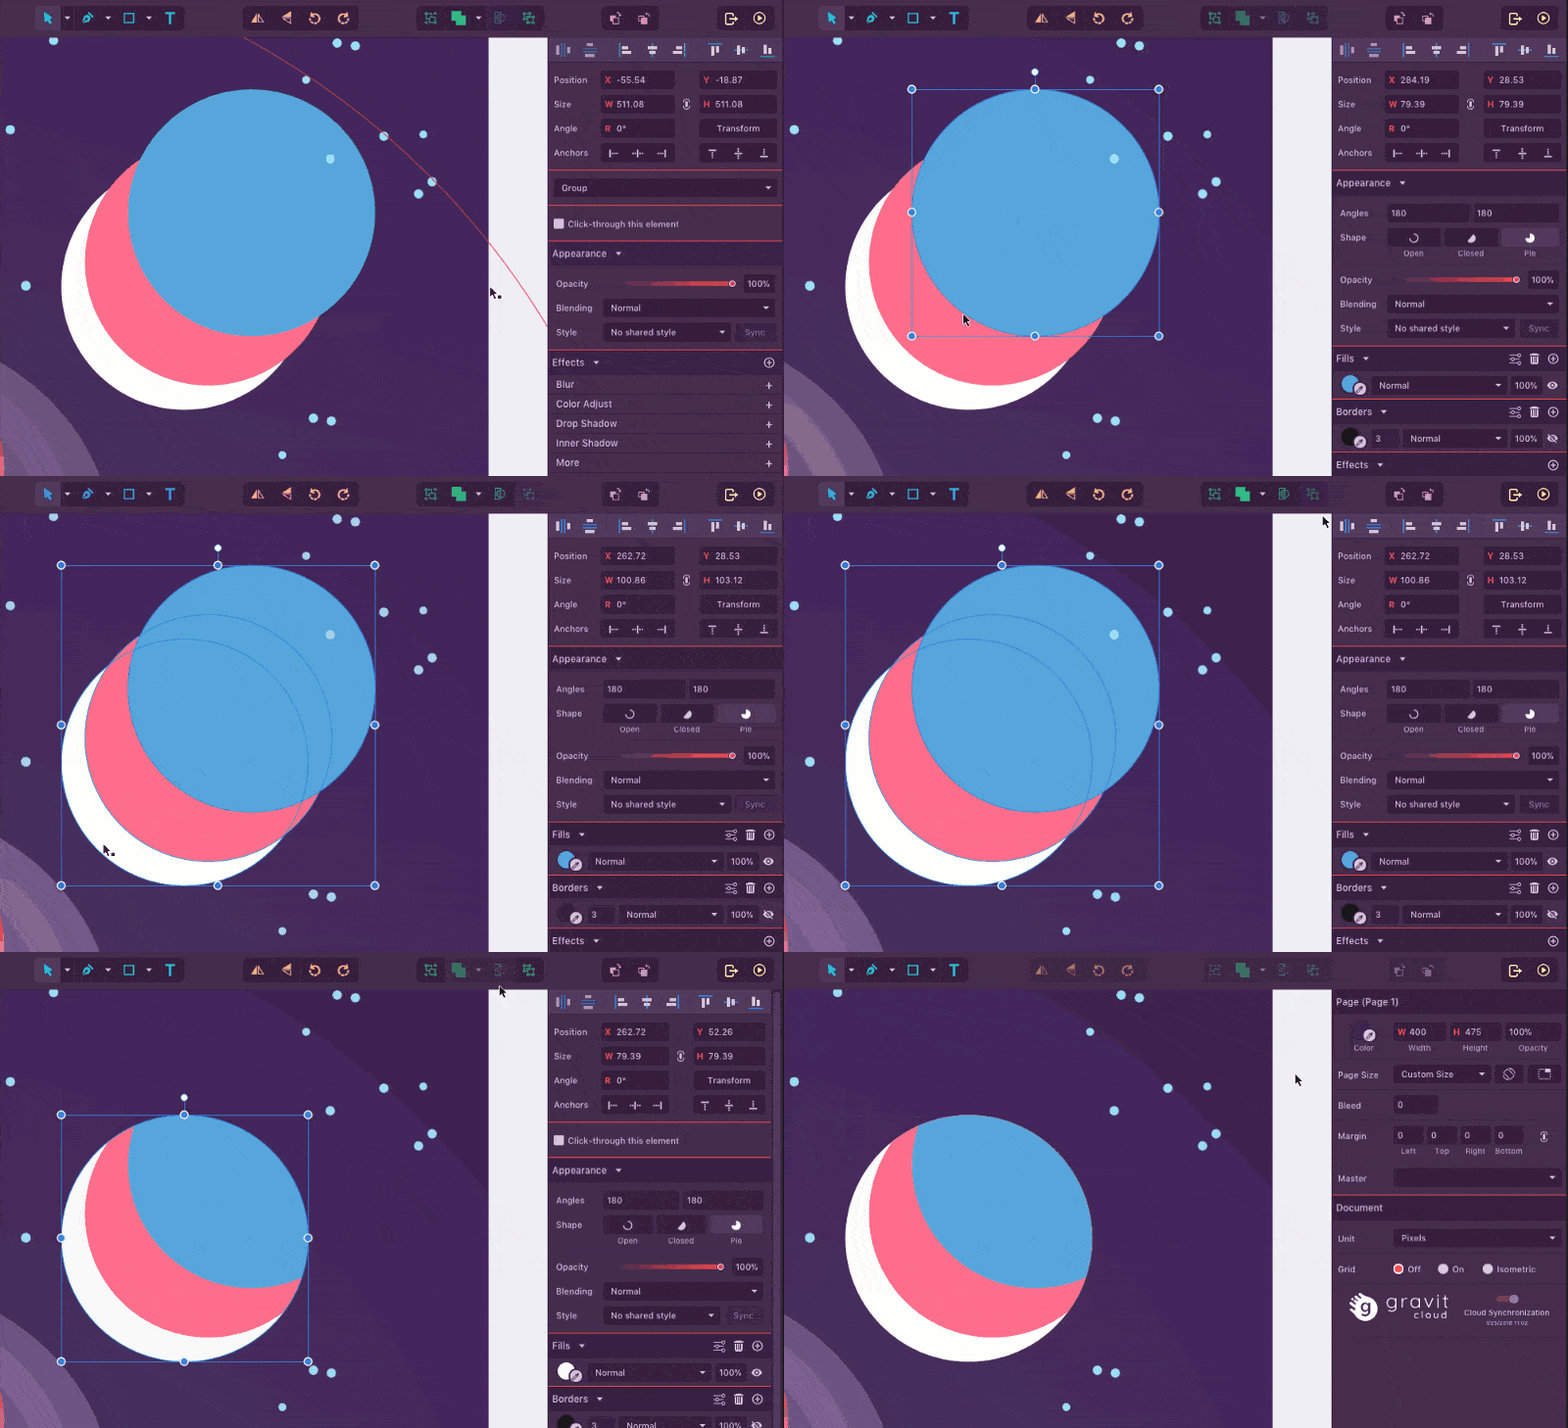
For the overlapping circles in the background I created a first circle, set its Opacity to 2%, copy/pasted it (Ctrl/Cmd + C and Ctrl/Cmd + V), enlarged the circle holding Alt and Shift (to resize from the center and keep the ratio), and repeated that twice. This gave me this nice gradient effect.
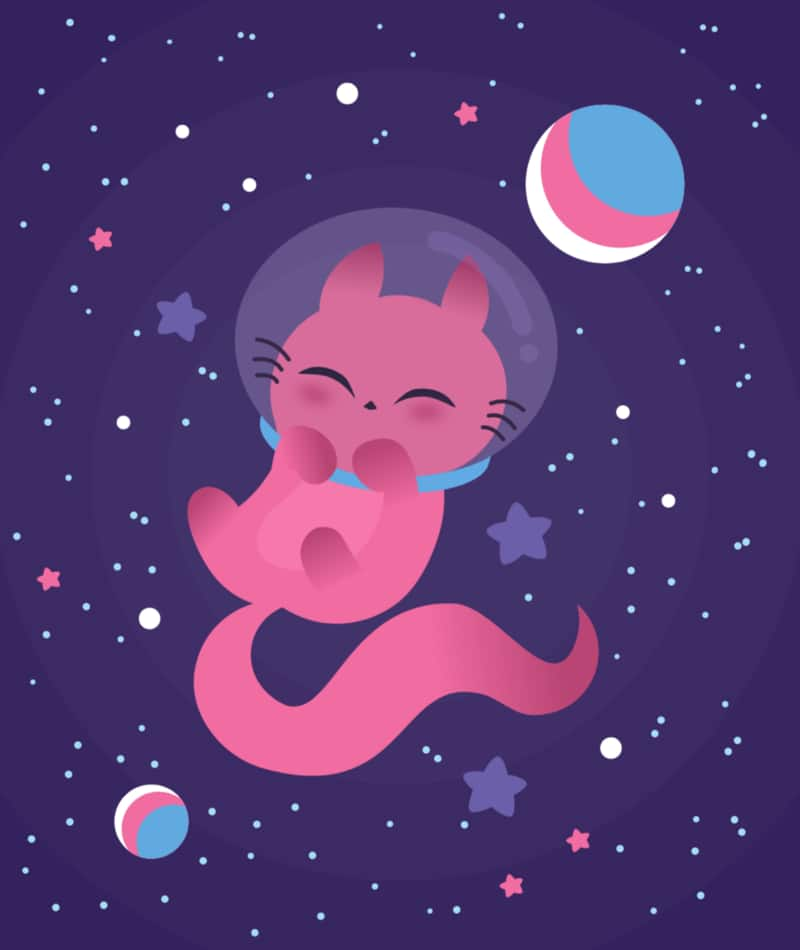
This is the final result of my exemplary character design: a cute Space Cat. It’s a very simple character, but it gives you an idea of the process and how Corel Vector can help you with the final concept.
 Corel Vector
 Ultimate Vector Bundle Vol. 1
 CorelDRAW Graphics Suite
 Ultimate Vector Bundle Vol. 2
 CorelDRAW Standard 2021
Download your FREE 15-day trial and see how easy it is to design your creative projects with this web-based vector graphics app that empowers you to create on any device.

