

Designing a logo can be a difficult task, even more so if you’re trying to use some unnecessarily complex software — but it doesn’t have to be like that.
Corel Vector is a multipurpose tool that allows you to create screen designs, vector illustrations, presentations, print designs — and, of course, logo designs. Every single element in Corel Vector’s interface was designed not only to look great, but also to make your workflow as a designer much more intuitive and easier.
With this tutorial you will learn how to create a fancy professional-looking logo using Corel Vector’s smart and practical tools, highlighting some of our awesome features like Effects, Multiple Fills and Boolean operations.
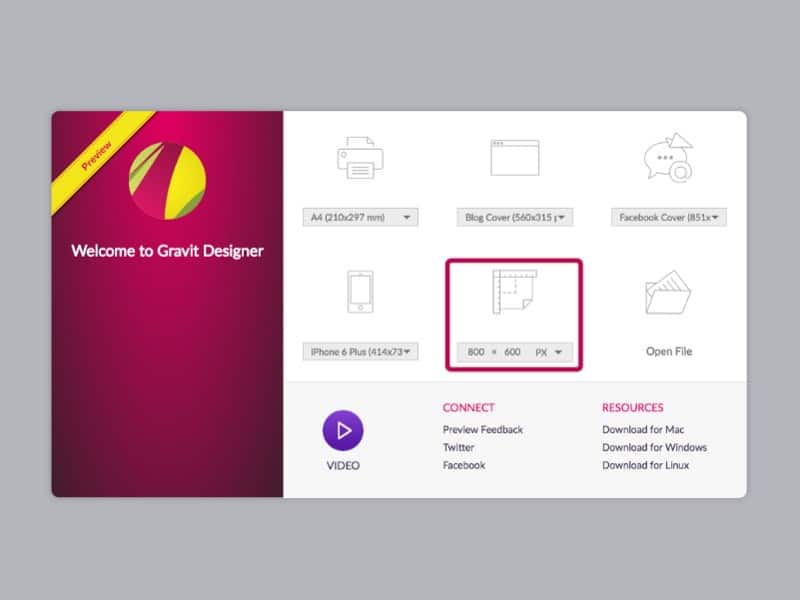
Step 1 — Create a new document
Begin your design by creating a new document. Choose File > New Design (Control + N) to open the “New Design” panel. Choose the preset option with 800 pixels wide by 600 pixels high.
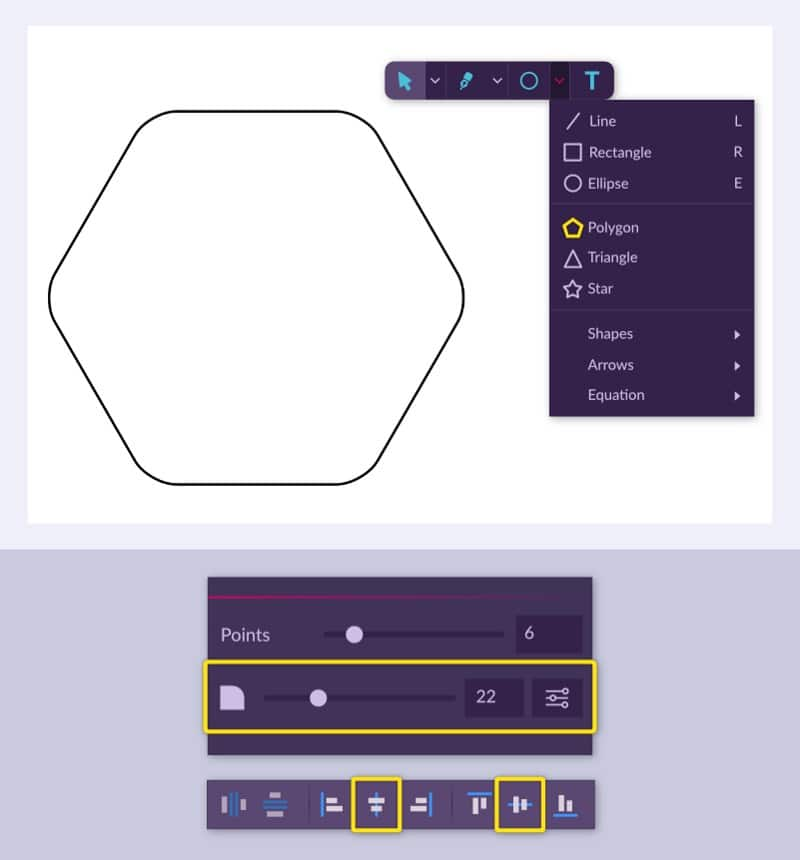
Step 2 — Draw a hexagon
Select the Polygon Tool from the toolbar. Draw a hexagon holding shift, then on the properties panel, set the round corners to 22. On the alignment panel, simply click “Align center” and “Align middle” to centralize your shape on the page.
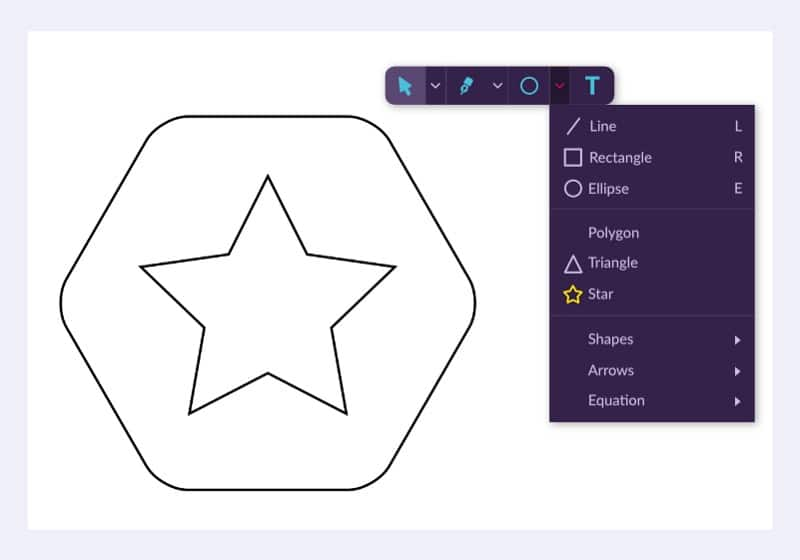
Step 3 — Draw a star
With the star tool selected from the toolbar, hold shift to draw your star inside the hexagon. Then, select both the hexagon and the star, and centralize them with “Align center” and “Align middle” from the Alignment panel.
Step 4 — Draw ellipses
Select the Ellipse tool (E) from the toolbar and hold shift to draw it. Draw five ellipses and place them inside the hexagon so that one of the borders of each ellipse is aligned with each point of the star.
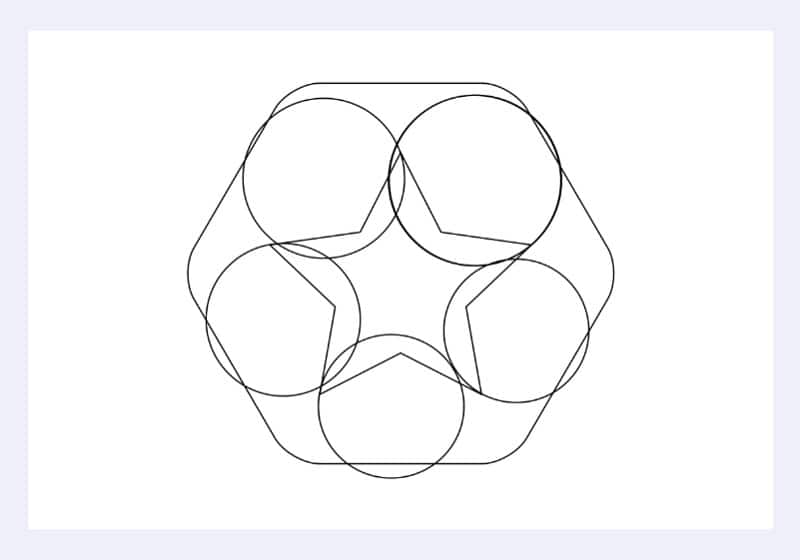
Draw another five ellipses and then place these ones so that they form a shape similar to a crescent with the ellipses you drew on the last step.
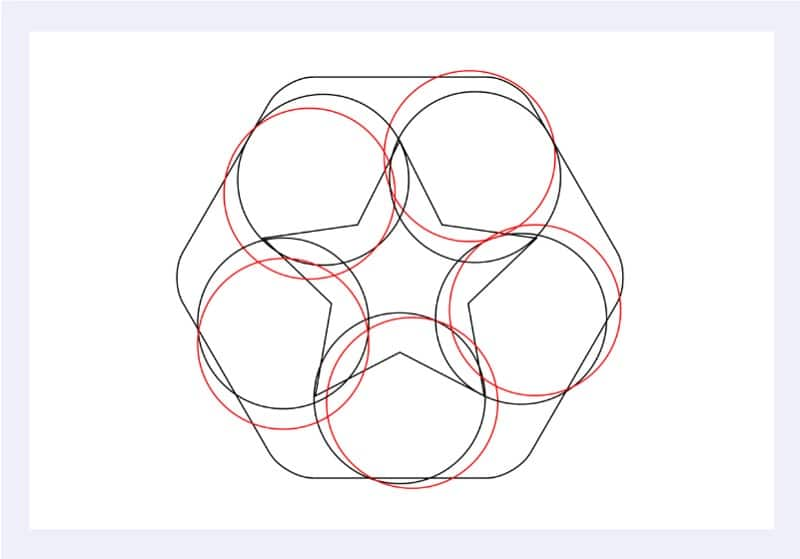
Create five more ellipses, and these ones will be placed so that one of the borders aligns with each vertex of the star.
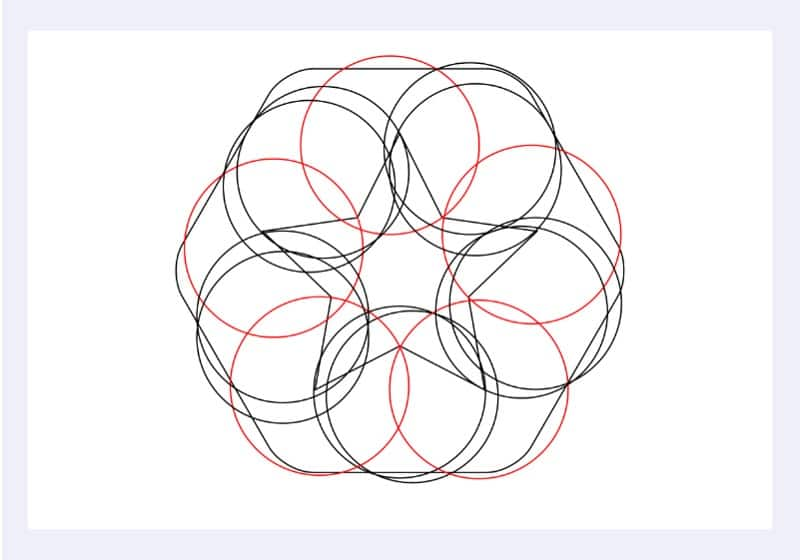
Make it so that part of your ellipses stays inside the star, and part outside the hexagon.
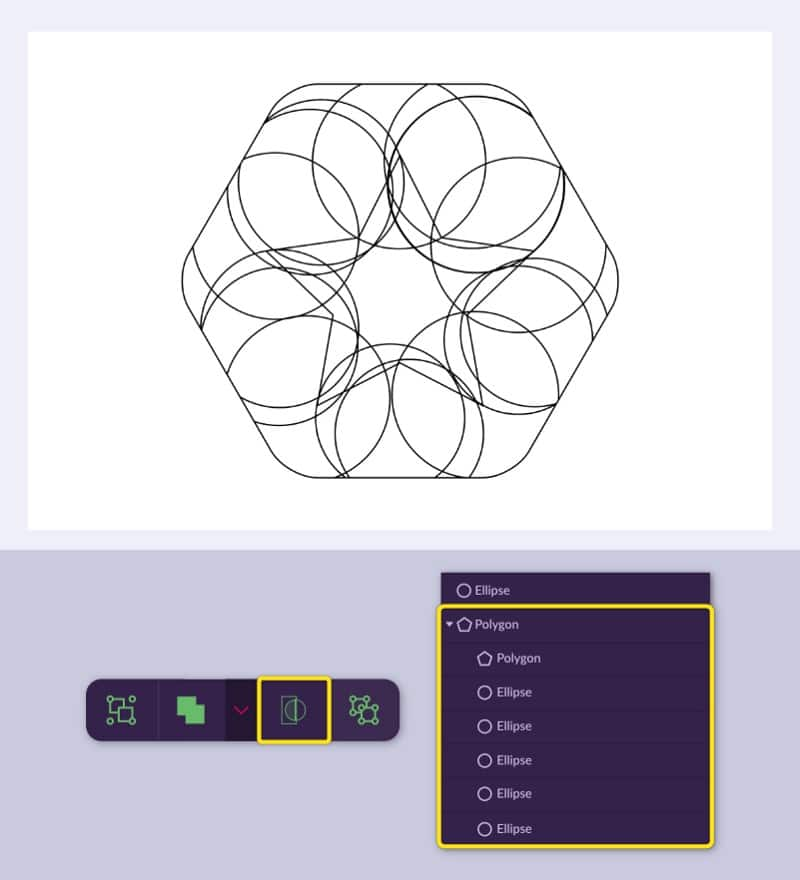
Step 5 — Make a Clip mask
To select more than one object, leave the Shift key pressed and click on the objects you want to select. With the ellipses and the hexagon selected, click on the Clip button. This way, you just created a Clip mask, putting all the ellipses inside the hexagon. You can also do that by going directly on the layers panel, selecting all the ellipse layers and then moving them inside the hexagon layer.
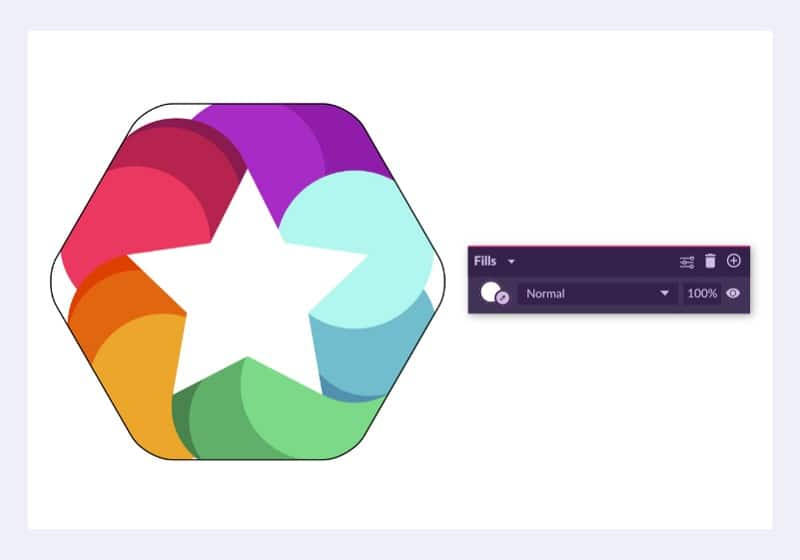
Step 6 — Set the colors for the ellipses and remove the borders
Select each ellipse and, on the properties panel, choose a fill and remove the border by clicking on Toggle visibility.
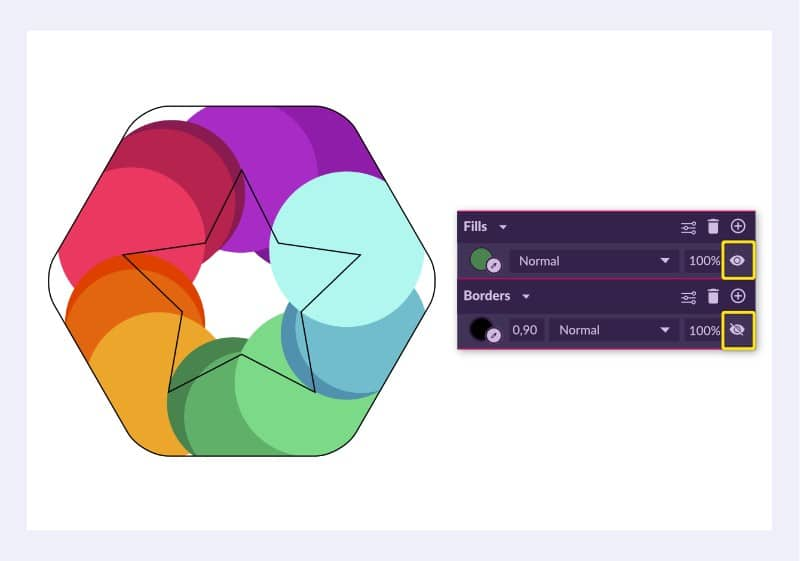
Step 7 — Set a fill color for the star
Let’s set a temporary color for the star shape. I chose white, but any color will do, as you will change it later to match the chosen background color. You can now remove the border of your star.
Step 8 — Arrange the layers
On the top bar, use “Bring forward” and “Send backward” to arrange the layers so that the ellipses follow an order like on the example. You can also click with the right mouse button and go to Arrange > Send to Back or Arrange > Send to Front to send layers directly to the front or the back of your page.
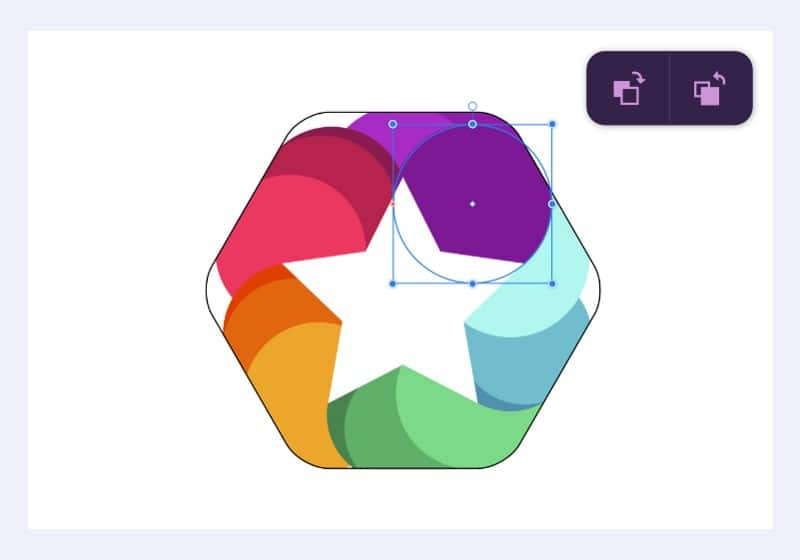
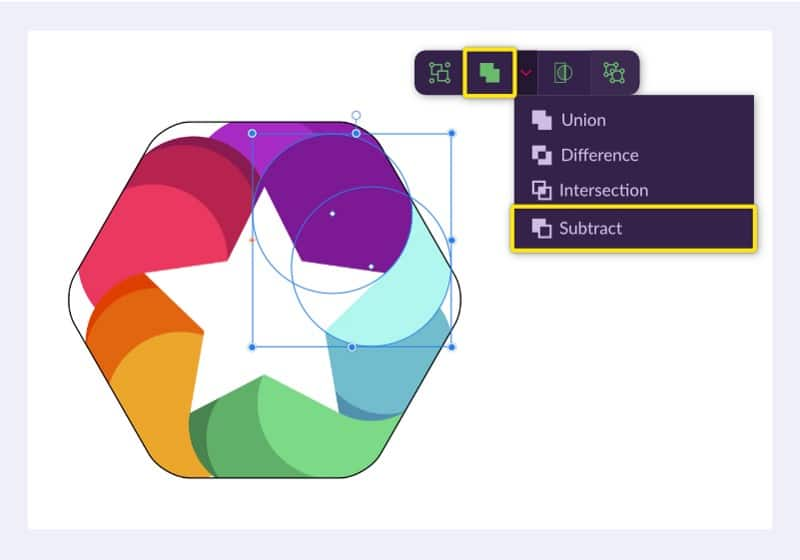
Step 9 — Subtract to remove the ellipse
To make the layers sequence right, you will need to remove the light blue ellipse. To do this, you need to bring the darker purple ellipse to the front of the light blue ellipse. Make a copy of the dark purple ellipse using Copy (Control + C) and Paste (Control + V). Select the copy of the dark purple and the light blue ellipse and then select Subtract on the top bar.
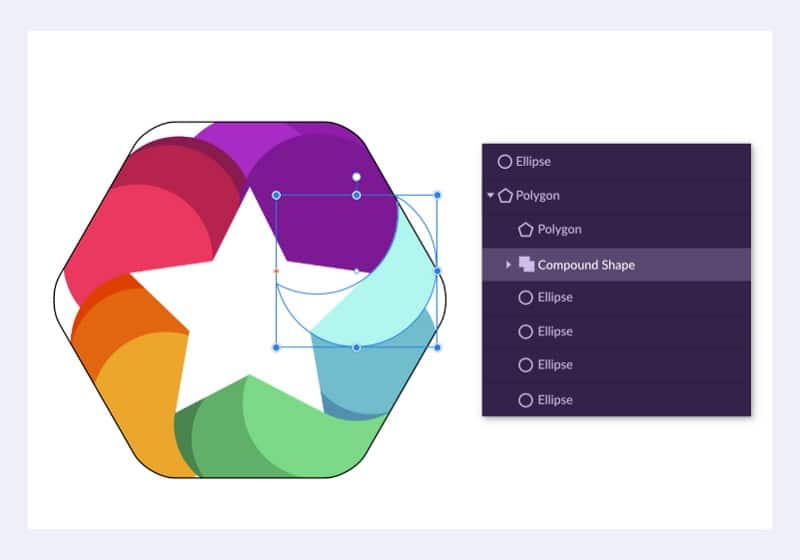
After that, you will have a Compound Shape made by the two ellipses, which allows you to modify your Boolean operation, if necessary, while the effect is already working.
Step 10 — Convert ellipses to path and close the gaps
You will see that some parts of your hexagon still have no color. To fix that you need to “stretch” the circles so that those gaps are closed with the right colors. Select the ellipse that you want to stretch, click with the right mouse button and select “Convert to Path”, or press Command/Control + Shift + P. Now that you have a path and not a shape, you can edit the nodes with the Subselect tool (D).
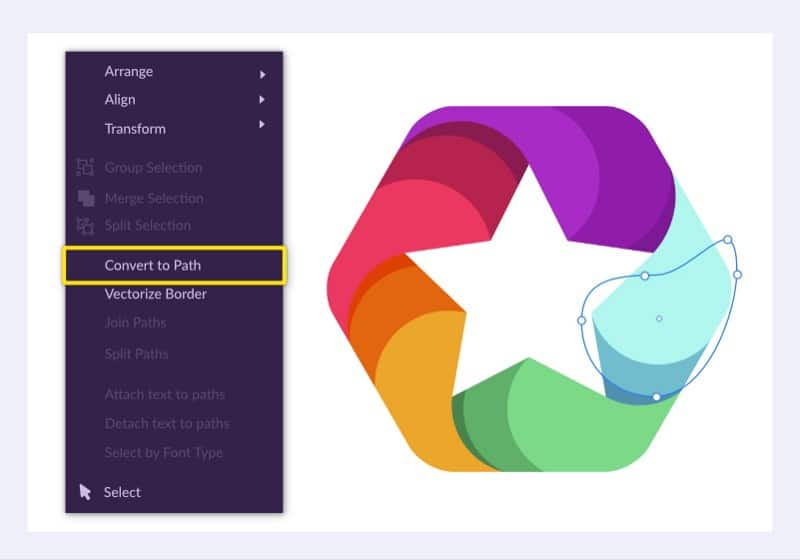
Pull the nodes and create new ones so that you can fill the white gaps with the same shape, without deforming the rest of it. You can now also remove the border from the hexagon.
Step 11 — Set Drop Shadow for the ellipses and the hexagon
On the Effects panel, you can add lots of detail to your design, like shadows, blur and distortions. With one of the ellipses selected, go to the panel on the right, open the “Effects” menu, and select Drop Shadow. This effect will project a shadow from your shape.
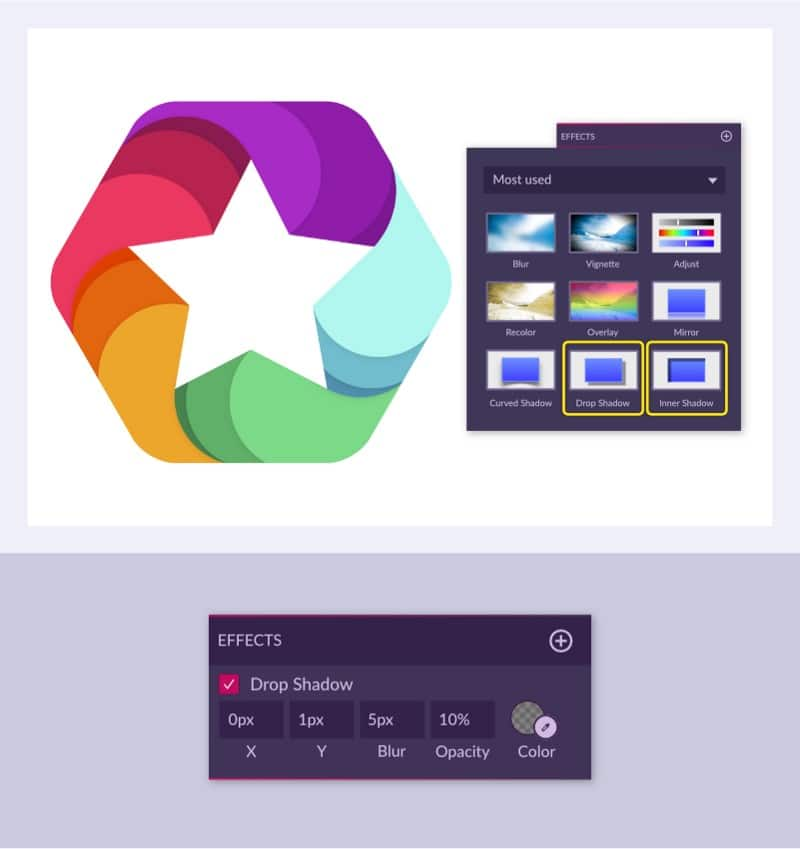
Leave X to 0 pixels and set Y to 1 pixel, Blur to 5 pixels and Opacity to 10% and leave the default color (#000000). Repeat the same process for all the other ellipses.
Step 12 — Set Inner Shadow for the star
With the star shape selected, go to Effects and this time select Inner Shadow. Leave X and Y set to 0, Blur to 10 pixels, Opacity to 70% and leave the default color. This effect will project a shadow on the inside of your shape. Select then the hexagon and add Drop Shadow to this one. Set Y to 5 pixels, Blur to 30 pixels and Opacity to 65%.

Step 13 — Set a background color
To set a background color, create a rectangle with the Rectangle Tool (R) and set it on the bottom layer in Modify > Arrange > Send to Back. Select the Gradient option on the Fills panel and set the outer colors to R:26, G:15 and B:20 (#1A0F14). To add another color to the gradient just click on the slider, in the example exactly in the middle, and then set this one to R:80, B:53 and B:95 (#50355F).
Now we are going to add a second fill with noise to give some texture to the background. Click on the plus icon on the corner of the Fills panel, select Noise, and set it to 5%. Now, as you can see, you have two fills on the same shape.
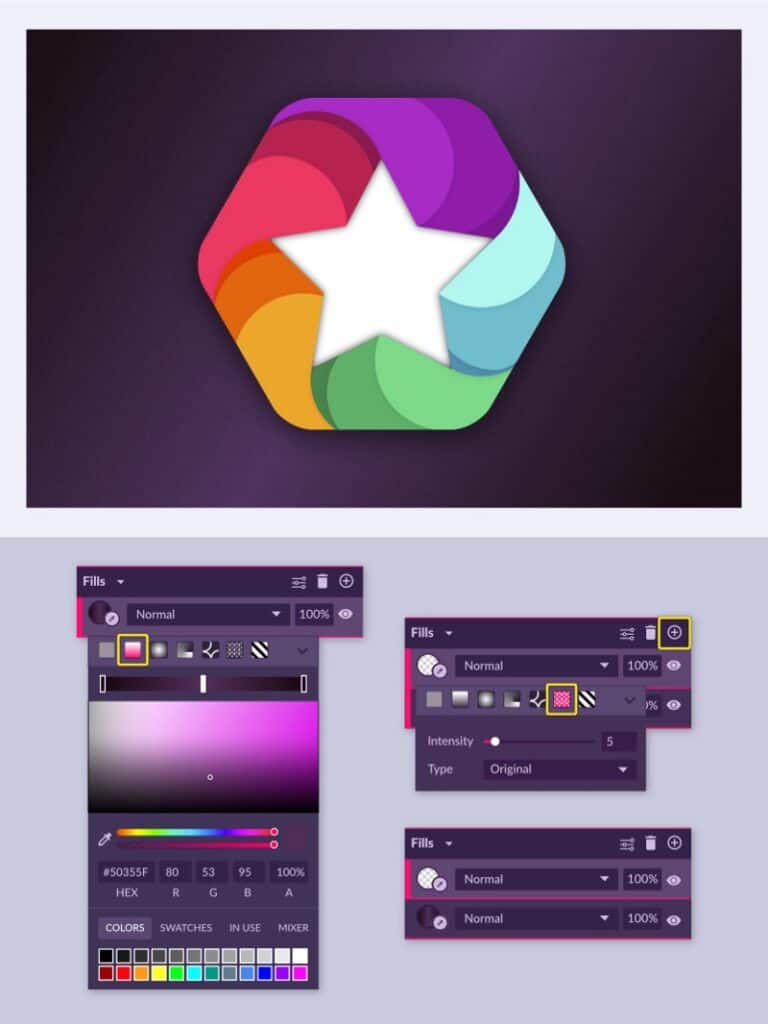
Step 14 — Match the star fill with the background fill
Now let’s match the star with the background color, so to make it look like you can see through the shape. Use R:80, B:53 and B:95 (#50355F), the same purple as in the center of your background gradient and add the same amount of Noise.
Step 15 — Add text
Now you will write your company name with the logo. Select the Text tool (T) from the toolbar and click anywhere to activate it and write “StarCo” in this example. Then with your text selected, go to the text panel on the right, choose the font Yellowtail, Regular weight and font size 117 px. Add a Drop Shadow to your text, setting X to 0 pixels, Y to 3 pixels, Blur to 4 pixels and Opacity 50%.

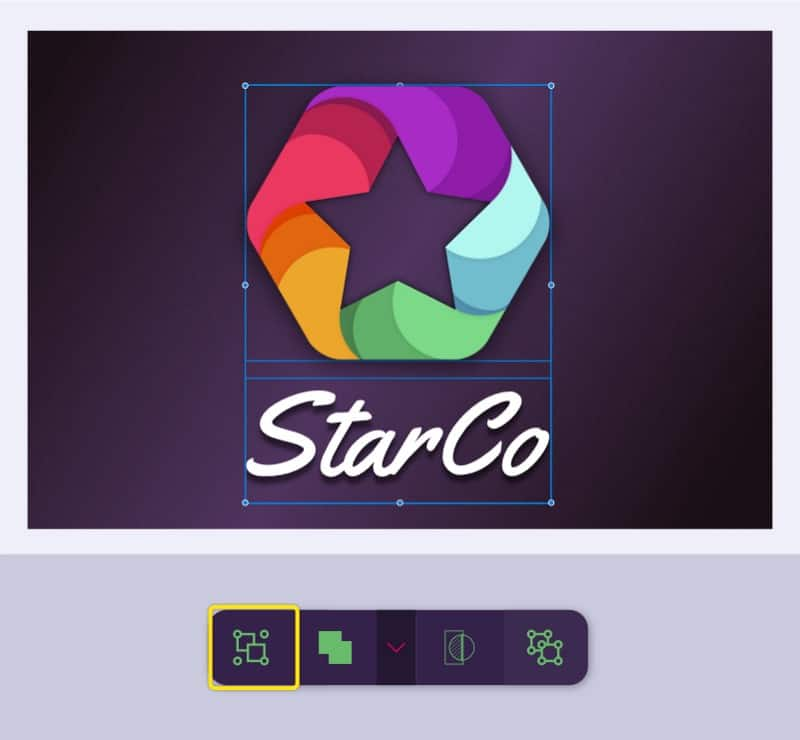
Step 16 — Center your design
For the final step of this process, select your text and center it under your logo, using “Align center” from the Alignment panel. Then, to centralize everything, select the hexagon and the star and then click the Group button on the top bar (or use Command/Control + G). Then with this group still selected, select your text too and group it together. Now, with this one group selected, you can simply click the “Align center” and “Align middle” buttons, and your whole design will be centralized to your page.
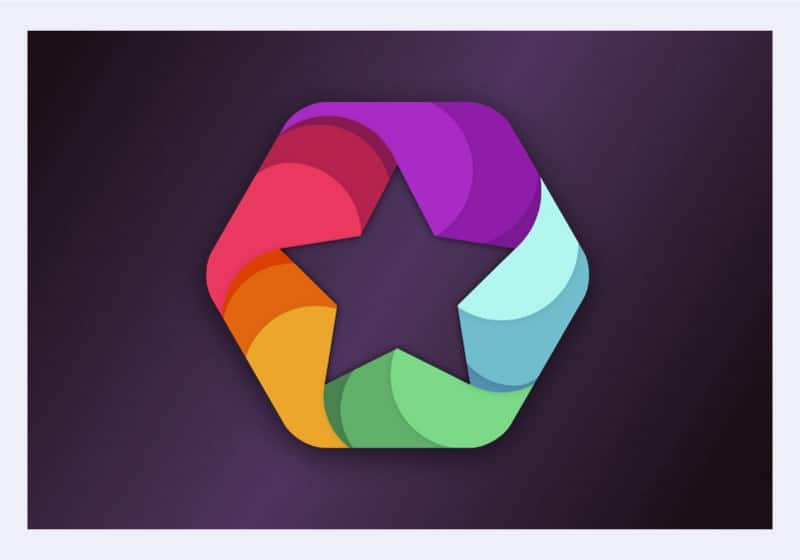
The finished design

Download your FREE 15-day trial and see how easy it is to design your creative projects with this web-based vector graphics app that empowers you to create on any device.
