
What is laser cutting?
Laser cutting and etching is a precise method that uses a high-power, thin, and focused laser beam to cut through various kinds of materials such as wood, glass, paper, metal, plastic, among others. The process uses a CNC router (Computer Numerical Control, a computer-controlled cutting machine) to dictate the movement of the laser beam on the chosen material according to a pattern.
For the cutting, data that mathematically calculates straight lines and curves (also known as vectors) must be used to be read by the software. In short: A laser-machine will cut a vector shape, pattern or drawing in a specific material.
That is where Corel Vector comes into play! With Corel Vector, you can create and export the pattern to be used by the laser-cutter.
Why Corel Vector?
Corel Vector is a versatile and full-featured design app that can be used to design apps, websites, logos, icons, illustrations, for print, and is also very easy to use for laser cutting. Laser-cutting requires vector files for the final design to send to the CNC machine for the cutting process. Corel Vector also has a full-featured free version and is available for all platforms and can be used by students, schools, and universities. With Corel Vector, students of all ages, and anyone who wants to create pieces with laser-cutting, can create the drawings for the machines quickly and easily. You can also import pre-made patterns to Corel Vector (in PDF, SVG, AI, or EPS) and use it to edit them as you like, then export it again to be read by the cutter.
Creating the file in Corel Vector
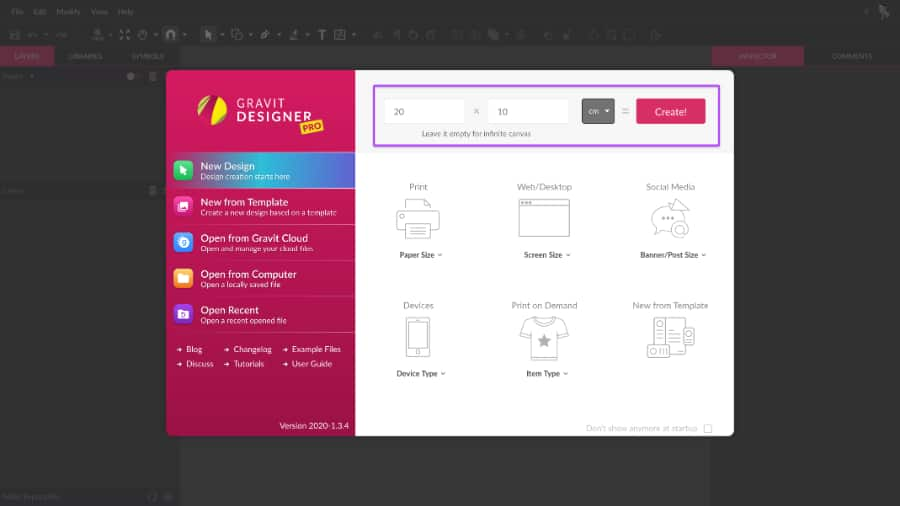
Let’s start by creating a new document. You can use any of the pre-made sizes available, but in this tutorial, we will use a custom size. You can do that at the top of the Welcome Screen by setting the Width, Height and the unit of measure. Be sure to use a “real world” unit such as cm or mm, because this will make it much easier to have a better idea of the final product. For this tutorial we’ll create a file of 20 x 10 cm (about the length of the long side of a credit card). Click Create!and you are good to go.
Color codes
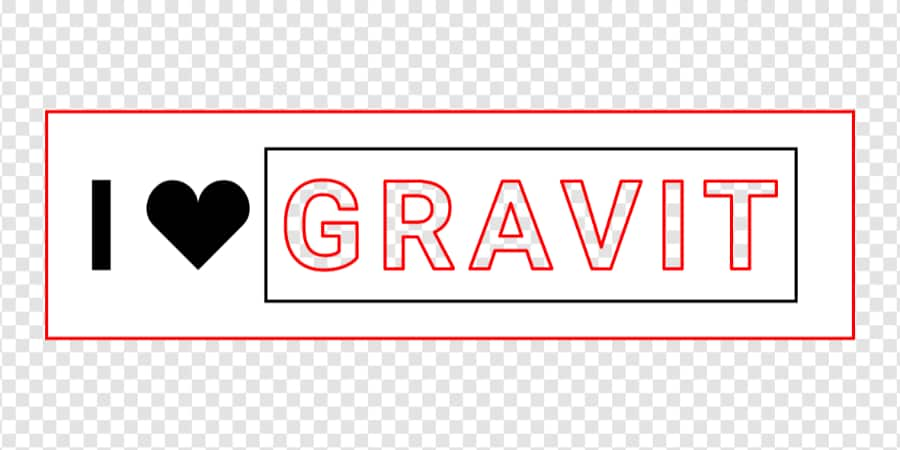
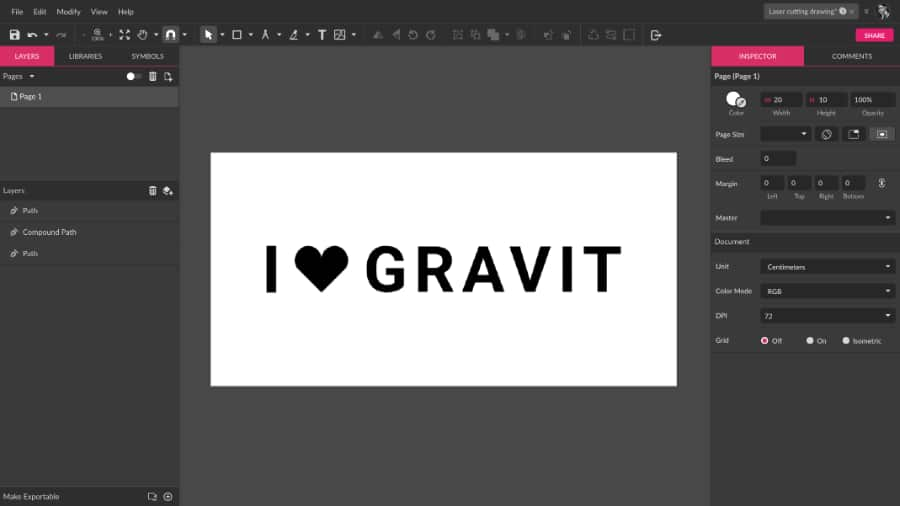
This is the finalized drawing we will be creating in this guide:
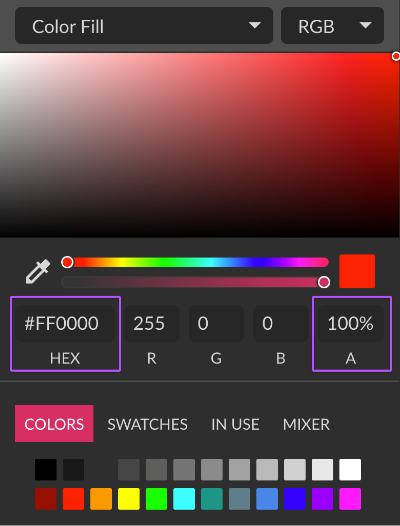
You need to use parameters that the software will recognize, and this might vary from machine to machine. The machine modes usually work with a specific color code, and for this guide we will be using the following codes:
- Red (#FF0000) is for the parts where the laser will cut through the material
- Black (#000000) is for the parts that will be engraved on the material
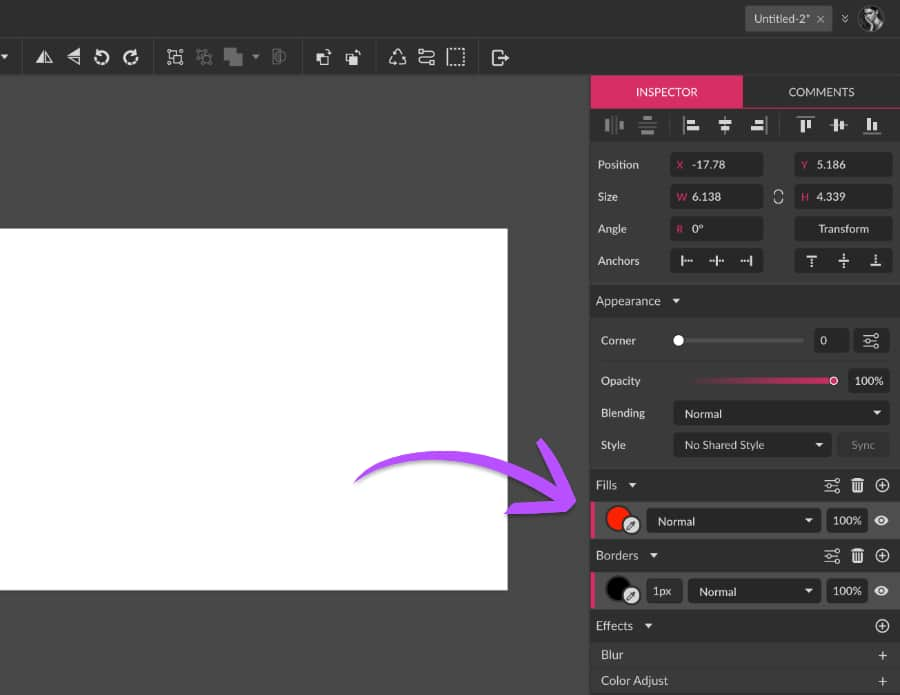
The HEX code can be changed on the Color Picker window for both Fills and Borders, at the left on the Inspector panel, when any element is selected on the canvas. Remember to always leave the color opacity at 100%!
Creating the text
To create the text “I” and “GRAVIT” from our example, select the Texttool and create two separate text layers for each word. With the text layers selected, check the Inspector panel again and you will notice that the Appearance options for the Text tool will be shown. The font used was Roboto (a free font already included with Corel Vector), with Bold weight and 78px of size.
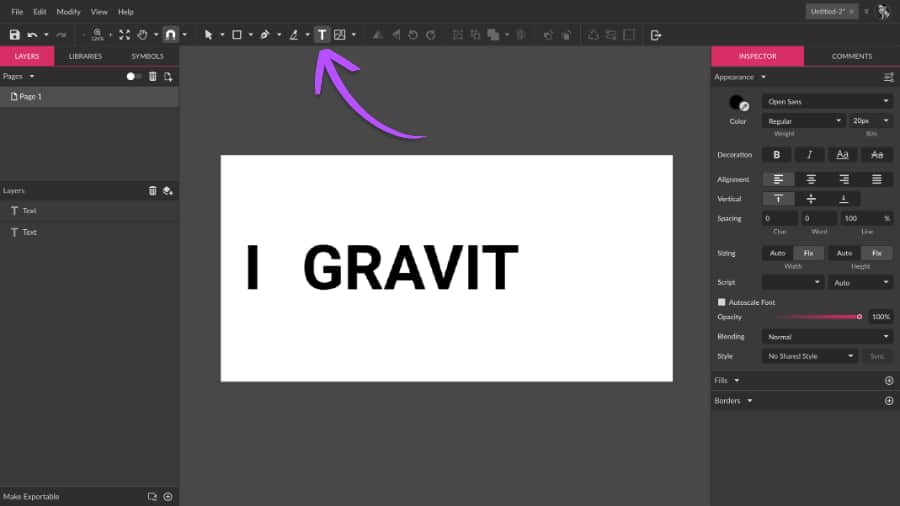
For the word “GRAVIT”, add 0.2 of character spacing to avoid that the letters are too close to each other. You can leave the colors, fills and borders as they are for now.
Creating the heart shape
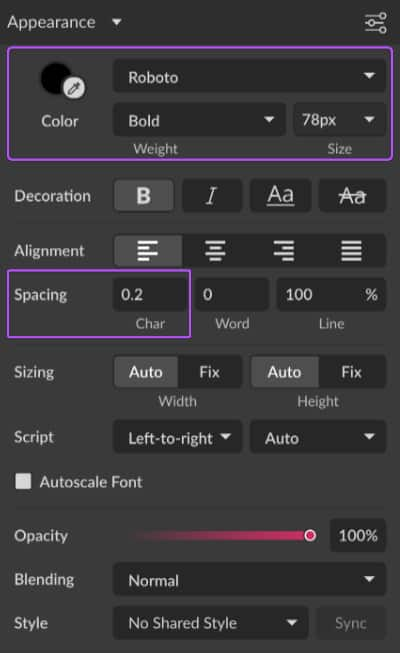
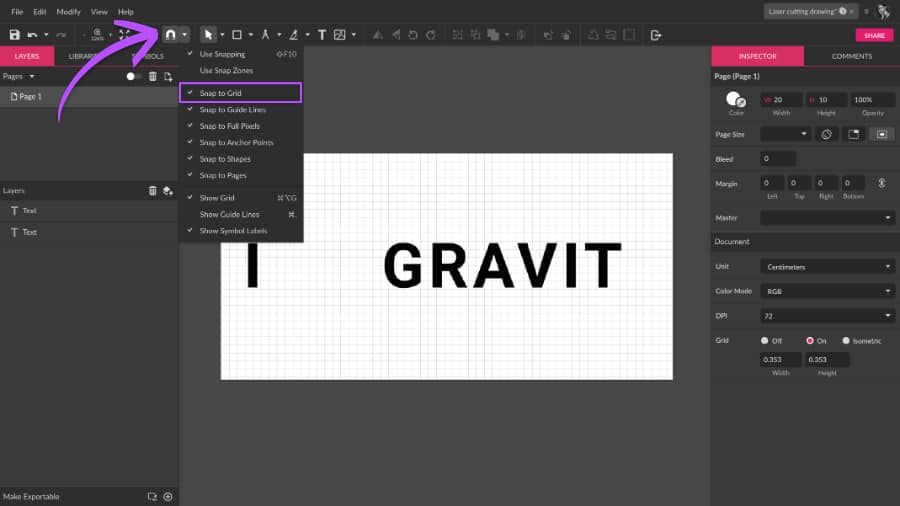
The easiest way to create a heart shape in Corel Vector is by turning on the Grid and using the Bezigon tool. The Grid will be shown by checking On at the bottom of the Inspector Panel (when nothing is selected on the canvas). The Bezigon tool can be found right below the Pen tool in the toolbar.
The Bezigon is a drawing tool, similar to the Pen, but this one can perform a special trick: you can create a geometrically perfect curve by holding Alt while placing an anchor, and this will help us when creating the heart shape. The grid lines will aid you to create a proportional and perfectly symmetric shape. Be sure to leave the Snapping on with the option SnaptoGrid enabled on the toolbar, so that the Bezigon anchors “snap” correctly to the grid.
Use the Bezigon to create the heart by placing the anchors on the grid intersections, while pressing Alt when creating the curves:
Add a black fill to the shape and hide or remove the border. After your heart shape is done, you can turn the Grid off if you prefer, and make the shape with the same height as the text. If you want more details on how to use the Bezigon tool, be sure to watch this tutorial.
Outlines
Let us head to the final part of our project: the outlines. As you saw on the final drawing at the beginning of the guide, we will have black and red outlines, and as defined previously, what is black will be “engraved” on the material, and what is red will be cut out.
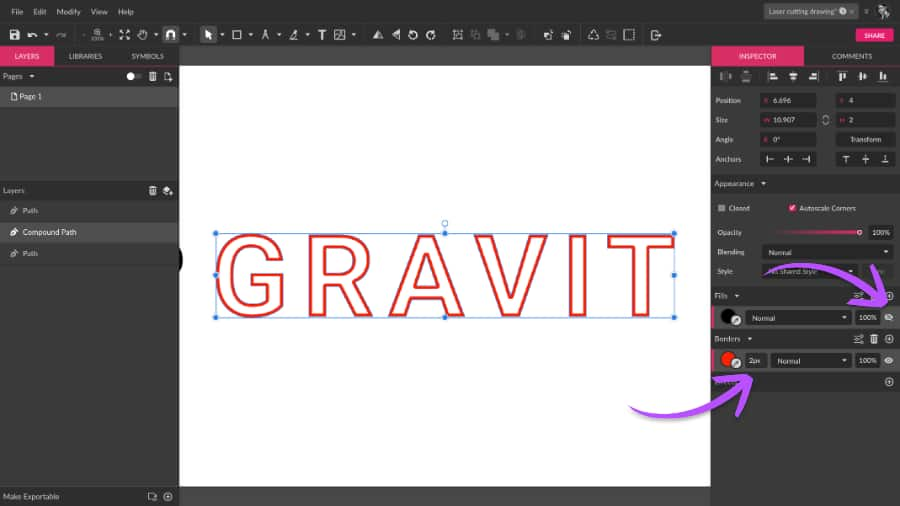
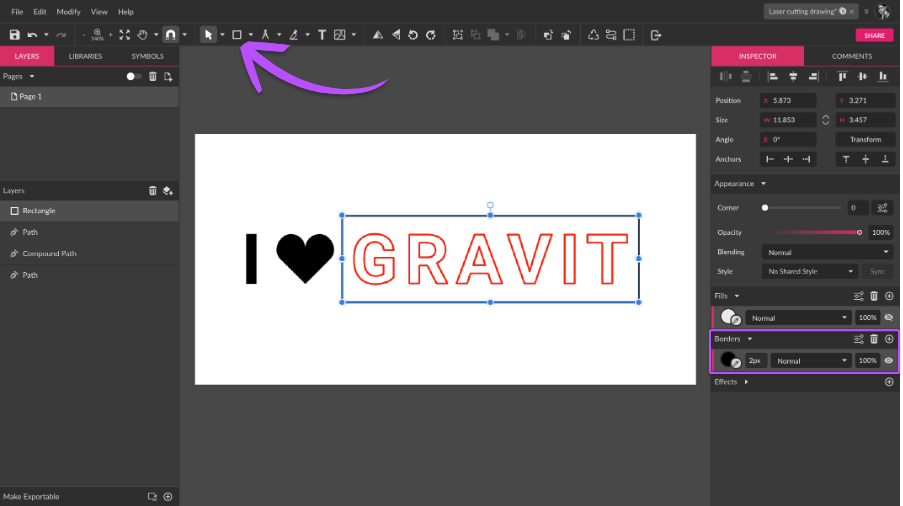
Let us start by turning the “GRAVIT” word into a red outline, so that later it will be cut through. To do that, hide the Fill’s visibility (or simply delete it) and add a red border on the Inspector panel. For some machines, if the outline is too thin the machine might not “see” it, and if it is too thick, the object might be ignited. For this project, let us use a border of 2 pt.
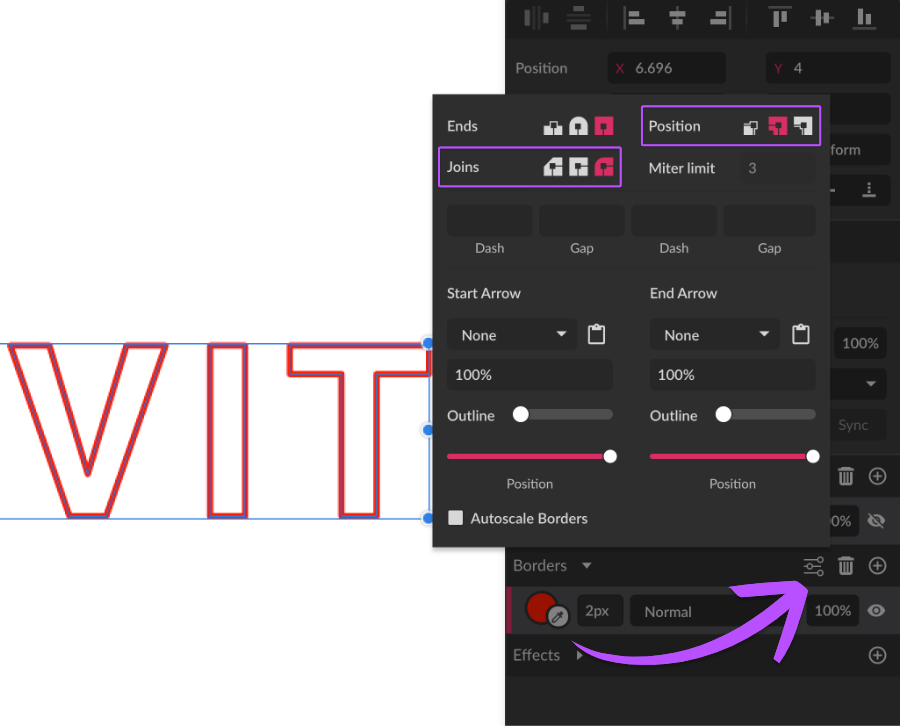
Corel Vector’s Border position comes set as Inside by default, and this might cause problems for some machines. Be sure to switch this position to Centeron the Border’s AdvancedSettings! On this dialog, you can also change the Join type to Round if you prefer.
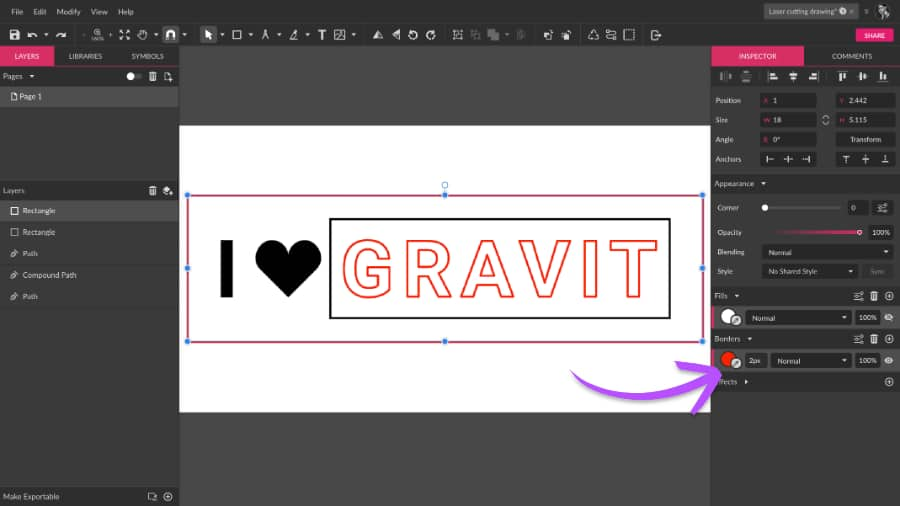
We will also add an outline around the word “GRAVIT”, but this one will be black as it will not be cut through, but engraved. You can use the rectangle tool to create this outline, and use the same settings as you did for the “GRAVIT” word (border of 2 pt. set to Center and Round).
Let us also use the Rectangle tool to create another red outline, this time around the rest of the drawing, since this will be the “edge” of the piece that will be cut on the machine.
Trim the canvas
We are almost done! To ensure that you will export your work correctly, be sure to click the option Trim Canvas on the Inspector panel. This will trim the empty area of the canvas around your work, leaving only your drawing to be exported. Do not forget that the Pages options on the Inspector appear only when no elements are selected on the canvas!

Exporting the final work
Your drawing is ready! Now all that is left is to export it, and in our example, we will export the drawing as a PDF file. If you are a user of the trial version of Corel Vector, you can do that by going to the menu File > Export > PDF Document(.pdf) > 150dpi.
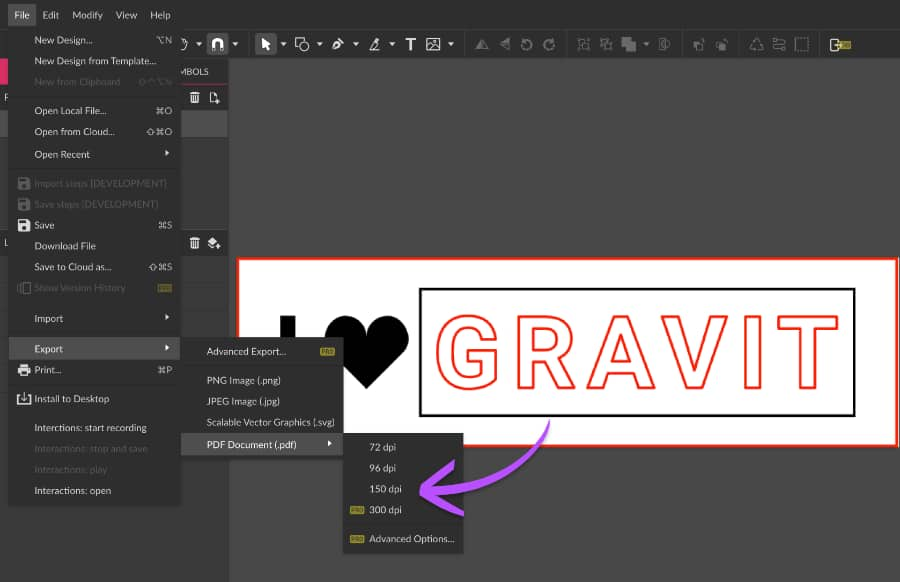
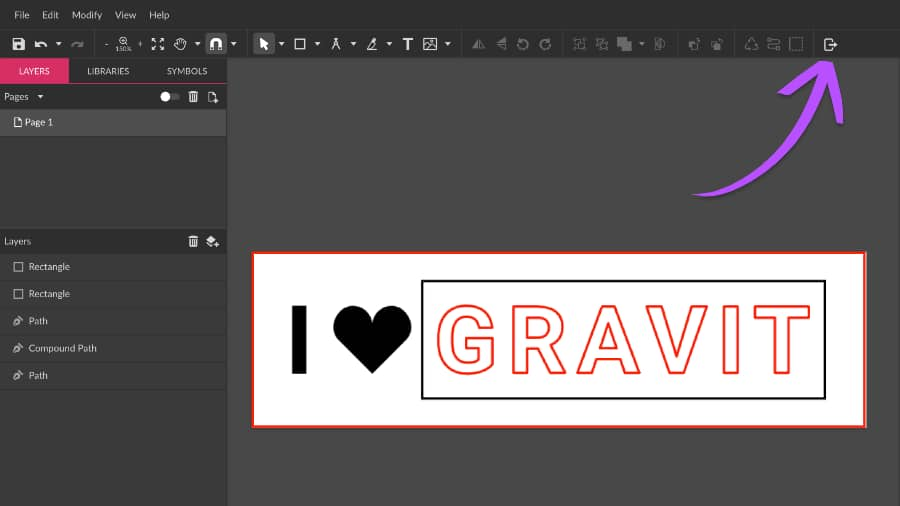
If you are a Corel Vector PRO user you can use the same path for exporting, but you also have the option to export at 300 dpi. You can also use the Export Dialog where you will find some additional export options. The Export Dialog can be accessed via File > Export > PDF Document(.pdf) > Advanced Options… or click the icon on the toolbar.
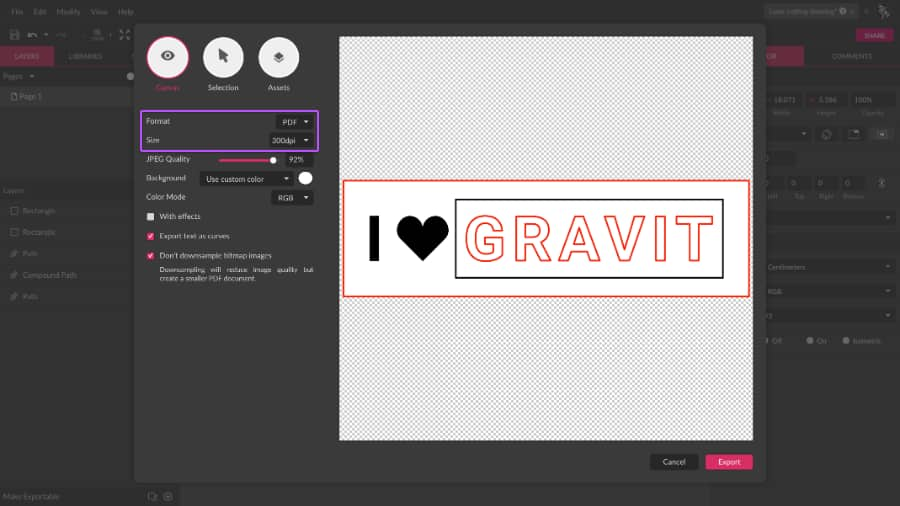
TIP: Be sure to convert your text to curves before exporting to avoid problems with font recognition. To do that, just select the text layers and press Ctrl/Cmd+Shift+P. If you are a PRO user and use the Export Dialog, just check ExportTextasCurves.
That’s it, your drawing is ready to be used by the laser-cutting machine! The final result, if the material used is wood, for example, should look something like this:

Download your FREE 15-day trial and see how easy it is to design your creative projects with this web-based vector graphics app that empowers you to create on any device.
