
Vector Art – Turn Drawings into Digital Illustrations
Pixel-based illustration, the most traditional digital art we can find on the internet, can give you a certain freedom when it comes to strokes and colors, but it has its limitations. You need to create a huge canvas with a high resolution if you want to print or use it in a larger size, for example. It can also be hard to achieve precision on the strokes (even more if you are a beginner).
That’s when vectors will become your best friends!

Vector-based illustration gives you high precision while allowing you to play with sharp lines, shapes, colors and gradients in a very convenient way. Once you get used to the basics of Corel Vector’s tools, you start to discover a new world of creativity; play with lines and points, create shapes, and give form to your work.
In this article, I will help you to get started with some tips and tricks to create cool illustrations.
Paper doodling
Pouring your mind onto a piece of paper with any tool you have at hand (even ballpoint pens) at any time can be a big help when it comes to inspiration and creativity. A simple sketch may become the source of a great idea. Then, once your idea is clear in your mind, make a doodle that later will be the base for your vector illustration.
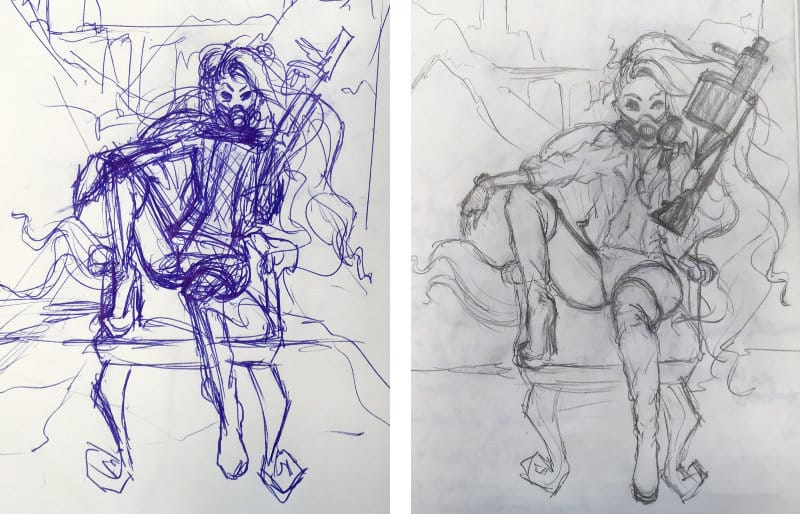
My first sketch with a pen is so messy that it’s even a little creepy. After the initial concept, I created another one that looks cleaner with more detail.
Don’t worry, it doesn’t have to be super clean or perfect. You just need to catch the main concept and have some defined lines to help you get started. Take a picture or scan it, then drag it to your blank canvas in Corel Vector (click “Create” on the start screen, with both fields being empty).
Line art
Defining your lines and shapes as a first step will simplify your work, so you might want to start with that.
In this step, the preset Shapes are very useful for creating the basic forms. To create points and curves freely, use the Pen tool. For freedom combined with precision, the Bezigon is the right choice: it lets you create a free shape with accurate curves while tracing.
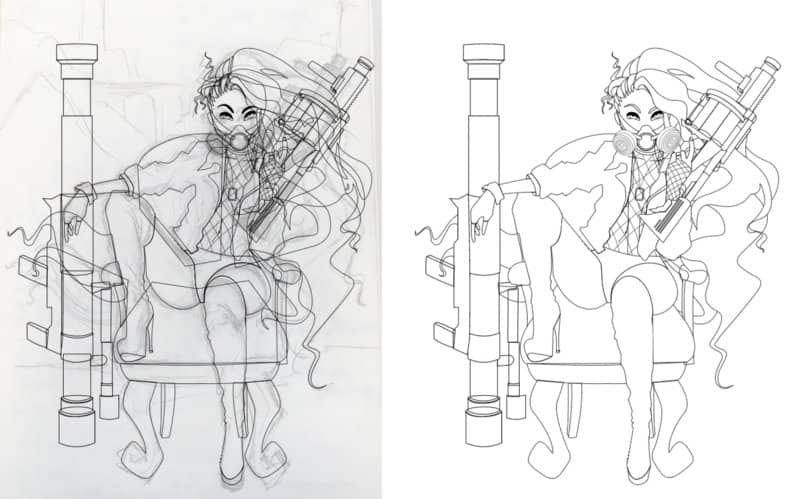
After adding some transparency to the drawing, I created closed shapes on top of it to form the line art.
Every shape will become a different object on the layers panel, so you might want to group some of them and organize them in layers with names to avoid a huge amount of loose objects.
You can simulate line pressure and create more detail by converting a border into a path, and then adjust the anchor points to make your line thinner or thicker.
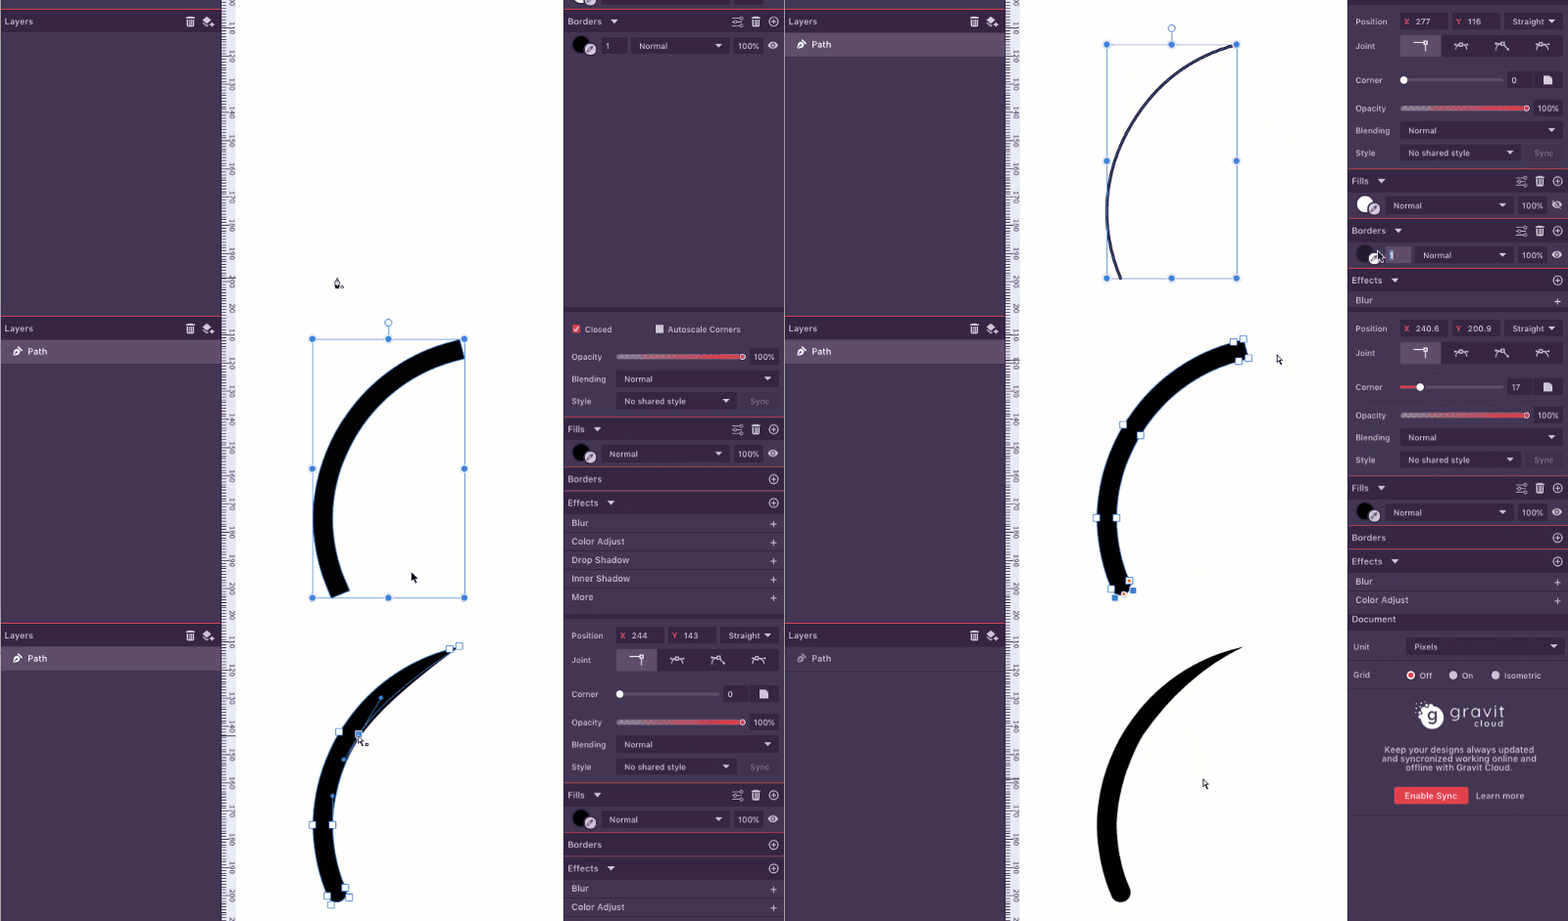
After you have created all the lines and shapes it can look quite confusing, but don’t worry, you’re going in the right direction.
Flats
Now it’s time to define and pick your base colors. In this step you will fill your line art with just a click on the shape and select a shade on the in the color dialog, or create a gradient — it’s that simple when working with vectors. Don’t forget that you can always adjust and change any color later by selecting the shape and moving the color picker.

As you are filling your shapes, you can adjust and position them in the right order by sending the layers to the back or to the front. Just drag them to the correct place in the layers panel or use Modify > Arrange from the menu bar.
Shading
When you have decided on your base colors it’s time to start shading — that means adding light and shadows to give some depth to your work. That’s not necessary if you don’t want any depth; sometimes a flat illustration is enough, but in my example I want to add details to create the illusion of a three-dimensional object.
You can do that with solid shapes or gradient fills, as I did on the guns (the gradients created light and shadow and a sense of depth).

Effects
Corel Vector has a variety of effects that can help you when it comes to adding a final touch to your illustration. Shadows, Glows and Blur are my favorites to add nice details. When selecting your shape, you can find all these options on the right panel at “Effects.”
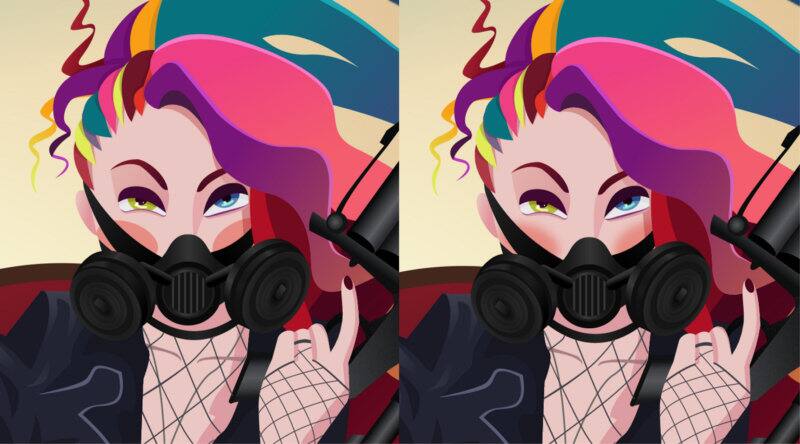
Color effects like Adjust, Overlay and Recolor allow you to do some fine tuning on your color scheme. Corel Vector has more than 30 effects to combine on your design, so be sure to check them out at “More.”
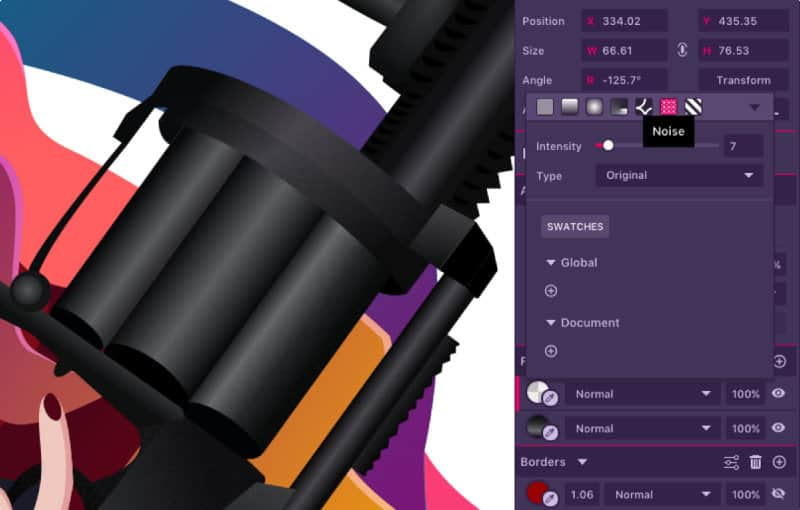
A noise fill is a nice detail to add if you want some texture. With Corel Vector’s multiple fills, you can add it on top of the other fill colors of your shapes. On the Fill panel, click the little “plus” to add another fill, and then select “Noise”.
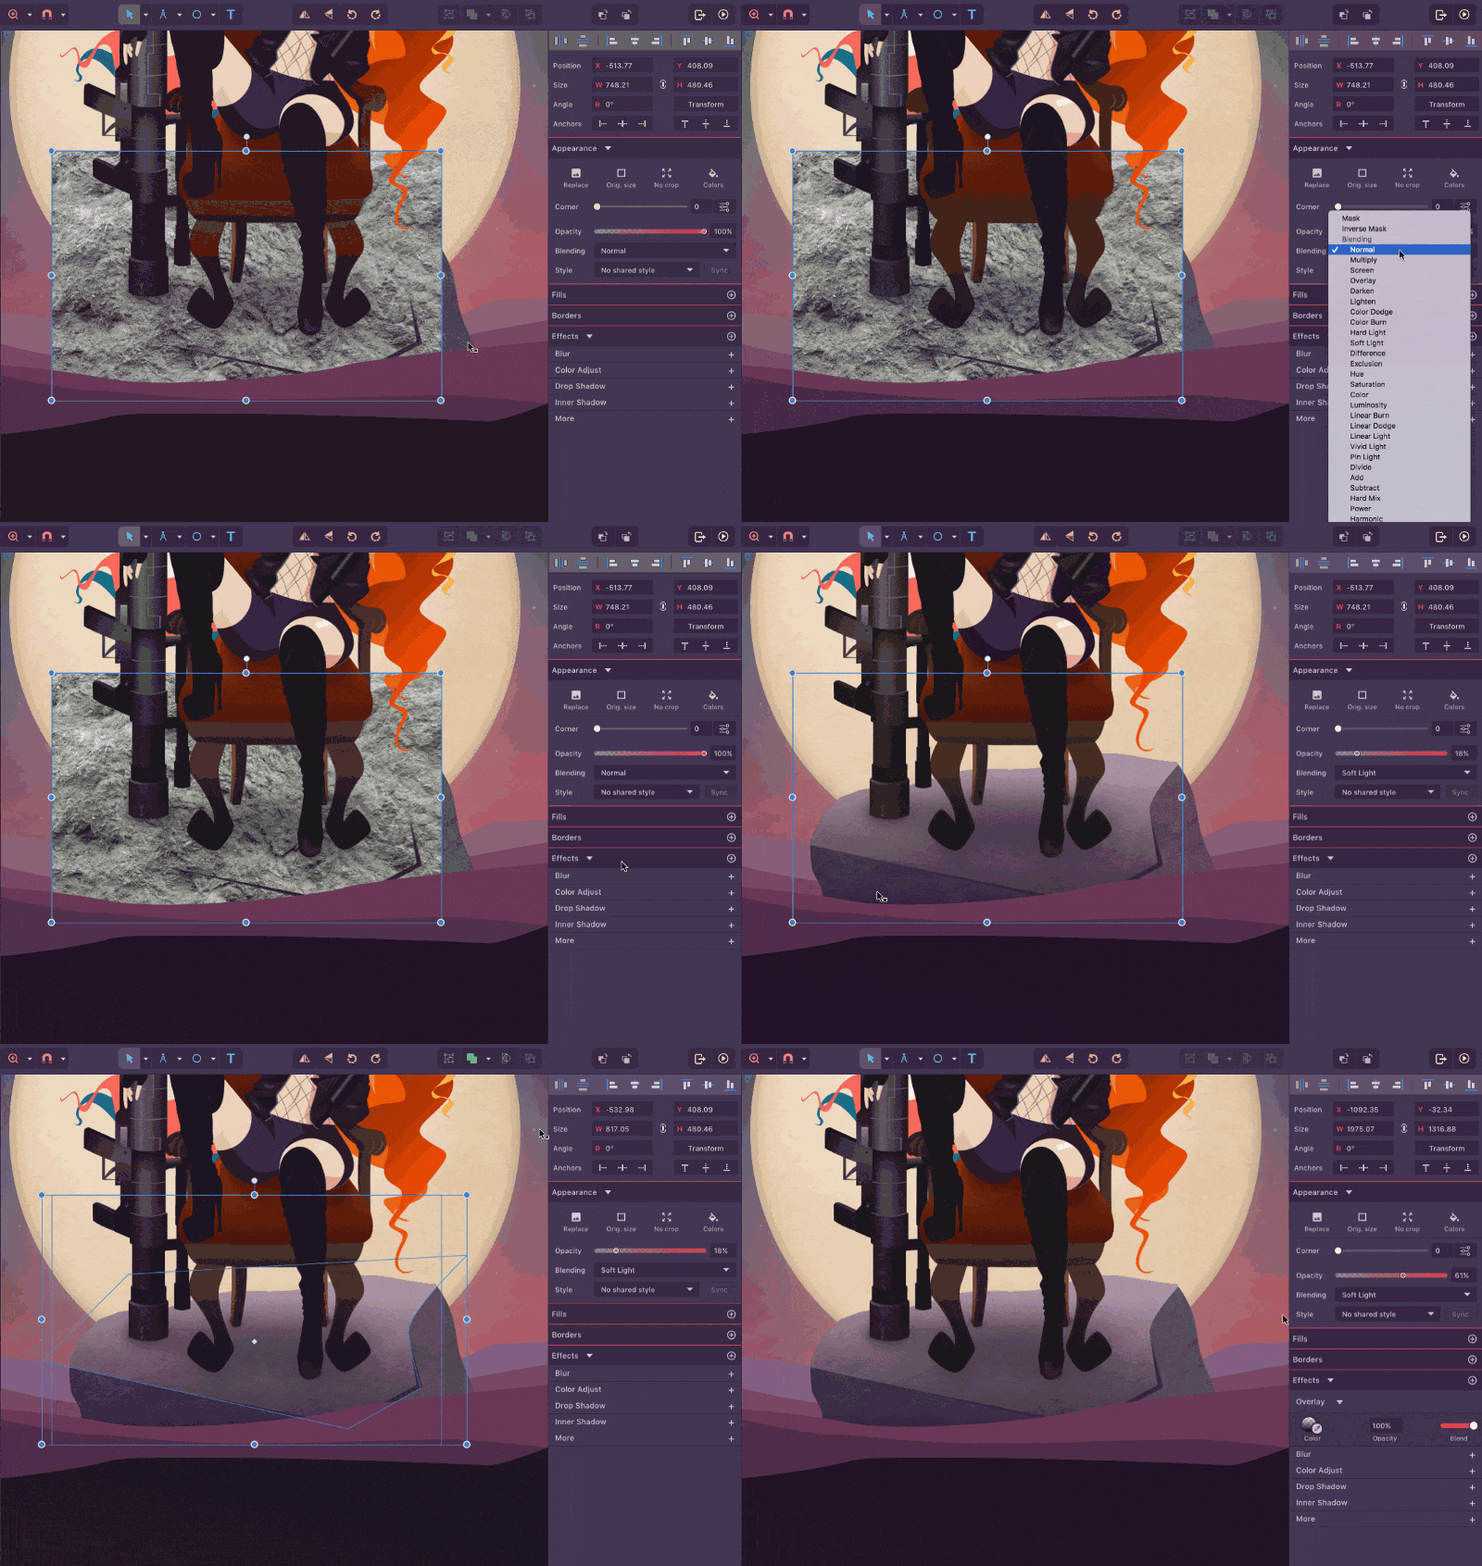
You can also import an image and clip it to your shape, with some transparency and blending modes, to create texture.
It might take you a good amount of hours and hard work, but the final result will be as awesome as you want it to be. Small details and little refinements can make a huge difference in the end.

Download your FREE 15-day trial and see how easy it is to design your creative projects with this web-based vector graphics app that empowers you to create on any device.

