

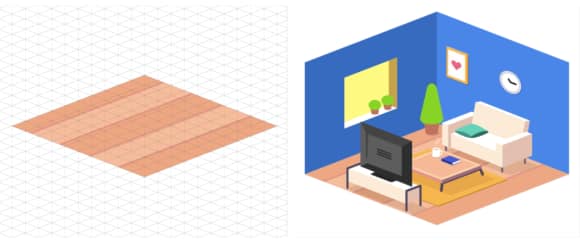
Among the many styles of illustration, isometric illustrations have been standing out a lot these last few years for the uniqueness they can bring to a composition.
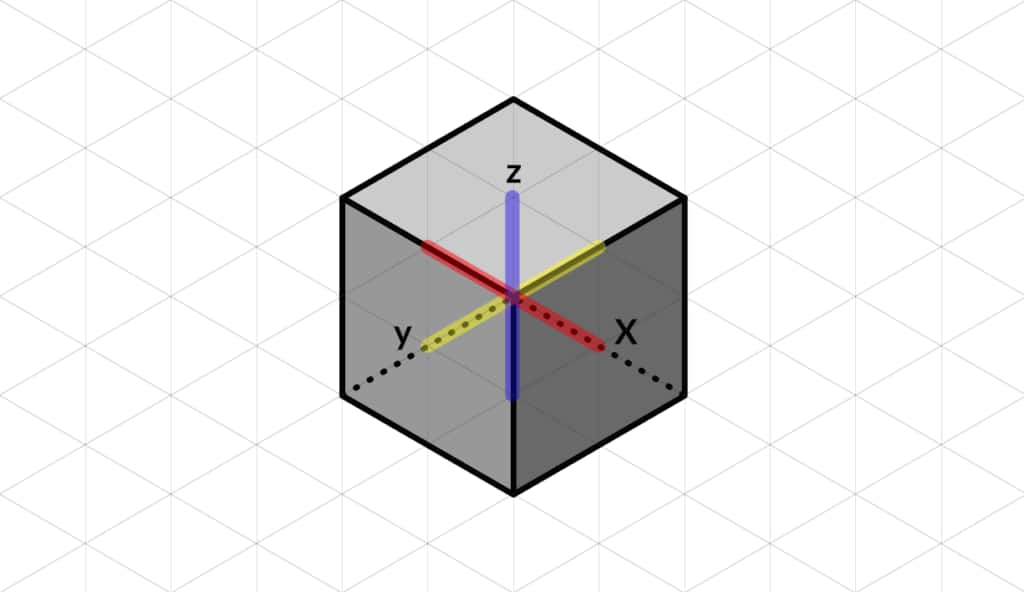
Isometric illustration, or isometric projection, is a technique that is intended to produce illusion of depth and perspective without distorting the object’s main dimensions. It’s a projection in which the three coordinate axes (X, Y and Z) appear equally reduced and the angle between two of any of the axes will always be 120 degrees (“isometric” means “same measure” in Greek).
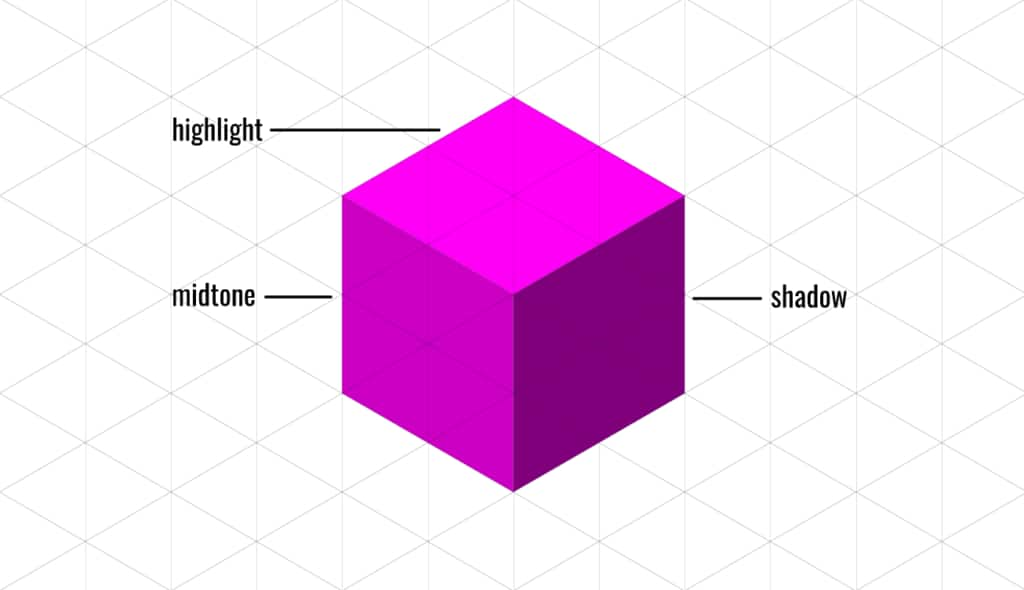
In other words, it’s a simple way to represent a 3D element with a 2D illustration. All three visible sides of the object are represented equally, with highlight, midtone and shadow depending on the direction of the light, giving the illusion of depth.
Set up your document
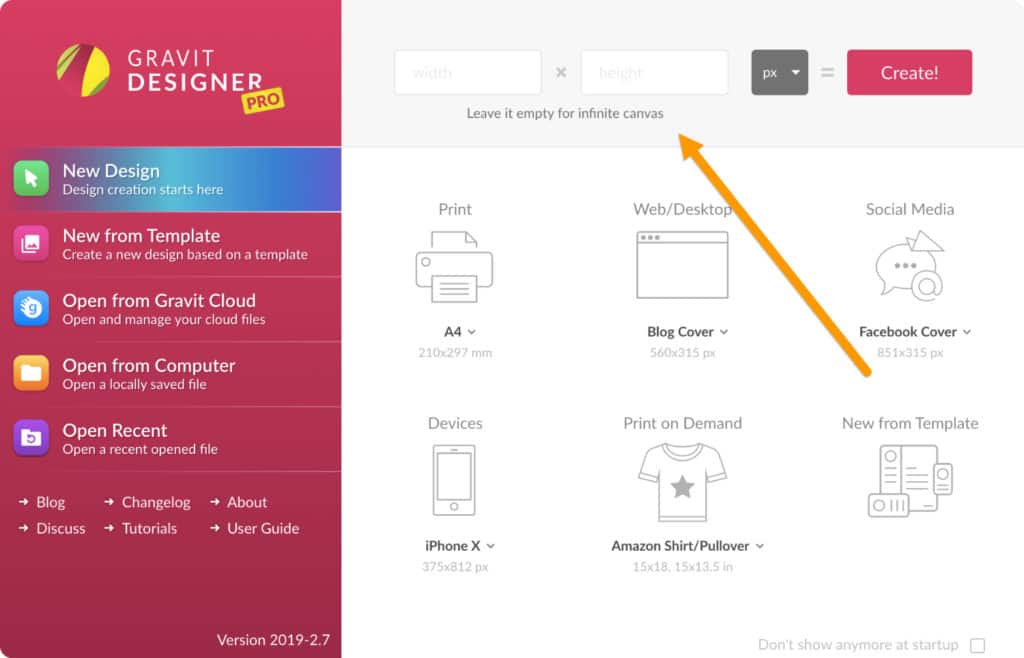
On Corel Vector’s Welcome Screen, leave the Width and Height fields empty and click “Create!” to create an infinite canvas.
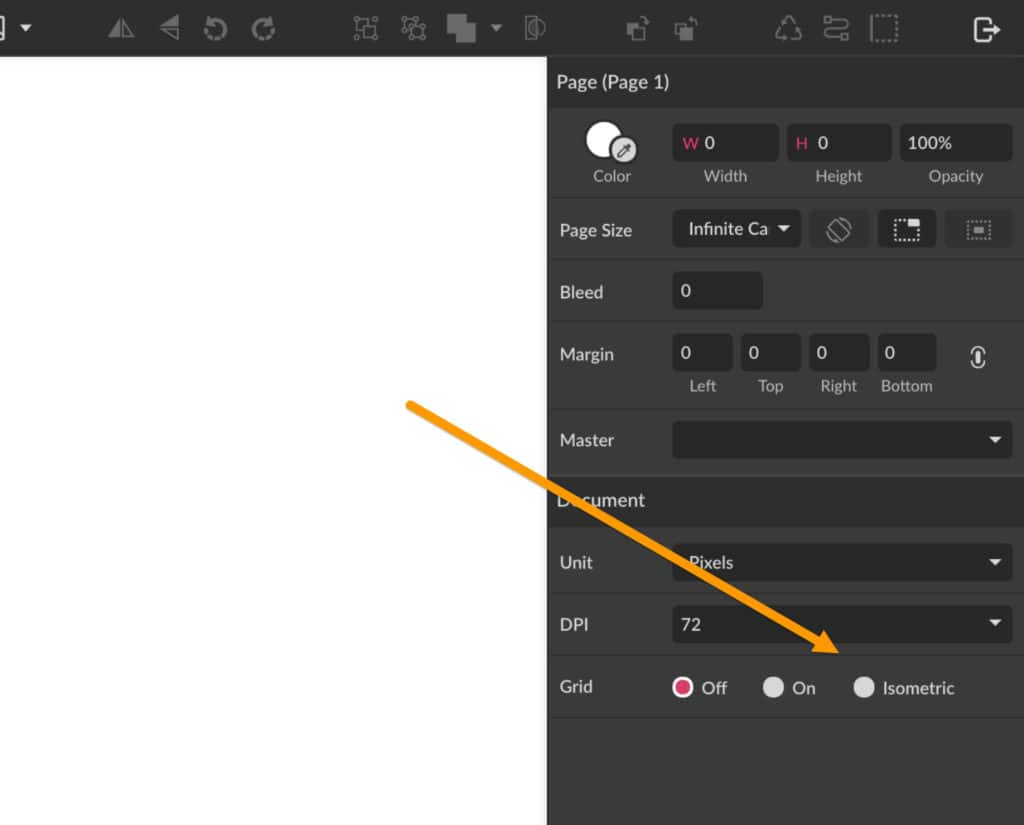
With nothing selected, you can see the Grid options at the bottom of the Inspector panel on the right. Toggle the Isometric grid.
The Isometric grid can have its size and angles adjusted by editing Size, Angle 1 and Angle 2.
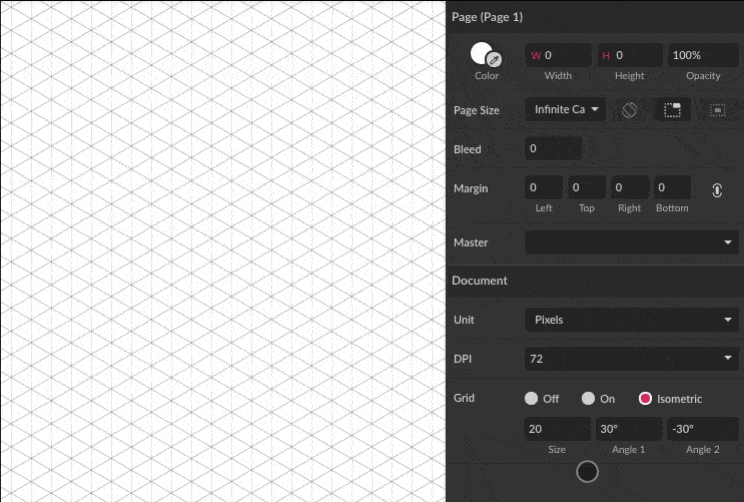
For this tutorial we’ll leave the Size at 5, Angle 1 at 21° and Angle 2 at -21°.
Follow the Grid
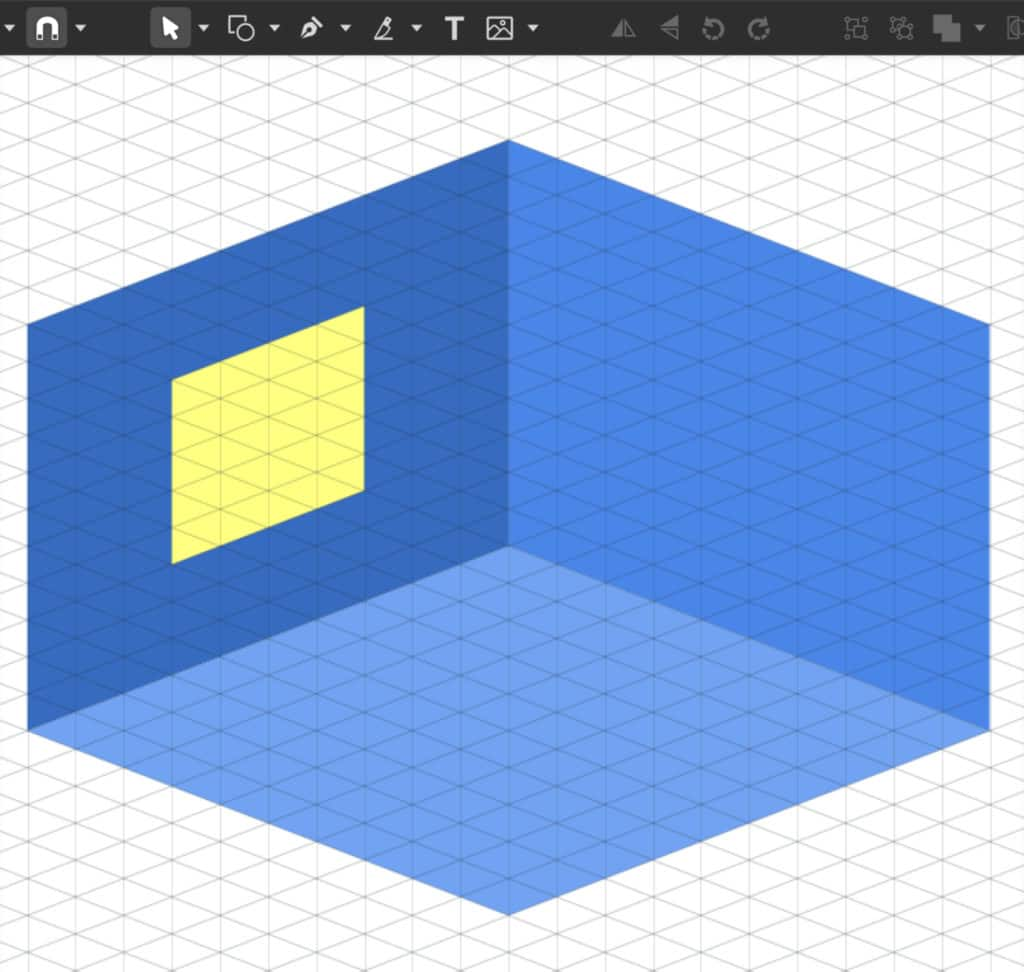
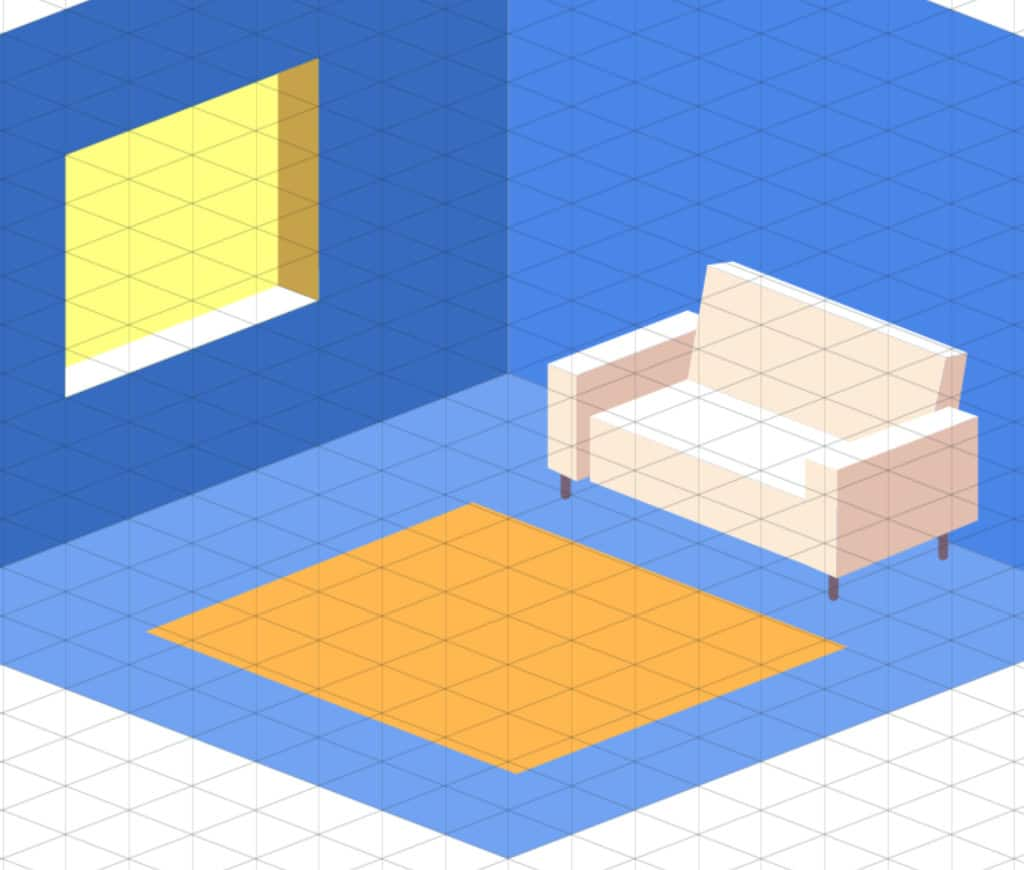
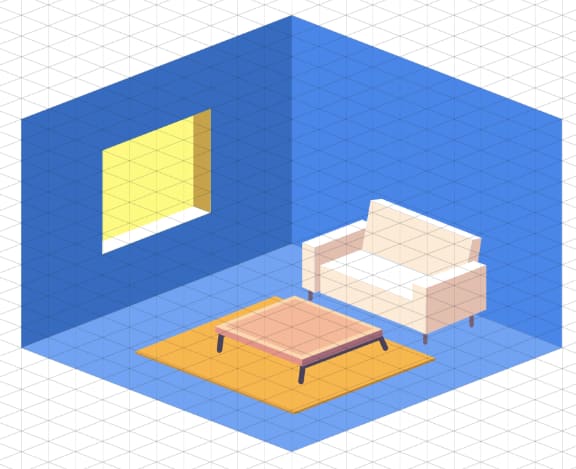
With the Isometric grid set up, it’s up to you to create anything following the grid lines. For this tutorial, let’s create a living room.
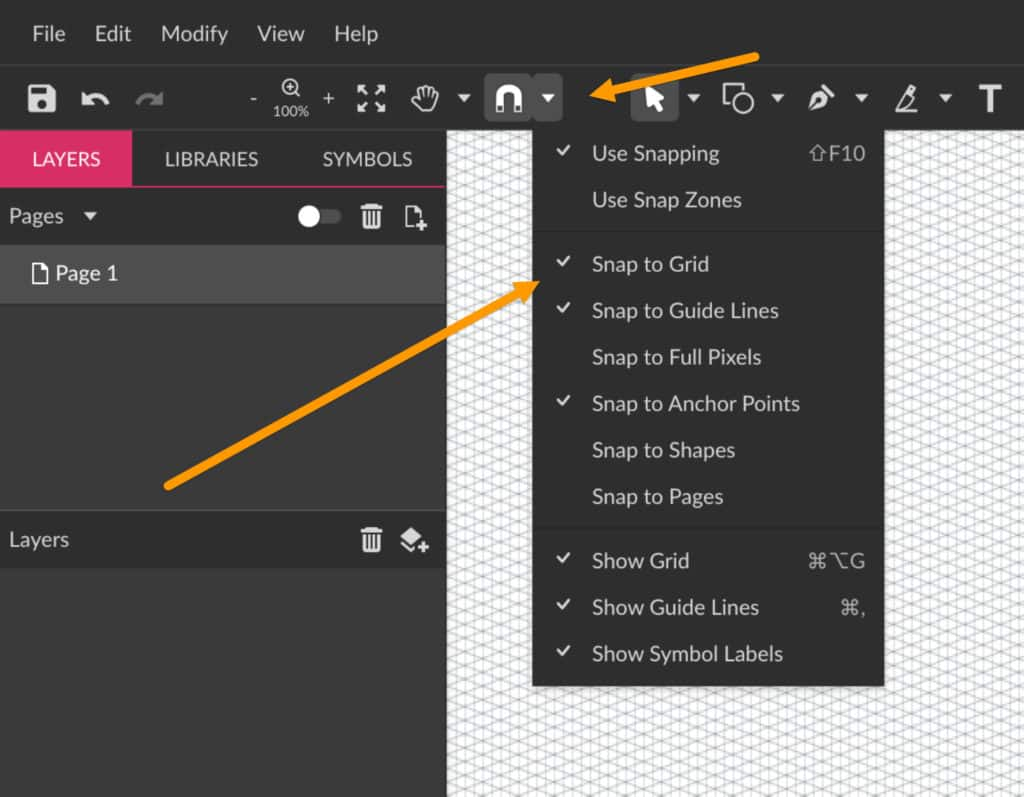
Don’t forget to toggle “Snap to Grid” on the Snapping options (clicking the small arrow right next to the magnet icon) at the toolbar. You might want to toggle off the options “Snap to Full Pixels”, “Snap to Shapes” and “Snap to Pages” for this illustration as you don’t want your Snapping going too crazy, focusing only on the Grid.
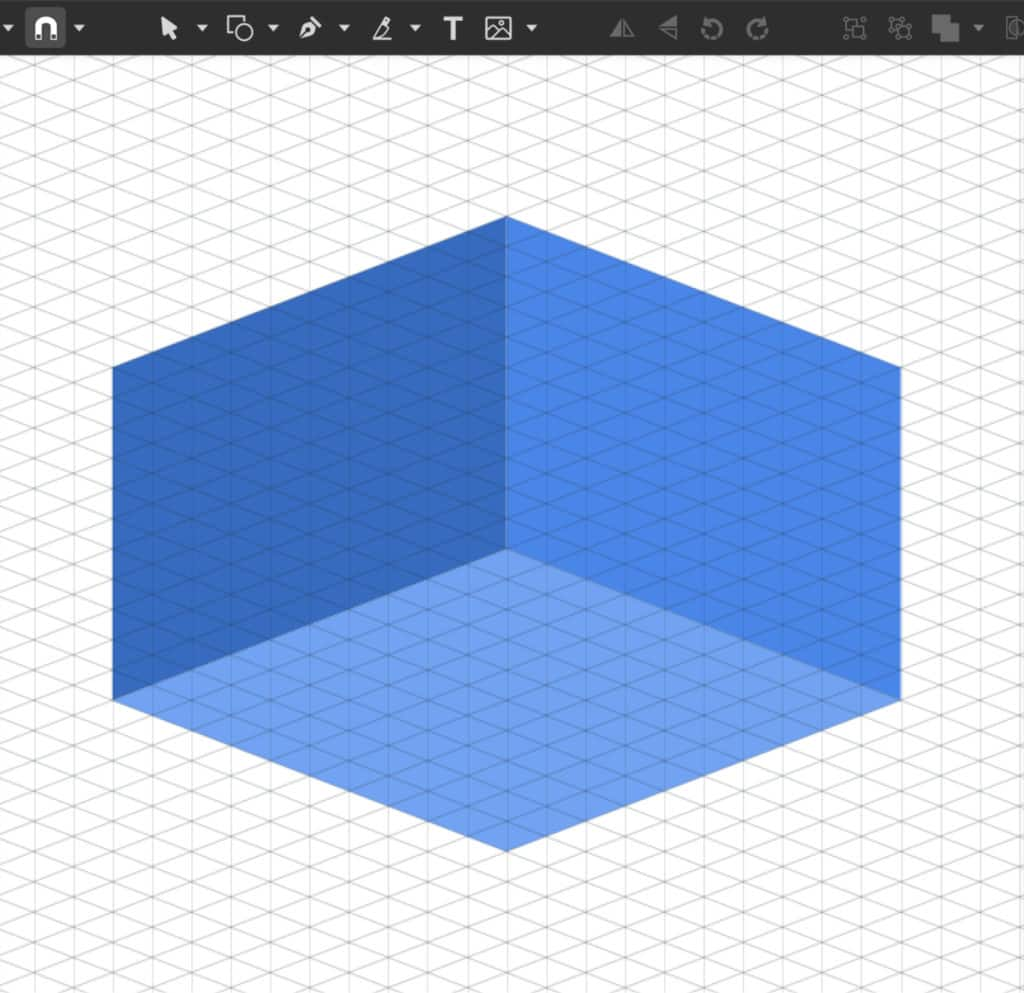
Let’s start by creating the walls. Select the Pen tool (P) and create a rectangle following the Grid so that this rectangle is in the correct perspective.
Create the second wall and the floor with the Pen tool, following the same perspective. Add some color, but don’t worry about choosing a final color palette yet.
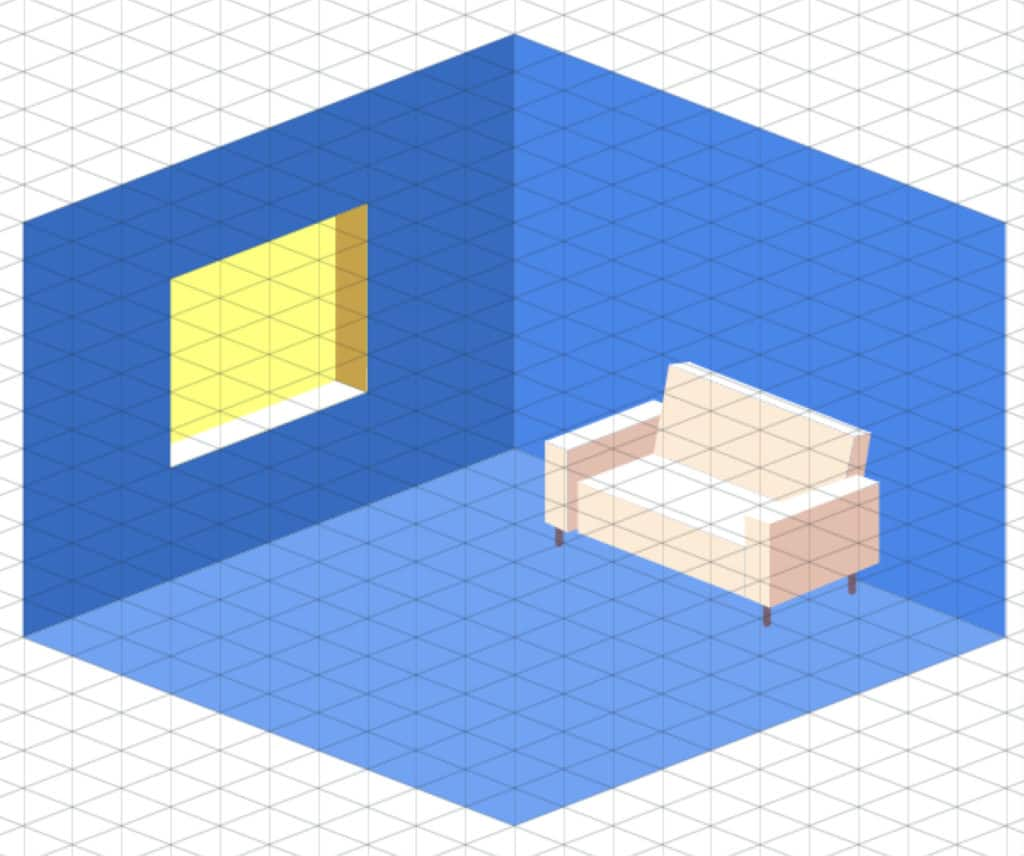
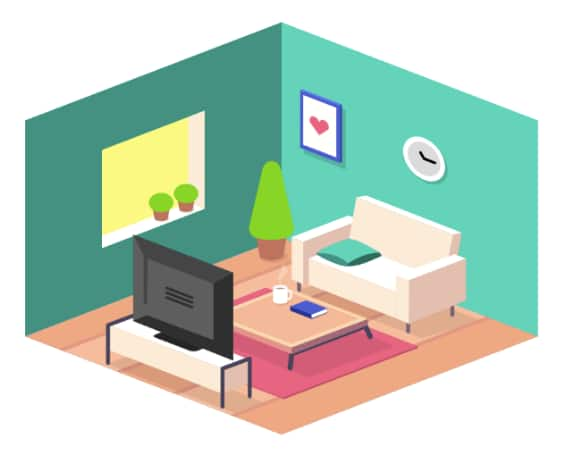
Living room details
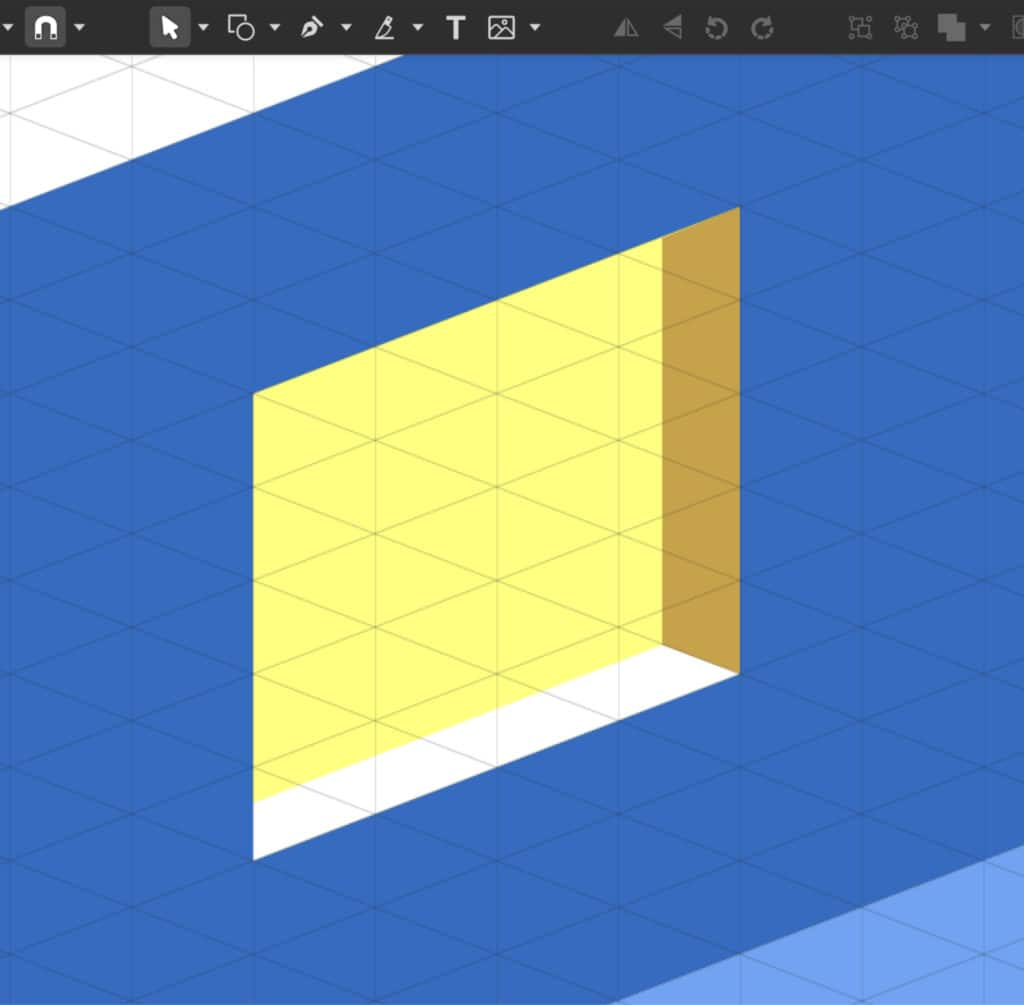
Time to start creating some details for the living room, like a window and some furniture. You can check some images for inspiration on what to create. Start by adding a window to the left wall with the Pen tool.
Because of the perspective of the illustration, you need to add the depth illusion to most of the elements. In the case of the window, this means showing the inside of the wall that would show at the bottom and at the right side.
TIP: the Isometric Grid doesn’t have to be toggled on all the time. As long as you follow your main lines, you will get the right angle. You can turn the grid on now and then as a guide to check the inclination of your paths.
Next let’s add a couch. This couch is just a series of rectangles following the grid perspective and scheme of highlight/midtone/shadow shown earlier.
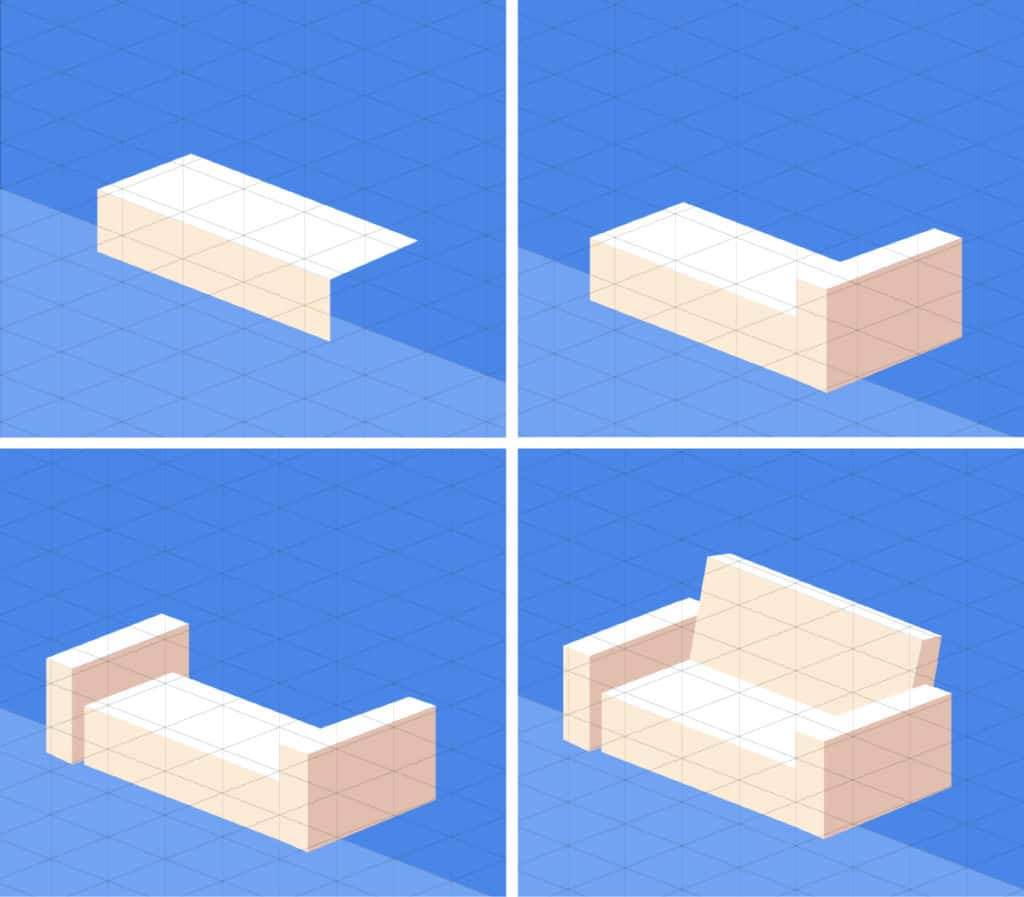
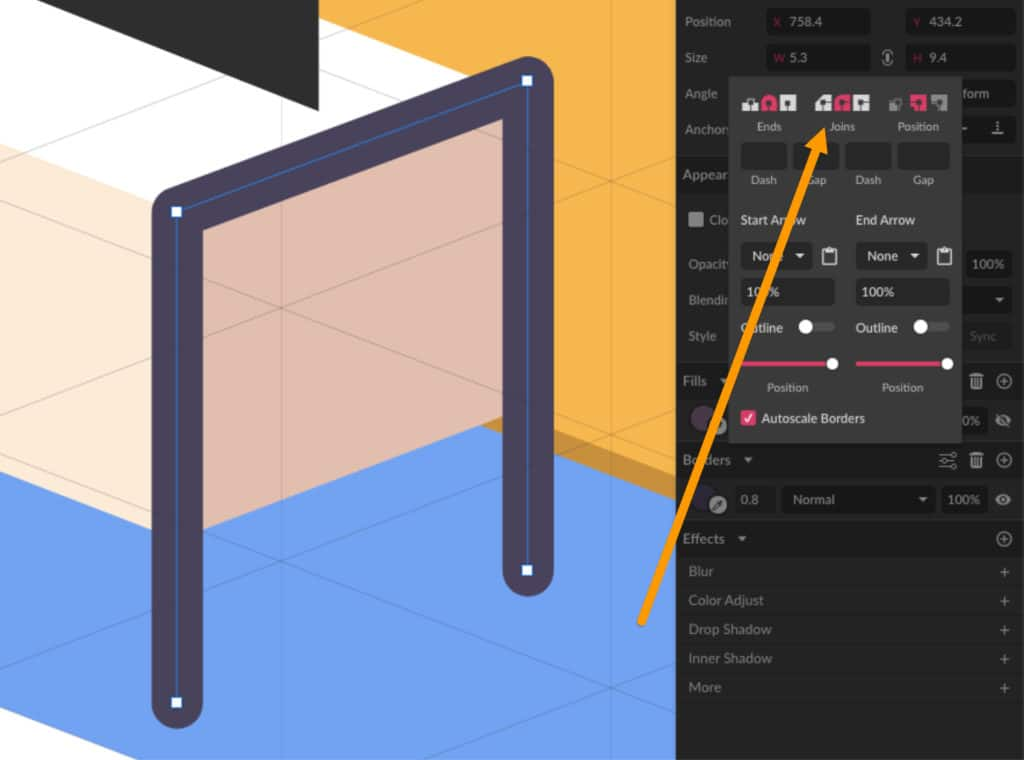
Place the couch properly as if it were with its back to the wall of the living room. You can add a little more details by adding wooden feet to the couch. Using the Pen tool, create small lines and set the ends as Rounded on the Border’s Advanced Settings. Place this small path behind the couch shape so it looks like this foot is coming from under the couch.

Because of the perspective, the left foot to the back of the couch won’t appear in the illustration.
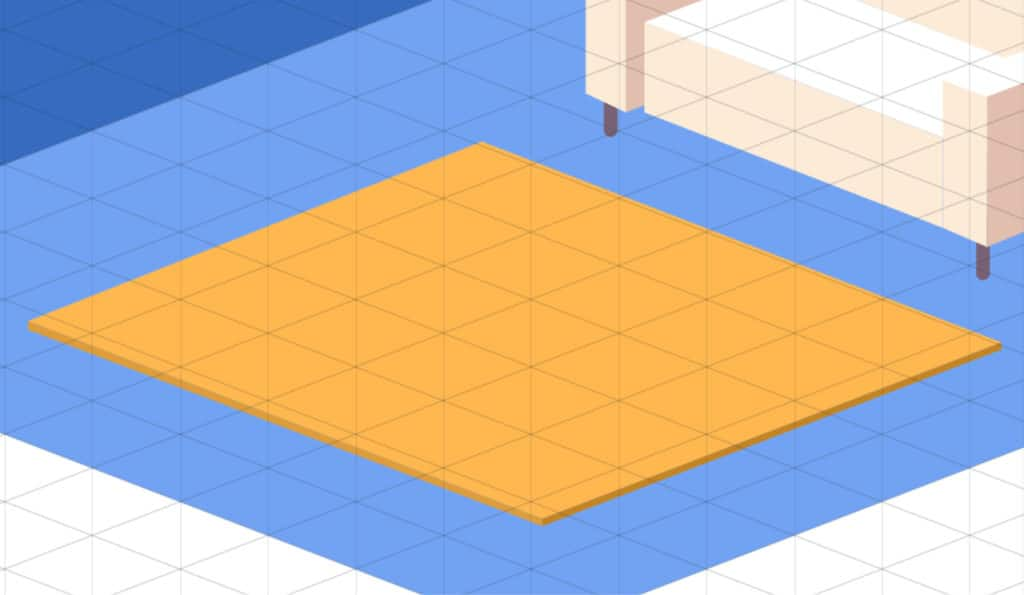
Next, let’s add a carpet and a center table. Again, using the Pen tool, create a rectangle to represent the carpet.
Since the carpet is supposed to have some depth, add two rectangles at the bottom following the same rectangle rule of three sides showing and highlight/midtone/shadow.
Similarly to the carpet, the center table is another rectangle with the depth, but the bottom rectangles used to represent depth have more height than the rectangles used for the carpet.
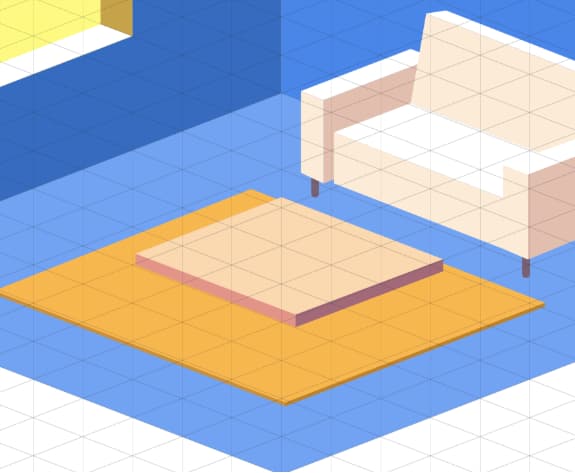
Let’s add feet to the table, positioned behind the table shape, and position it all correctly over the carpet. You can also add a detail to the table by adding another rectangle with a different color on its center.
As you can see, most of the objects can be composed by rectangles following the Isometric grid lines.
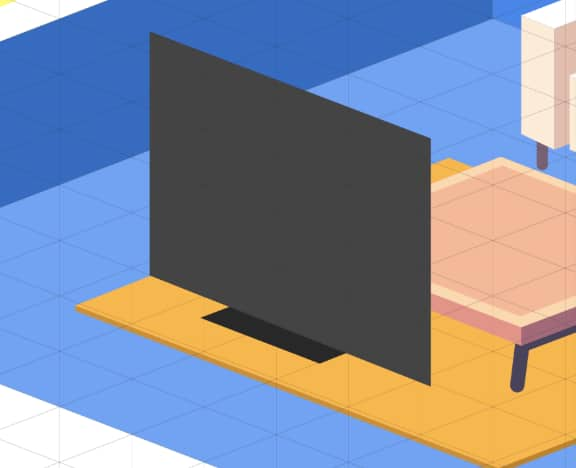
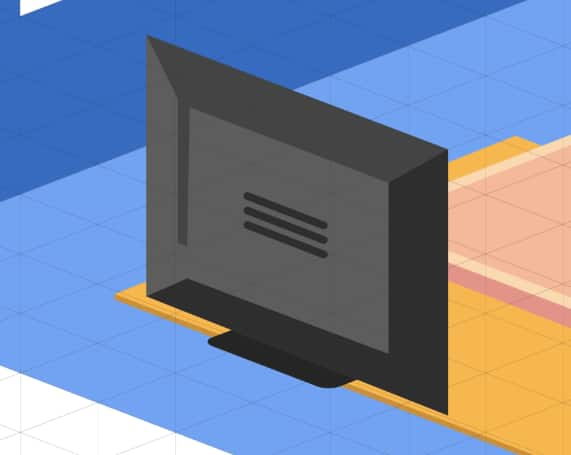
Moving on, let’s build a TV and a table for it. We will see the back of the TV, which is another rectangle with a smaller rectangle representing its support.
The support will have rounded ends, so select it with the Subselect tool (D) you can select corners individually and round the corner on the Inspector panel.
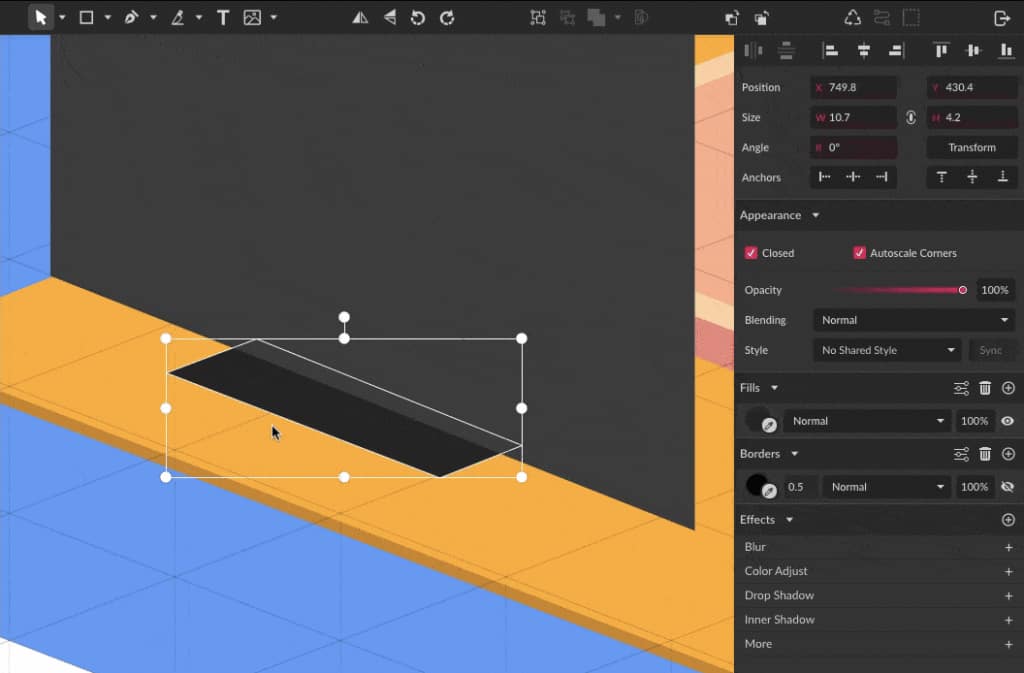
Add some details to the back of the TV to create an illusion of depth.
The TV will be standing on a table similar to the center piece you created previously, but a little more elongated. The feet of this table will be showing placed over the table shape to create an extra detail to the design.
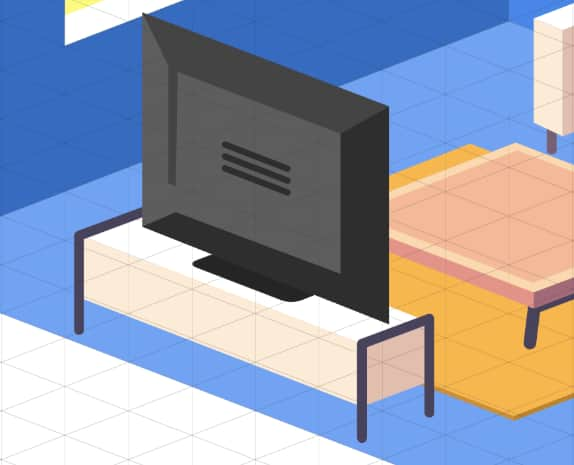
The rounded joins of the table details are set on the Border’s Advanced Settings, the same place where you set the rounded path ends previously.
Extra details
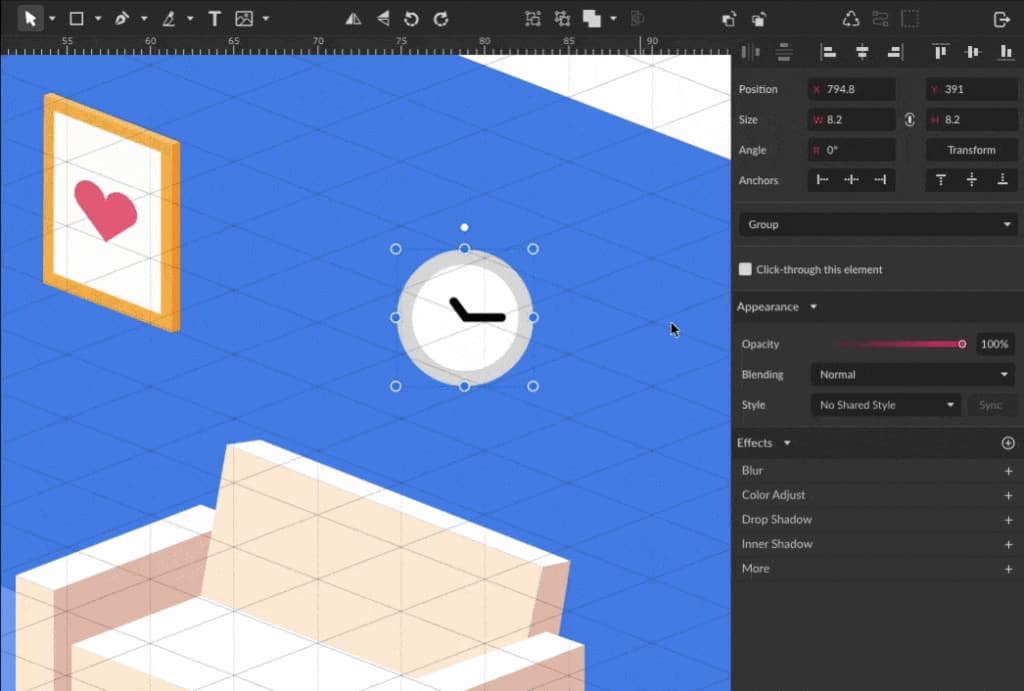
Now that you have some living room basics, let’s start adding extra details to make this illustration come alive. Start by adding wall details, like a clock and a painting.
Like the shapes created previously, the painting hanging on the wall is created by a series of rectangles.

Add something to your painting to make it more lively. Let’s add a heart shape, create with the Bezigon tool (B).
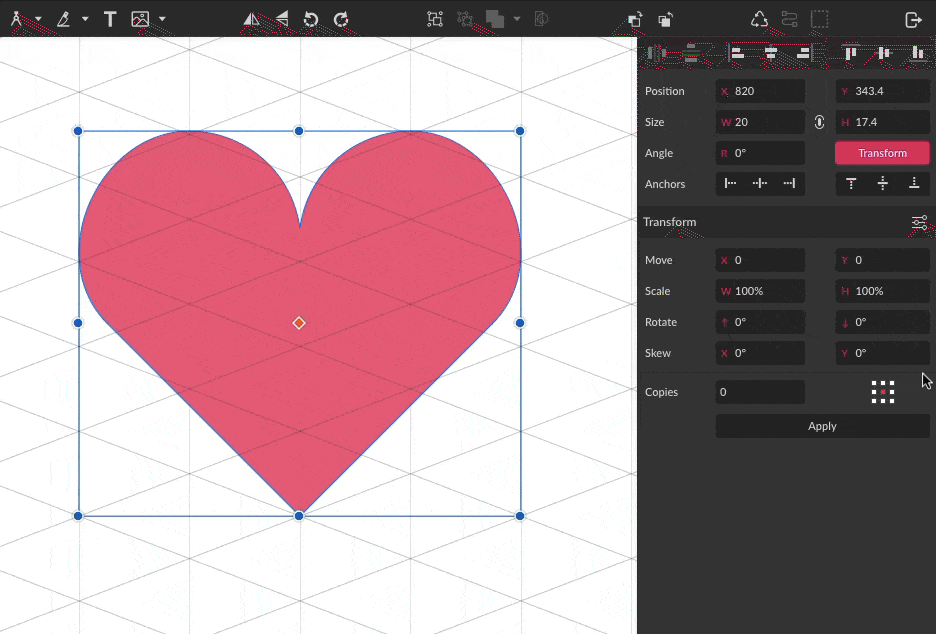
For any objects that are not composed by simple rectangles, you can use the Transform panel to obtain the correct perspective.
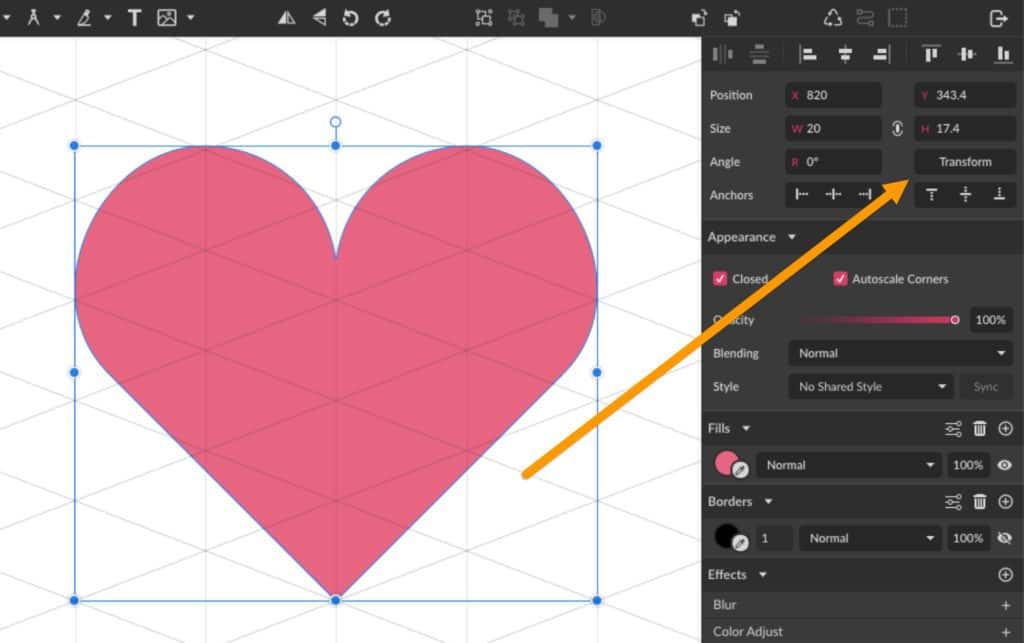
The Transform panel has many options, but for this tutorial we will focus on the Skew options. With the heart shape selected, add the same angle used on the Isometric grid (21 degrees) on Skew Y, and click Apply. This will ensure that your object is correctly distorted according to the same perspective you’re using for the rest of the elements.
The same principle can be applied to any other objects, so if you have any elements that are more difficult to draw only by orienting yourself with the Isometric grid, create the element on a usual 2D view and then apply Skew with the correct angle to make it Isometric. Let’s use this technique to add a clock on the wall.
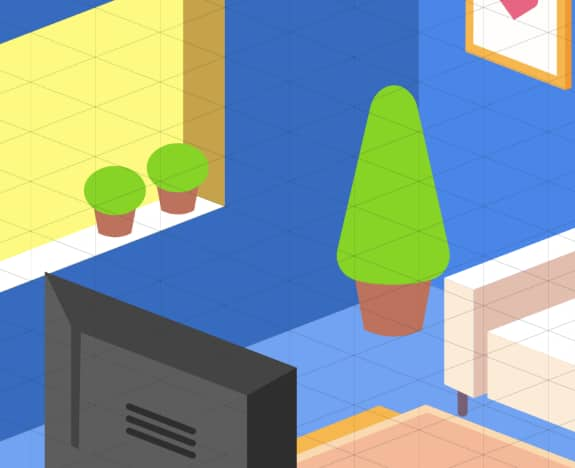
Now let’s add some plants. Since our vases and plants will be cylindrical, this means that their view doesn’t need to be distorted as it already will look correct on this isometric view.
TIP: Switch between Isometric grid and normal grid at any time on the Inspector panel depending on your needs.
Start by creating the flower vase with a simple rectangle. Convert it to a path on Right Click > Convert to Path and with the Subselect tool move the nodes to make the base narrower and pull the top nodes down if you want the vase to be shorter. Use the Subselect tool again to pull the path at the bottom creating a curve.
Do a similar process to create a pine tree-like plant. Create the rectangle and convert it to curves, move the nodes and make the corners rounded under the Appearance panel.
You can use the same vase to create other sorts of plants to make your living room look more lively.
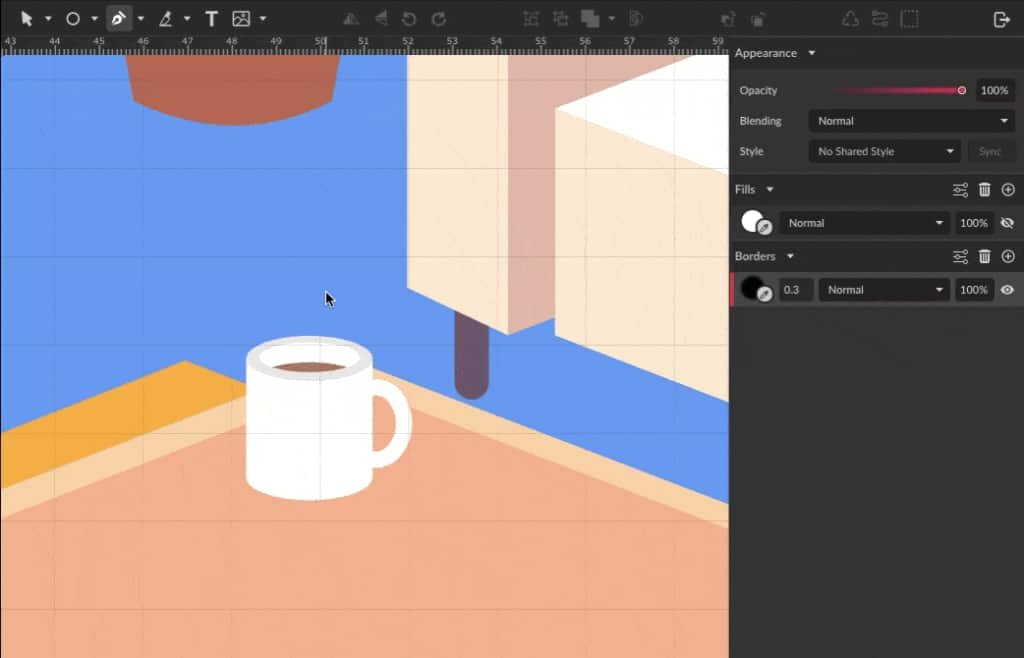
At the center table, let’s add a book and a coffee mug. The coffee, just like the plants, is cylindrical so you can create it in a normal 2D view and place it on the table.
You can create the coffee mug with simple rectangles and ellipses, and the handle can be created with the Bezigon tool.
Create some steam coming out from the coffee with the Pen tool and setting the Opacity to 25% on the Inspector panel.
The book can be created with rectangles following the Isometric grid.

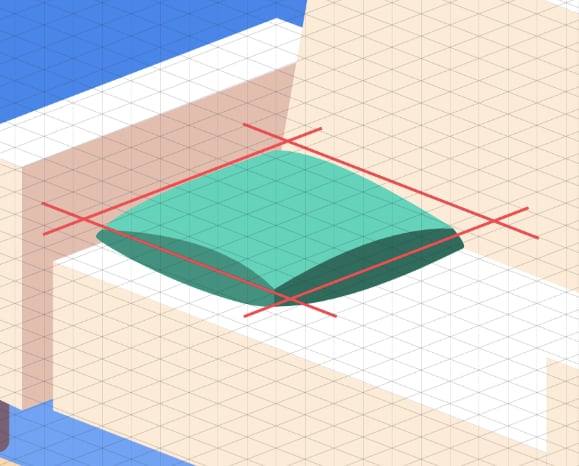
The last detail we will add to this living room is a cushion on the couch. This cushion doesn’t need to be made of rectangles and you can use the Pen tool to create something more rounded following the Grid lines.
Light and shadows
With a light source on your illustration, it’s always a good idea to add shadows to emphasize the illusion of depth of the objects. Since we create the light source coming from the direction of the window, the shadow should be on floor on the opposite side.
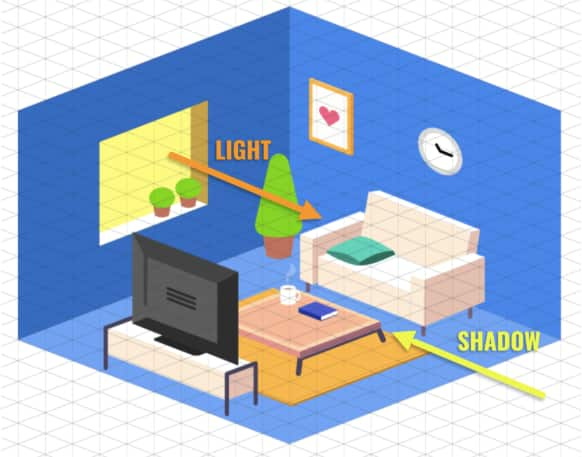
The shadow will be a faded color extending from some objects with volume like the tables, the couch, the plant vases and the objects hanging on the wall. The carpet, for example, is a flat element so it won’t cast a shadow in this case.
The shadows can be created with the Pen tool or with the Ellipse tool, for rounded objects, and placed behind the element to which it belongs. To keep all shadows consistent, use black color with 9% opacity for all shadows.

Wooden floor
A final detail we will add is a wooden floor. Create a series of rectangles following the Grid lines. Between each rectangle, a single path with a darker color to represent the separation between the wood boards.
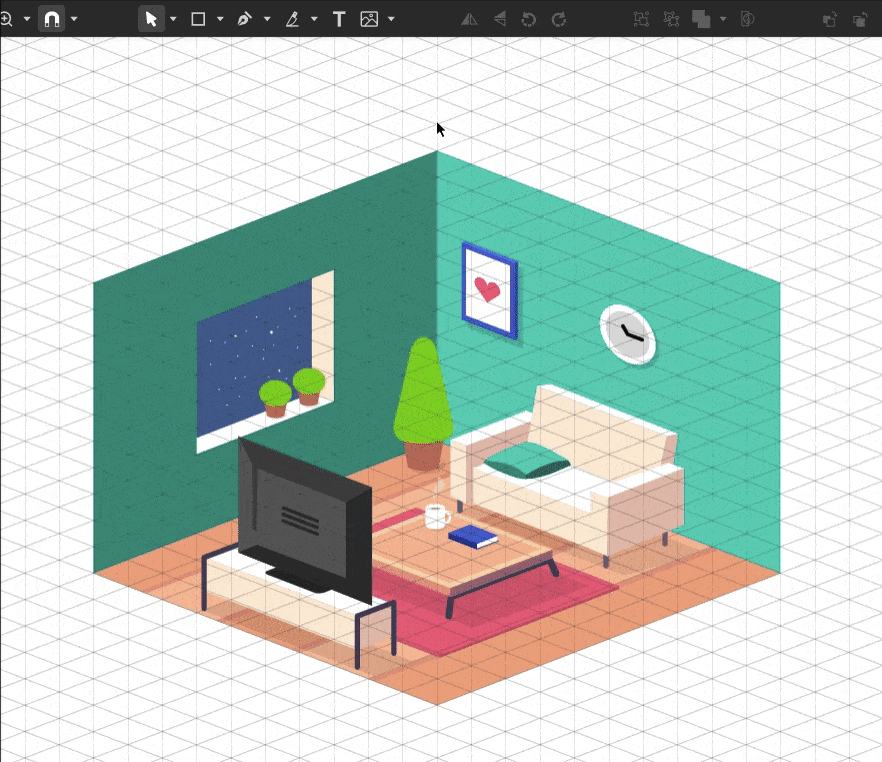
Final colors
Now that you have finished adding elements to your illustrations, it’s time to define the final colors. In this example I will change the colors of the walls and some other elements, including the window, making it a night sky with some stars.

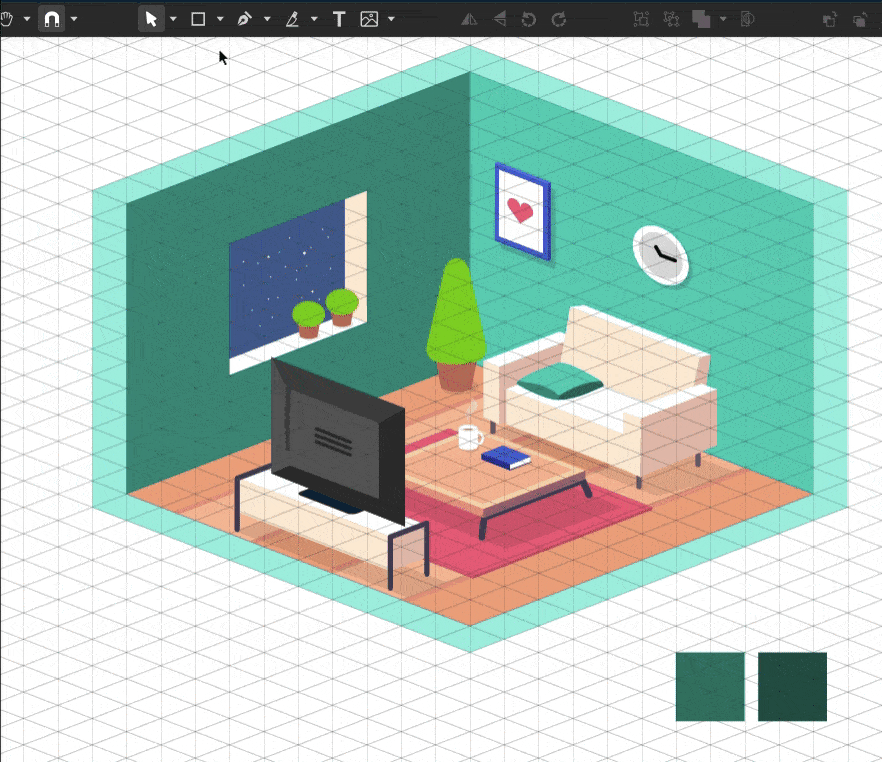
One final touch
The walls of the house itself still look a little flat, so what we’ll do is add depth to the walls, as if we were really seeing a slice cut from a house with actual 3D walls. To create this effect, create a “border” around the house.
This border represents the wall thickness. As with all the rectangles created previously, the top is the highlight, the left is the midtone and the right is the shadow, so just create two more shapes placed on top of the last one.
Your isometric living room is ready!
 Corel Vector
 Ultimate Vector Bundle Vol. 1
 CorelDRAW Graphics Suite
 Ultimate Vector Bundle Vol. 2
 CorelDRAW Standard 2021
Download your FREE 15-day trial and see how easy it is to design your creative projects with this web-based vector graphics app that empowers you to create on any device.
