
3 Unexpected Ways You Can Use the Slice Tool
In this design tool tutorial, you will learn how to use the Slice Tool. I will guide you through the step-by-step process of the creation of the slice for export, I will explain how to adjust the background, size, and position of the slice to suit your needs. Then I am going to show you three real-world applications of the slice tool:
- CSS sprite
- Book Cover
- Interface images if you are preparing a software tutorial.
What is the Slice tool
The Slice tool (S) is a selection tool that allows you to slice a part of the artwork and export it into the four file formats.
How to use the Slice tool
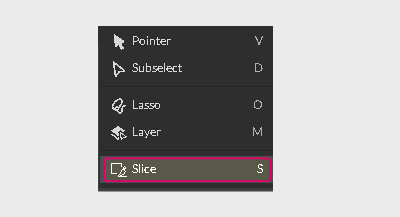
To locate the Slice tool in Corel Vector, click on the arrow icon near the Pointer tool icon to bring up the selection tool menu.
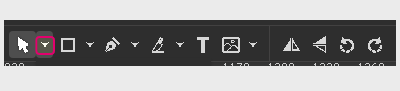
Select the Slice tool. You can also use the S key shortcut to activate the tool.
Select the Area to Export
Holding the left mouse button, draw a marquee around the object you want to export.

This area (let’s call it a slice) has a green semitransparent background.
Changing your slice
You can operate the slice in a way you operate with the Rectangle tool (R) in Corel Vector:
- Drag the bounding box to resize the slice.

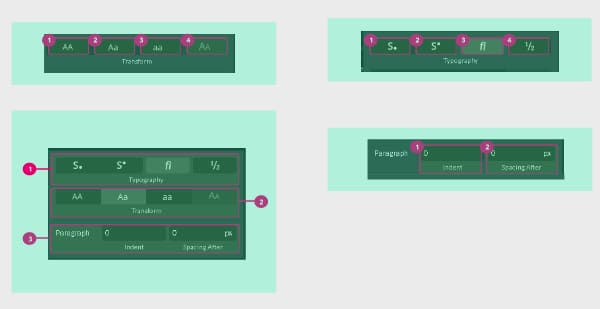
2. Use the Slice Tool Panel to modify:
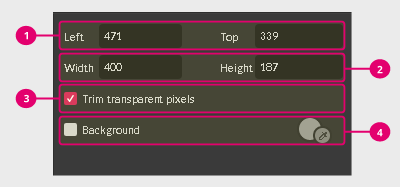
- The slice position (1)
- The slice size (2)
- The slice background (4)
- You can also select the option to trim the transparent pixels (3).
Exporting the slice
Once you are happy with the size and position, head over to the bottom left corner of the document and locate the Make Exportable section within the Layers Panel.
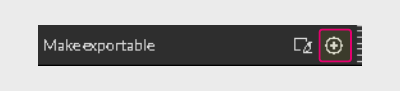
Click on the small Plus icon to bring up the Export Options Panel. Here you can specify the size, file format, and set a suffix for your own convenience.
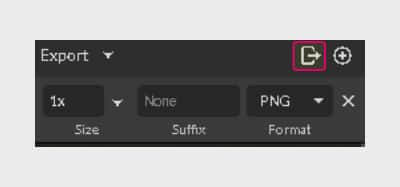
When you are done, click the Export… icon and bring up a familiar dialog box to pick up the desktop folder for your asset.
The Slice tool in the real world
In the second part of this tutorial, I want to focus on the real-world examples of the Slice tool application:
- Creating a CSS-sprite
- Streamlining a cover design
- Preparing tutorials and manuals in Corel Vector
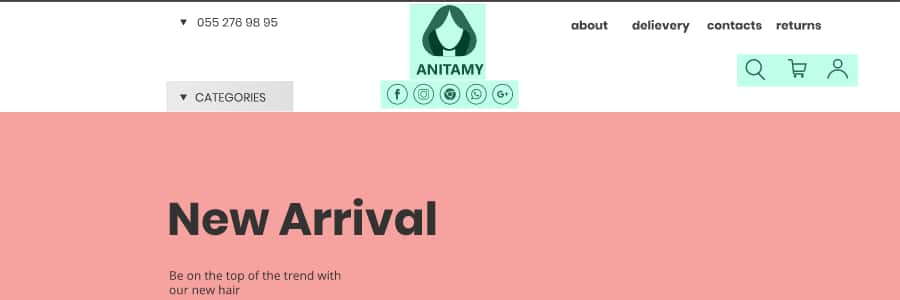
Create a CSS-sprite with the Slice tool
The CSS-sprite is a technique of using a single image to render several images on the web pages. This practice allows us to reduce the number of server requests and thus make a website load faster.

To prepare a CSS-sprite you need an image as a container for the multiple images and CSS code to show only a single image at once.
Obviously, you can do the first step in almost any design editor, but Corel Vector’s Slice tool allows you to grab them on the fly while working on your website layout.
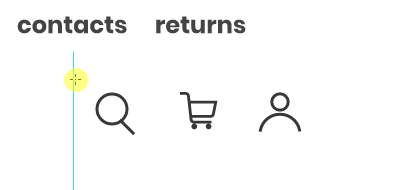
In the image below you can see my typical workflow. I am designing a website, and when I am happy with the overall look, I fetch assets via Slice tool. The greenish fields also help me to distinguish which assets I’ve already saved on my PC.
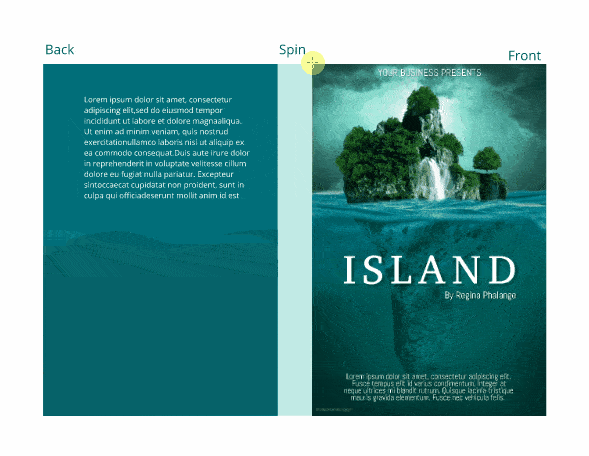
Streamline your cover design with the Slice tool
Assume you are designing a book cover. As for the Kindle book cover, it is a no-brainer. You need to create a single image.
Paperback book covers require more effort and planning. You need to do a cohesive and appealing system, that contains three designs:
- Front
- Back
- Spine
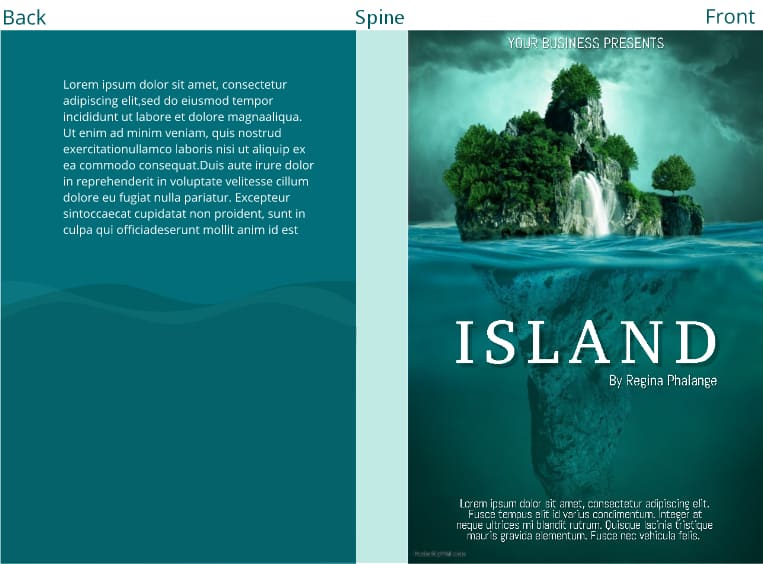
To accommodate the need, we often either split the task in three documents or three pages within a single document.
You don’t need to do that with a Slice tool. Design everything on a single page to see how it really works for the whole book. Then prepare the slice for each design and export them as separate PDF documents. Create a last slice to wrap the whole book.
The Slice tool for tutorials
Here is a special tip for those who are working on the software tutorials. You can place a snapshot in Corel Vector adding highlights, sizing and background. Then you may use the Slice tool to export them in your preferred format.
Download your FREE 15-day trial and see how easy it is to design your creative projects with this web-based vector graphics app that empowers you to create on any device.
