
DIY Painted Wood Sign
Learn how to make a hand-painted sign without using those expensive stencil paper and adhesive spray. This project tutorial shows you how to transfer letters and images onto wood using just a pencil! We also provide a set of 6 Holiday theme stencils that you can DOWNLOAD FOR FREE and print out to use.
How to Make a DIY Painted Sign
There are 5 easy steps to this project. Watch the video to see how it’s done and follow along with the detailed instructions below.
You will need the following materials for this project:
- A piece of wood
- Pencil (2B pencil is preferable because it has a higher blackness)
- Acrylic Paints
- Eraser
- Paint brushes
- Masking Tape (or Magic tape)
- Have your canvas at the appropriate size for your wood.
- Create and edit your design on it. Then print it on a regular paper. (you can print it out in black and white, even if your design is colored )
- If you need, here is a set of 6 Holiday theme stencils FREE FOR DOWNLOAD.
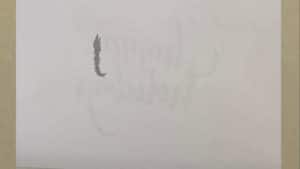
- Use a pencil to scribble firmly over the back of the image. The more scribbles the better.
- You can hold the paper up to the light to make sure the whole design is completely covered.
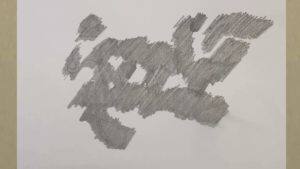
- Place the paper pencil-scribble side down on your wood sign and secure it in place using the tape.
- Use a ball point pen to trace the outline of the letters and the graphics. Press down a bit harder (and trace back and forth) so that the pencil lead gets transferred onto the wood.
- Remove the paper, you should see that all your pencil marks are there
- Now we can start painting it in with acrylic paints.
- You can use a small paint brush (or Script/Liner brush) to stencil the outline first and then fill in the rest.
- A few more coats of paint can cover the pencil marks and make the
color even and full.
- If you can still see the pencil marks after the paint is dry, use an eraser to remove them. And that’s it!

How to Edit Images
Before you start transferring the text or image onto wood, make sure it is looking it’s best! These tutorials will show you how to crop your photo to the correct size, how to reverse it, and how to add some effects.
Reversing or Mirroring your Image
If you don’t want your photo transfer to end up backwards, make sure you reverse it first! Learn how to do this in PaintShop Pro.
Cropping and Resizing your Photo
This tutorial will show you how you can crop your photo to remove any unwanted parts and make it the right size to fit your piece of wood.

Removing Objects from Photos
Whether you need to touch up some blemishes, remove an unwanted object or erase a scratch in an older photo, PaintShop Pro has the tools you need – see them in action!
