
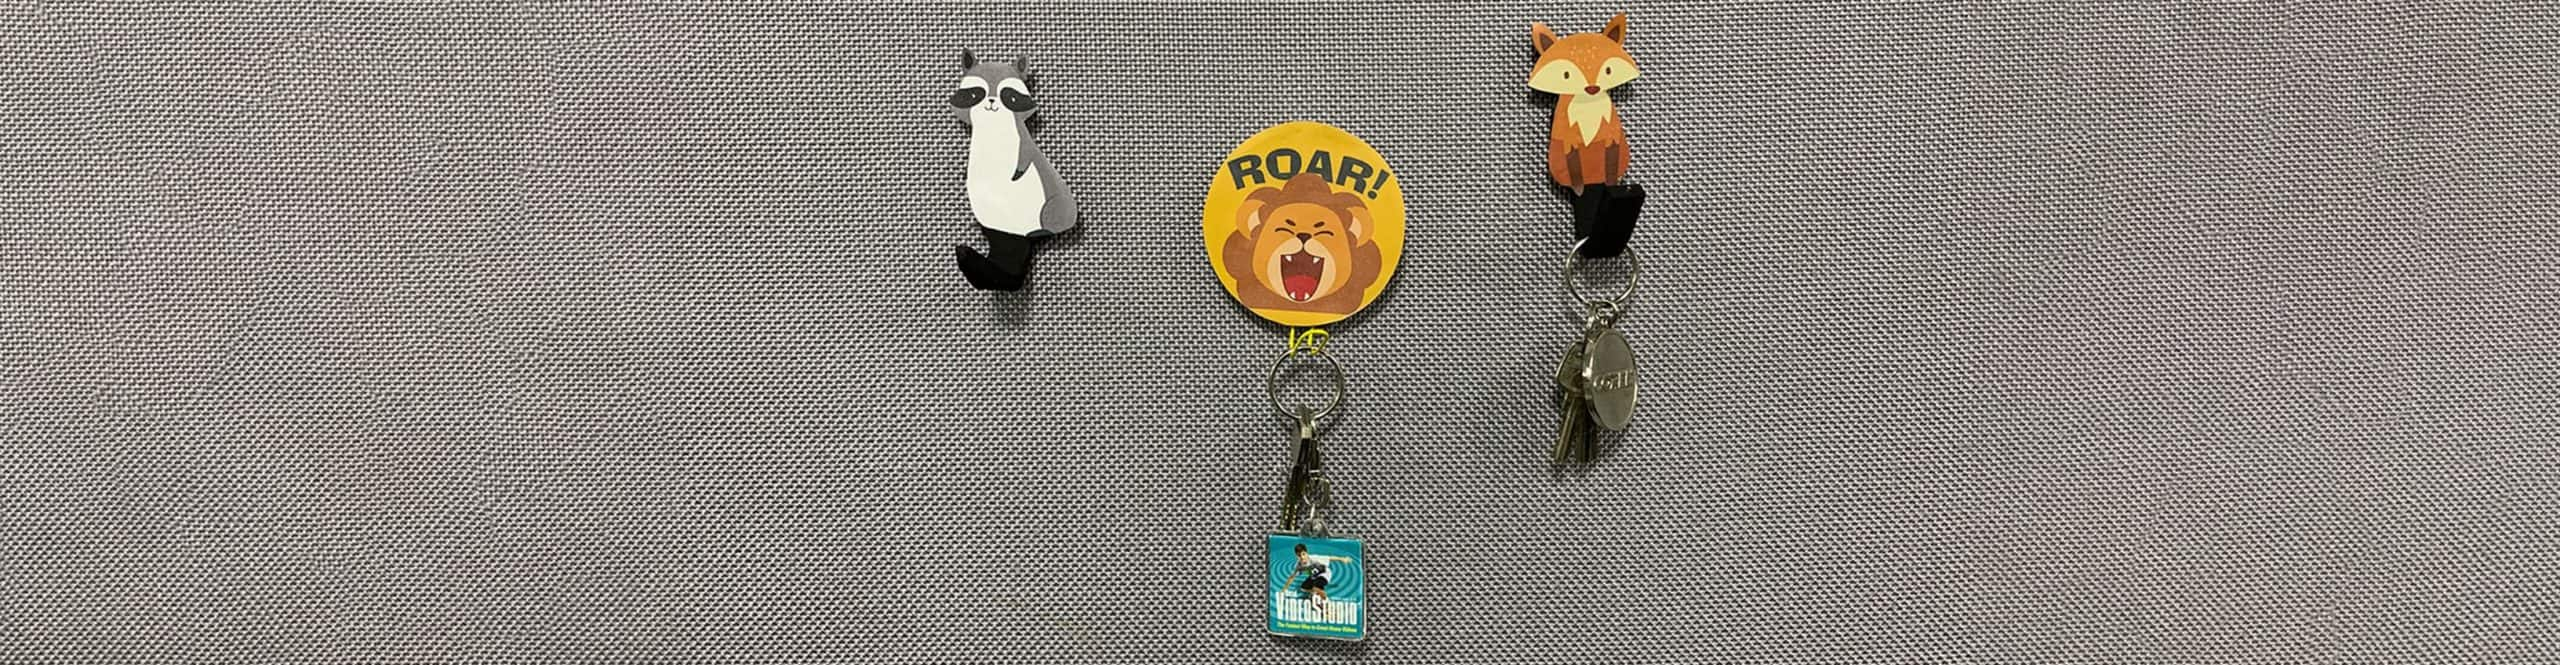
DIY Creative Magnetic Hooks
In this tutorial we’ll show you how to create a creative magnetic hook in a few simple steps. These personalized magnetic hooks can be used on fridge, car, and more. It’s also a cool decoration for your home or office. Free templates for this project can be downloaded here.
How to Make a Creative Magnetic Hook in 5 Easy Steps
There are 5 basic steps to this project. Watch the video to see how it’s done and follow along with the detailed instructions below.
You will need the following materials for this project:
- EVA foam sheet (1/4in or 6mm thick)
- Scissors
- Pliers
- Jumbo paper clips or aluminum wire
- Ruler
- Utility knife or x-acto
- Magnets (Neodymium magnets recommended)
- Clear adhesive vinyl sheets or packing tape
- Double-sided tape
- Hot glue gun
- Crayon or marker
- Cutting mat
- Printed design
- Download a free trial of Corel PaintShop Pro here
- Download the free templates provided in this project or create your own design
- Print your design out on a regular paper
- Carefully apply the vinyl sheet over the image. Ensure the vinyl covers the entire image to protect it. For a smaller image, you can also use packing tape to secure the image.
- Now using a ruler or credit card to smooth the vinyl sheet on the image. Smooth out any bubbles.
- Cut the image out with scissors.
- Place the cut-out image on the EVA foam sheet
- Use a marker or crayon to trace the outline of the design onto the piece of EVA foam
- Carefully cut out the piece along the lines you traced using a utility knife or X-acto
- Hold the foam down with your other hand and try to cut all the way through slowly
- Make sure your blade is sharp otherwise it will leave jagged edges
- Straighten a paper clip (or aluminum wire) with your hands or pliers
- Then bend it to a U shape so the 2 ends are about the same length
- Now stick and insert the paper clip into the foam from the bottom edge
- Work on one end at a time and have both ends inserted into the foam
- Leaving > 1.5 inch (4.5 cm) of the paper clip outside of the foam to be a hook
- Cut out a hole in the foam so a magnet can fit into it
- Use the hot glue gun to apply a small amount of glue to the hole then press the magnet into the hole.
- Turn over the foam and apply some double-sided tape onto it
- Now stick the image onto the foam
- Bend the paper clip into a hook shape and…Done!
Related Tutorials
For more details on how to resize images, create pop art style images, and using text tool in photo editing software, we have selected the following tutorials for you.

Resize Images Quickly and Easily
This brief tutorial shows you the new Image Resize window in PaintShop Pro, which makes re-sizing and reformatting images faster and easier than ever.

Turn a Photo into Pop Art
Learn how to transform a photo into a funky, pop art style image. PaintShop Professional Carole Asselin walks you through the steps of this simple process.

Using the Text Toolbar for Quick Styles
Quickly apply the text styles you want with a simplified text toolbar in PaintShop Pro. Choose colors quicker and customize your text toolbar to show the items you use frequently and hide the ones you don’t.
