Hey there Corel Community!
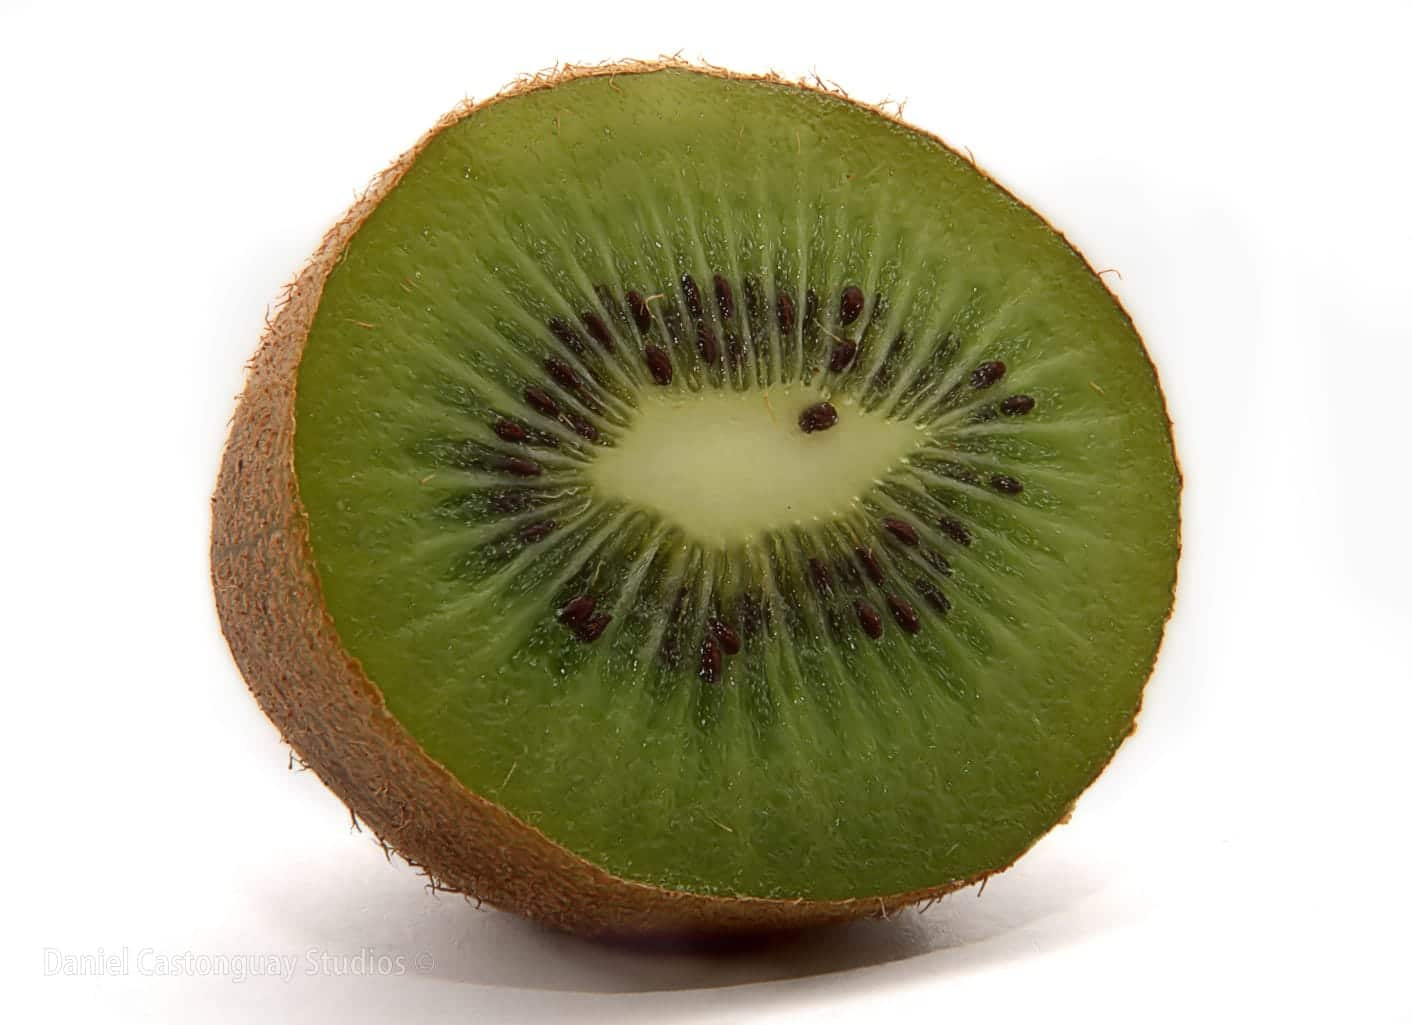
Welcome to our first-ever “Behind-the-Scenes” interview. This week, we caught up with regular contributor and professional photographer Daniel Castonguay, of Daniel Castonguay Studios in Montréal, Canada, to learn a little more about his photo, “The Kiwi”.
****
POV: Hi Daniel, it’s great to finally have a chance to talk with you and thanks for being such an active contributor to Fan Fridays! We were intrigued by your photo “The Kiwi” – it’s really a great shot. I’m sure some of our readers are wondering… why a kiwi fruit?
DC: Thanks a lot, I’m very excited to be here on Points of View. The for this shoot idea came from a challenge in a photography group I belong to, where each photographer had to isolate a small product on a white background, keeping some shadows with the use of a custom made light box. We could use any small object, like fruits, jewels, toy cars and such.
POV: Wow, very cool… For those who might not know, what does a light box do or help you achieve?
DC: When photographing small objects, I often use a light box. This allows me to control the subject’s background and lighting. In fact, a light box could also be called a “mini studio” since reflectors, diffusors and backdrops all come into play.
There are many different types of light boxes. It could be an open or close one, source of lighting could be constant or flashes can be involved, backdrop can be white, colored or even patterned. All depends on what you want to achieve.
POV: Tell me a bit about your setup for this shot, what kind light box did you use?
DC: For this particular assignment, I was asked to keep a white background, but visible shadows of the object in order to create a depth effect.
This open light box is made out of a foam container, the cover is used as the bottom reflector, 2 side mirrors to keep control of the shadow and the flash bounce on the subject. A curved soft cardboard is used as the backdrop. The flash built in wide panel is used as a diffusor providing wider angle of coverage. You can get a good view of the setup in the behind-the-scenes photo I’ve included.
POV: What kind of technical considerations should be taken into account when using a light box?
DC: In order to get the maximum sharpness, the use of a tripod and remote shutter release is the key to a stabilized camera. You’ll also want to keep the camera’s ISO at the lowest possible value, i.e., ISO 100.
Camera settings may vary depending on the desired effects. The best method is to try many combinations, so end up with the optimal result. For example, if you want to create some sparkling effects, or diffraction (a desirable effect when shooting jewelry or cut fruits), the aperture must be very small, usually f/22 and smaller.
POV: How did you prepare and, once done, what did your workflow look like after the shoot?
DC: Well, the main point of this assignment was to build the light box, so the Internet was a helpful starting point. In terms of prepping from a photography point of view, I had to take several test shots to check light diffusion and adjust various camera settings. Post processing of this shot was minimal and quite easy as details are limited and it was a simple subject to work with for this type of photography.
POV: Speaking of post-processing, you worked on your shot in Paintshop Pro X7.3. What did you do to the photo and what is it that you like about PaintShop Pro?
DC: For this photo, I enhanced it using Athentech’s “Perfectly Clear” plug-in and then also used a high-pass filter. I had to brush out the upper corners of the photo since the custom backdrop was not the best choice and showing a bit of variations in the whites. That was mad out of cardboard but I think that fabric would have worked much better.
I’ve been using PaintShop Pro since version X3. I really like the ease of use and how intuitive the software is. I also really like that X7 works with the Topaz Labs plugins.
POV: We love seeing your beautiful photography and digital art compositions as part of the Fan Friday gallery. Can you tell me what you’re planning to shoot next?
DC: A as Montréaler, I really love the multiculturalism of this city. Over the last year, I’ve been very into street photography. I’d like to take a trip to Chinatown – that would be an interesting location for me.
Want to try it out? Here’s Daniel’s gear and settings for “The Kiwi”:
Camera: Pentax K-50
Lens: SMC Pentax-DA 1:3.5-5.6 18-135mm ED AL (IF) DC WR
External flash: Sigma EF-530 DG Super (in TTL Mode)
Aperture: f/29
Speed: 1/125
ISO: 100
Focal length: 120mm




0 Comments