Think of your favorite portrait…
It’s OK — take a second and open up a new browser tab and pull that portrait up on Google (if you’re stuck or can’t think of one, take a look at Horst Faas’ “War is Hell” or Steve McCurry’s iconic “Afghan Girl” from the cover of National Geographic).
Now, take a good hard look… Where are your eyes drawn? What has the photographer focused on in this image?
In most cases, you’ll see that the photographer has focused on the subject’s eyes. And while there are all kinds of factors to consider when it comes to a capturing incredible portraits, it’s the eyes that often make the difference between a good portrait and a really great one.
In today’s tutorial, we’re going to take a look at some different ways to retouch a subject’s eyes so that they’re sharp, bright, colorful, and most importantly, that they draw in the viewers own eyes. So let’s get into it!
Focus on the Eyes
Most of what we’re going to talk about here will be done in AfterShot Pro. As is most often true in photography, though, there are a few things you can do when taking a portrait to give you an ideal starting point before you bring it into AfterShot Pro.
The first thing to know when capturing a portrait (and I’m already repeating myself, so it must be important) are the subject’s eyes.
TIP: If you accidentally focus on the nose or the ears, it’s almost a guarantee that the photo won’t work, and the viewer will be distracted.
If your subject is not facing the camera head-on, and one eye is front of the other, you should focus on the eye nearest to the camera. Of course, there are no real rules in photography, so as always these are the guidelines I try to follow.
So, the first step to making sure your portrait will have stunning eyes is to make sure at least one of them is in sharp focus. If you’re shooting with a shallow depth of field and you accidentally focus on the nose or the ears, it’s almost a guarantee that the photo won’t work, and the viewer will be distracted. So this step is key, focus on the eyes!
Catchlights Are Key
The next thing you should do is to pay attention to the catchlight in their eyes.
A catchlight is the small reflection(s) of light in an eye that create specular highlights.
If you’re shooting with speedlights or studio lights, the location of your lights will most likely add catchlights to the eyes. If you’re using natural light however, there are a few tricks you can do to make sure the lighting is pleasing.
The easiest way to achieve this effect by use of a reflector to bounce some light into the face and eyes, adding a catchlight in the process. A second option is to use the sun, or another lightsource to create your catchlights. This might take some practice repositioning your subjects body and face until you get the eyes to shine just how you want them.
If you can get the eyes in focus and capture some nice catchlights, the rest of the editing work should be easy.
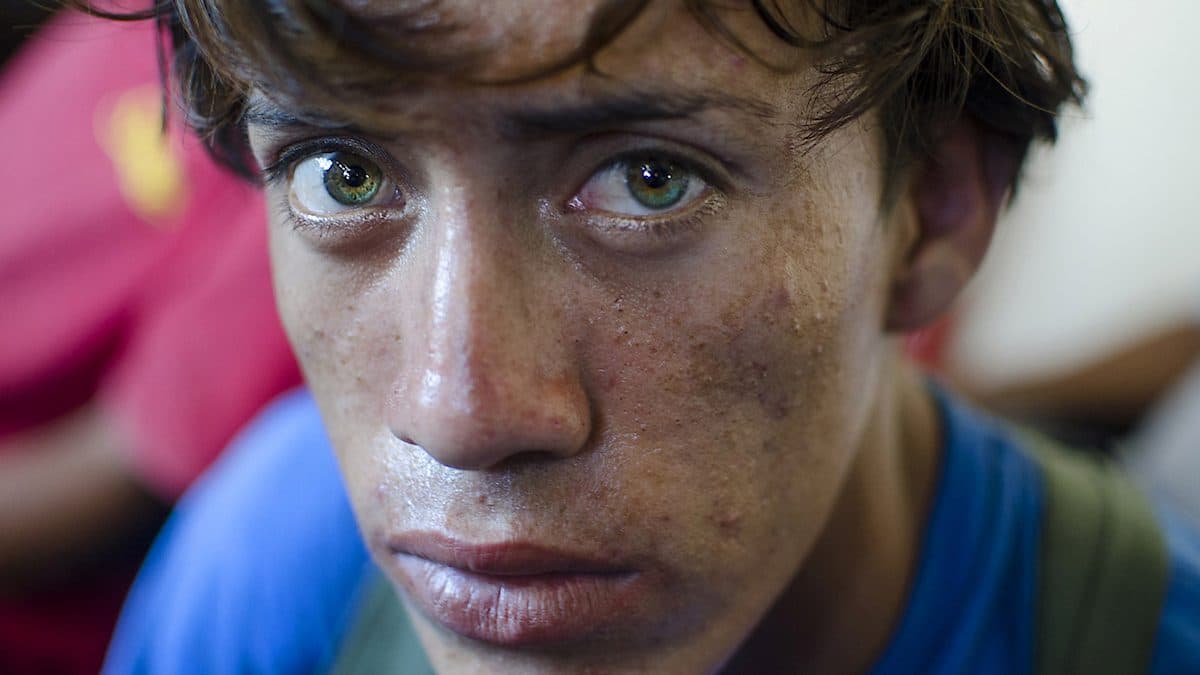
Here’s a portrait I took of a shoeshine boy while I was in Nicaragua. I think his eyes are great to begin with and, as you can see, there’s a nice specular highlight in each one coming from a window that makes for an excellent large light source.
Saturation and Brightness
The first thing I’m going to do is add a bit of color to the eyes. To do this, I add an adjustment layer and bump up the saturation in the eyes until they look good.
Be careful not to go too far, you don’t want them to look over-saturated and fake.
Then I click Command + I (or Ctrl + I on Windows/Linux) to invert the layer and, with my Brush Tool, paint over the areas of the eyes that I want to add the saturation to. If it looks too saturated, simply move the Opacity slider down until you get something you’re happy with.
The next step is to add a bit of brightness to the eyes. To do this, add another adjustment layer for fill light and exposure. Try and brighten only the area opposite of the catchlight, and be careful not to brighten the whites of the eyes too much, or at all, as that can look overly unnatural.
Once you get the saturation and brightness to your liking, the last step is to add some sharpening, but only if needed.
Before you start sharpening, be sure to create a new adjustment layer so you’re only applying the mask to the areas that need sharpening.
TIP: It’s important to sharpen sparingly and only around the eyelashes, eyebrows, and irises of the eye. Try to avoid the white area of the eye.
After this step, you should have some great looking eyes that will really make your portrait pop.
Below is a final version of the original above. You can see the difference in the eyes is just enough to make them interesting, but not overly saturated or sharpened so they are distracting.
Follow these tips when editing your next portrait in AfterShot Pro and you’ll be well on your way to portrait perfection and retouching eyes like a pro.
If you haven’t checked out AfterShot Pro yet, download the free 30-day trial. Take it for a spin, edit your own photos and share your portraits with us in the comments below!
Try AfterShot Pro Today!
Grab your photos and give this tutorial a try. Download a free 30-day trial now.


1 Comments