
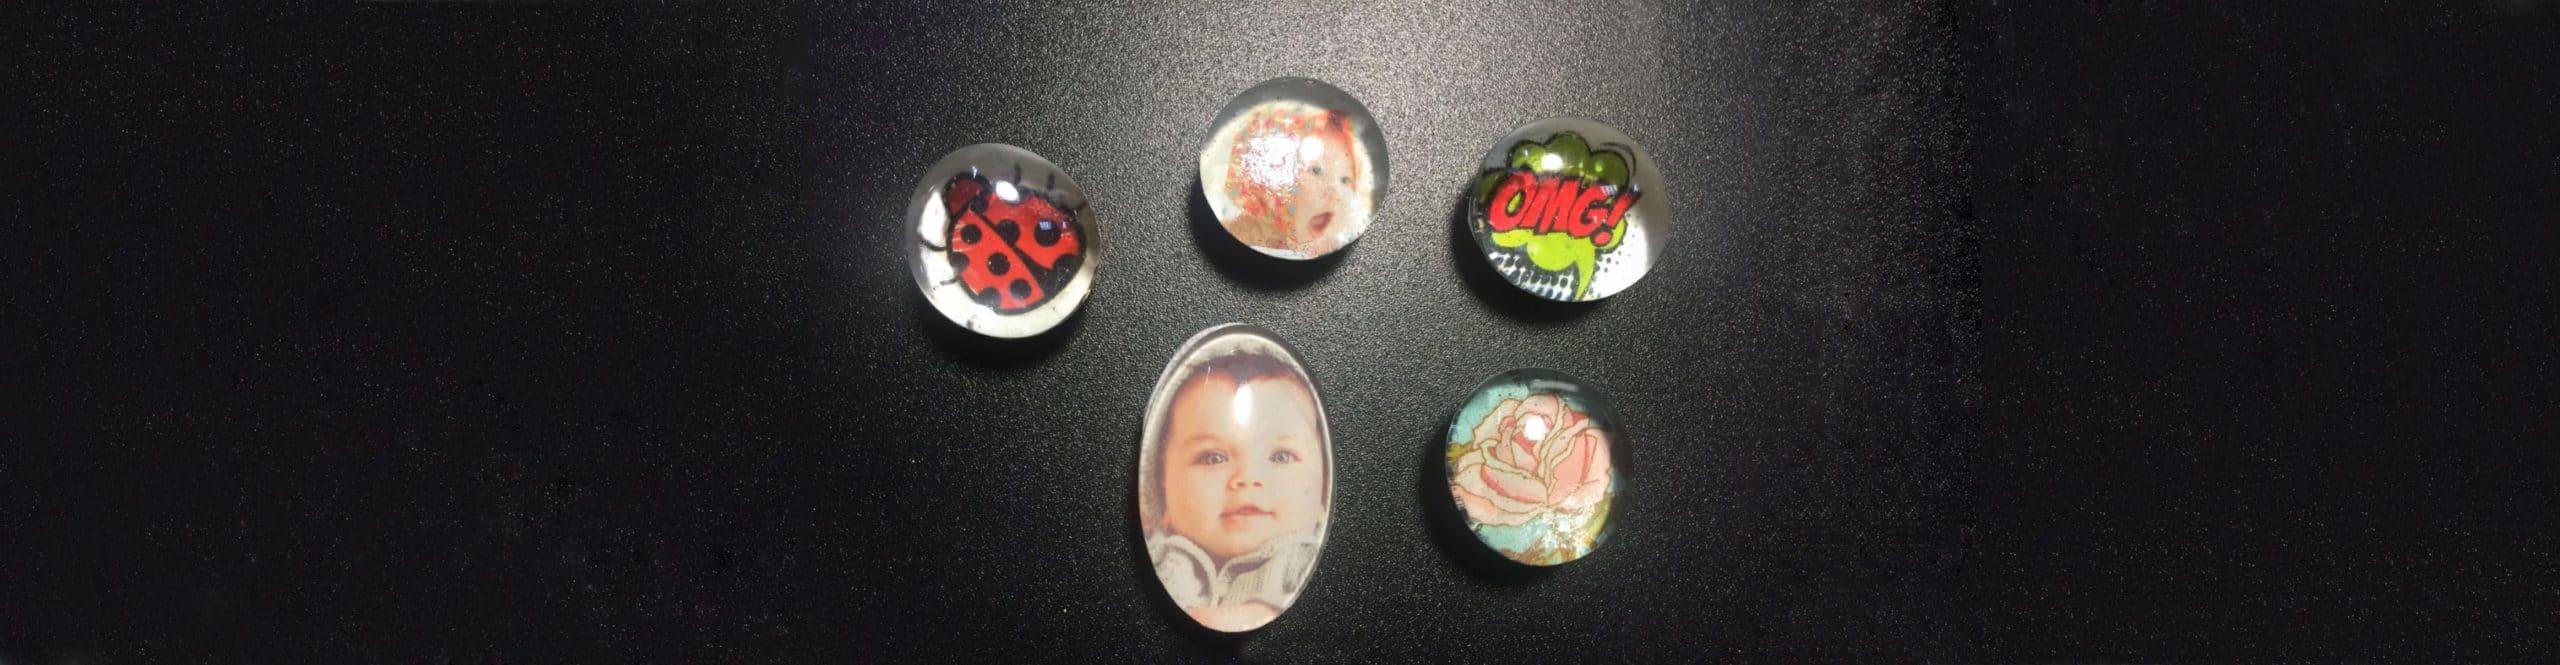
How To Make Photo Magnets
In this tutorial we’ll show you how to create custom photo magnets in a few simple steps. These personalized magnets can be used on fridge, car, and more. And it’s also a perfect gift for your special ones.
How to Make a Photo Magnet in 4 Easy Steps
There are 4 basic steps to this project. Watch the video to see how it’s done and follow along with the detailed instructions below.
You will need the following materials for this project:
- Photos printed on paper
- Glass Gems
- Magnets
- Scissors
- Pen
- Hot glue gun, E6000 craft adhesive or any clear glue
- Download a free trial of Corel PaintShop Pro here
- Find a photo or image you like and open it with PaintShop Pro
- Resize the image to fit the size of the glass gems
- Print the images on a photo paper or scrapbook paper for better quality
- Place the glass gems on your photo
- Use a pen to trace around the glass gem
- Cutout the shape you just traced with scissors (make sure to cut inside the line)
- Apply E6000 glue(or any clear glue for glass) on the flat side of the gem
- Smooth the glue with your fingers or a toothpick to get a thin even layer
- Carefully place the photo onto the gem
- Press firmly on the photo to remove any bubbles
- Wait for 10-15 minutes to let it dry
- Use the hot glue gun to apply a small amount of glue to the back of the gem (on the back of the photo which you glued to the gem)
- Adhere a magnet to it
- Let the glue dry completely and it’s done!
Related Tutorials
For more details on how to resize images, create pop art style images, and using text tool in photo editing software, we have selected the following tutorials for you.

Resize Images Quickly and Easily
This brief tutorial shows you the new Image Resize window in PaintShop Pro, which makes re-sizing and reformatting images faster and easier than ever.

Turn a Photo into Pop Art
Learn how to transform a photo into a funky, pop art style image. PaintShop Professional Carole Asselin walks you through the steps of this simple process.

Using the Text Toolbar for Quick Styles
Quickly apply the text styles you want with a simplified text toolbar in PaintShop Pro. Choose colors quicker and customize your text toolbar to show the items you use frequently and hide the ones you don’t.

Comments (2)
Reader Interactions
Comments
Looks great but how do you get the materials needed.
Hi Gary, you should be able to find the materials at a craft store (for example Michaels if you’re in North America) or a dollar store. Or on Amazon.
Best regards,
The Discovery Center team