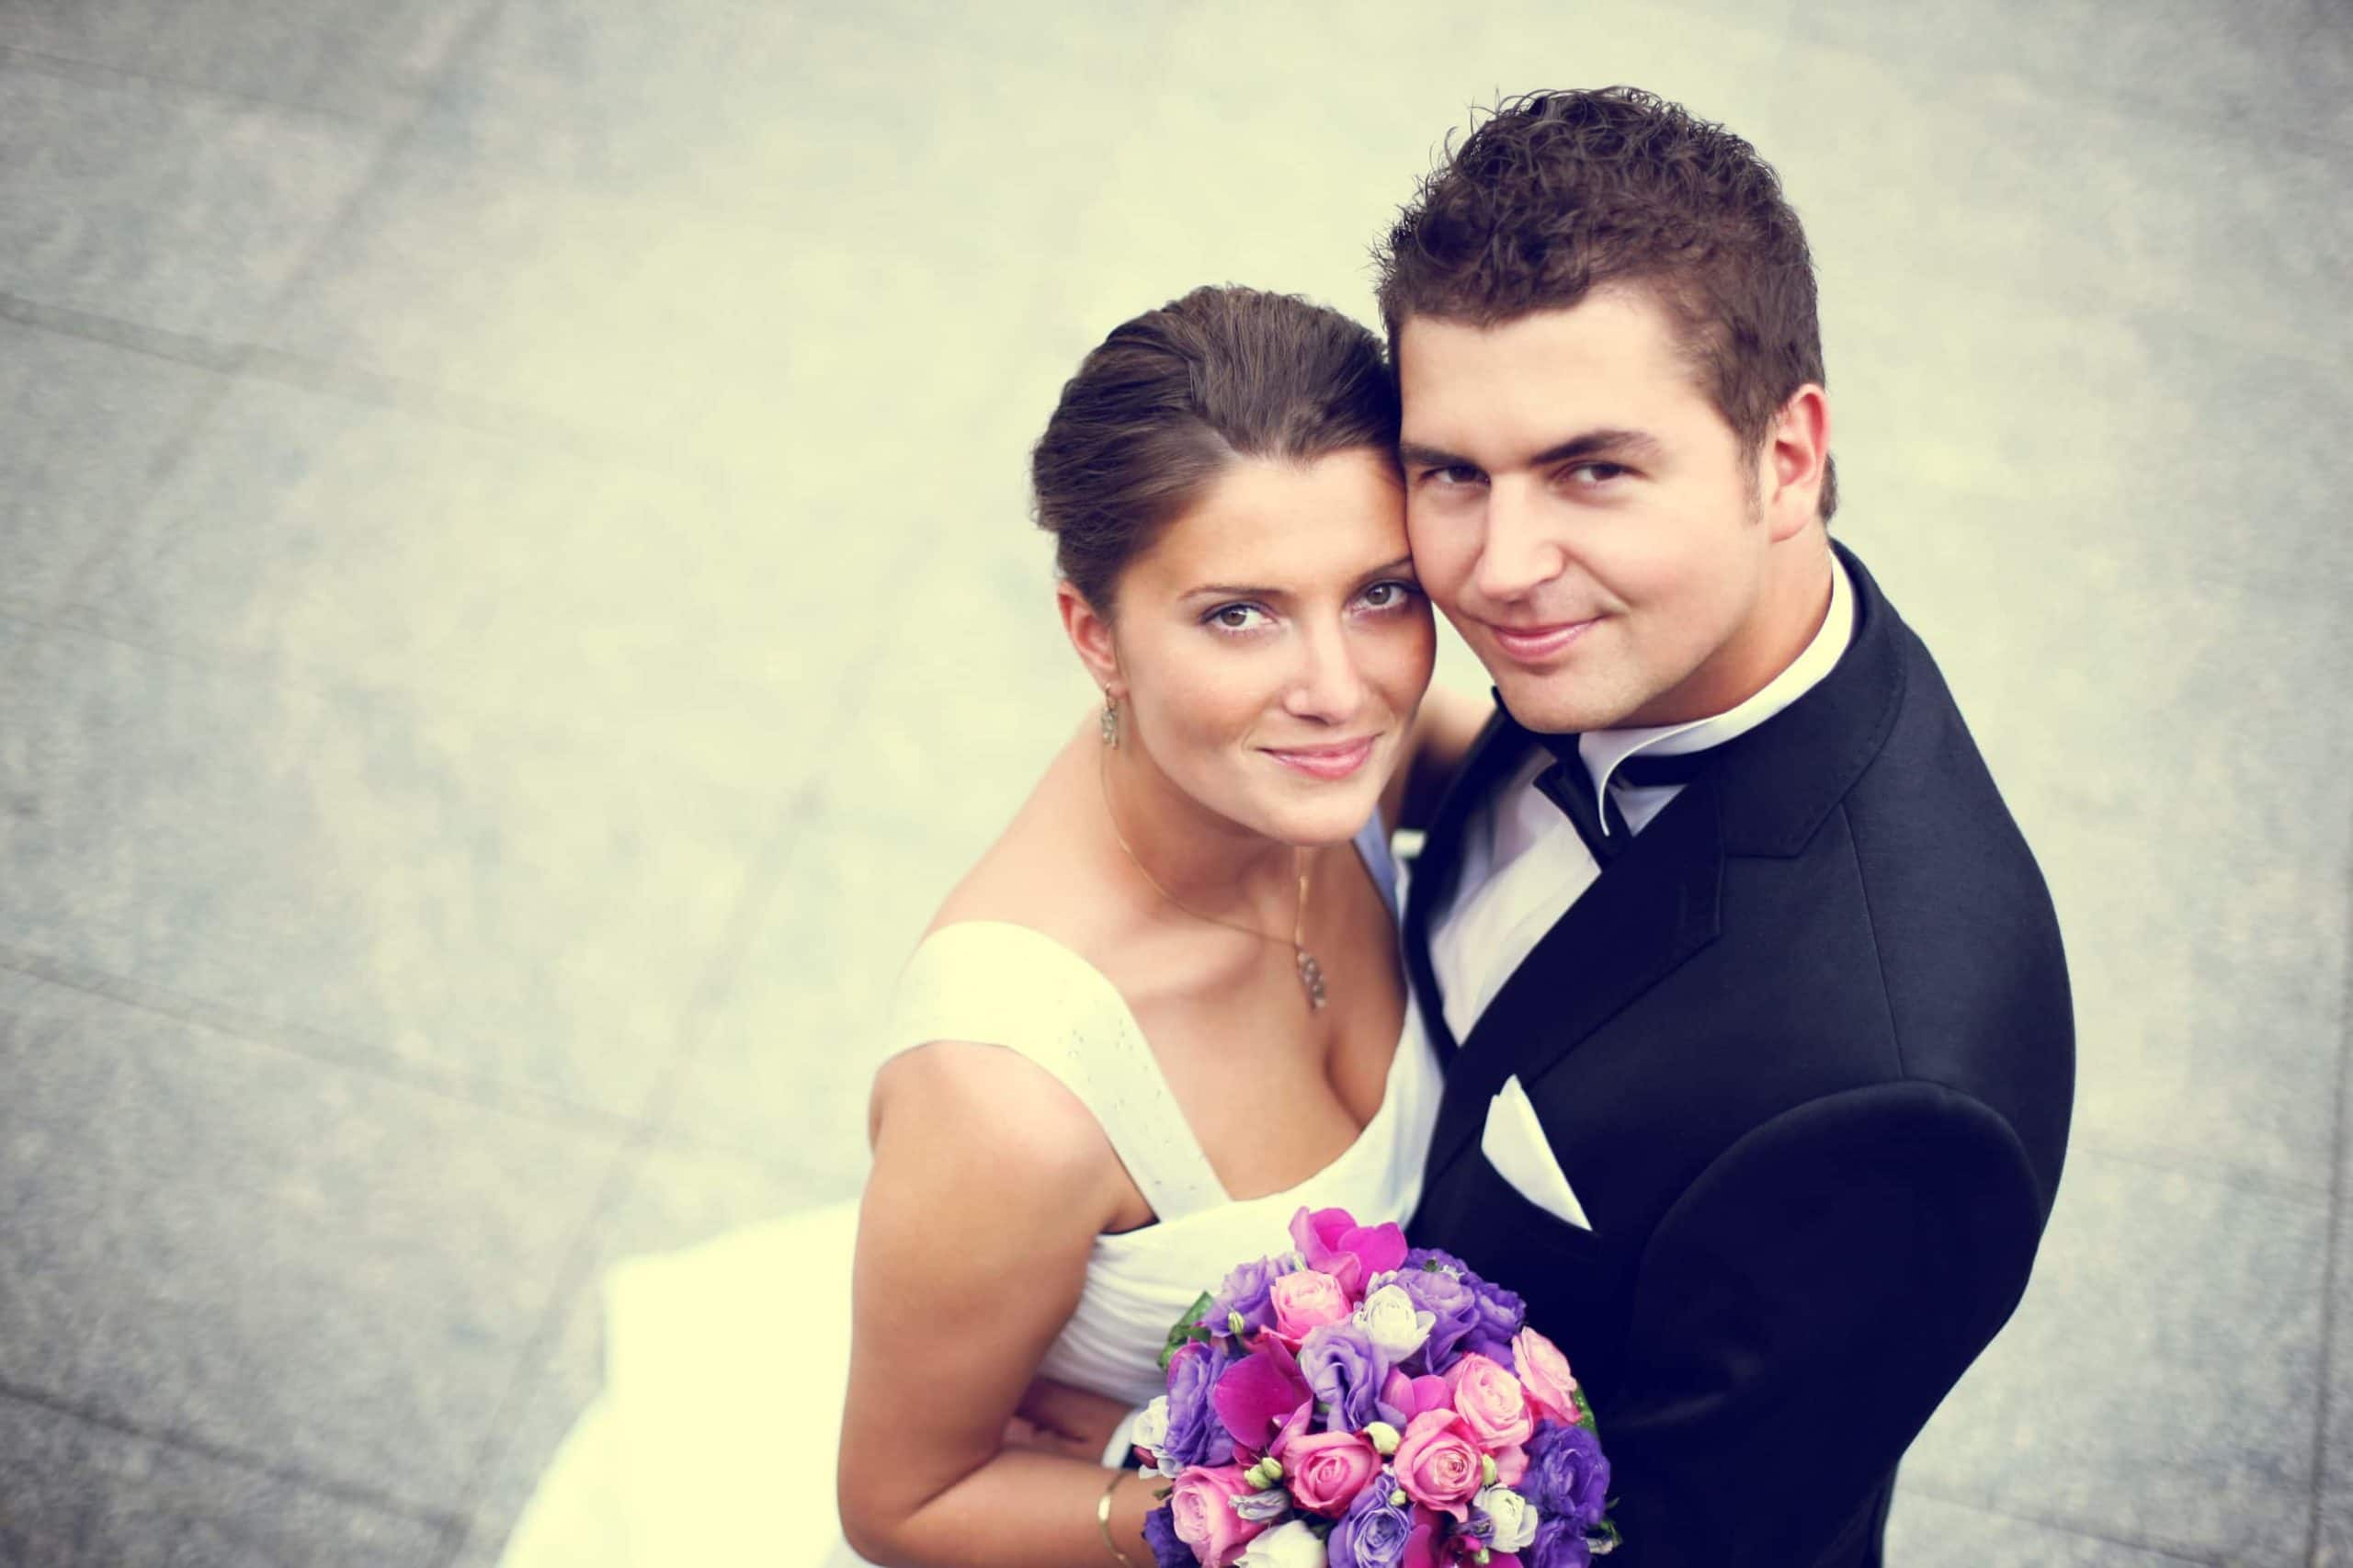
When it comes to processing hundreds of photos, workflow tools like AfterShot Pro can save wedding photographers (or anyone shooting photos) tons of time. But when it comes to perfecting those special shots, a full photo editing suite like PaintShop Pro has all the tools you’ll need to create your own cool photo effects, just like those commonly used in wedding photography–all without the need for presets.
In today’s tutorial, I will show you three quick and easy effects you can apply to your photos that wedding photographers around the world regularly turn to when editing after the shoot. We’ll take a look at how you can add color tints using split toning, make high contrast black-and-white photos pop, and create an old-school vintage film effect that will give your photos a special look that everyone will be asking about. So let’s jump right into it!
Add Color Tints using Split Tones
Split toning is a technique of adding different color tints to the shadows and highlights of an image. In PSPX8 this can be done with Curves and Levels adjustments. Let’s start with a split tone using curves.
Split Tone with Curves
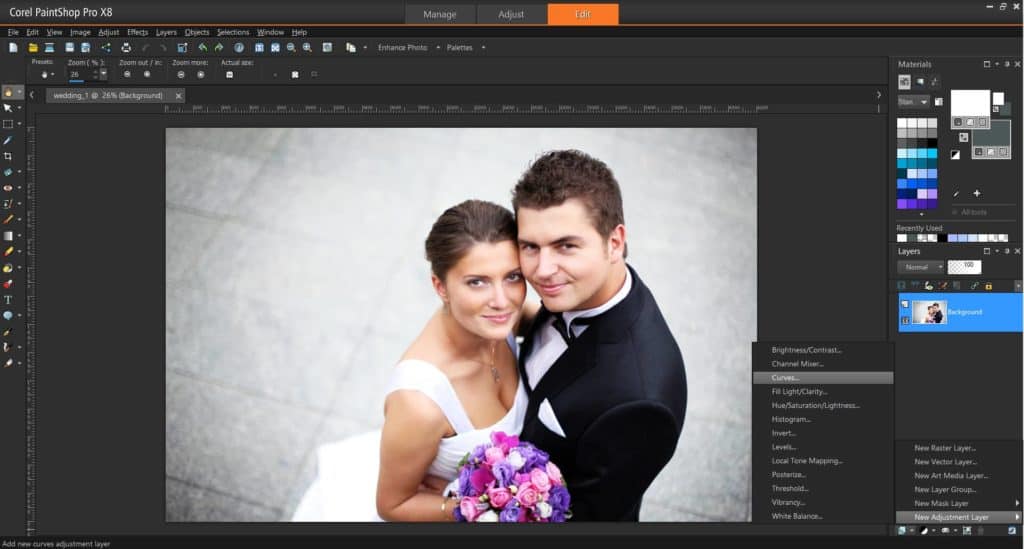
With your image open in PaintShop Pro, your first step is to create a curves adjustment layer.
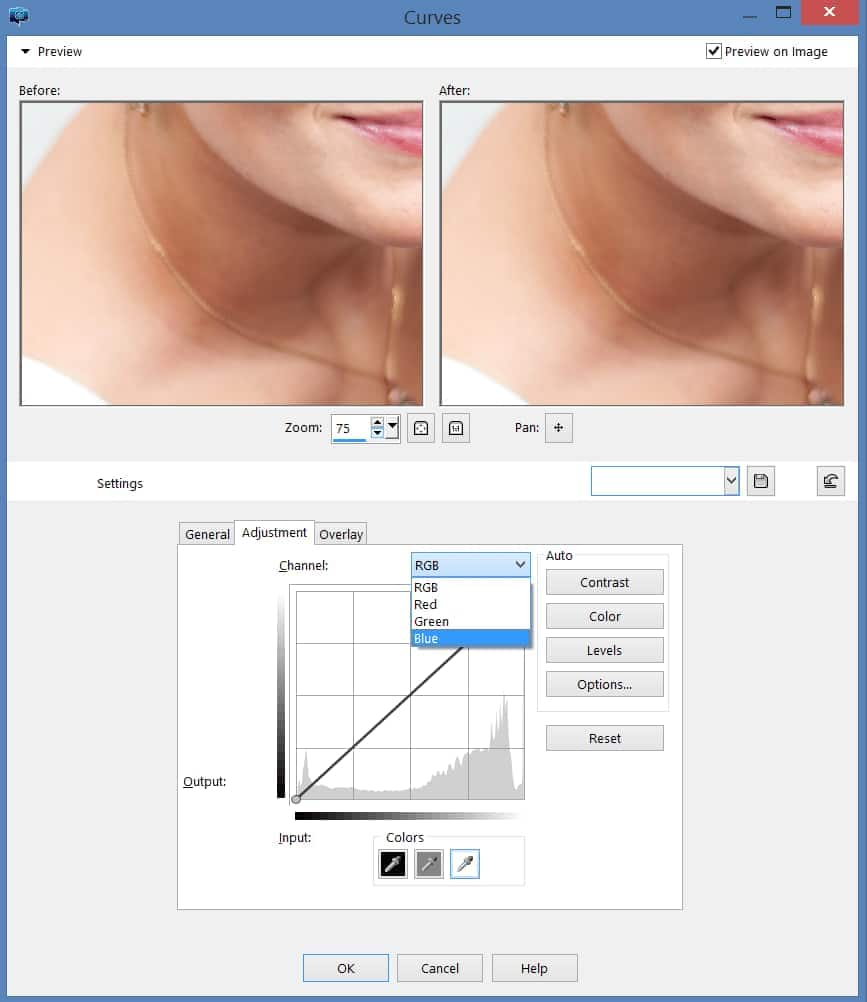
In the RGB drop-down menu of the dialog that opens up, select one of the color channels.
For this tutorial, I’ll use the blue channel.
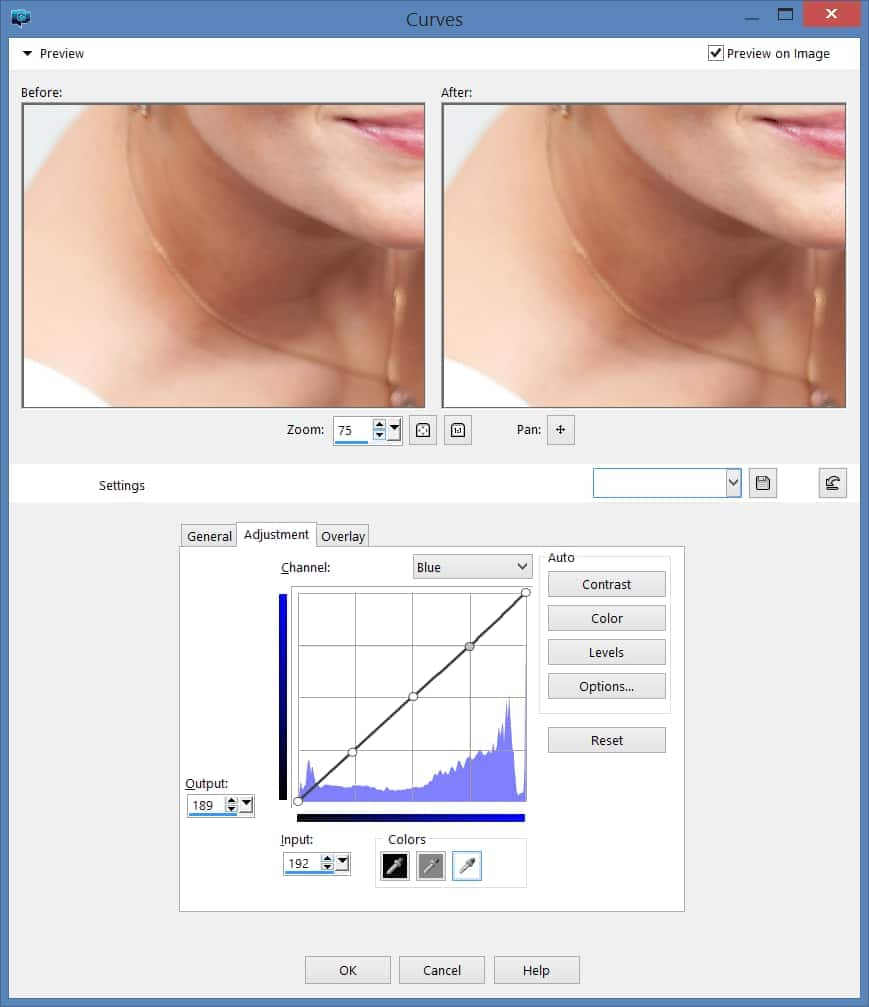
The key here is to make adjustments only in the highlights and shadows.
To start, place control points on the curve where it intersects the grid lines.
This will keep the curve from moving in these areas and restrict the changes to the ends of the curve where the highlights and shadows are located.
QUICK TIP: Placed a point on the curve you don’t want? Simply drag it off the graph and it’s gone.
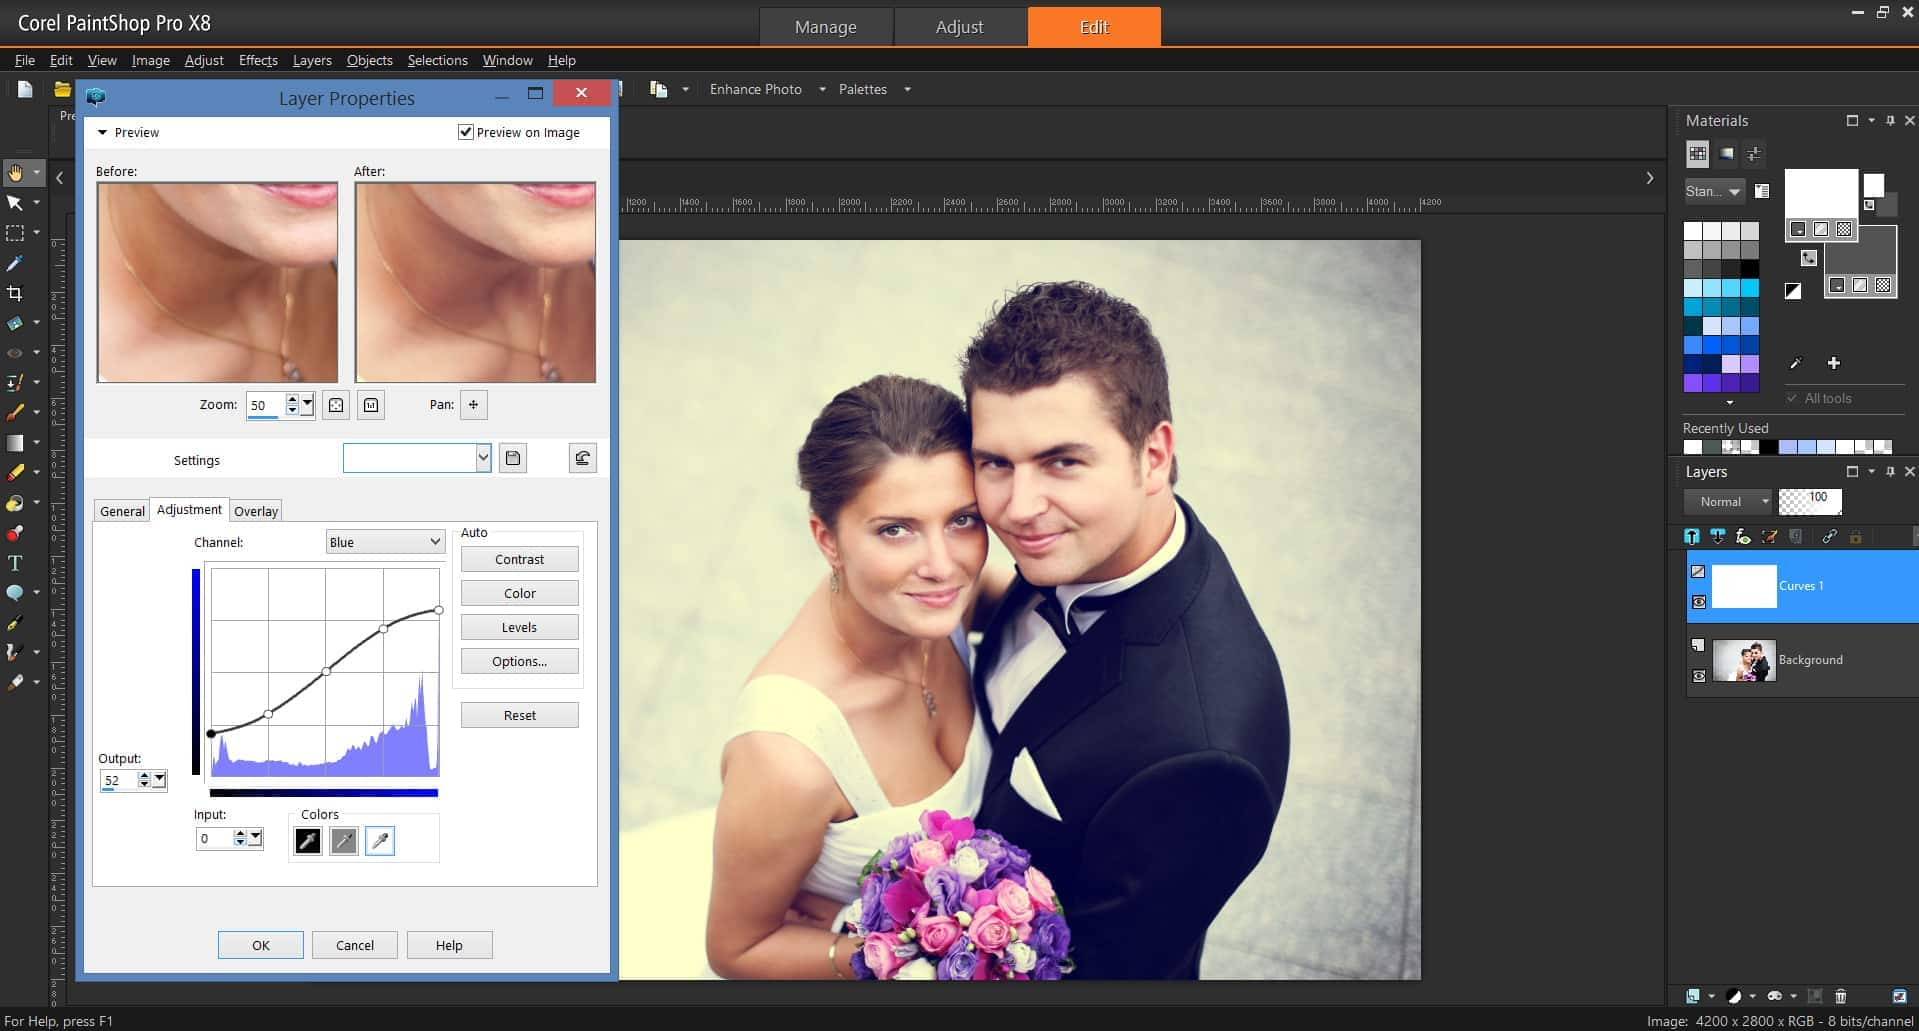
Lifting the control point on the left end will increase the amount of blues in the shadows.
Dragging the point on the right side down will remove the color – blue in this case – from the highlights. This has the effect of adding its opposite color, yellow.
Here is the final curve and the result on the image. Notice that I’ve tweaked the second and fourth points slightly to enhance the effect.
Split Tone with Levels
You can also use Levels to achieve the opposite effect to the curves option we just discovered. This time, open the image and add a Levels adjustment layer.
In this case, sliding the left (black) point to the right will remove the color (blue here) from the shadows, effectively adding its opposite (yellow in this case), while moving the right (white) point to the left will add the color to the highlights.
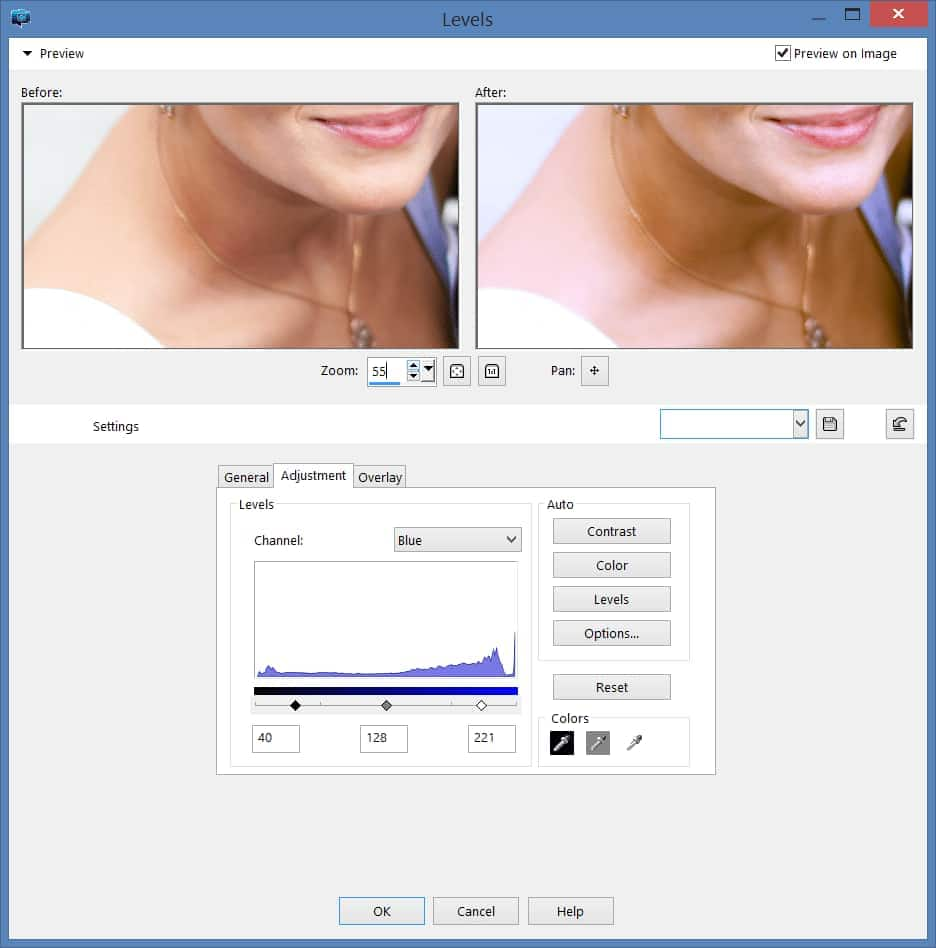
QUICK TIP: The key here is to keep an eye on the middle value and keep it at 128.
Moving the end sliders will move the center value, bringing the effect into the midtones. After each adjustment of the endpoints, return the middle value to 128. This will keep the effect out of the midtones and away from skin tones, which are important to preserve.
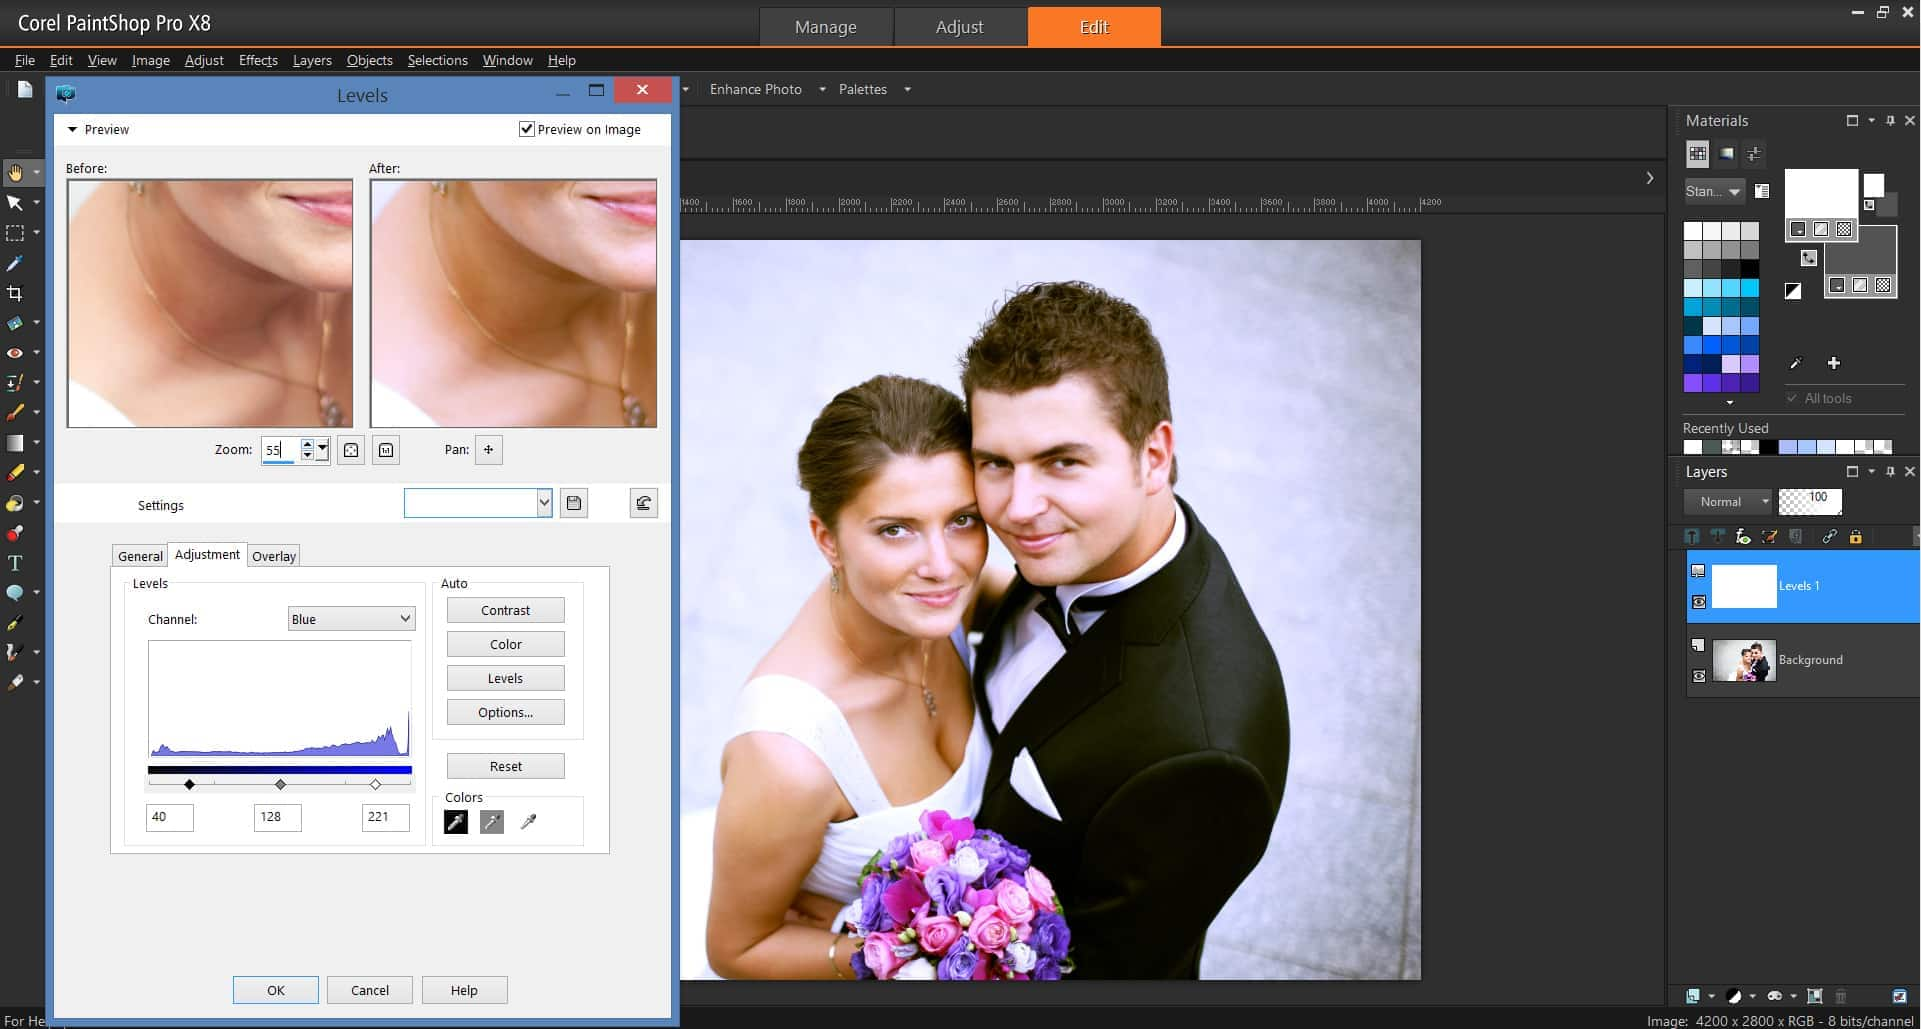
After a few minor adjustments, we can see the edited Levels version of the wedding photo is really coming together, so let’s move on to our next technique!
Create High Contrast Black & White Images
When you convert images to black-and-white, they often lack contrast in the midtones and look flat. Any attempt to increase contrast will risk blowing out the shadows and highlights. Careful work in curves can fix this, but there is a simple way to do this using the Blend Ranges controls in the layer properties.
First step is to duplicate the background layer so we have something to work with. With that done, it’s time to apply some contrast adjustments image-wide.
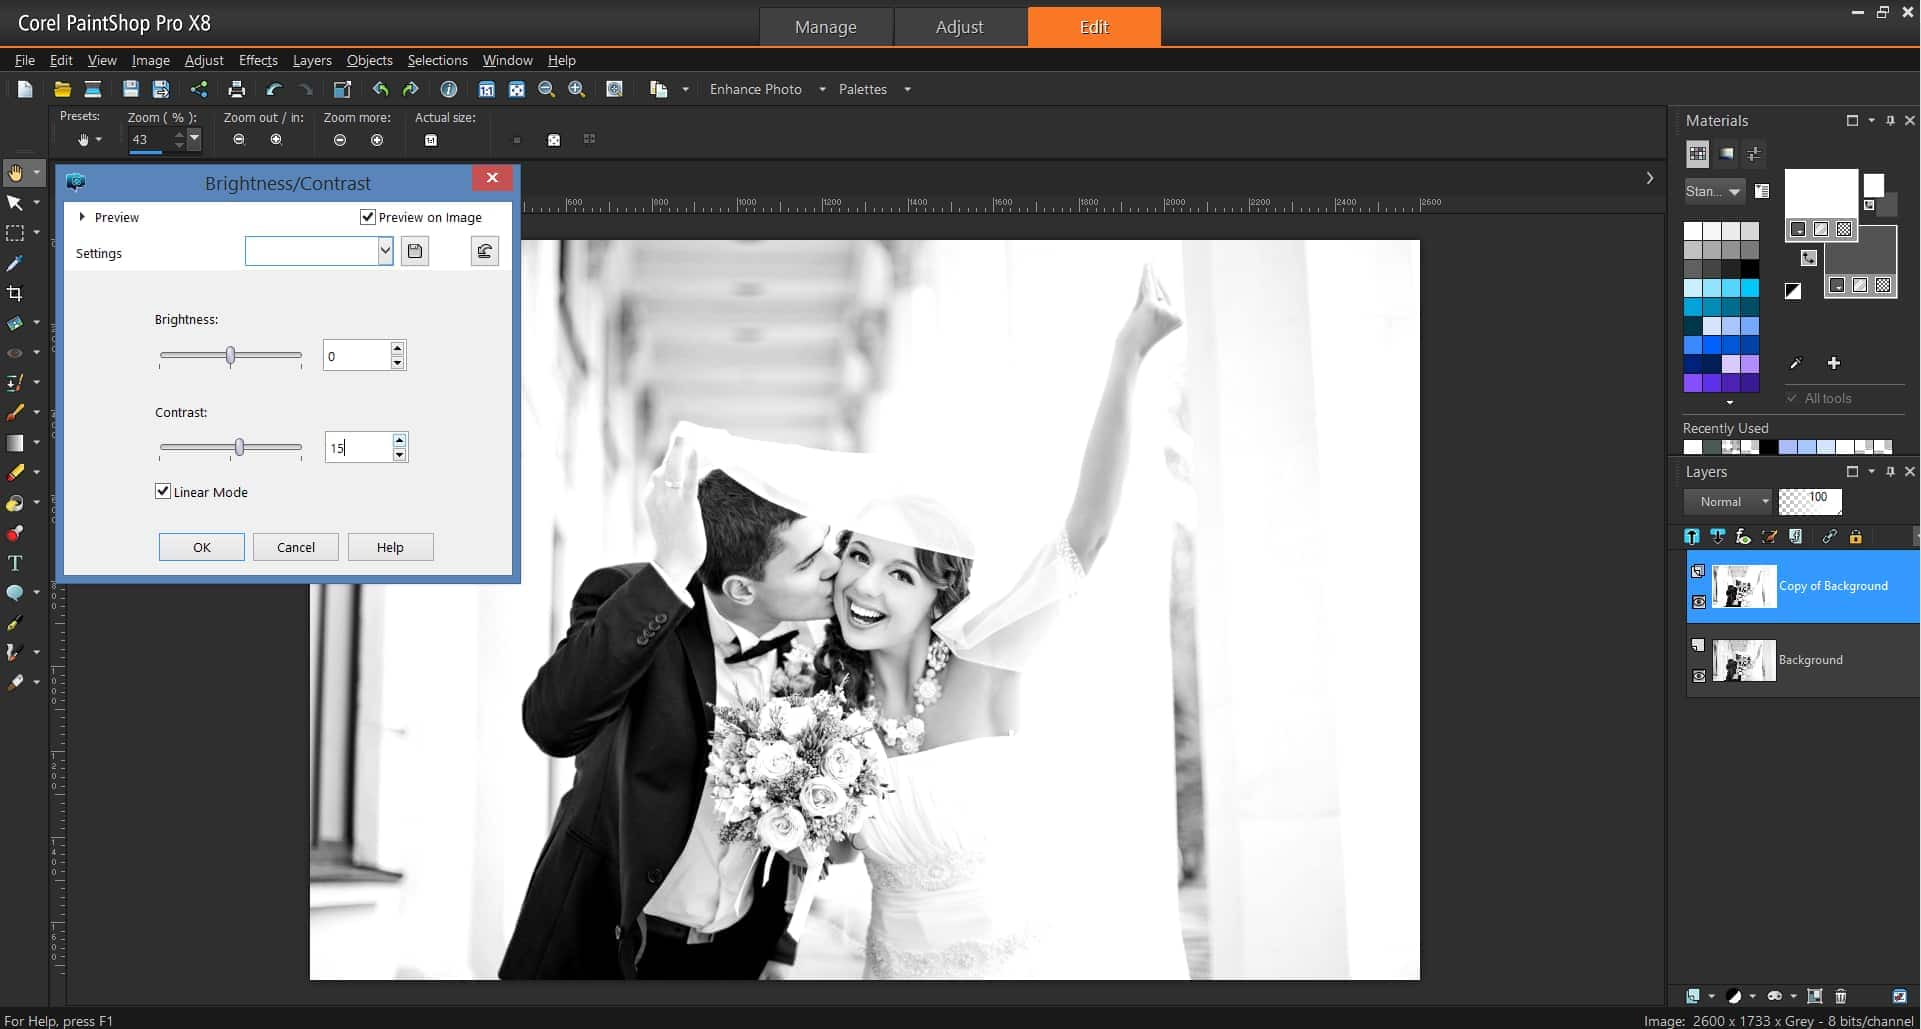
Head up to your Adjust menu, select Brightness and Contrast and select Brightness/Contrast, just as you see below.
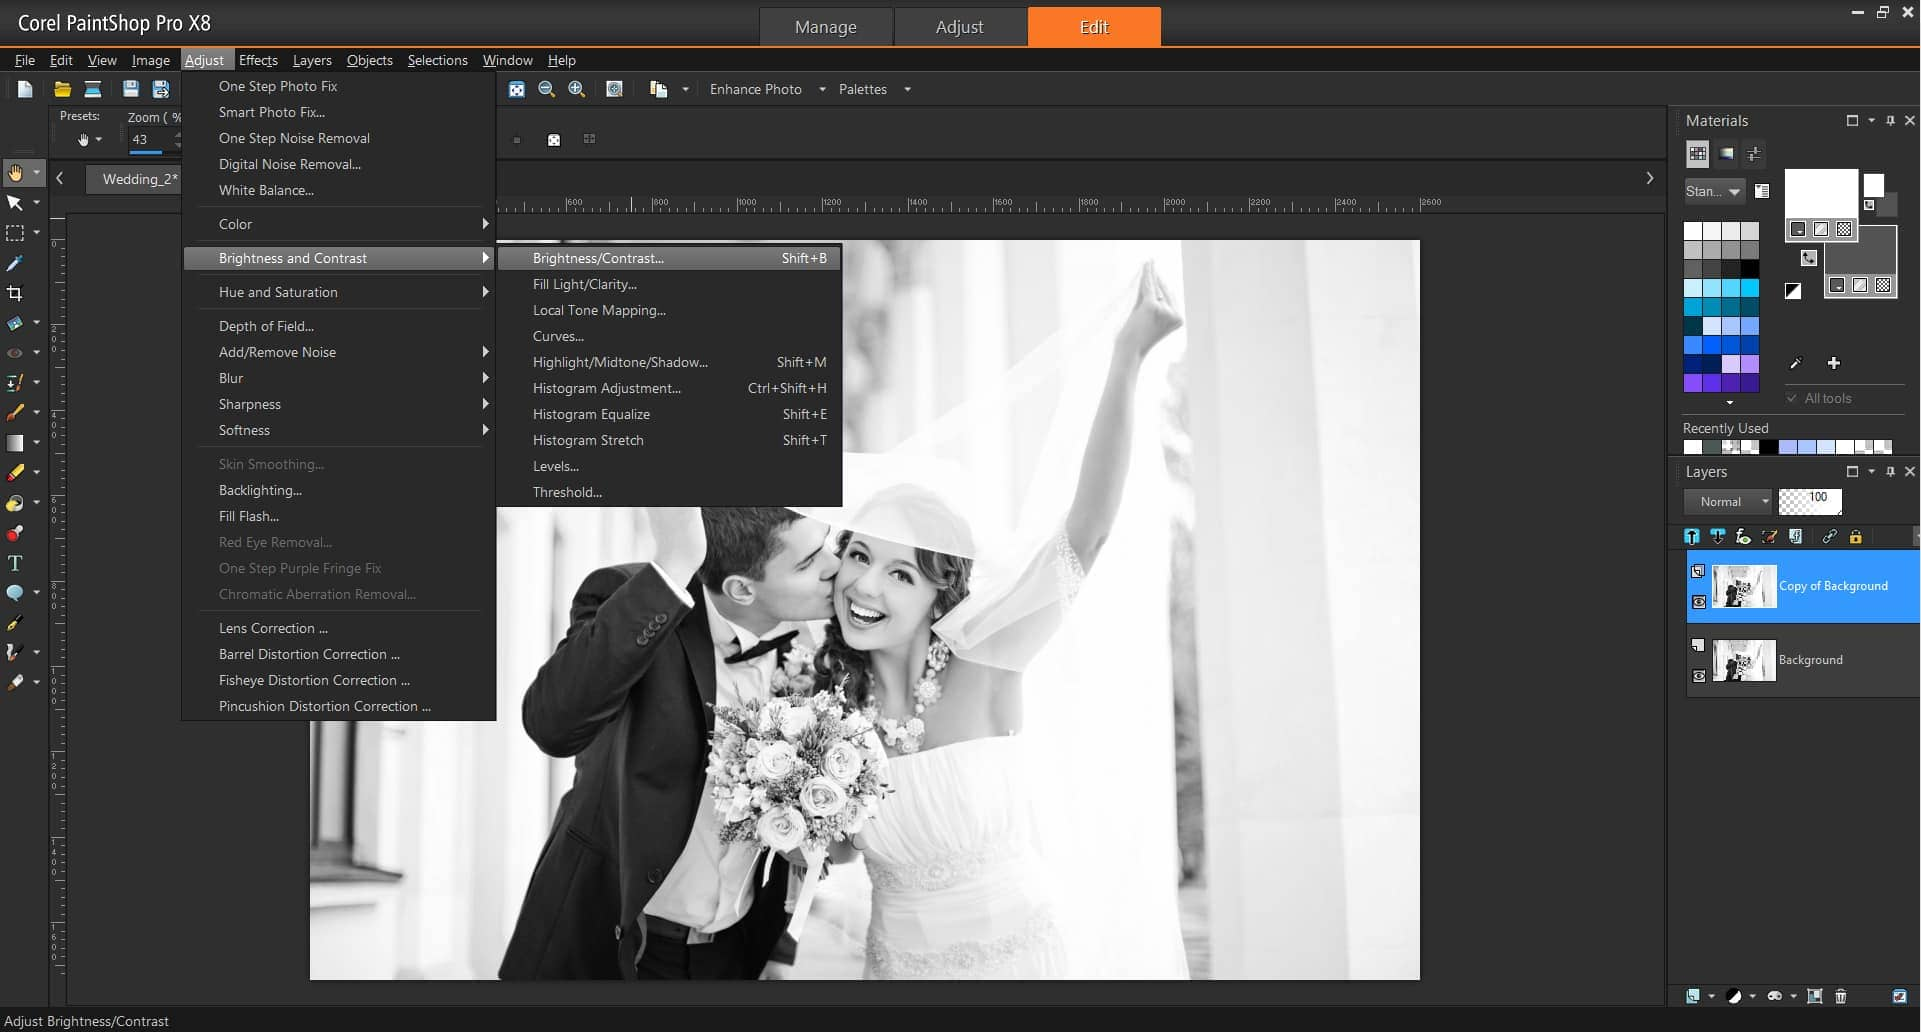
If we move the contrast slider to the right, increasing its value, we can see how the changes are applied to the whole image. It’s pretty clear that the midtones are now more interesting, but the whites and blacks have been blocked up.
To correct this, we’re going to use a handy little feature called Blend Ranges.
Double-click the top layer where the adjustment was applied to get the Layer Properties dialog and click Blend Ranges.
You’ll now see a couple of sliders and a drop-down menu, like in the screenshot below.
Basically, it works like this… The sliders for ‘This layer’ will designate where the top layer will be seen.
The default is to be seen across the entire brightness range from 0 to 255. By moving the sliders in toward the center, the selected layer will not be shown in the highlights and shadows, allowing the underlying (not clipped) layer to show through.
The sliders on each side are in pairs so that you can define a gradient from where the layer is invisible to where it shows through completely.
Here are the final settings I used for this image…
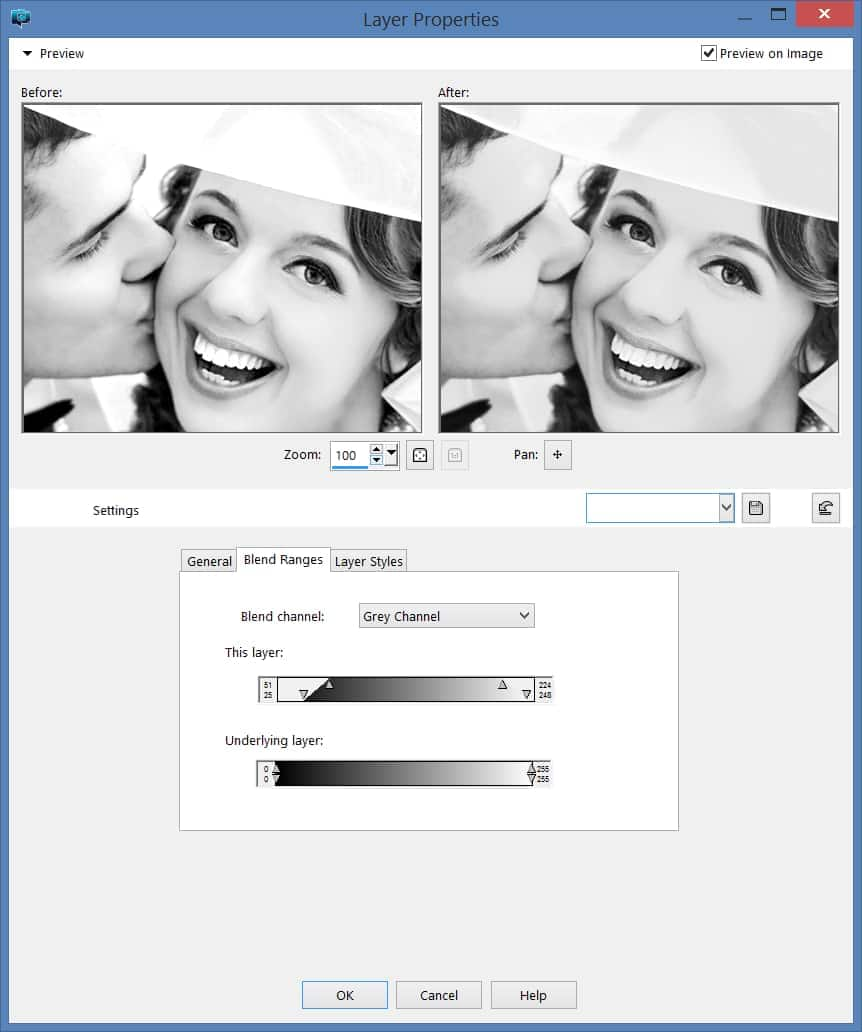
What this dialog shows is the top layer is invisible between brightness 0 and 25, then it gradually increases to full visibility between 25 and 51.
The layer is completely visible, covering the bottom layer, between values 51 and 224, then fades to zero visibility between values 225 and 248.
Finally, it is completely invisible from 248 up to 255, allowing the bright, not-blown-out areas of the original layer to show through.
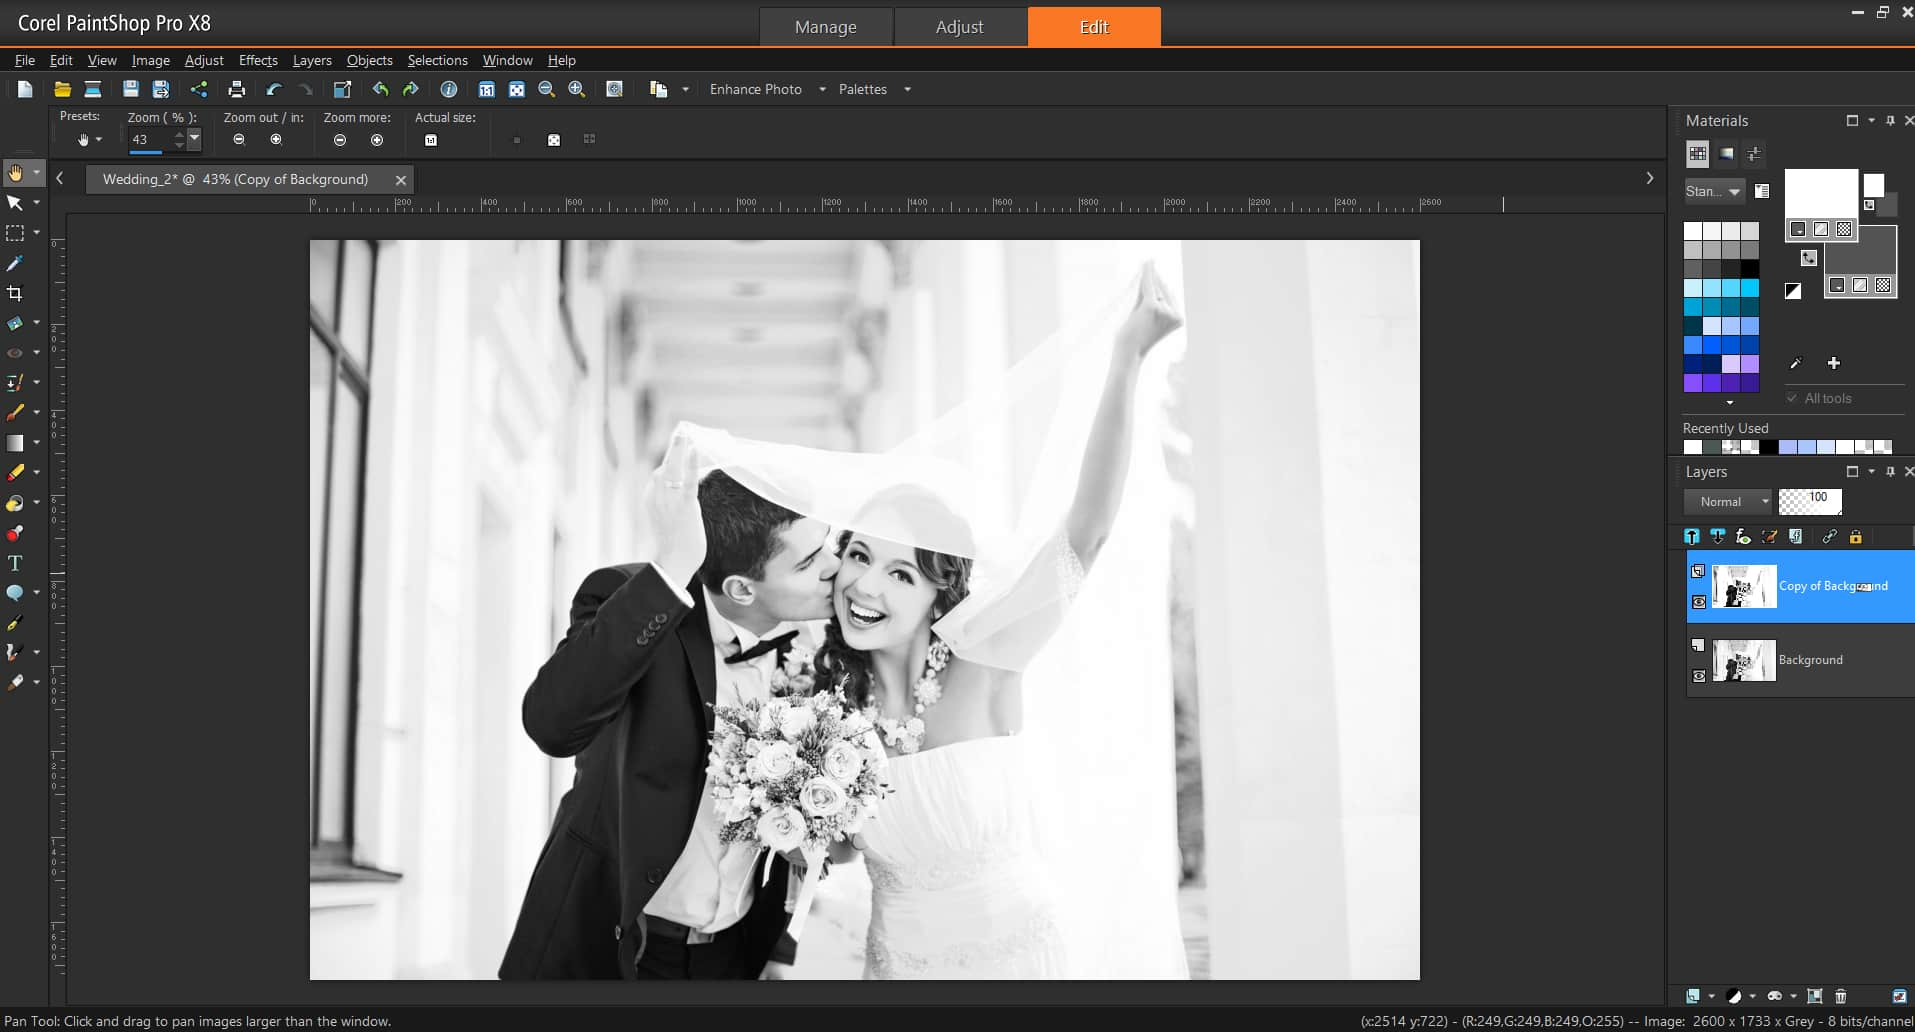
Here is the final image (you can see full-size before & after images in the gallery at the bottom of this post)…
Adding a Vintage Film Effect
A film look can evoke a nostalgic feeling from an image and is one effect in particular that has become extremely popular with wedding photographers and photo editors. One characteristic you might notice when shooting on film is the reduced contrast in the shadows and highlights. This is pretty easy to accomplish with curves, and is similar to the split toning technique we looked at earlier.
Once again, here’s what I started with…
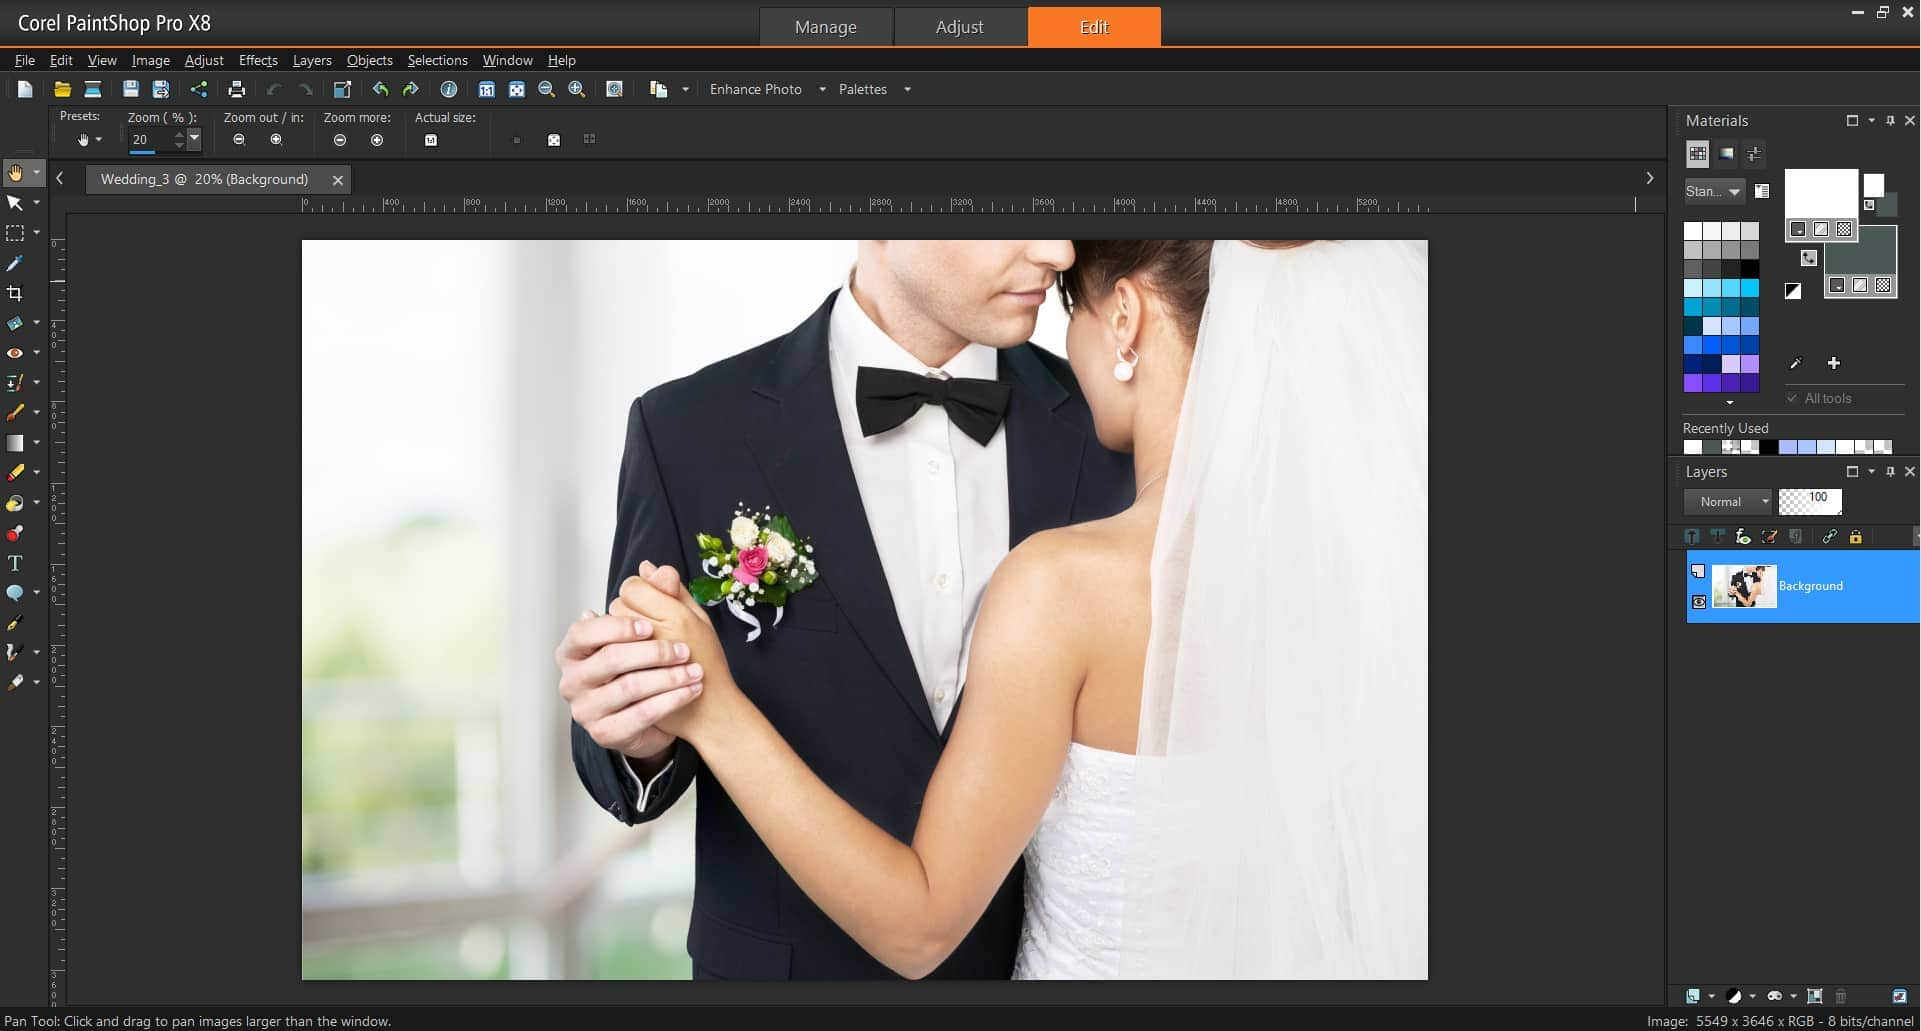
To get started with the Film Effect, open the image and, just like we did for the Split Toning effect, create a Curves adjustment layer.
This time, instead of selecting a specific color channel, we’ll apply change to the combined RGB channel. Pull the left point up and the right point down to reduce the contrast in highlights and shadows.
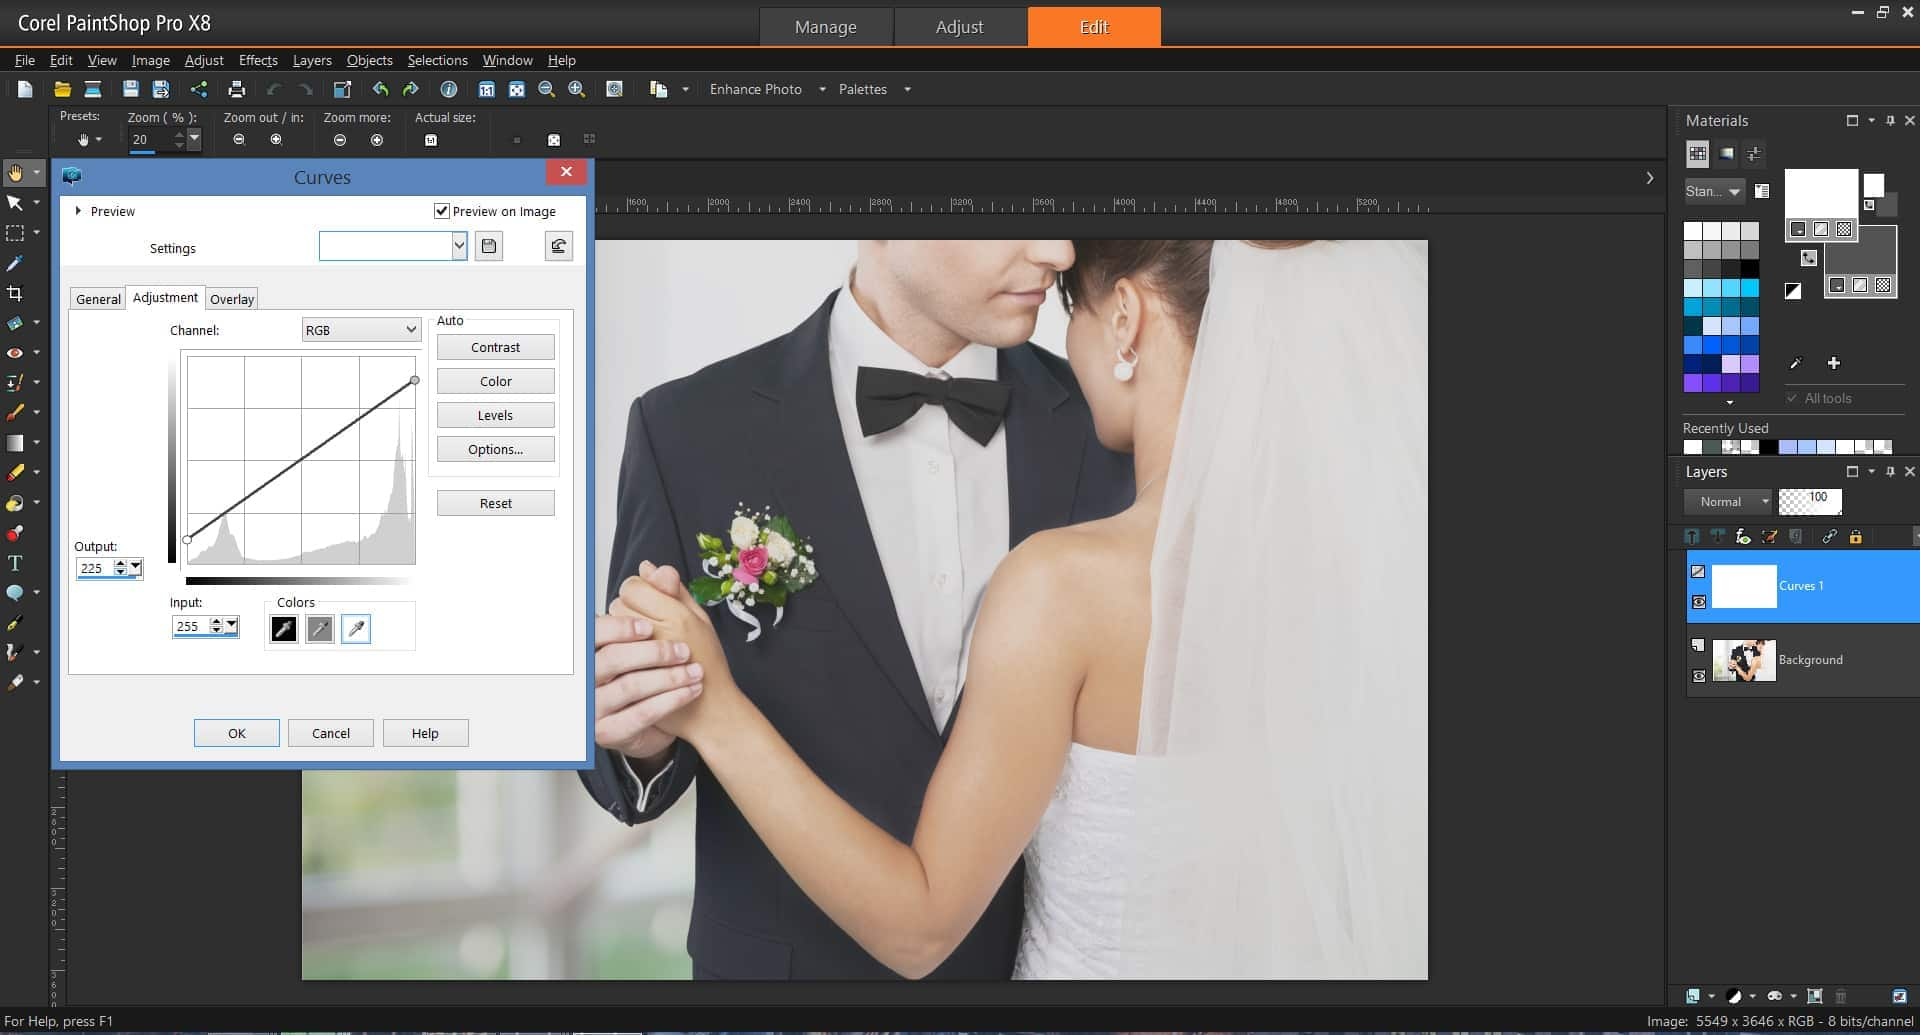
You’ll see that this reduces the contrast levels across the whole image. This is not what we want, so now we’ll have to correct it.
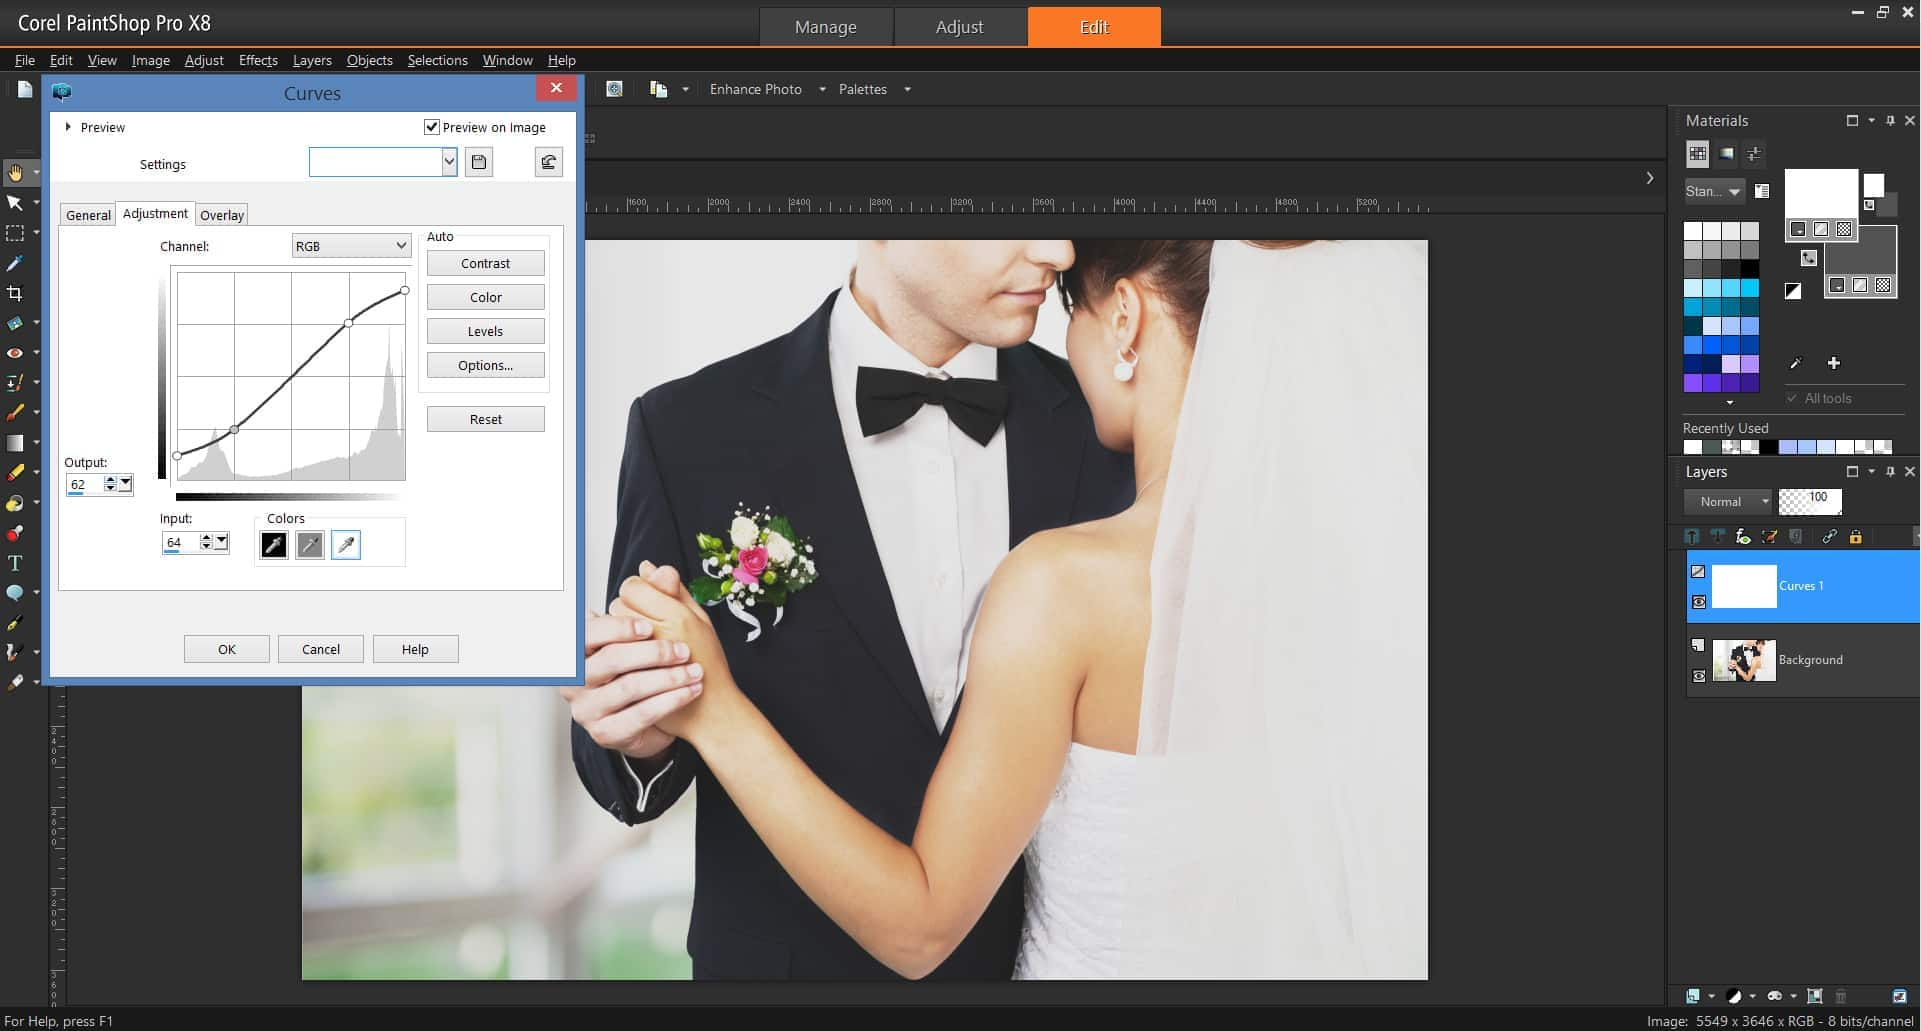
The solution? Make an S-curve to bring back contrast in the midtones.
To make an S-curve, create a new point on the line and drag it up or down to return the line to where it originally intersected the grid lines. You can play with the exact placement to get the effect you’re looking for.
The screenshot below should help explain. Note that the points sit where the grid lines intersect along the line’s original path.
Create Your Own Custom Looks & Have Fun!
You’ll find that getting the most unique looks for a batch of wedding photos often comes from combining several effects like the ones we went through today. Give it a try by combining the film effect with the split toning effect we saw earlier, or try adding contrast to a color channel with an S-curve, or reduce the contrast by lifting or lowering the end points.
As you can see, the creative possibilities are plentiful here. I’ve included a small Before and After gallery below so you can just how easy it is to make a few minor changes that make a BIG difference–especially when working on wedding photos!
Try these effects out for yourself. Sure, you could go out and buy a bunch of presets—but so is everyone else.
Get creative! Alter or combine these 3 quick photo effects for wedding photographers to create your own special looks that can be applied to any images for a unique and trendy look that’s all your own–with a little help from your friends at PaintShop Pro!
Feeling Inspired? Download the Free 30-Day Trial of Paintshop Pro and discover the creative possibilities.



1 Comments