In this tutorial, we’ll take a look at various indoor lighting setups for photography. You will learn how to position one or more light sources in order to achieve the look you want.
Thanks for watching! You will find a written version of this tutorial below, and a printable PDF copy to download on the Download resources tab above.
Written Tutorial (PDF, 944 KB)
Download your FREE 30-day trial and make every shot your best shot with PaintShop Pro, your all-in-one photo editing and design software.
Color and light in photography
Photography composition
Natural lighting in photography
 PaintShop Pro 2023 Ultimate
 Vision FX 2.0
 PaintShop Pro 2023
 AfterShot Pro 3
Indoor lighting setups for photography
In this tutorial we are going to look at some indoor lighting setups. It does not really matter what kind of camera that you have. The camera simply records the light that it sees and so it is important that your subject is lit to best so that you can achieve the results that you are looking for.
There are numerous different possibilities when it comes to lighting a subject and a wide variety of light sources and tools to affect the light. Everything from flood lights, hair lights and ring lights, right down to mirrors and reflectors to bounce the light where it is needed.
We will look at a few setups that will use some basic equipment to help you achieve the look that you desire. The images that I have shot of the doll were done with LED lights available from any “Dollar store” and my reflectors were made from aluminum foil.
First, let’s talk a bit about light.
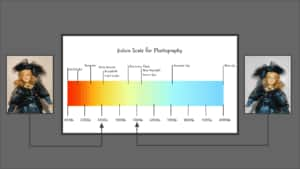
Light is measured in temperature on the Kelvin scale. In photography, the temperature ranges from 1,000K to 10,000K.
In this diagram we can see various light sources and where they reside on the scale. The mood that you want to convey will determine what you use as a light source. If you are looking for soft warm lighting use Early sunrise or Tungsten lighting. This is ideal for soft glamour-style photography and portraits.
At the other end of the scale the lighting can be harsher and is more suited for high contrast portraits or product photography.
Now before we get into the types of setups let’s talk a bit about some lighting terms.
Ambient light – This is light that surrounds the shooting area and is usually unwanted.
Background light – The light that is set behind the subject to help eliminate shadows on the background. It can also be used to bring out detail in the background.
Back light – Back light is used behind the subject to help separate them from the background.
Catch light – A catch light is a light source that causes a specular highlight in a subject’s eye.
Fill light – The fill light will “fill” in the shadows to lighten them and control contrast. It helps to balance out the lighting.
Hair light – The hair light is used to emphasize the hair or help to separate dark hair from a dark background.
Key light – This is the main light source for your subject.
Now let’s move onto the various lighting setups.
The one-light setup
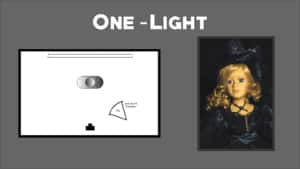
The one-light setup is best used when you have another light source as well, such as daylight. Your flash becomes the key light and simply expose for the background. This will have the effect of making the subject a bit darker, but the key light will compensate for that.
You would place the key light 45 degrees away from the camera on the side that the subject parts their hair and the level of the light should be just above the head.
Butterfly lighting setup
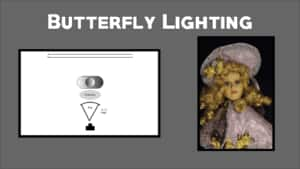
Next we have butterfly lighting. You can easily identify butterfly lighting as it creates a small shadow under the subject’s nose. The key light is typically placed about 5 feet in front of the subject and well above the head level angled downwards. You may want to use a small reflector close to the subject and reflecting upwards. This will create a strong jaw line.
Rembrandt lighting setup
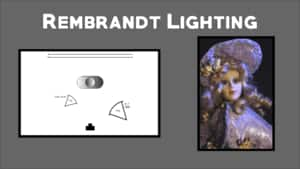
If an image is taken using a Rembrandt lighting setup you will notice a small triangle of light opposite from where the key light was set. This lighting technique is very flattering for almost all subjects. As a rule, when setting up the key light, do it on the opposite side from where your subject has his or her hair parted. The reason this is done is to avoid casting large shadows across the face.
The key light is 45 degrees to the side and 6-7 feet up.
The fill light is 90 degrees opposite the key light and just at eye level.
With this setup, play with the key light to achieve the desired look.
Rim lighting setup
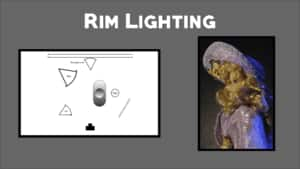
Rim lighting is most effective when your subjects head is 90 degrees from the camera. This is a much more dramatic style of lighting that accents elegant features.
The key light is aimed at the face and is placed behind the subject to illuminate the profile.
The fill light is placed on the same side as the key light with a reflector to fill in the shadow area.
Hair and background lights are optional for this setup but if used, are placed on the opposite side to the key and fill lights.
Split lighting setup
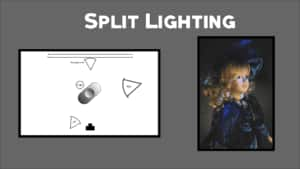
A split lighting setup will illuminate only half of the subject’s face. It has a slimming effect on the face and nose. The key light is usually lower and can be farther to the side of the subject.
Using a weak fill light will help to hide facial imperfections or if you wish, using no fill for a dramatic effect.
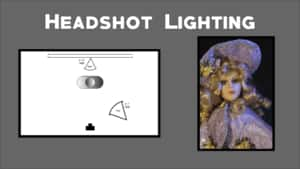
Headshot lighting setup
Headshot lighting is used when shooting with darker backgrounds and the subjects hair will blend in. The hair light will create a sort of outline around the head to help separate them.
The key light is similar placement to the Rembrandt setup:, 45 degrees to the side and 6-7 feet up.
The hair light should be 3-4 feet above the subject and on a boom. If a boom is not available, point it at the background behind the subject’s head. A diffuser for the hair light should also be used.
Download your FREE 30-day trial and make every shot your best shot with PaintShop Pro, your all-in-one photo editing and design software.


Comments (1)
Reader Interactions
Comments
I learned it this way: Butterfly. loop, rembrant, side and split lighting. Start with the main light in front of the subject, this is butterfly lighting. It casts a small shadow under the nose. Then move the main light to the left or right. When the nose casts a small shadow, it’s called loop lighting. Now move the main light a little farther left so the shadow from the nose and cheek meet and forms a triangle. This is rembrant lighting. As you continue to move the main light to the left, you get split lighting. And finally when the main light is completely on the side you have side lighting. When the main source of light is at a 45 degree angle to the camera subject axis, the subject will be the most three dimentional. But you don’t have to measure the angle, you just need to see the efect.
Why do you put a shadow on a person’s face? To make the face look smaller or larger. When the shadow is on the side closest to the camera, it’s called short lighting. When the shadow is away from the camera, other side, it’s called broad lighting, and makes the face look bigger.
Then you have the fill in light. This is to control how light or dark the shadow is.
There’s a lot more to explain, but you can write an entire book on lighting.