The classic double exposure technique combines two or more distinct images into a single image, or exposure. In past, success with this technique has typically required the photographer to calculate the different exposures correctly along with some pretty serious planning for how the images would blend with each other.
These days—thanks to modern DSLRs and a little help from a photo-editor like PaintShop Pro—the double exposure technique is a whole lot easier to pull off.
Whether you’ve got the perfect images lying around on a hard drive or you want to head out and shoot something special, it’s easy to use layering techniques to create your own double exposure portraits in PaintShop Pro. Trust me, mastering the double exposure in PaintShop Pro is a lot less painful than figuring it out in-camera and will save you a ton of time.
Getting Started with the Double Exposure Portrait
In this tutorial, we’ll create a double exposure portrait blended with some scenery. You’ll want to shoot, or find, a headshot against a plain background to make it easier to isolate in our next step. If a solid background isn’t an option, look for as simple a background as possible.
Once you’ve got your headshot you’ll need to open it in PaintShop Pro. It’s always a good idea to label your layers so you know what it is at a quick glance and what part it plays in the final product. Let’s rename this one Headshot.
Isolate the Headshot
With your headshot loaded up in PaintShop Pro, it’s time to get down to work. Our first step is to isolate the head from its background.
Copy the background layer, then make the original layer invisible. This makes it easy to recover from any errors. If something drastic happens, just delete the bad layer, make a new copy of the original and try again.
On this plain background, the Background Erase tool should work well. Use a large brush with a soft edge (I used 60) and keep the center on the background you want to erase. You will find that you can get pretty close to the head.
Use single clicks and approach the edge to get an idea of how the tool performs. This also makes it easy to undo a bad stroke (Ctrl-Z) without affecting a lot of other work. In this case the tool is doing a great job of leaving the fine detail of the short hair and fuzz on the sweater.
Next, use the background eraser around the edge. After that, switch to the regular Eraser and use a hard edge (100). Once you are away from the area you want to keep, you just want to nuke everything and this is the fastest way and the finesse of the Backround Eraser can sometimes get in the way.
You can quickly change the size of the brush by holding the Alt key and dragging the mouse.
Once the profile is clean, create a new raster layer and use the Flood Fill tool to fill it with white.
This new layer will be created above the profile layer, so drag it underneath, and you will see the headshot on a white background.
Be sure to rename your original layer something other than “Background”. Otherwise, you won’t be able to drag the white layer beneath.
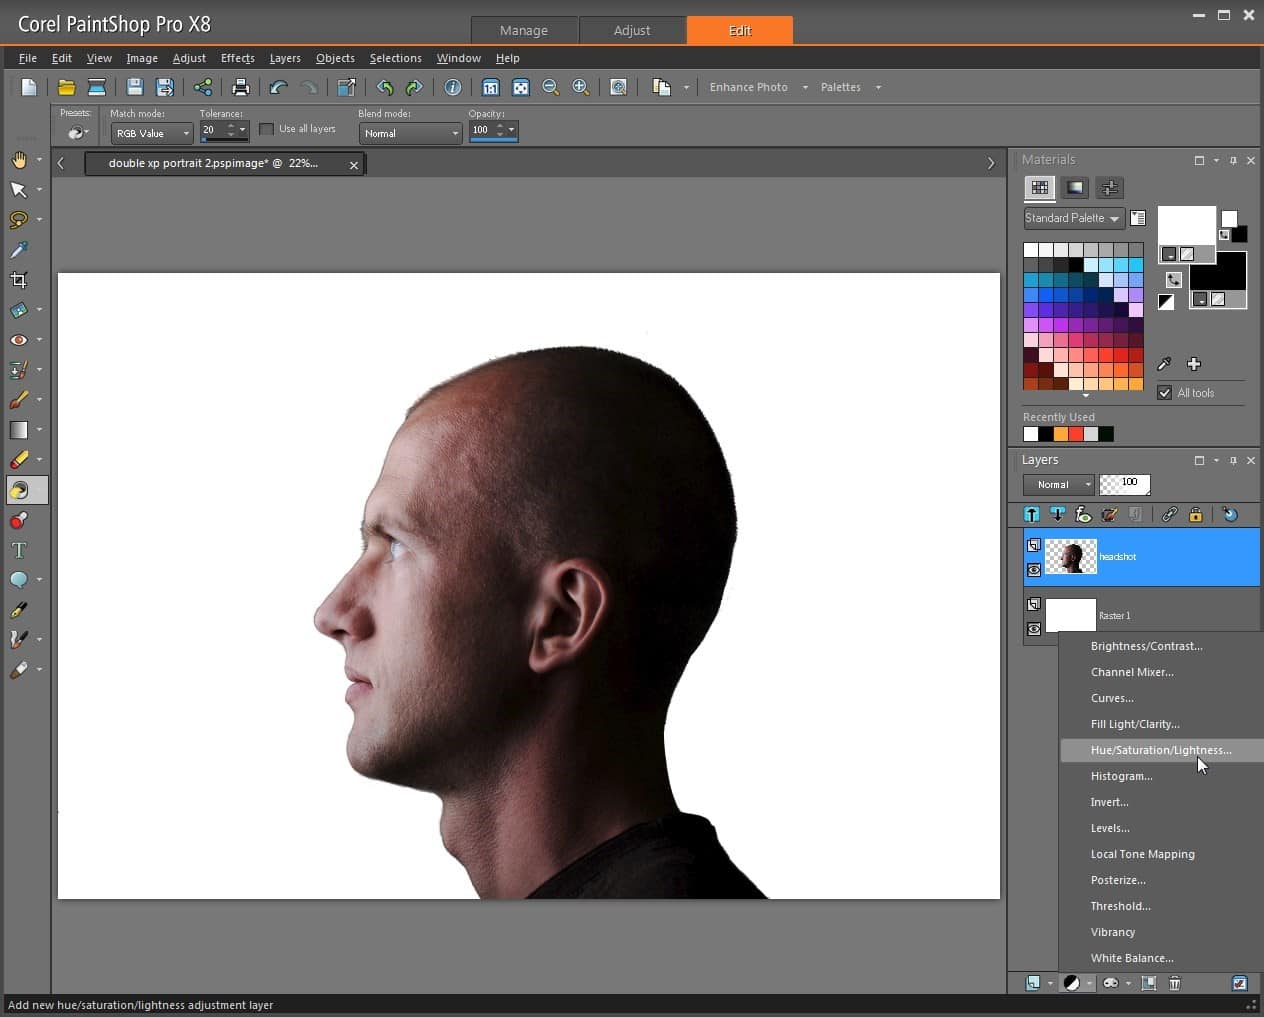
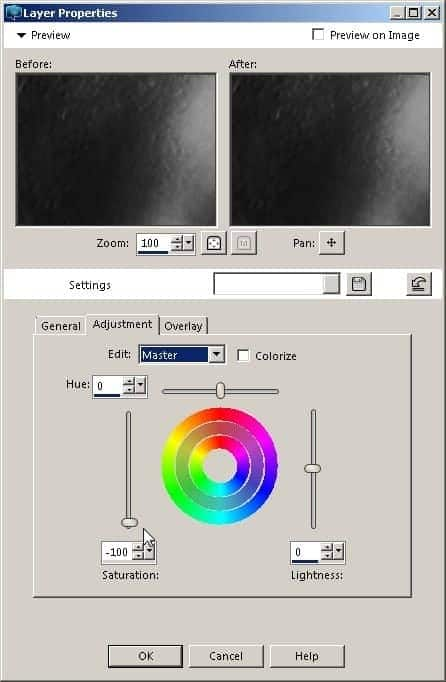
Next add an adjustment layer for Hue Saturation Brightness and turn the saturation all the way down.
Prepare the Secondary Image
Now it is time to bring in the secondary shot for our double exposure portrait. Open up the scenery image and then put the two images together, following the steps below.
First, on the scenic image, choose Select All with Selections—Select All or by pressing Ctrl+A.
Next, copy this image by right clicking and choosing Copy, Edit—Copy from the context menu, or by pressing Ctrl+C
Now switch to the headshot image, making sure the topmost layer is selected, and paste the scenery image as a new layer with a right-click and then selecting Paste—>Paste as New Layer from the context menu, Edit—>Paste as new layer from the menu bar above, or by pressing Ctrl+L.
Blend Your Layers to Reveal the Double Exposure
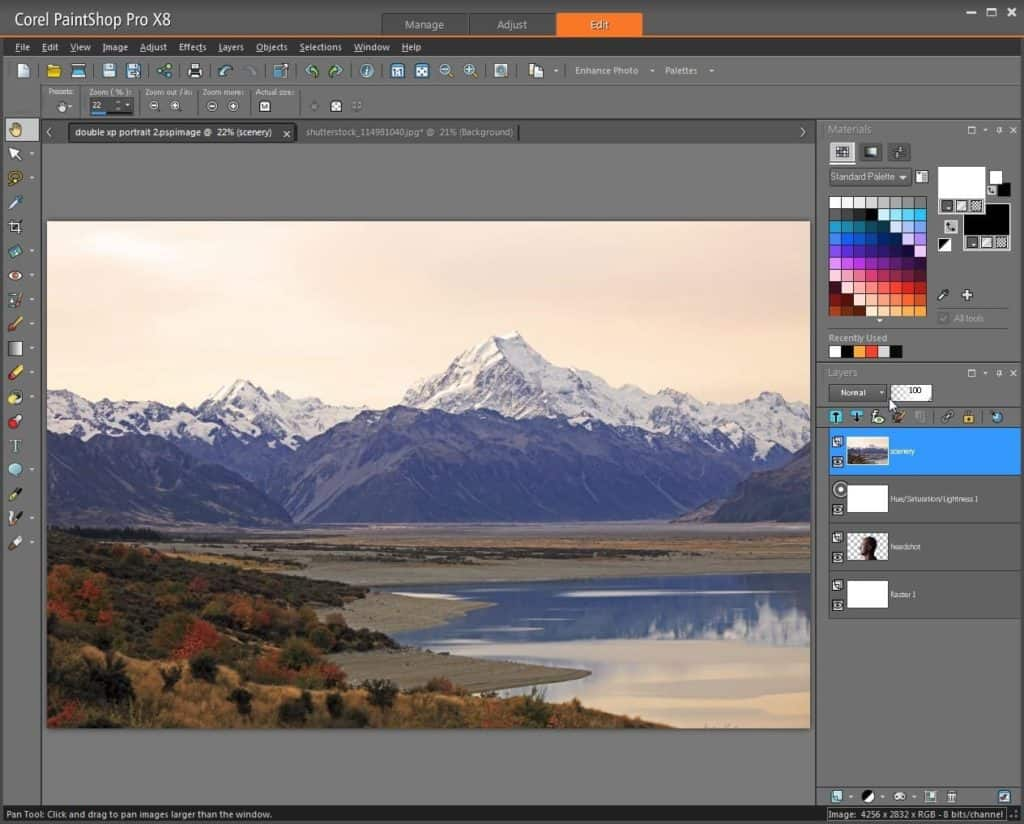
As you can see in the screenshot above, the new layer is on top and hides everything else because it is 100% opaque and set to Normal blend.
Let’s change the blend mode to Lighten. You might want to also take a look at the Screen or Dodge modes as well to see how they work for your images.
With the scenery layer selected, use the Pick tool to move the layer until you get an effect you like. Turn the white layer off temporarily while you see how the images work with each other. I like the image of the mountain in his head, but the color from the sky in the top of the head, as seen below, isn’t really working for me—so let’s change that.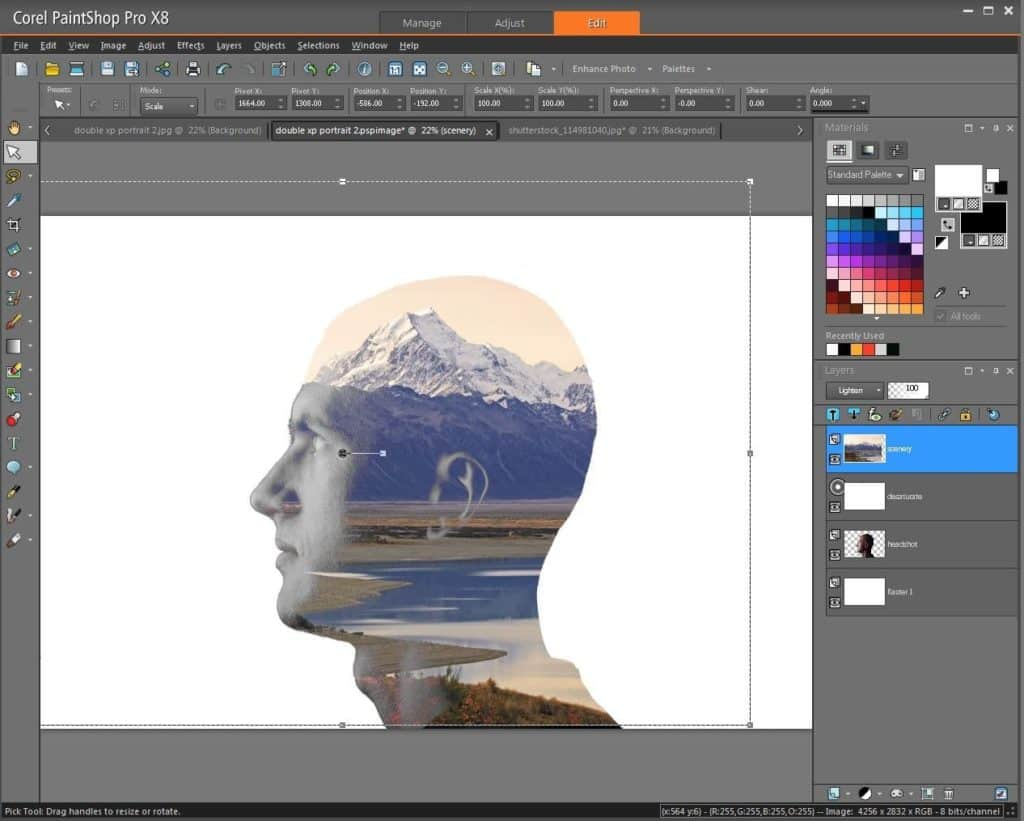
One option might be to move the desaturate adjustment layer above the scenery layer so it works on everything. Another is to reduce the transparency of the white layer and let some more of the overlay image blend in.
With these image, I like the idea of a look where the top of the head is white and merges with the background, leaving a mountaintop head – perhaps for someone with lofty thoughts.
Again, be sure that the scenery layer is selected. Choose the Brush tool with a white foreground color and a soft edge (I used 30), zoom in with the mouse wheel, and carefully paint in white over the sky area.
Approach the edge carefully with single clicks and you will quickly see how close to bring the brush.
Adjust the size with the Alt-drag shortcut to fit the brush to the contours of the edge. Once the edge is cut in, switch the brush to 100% hardness to quickly remove the rest of the sky. You don’t need to do this on the entire scenery layer, only the area that shows up in the final composition. You also might want to do this on a layer mask until you build up a lot of skill with the paintbrush, or to leave options open for other variations.
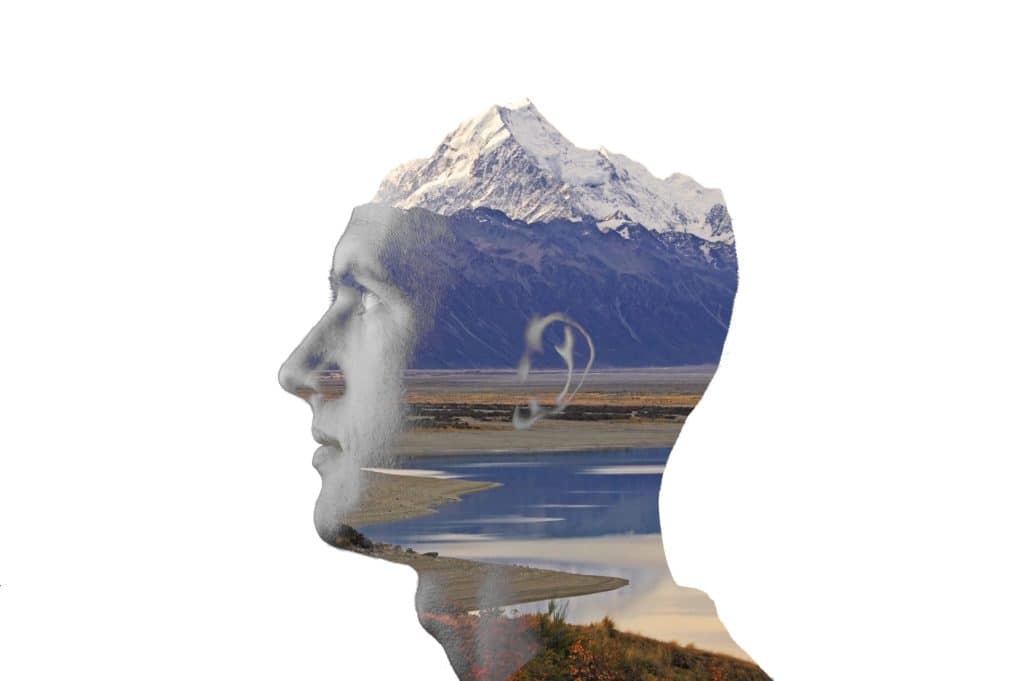
And there you have it. Now you’ve got a cool double exposure portrait.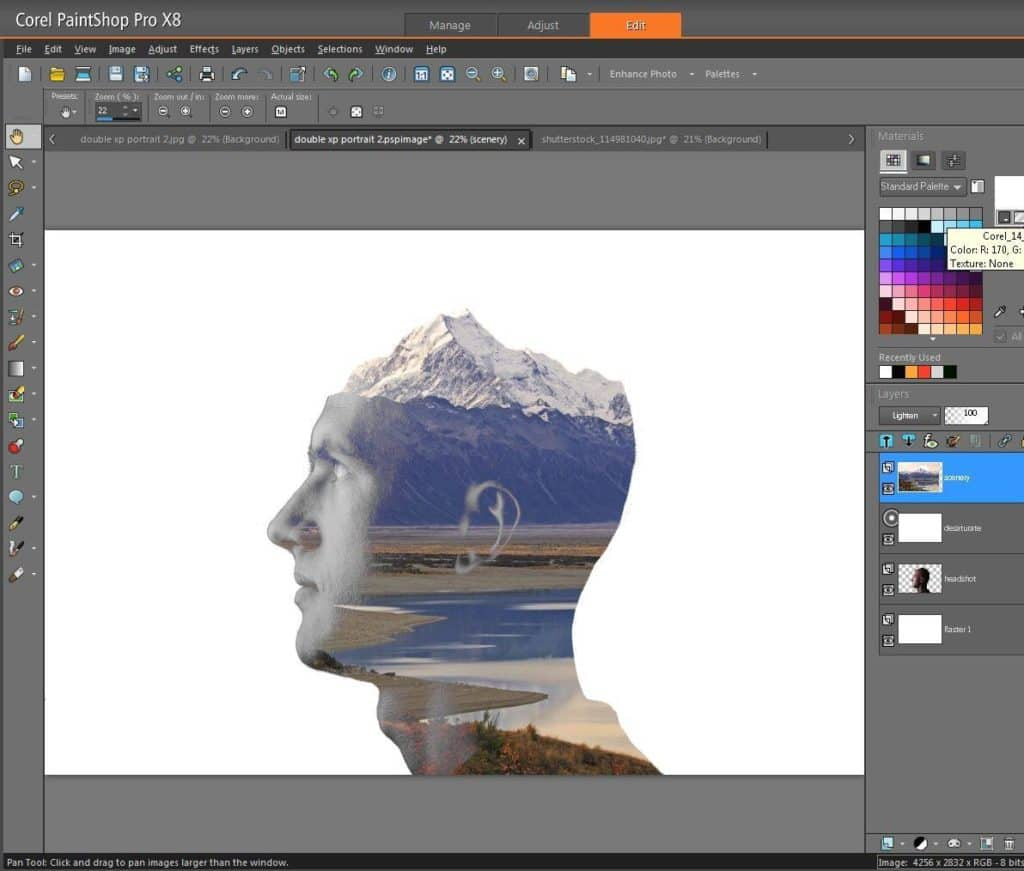
Download your FREE 30-day trial and make every shot your best shot with PaintShop Pro, your all-in-one photo editing and design software.




1 Comments