
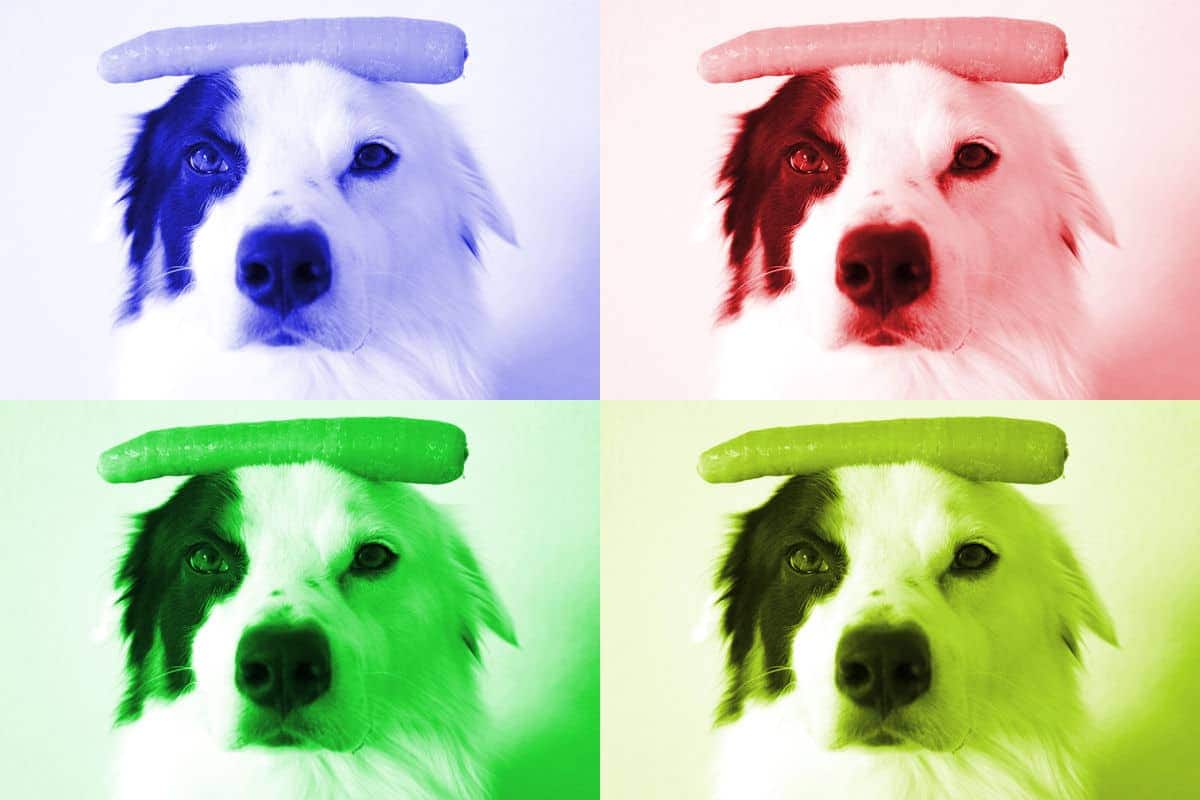
Make Andy Warhol-inspired pop art from your own images
Turning a dull photo into a 1960’s pop art masterpiece is much less difficult than it sounds. All you need is a photo (a portrait of a person or pet is a great place to start), a photo editor that supports layers, and an appreciation for vibrant color that defines the pop art movement.
Follow the steps below in PaintShop Pro to create a colorful four-image collage that mimics pop art.
STEP 1: Open up your image in PaintShop Pro
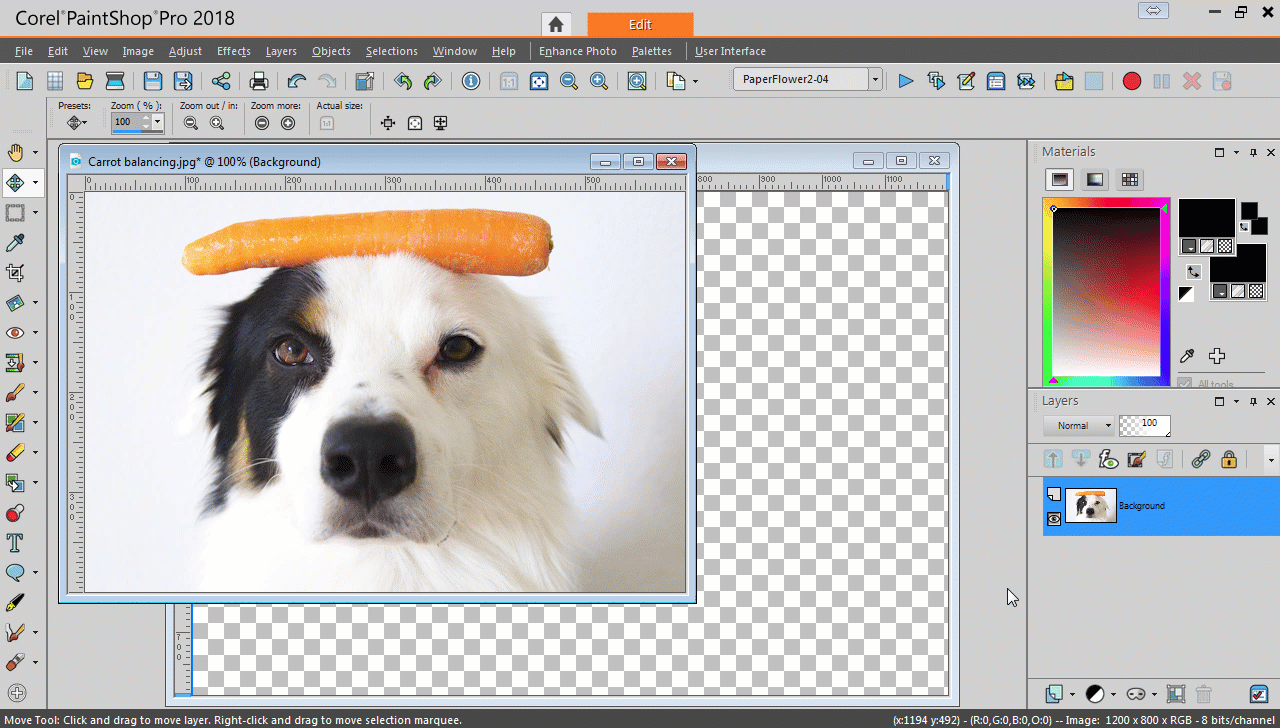
Open up the photo you want to use for your pop art by either dragging it into PaintShop Pro’s Edit tab, or by going to File > Open.

Step 2: Resize your image
If you are working with a large image and want to size it down, go to the Image menu, and choose Resize. Type in the new width or height that you would like to resize your image to, and the other value will adjust automatically, so you don’t experience distortion.

STEP 3: Copy your image
Copy your image by going to Edit > Copy, or use the keyboard command Ctrl+C.
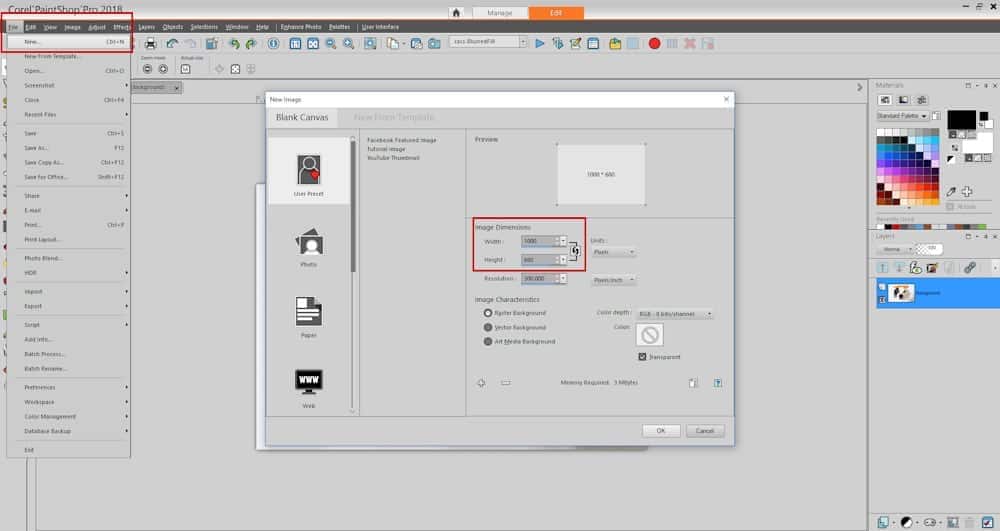
STEP 4: Create a new blank canvas
Go to the File menu and select New. Under Image Dimensions in the New Image dialog box, enter dimensions that are equal to twice the width and twice the height of your resized image (or, the original image if you chose not to resize). Click OK.
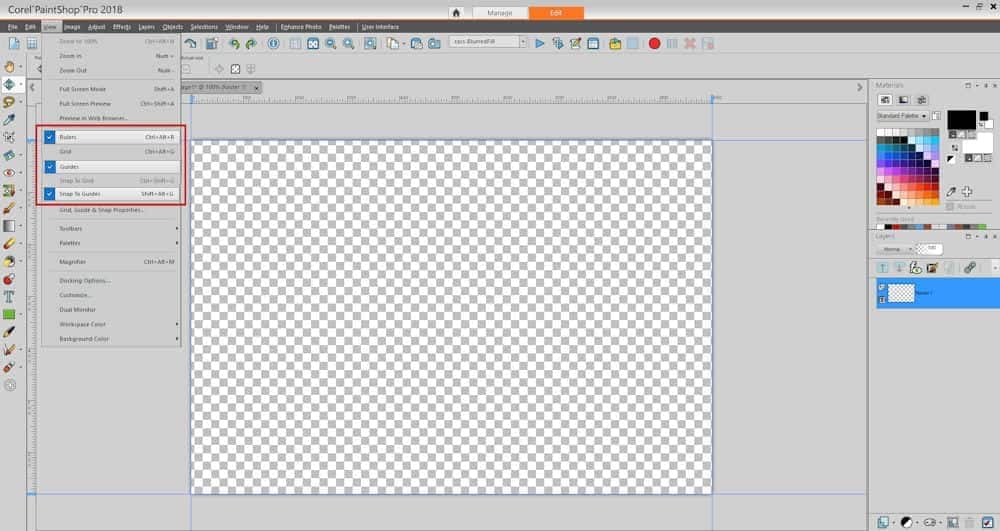
STEP 5: Add rulers and guides
From the View menu, choose Rulers. Then go back to the View menu and choose Guides. Make sure that Snap to Guides is checked in the View menu as well. Hover your mouse over the ruler that now appears on the left hand side of your working area. Click and hold as you drag a guide onto the canvas. Let go of the guide when it is lined up to the maximum width of your canvas, indicated on the horizontal ruler across the top of your working area. If you drop the guide in the wrong place, you can move it again by grabbing it from over the horizontal ruler where the guide line looks a little thicker. Follow the same steps to drag another vertical guide onto the canvas, but this time, place it at the minimum width.
From the horizontal ruler at the top of your working area, click and hold to drag guides that line up to maximum and minimum heights on the vertical ruler.
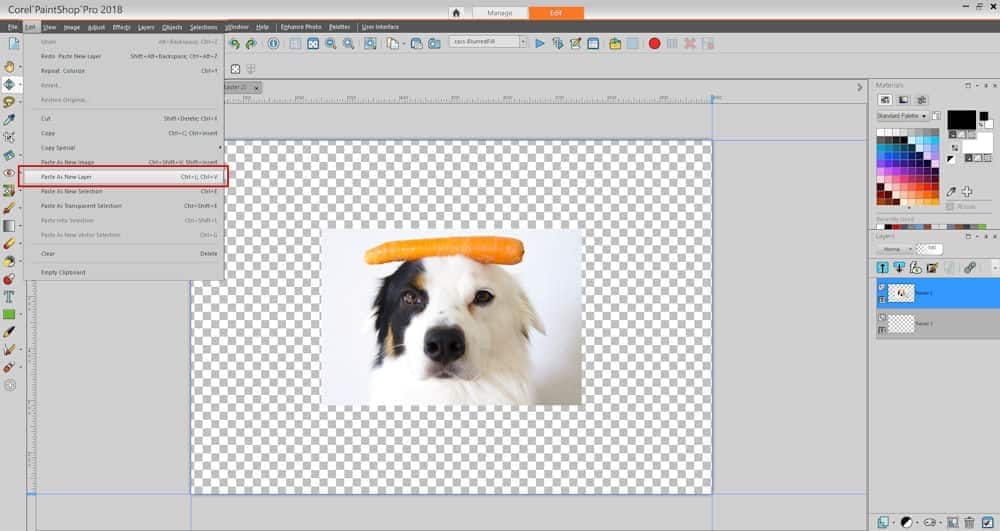
STEP 6: Paste your image onto your canvas
To paste the image you copied in step 3 onto your blank canvas, go to the Edit menu and choose Paste As New Layer, or use the keyboard shortcut Ctrl+V.
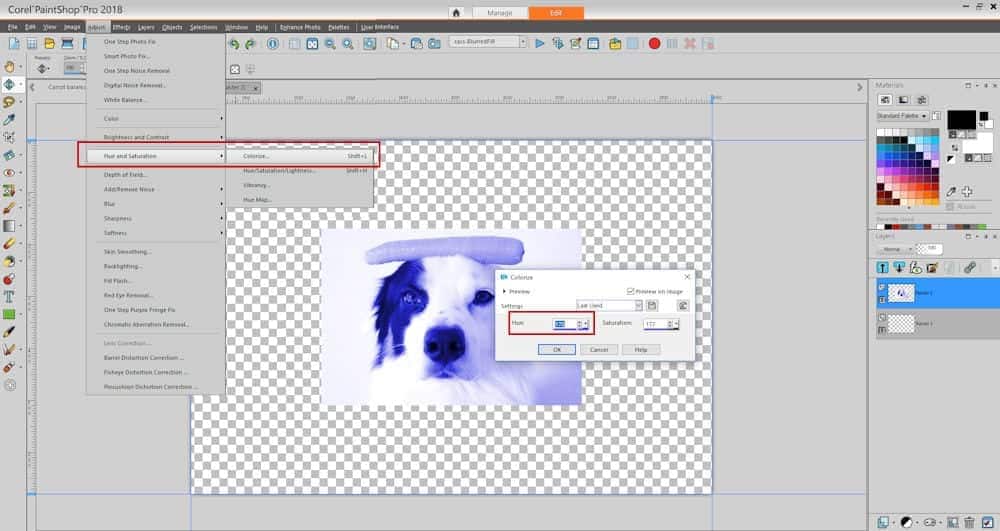
STEP 7: Colorize your image
With the image layer selected in your Layers palette, go to Adjust > Hue and Saturation > Colorize. Move the Hue control up and down to adjust the hue to your liking.
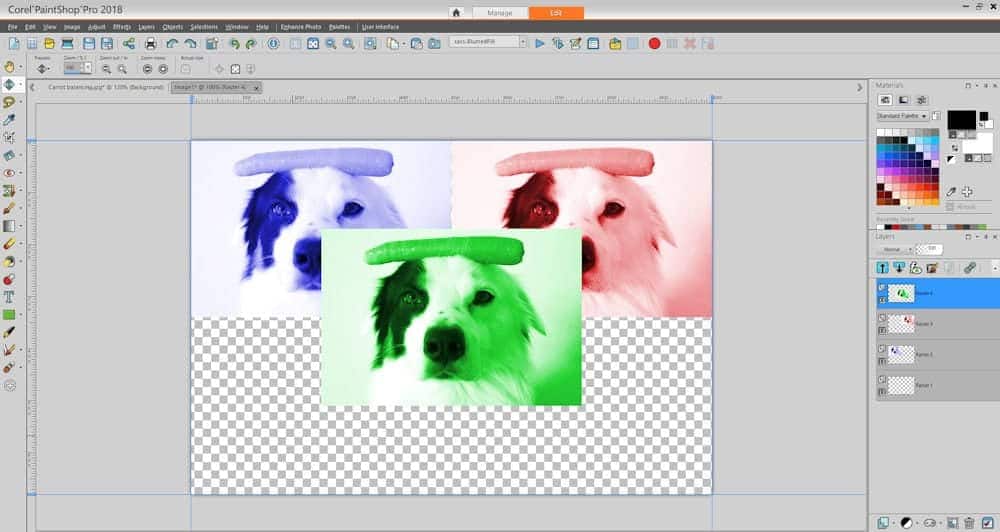
STEP 8: Reposition your image
Select the Move tool, found under the Pick tool in the Tools toolbar. Using the guides you set up, position your image in the upper left quadrant of your working area.

STEP 9: Complete steps 7-9 three more times
Repeat the last three steps, three more times – but with some small tweaks. Each time you repeat step 7, make sure to choose a different hue. For step 8, position your image in a new quadrant each time.
Congrats, you’ve just created personalized pop art in under 10 steps! Why not try adjusting Hue/Saturation and Brightness/Contrast, and then applying a Contour effect for a slightly different pop art effect? Check out the detailed tutorial here.
Download your FREE 30-day trial and make every shot your best shot with PaintShop Pro, your all-in-one photo editing and design software.


0 Comments