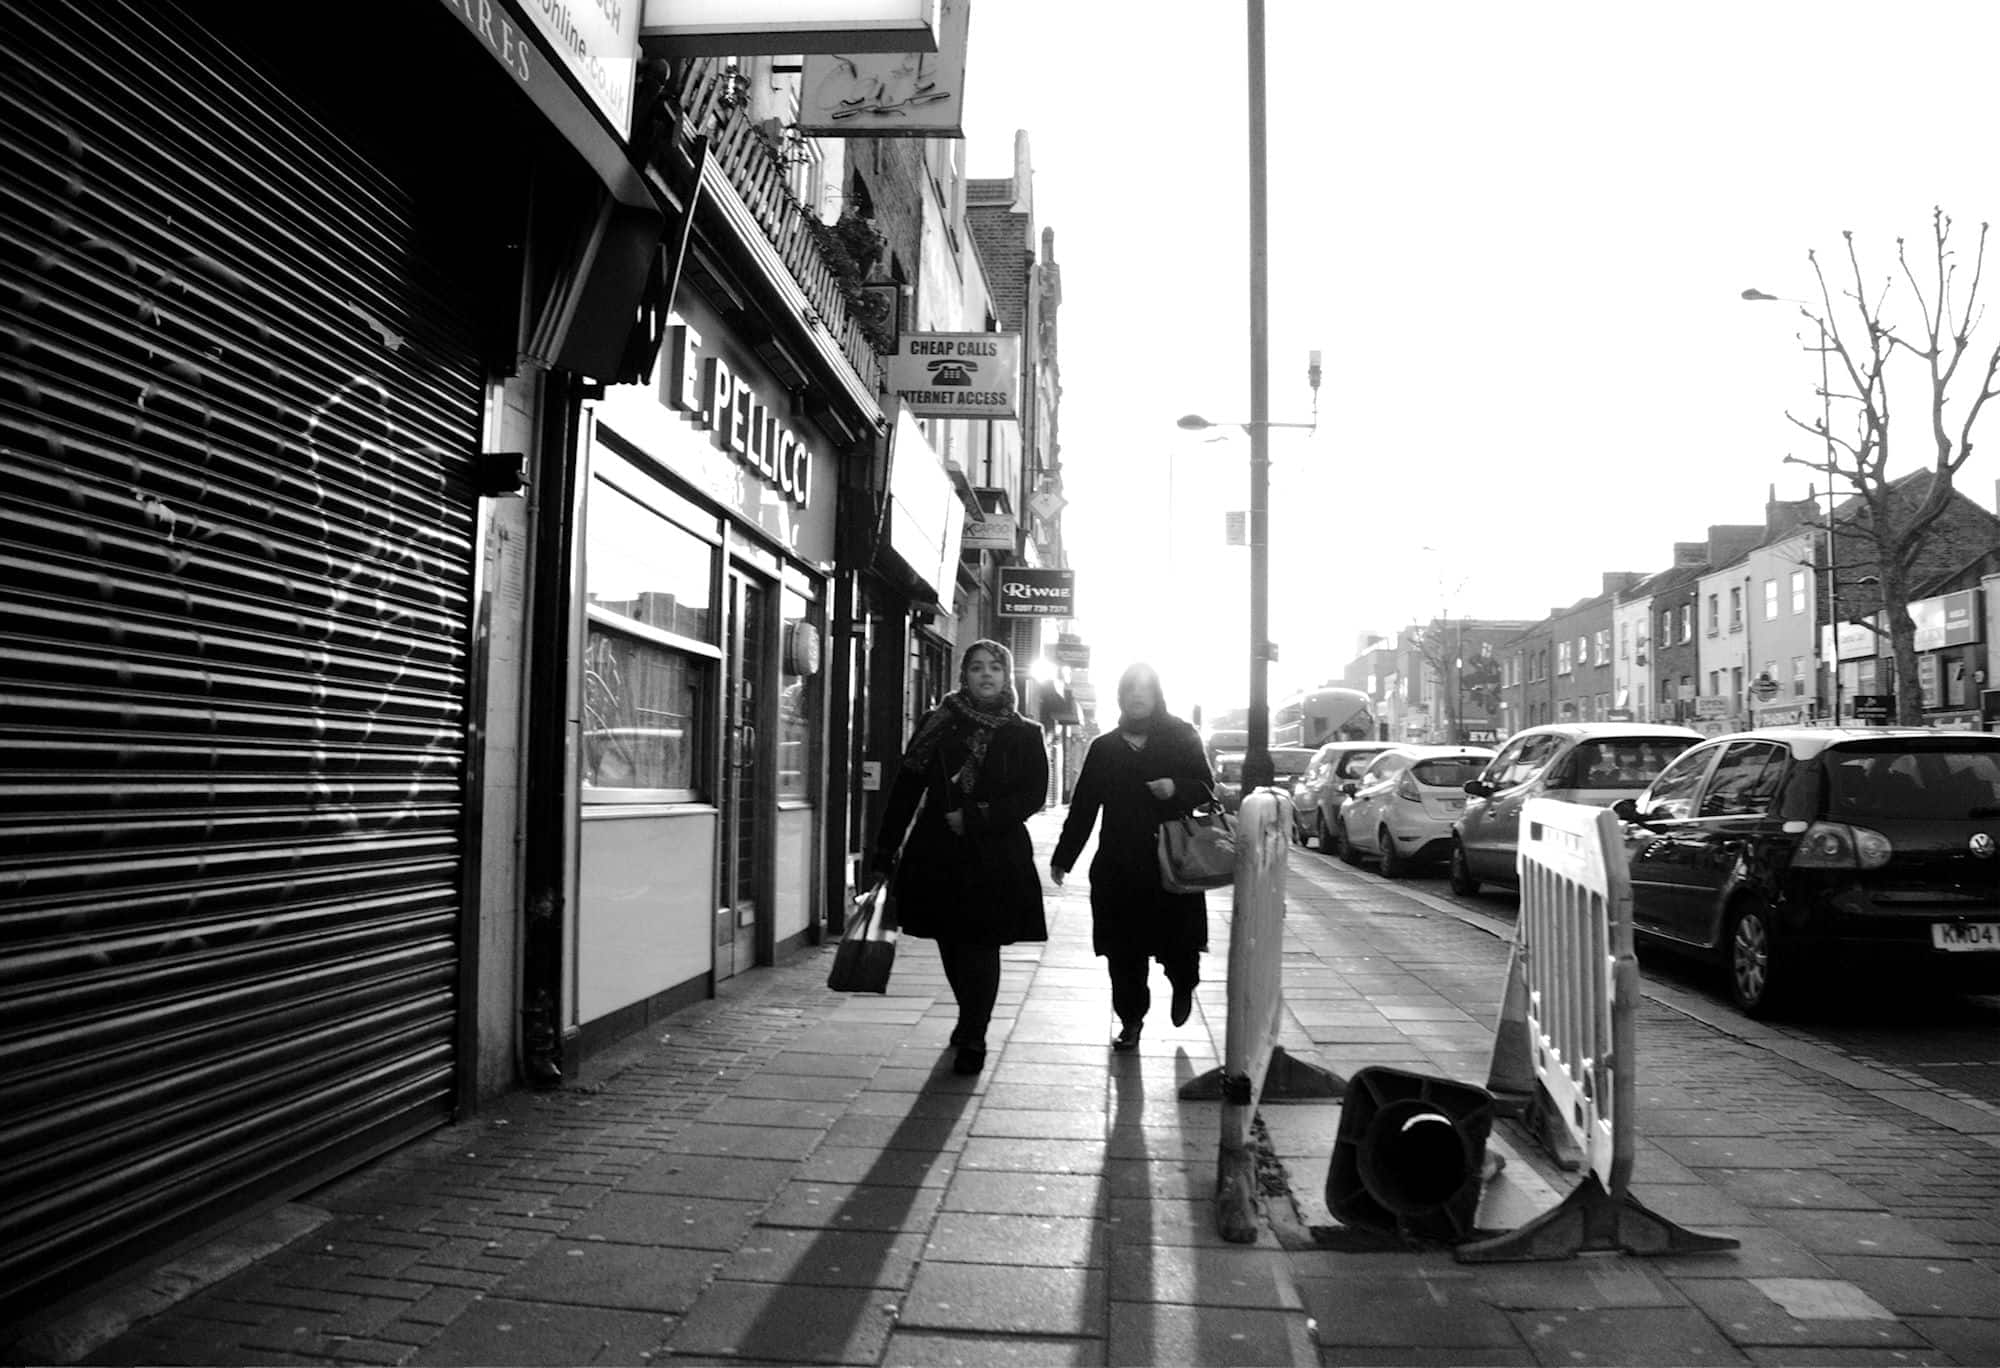
Unless you shoot black and white film or are lucky enough to own the Leica M Monochrom (a digital camera that shoots only in black and white), getting an image from color to black and white can sometimes be a troublesome process when trying to retain detail and apply the perfect balance of settings. Most of the time, this is a personal aesthetic choice; though, in some cases may be a necessity, such as printing for a black and white publication.
There are probably dozens upon dozens of ways to convert an image from color to black and white, and many different decisions you can make along the way to give a photo the type of feel that you want. Today, I’ll go over a quick and easy way to transform your color photos into stunning black and white images using AfterShot Pro.
To Convert, or Not to Convert…
Some people prefer black and white images in general, and either shoot exclusively on black and white film or convert all of their images to black and white. If you’re one of those people, I personally think you’re pretty lucky and don’t really need to make this choice.
Other people, myself included, look at an image in post and wonder whether it would look better in black and white or in color. Sometimes I’ll even have the two versions side by side and I still can’t decide which I like better! It can be a tough call sometimes and in the end the decision usually boils down to your own personal preferences.
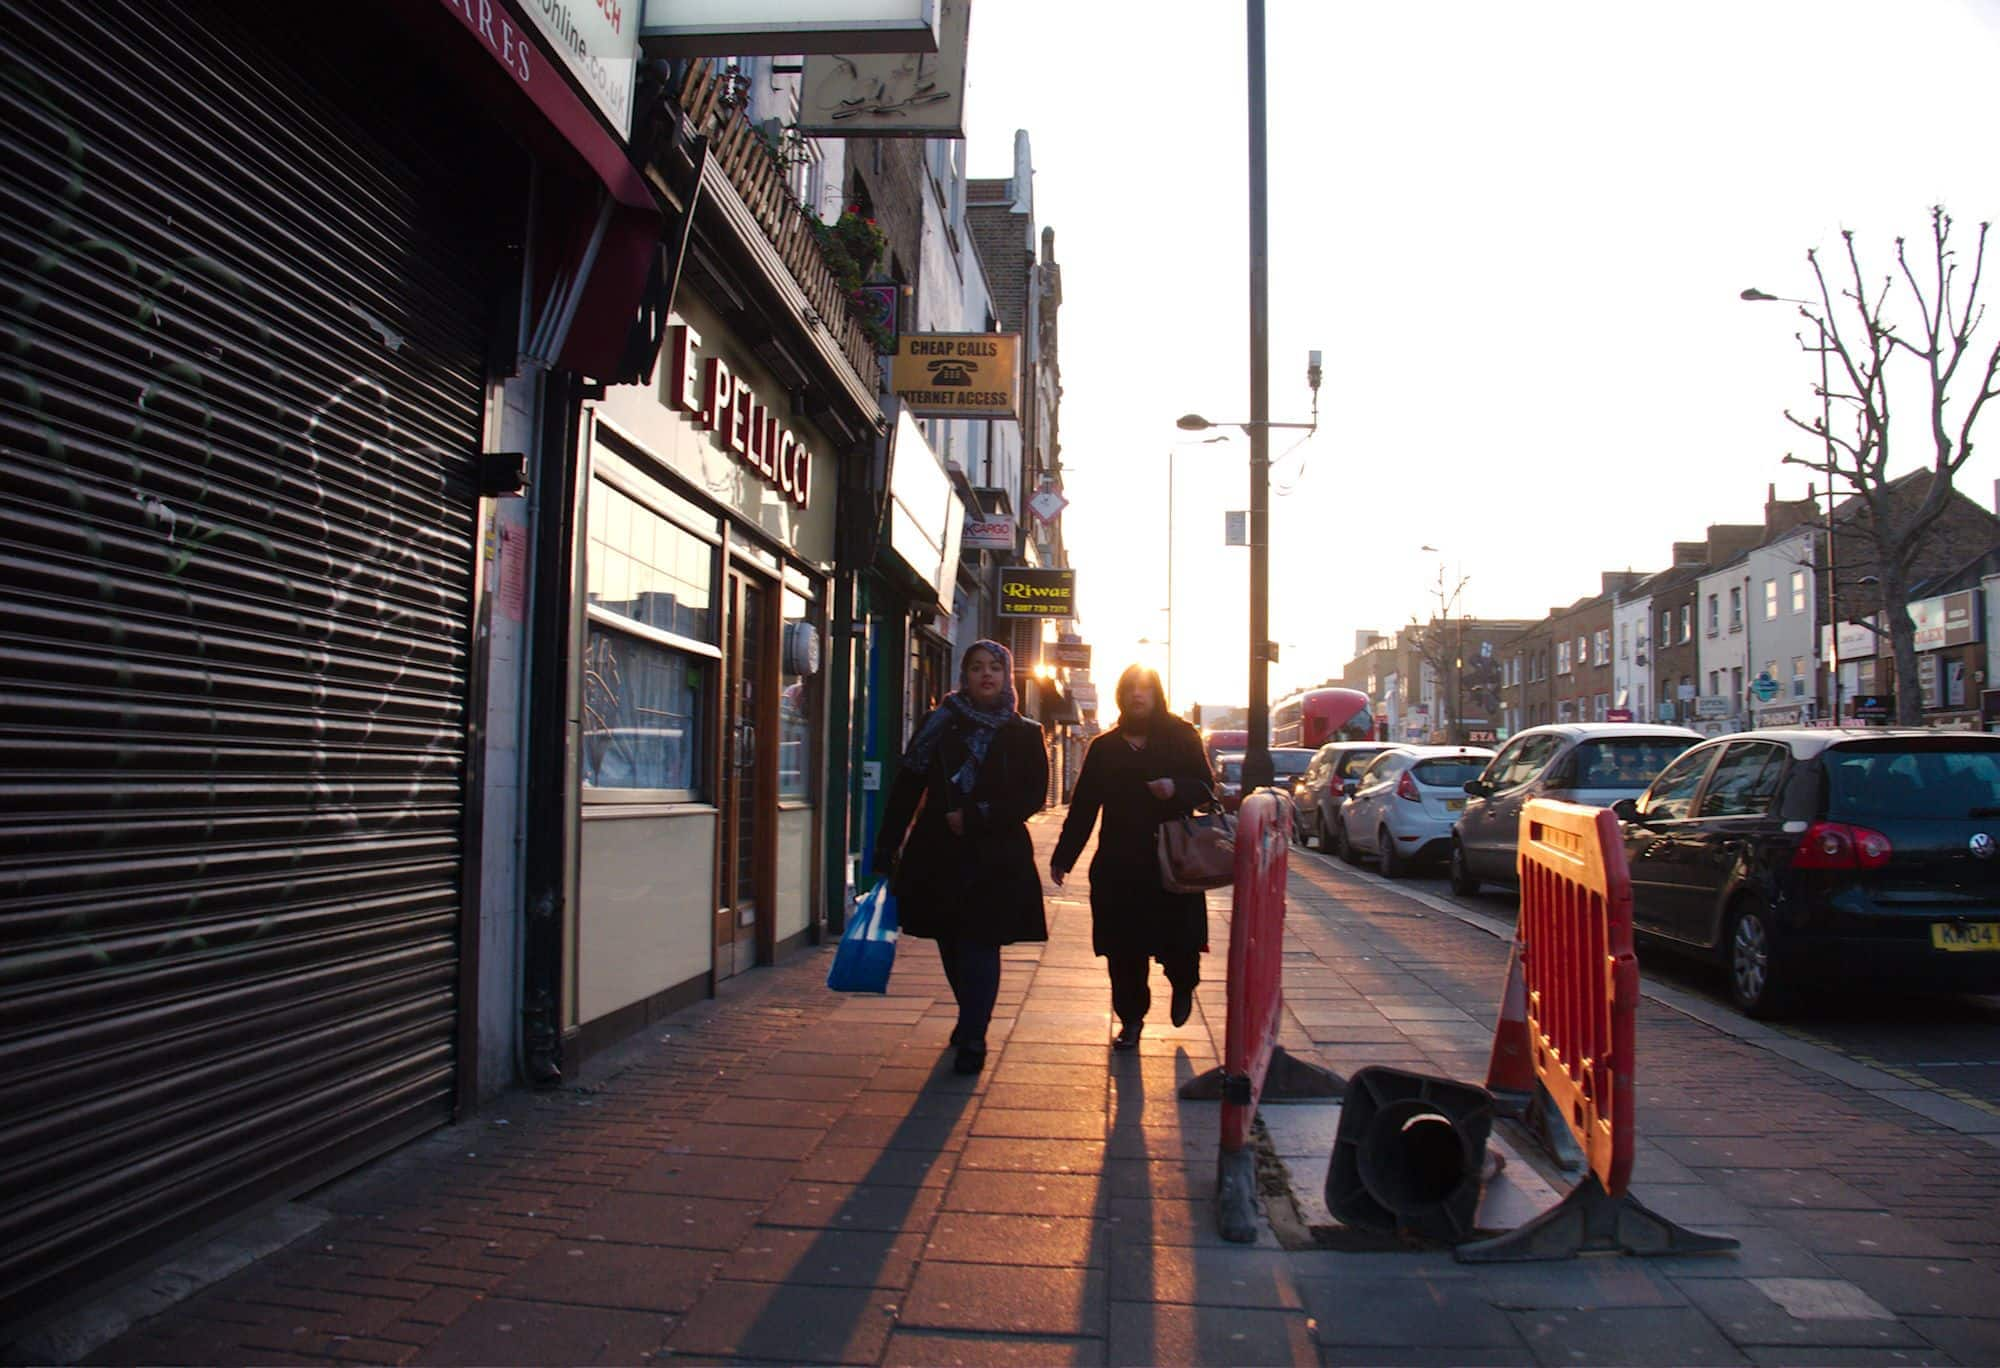
Take, for instance, this image I shot a couple weeks ago around sunset as I walked west facing the sun.
While I really like the orange color in the middle and the orange construction barrier on the right side, the all-white sky and the long shadows make me think this might look better in black and white.
There are definitely some situations that make the decision to convert a lot easier for me. Generally speaking, if I take a photo at a high ISO sensitivity and the resulting image has a lot of color noise, that’s usually a good reason for me to convert to black and white. Sometimes the image still might not work, but if it’s a strong image that is degraded by color noise, this can often be the only way to “save” that shot.
Another thing that might make me want to convert to black and white is if the color temperature is just too bizarre to fix. For instance, mixed fluorescent and tungsten lighting, or some other strange color shift that might occur when using a filter. These are often good candidates for black and white shots.
How Should I Convert?
The quickest way to get a preview of what an image will look like in black and white is to simply remove all color from the image while preserving the luminosity. You can do this quickly by just sliding the saturation slider all the way to the left.
For even more control and better results, AfterShot Pro has its very own Black and White plugin. You’ll find it under the Plugins tab on the right side of your screen, and it should appear at the top of the plugin panel.
AfterShot’s Black and White plugin gives you ultimate control of the final result.
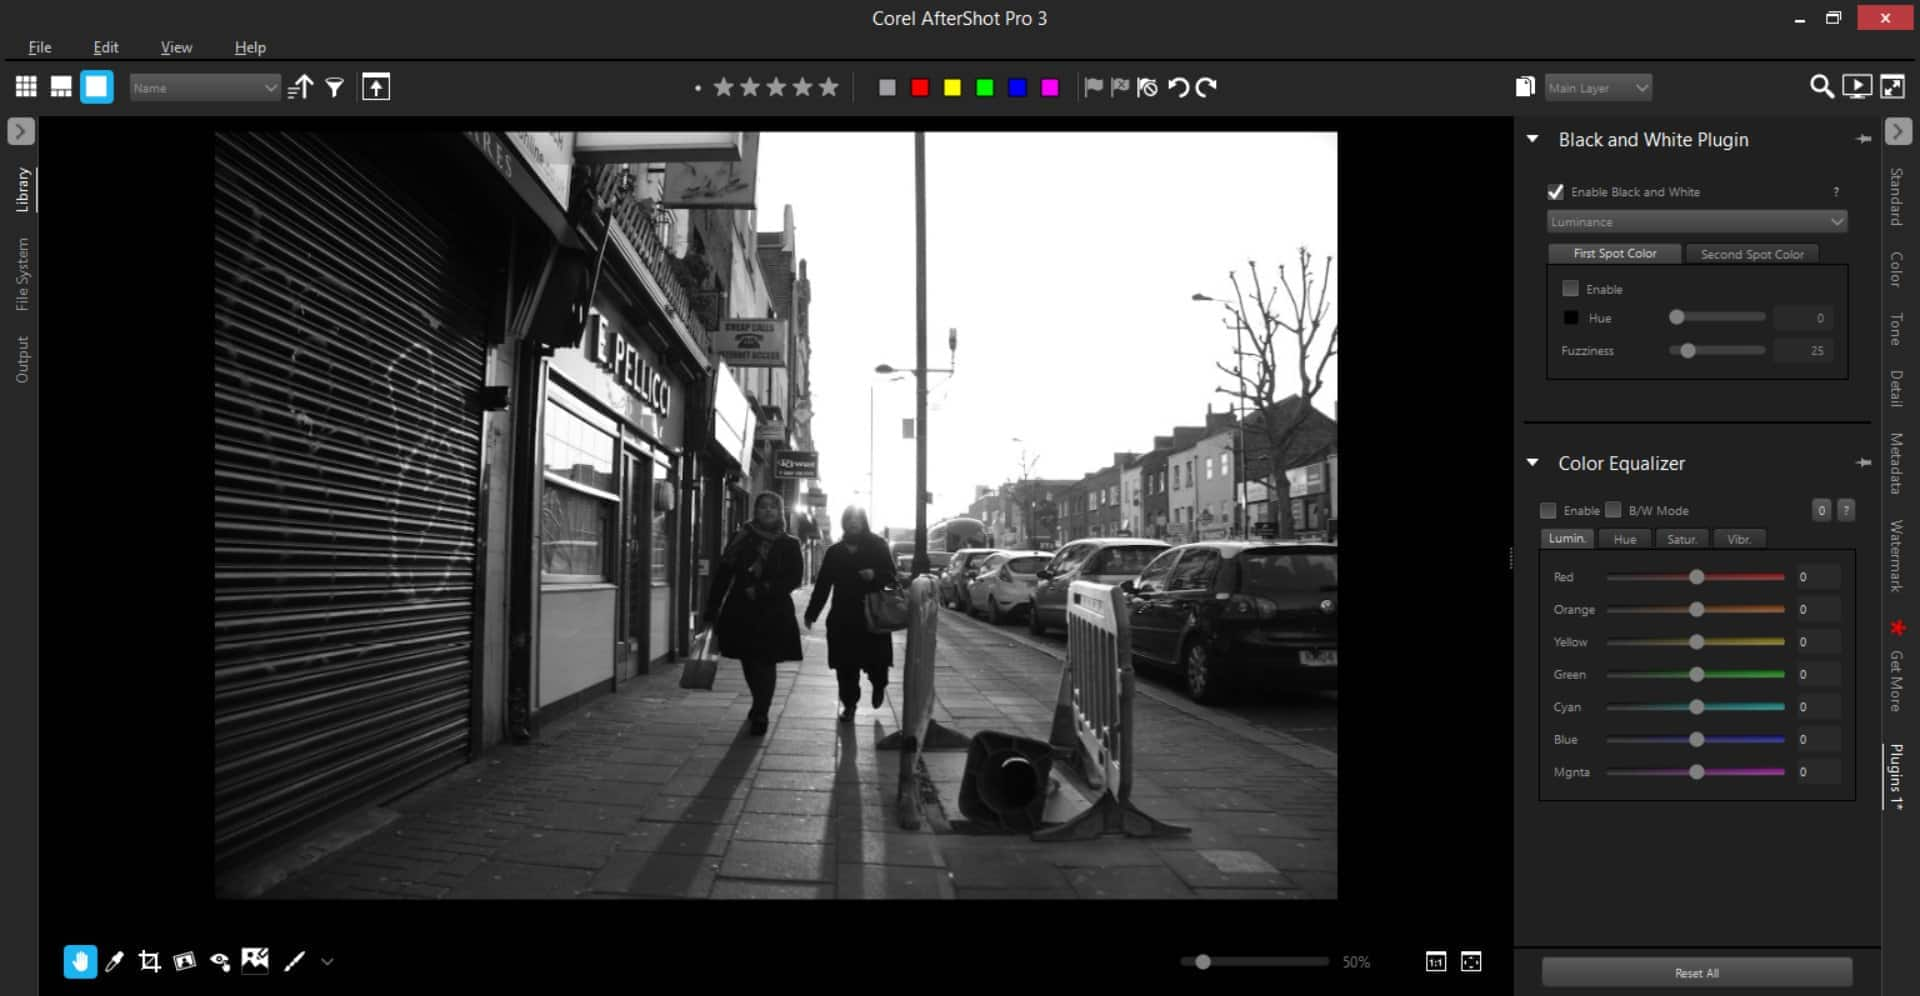
With the plugin selected, I check the box labeled Enable Black and White and I can already see that I like the monochrome version much better, as you can see in the screenshot above.
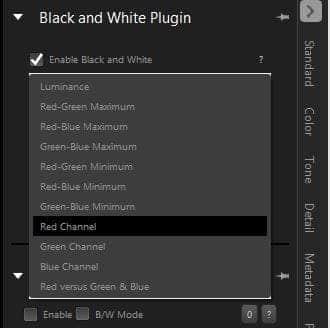
Below the Enable Black and White check box is a drop-down menu where you’ll find 11 choices that each give your photo a different look by mixing the RGB channels in varying ways.
For this image, I see that the red channel gives me the best contrast in the women’s shadows, and the blue channel makes the shadows almost disappear. Since those shadows are an important part to this photo for the look I’m after, I chose to select the red channel from the drop-down menu.
Beneath the RGB channels menu, you’ll see some options for First Spot Color and Second Spot Color, with an Enable check box and sliders to adjust the Hue and Fuzziness.
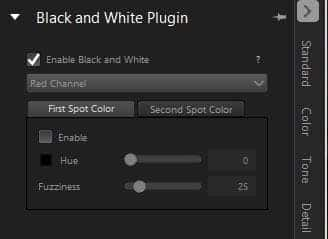
Spot colors allow you to select one or two colors to bring back into the image (think of a black and white photo of a rose where the red of the petals is the only color in the image).
For even further adjustments, you can click on B/W Mode under the Color Equalizer option and tweak each color channel individually. Making these fine adjustments with AfterShot’s Black and White plugin is a really nice touch that gives you ultimate control of the final result.
Applying the Final Touches
Now that I have my conversion started and my channel mix selected, it’s time to tweak the image and put on the final touches. For this, I go back to the Standard tab and the Basic Adjustments panel.
I know that I want to reduce the sun’s glare on the woman on the right’s face, so I make an adjustment layer, bring back the highlights, and paint over her head and face until there’s enough detail where you can see her face.
Next, I bring up the contrast and fill light, and up the blacks just a little bit until I’m happy with the overall image. Of course this is all personal, as I like very “contrast-y” images with strong blacks and whites. Some people, especially wedding photographers and magazine editorial photographers these days like very low-contrast images. So experiment with all of the amazing tools that AfterShot Pro has to offer until you find your own style and look. You can see my final image below.
And that’s really about all there is to it it! It couldn’t be any simpler to convert your images from color to black and white using AfterShot Pro. The only hard part is deciding which images to convert, and how you want them to look!
Want to discover even more AfterShot add-ons? Find a selection of plugins for AfterShot Pro here.
Download your FREE 30-day trial and make every shot your best shot with PaintShop Pro 2023, your all-in-one photo editing and design software.




2 Comments