High Dynamic Range post-processing is often complicated and daunting for many photographers. The idea of manually blending multiple exposures and carefully adjusting settings often sends many photographers running for the hills. HDR Efex Pro from the Google Nik Collection is available as a free download. It’s completely compatible with Corel PaintShop Pro.
HDR Efex Pro allows users to create a variety of different HDR looks from a series of photographs or a single image. The plugin comes equipped with presets as well as manual settings that give the photographer a great deal of flexibility when it comes to creating realistic looking images or artistic interpretations.
Tone Mapping
Tone mapping refers to the processing of a single image to reduce deep shadows and bring out detail within an image. To utilise the tone mapping option, simply open up HDR Efex and select the single image option. Once HDR Efex is open, you have the ability to adjust images to bring out more details. You can create looks that are very subtle or choose to add an artistic flare to the image.
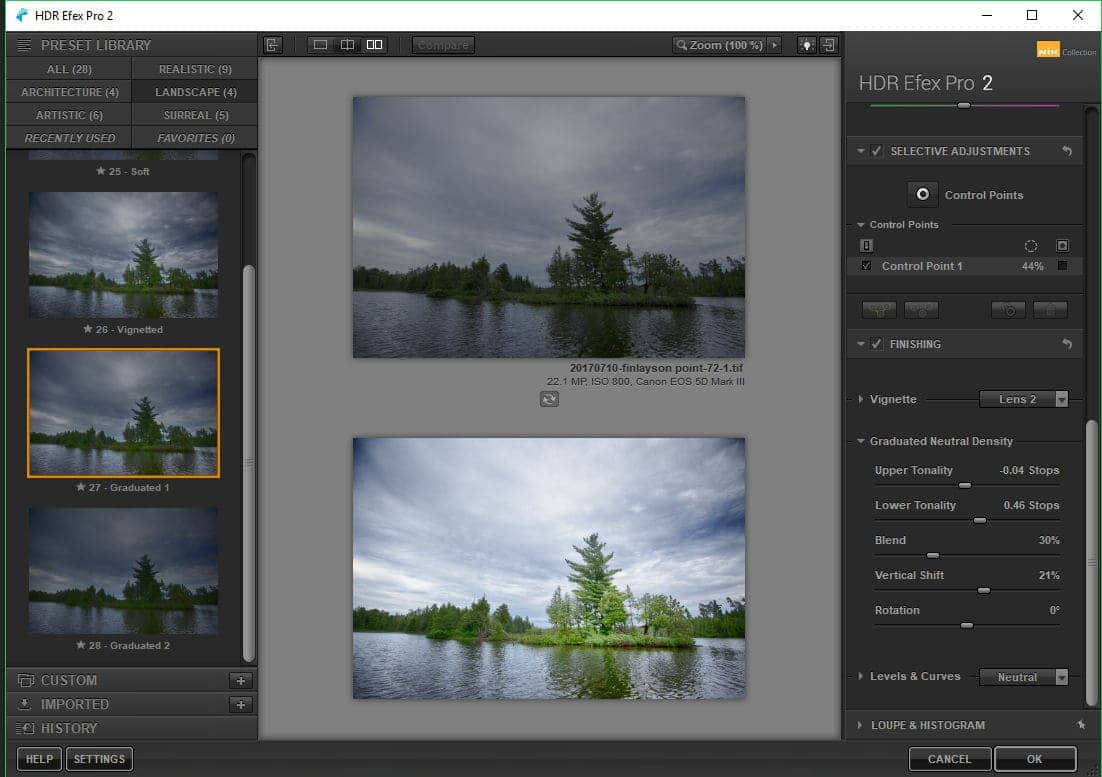
Here you can see the before and after effects of using HDR Efex. The original shot was very flat and grey in tone. The use of HDR Efex gave the image more depth and appeal.

The colors are now brighter. The image appears less muddy, and overall the photo is pleasing to the eye. The process by which this look was attained is quite simple. Let’s take a look at another image as we walk through the editing process. In this case, the lighting is very flat. There are few highlights, and the image is quite monochromatic. After a few simple adjustments in HDR Efex brings more life to the image.
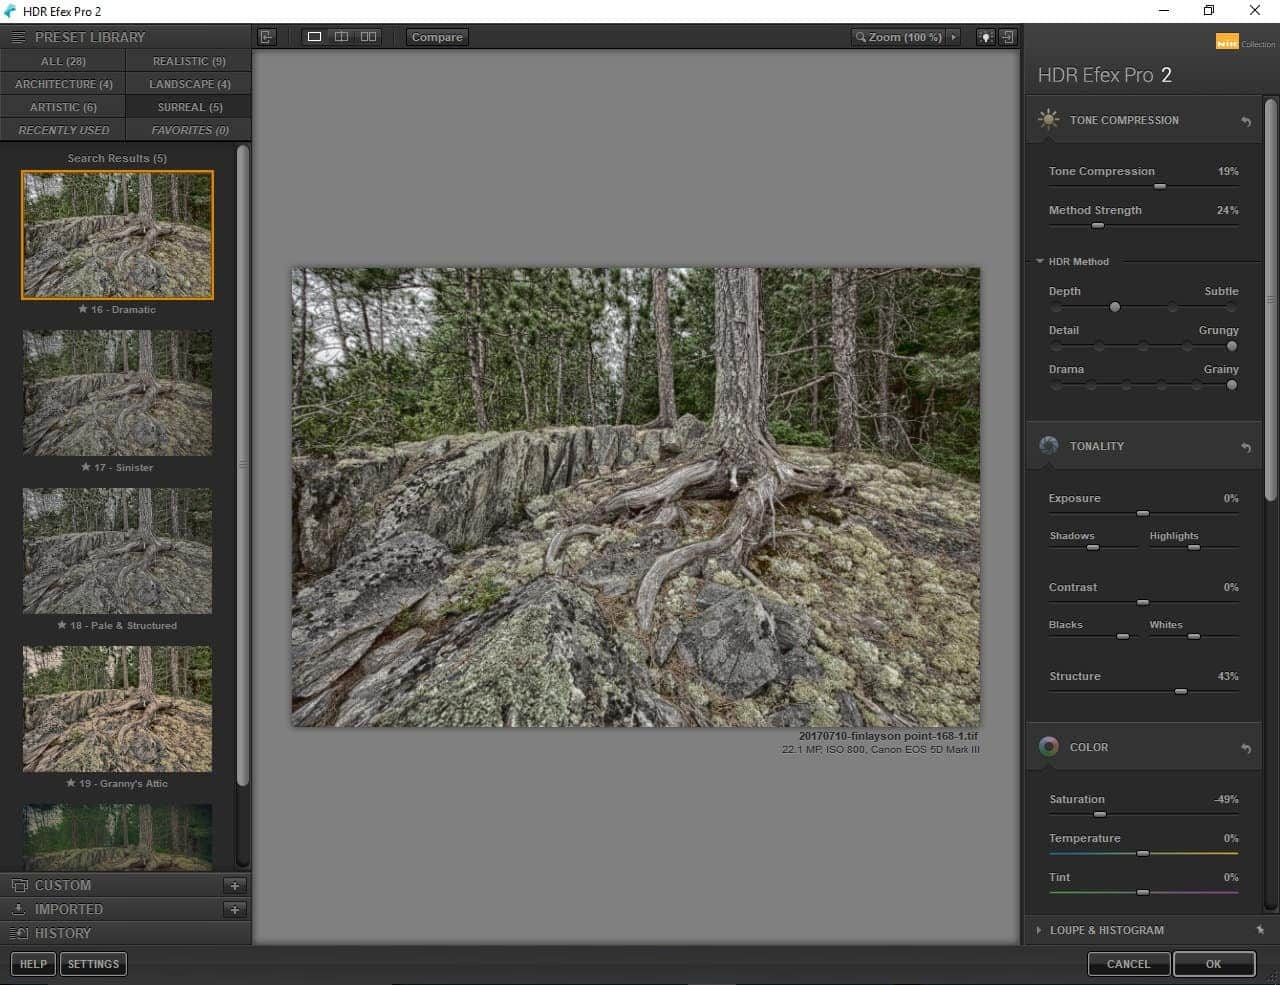
The first step was to select a preset from all available options. Several options we considered. Here you can see the effects of the “Dramatic” preset on the image.
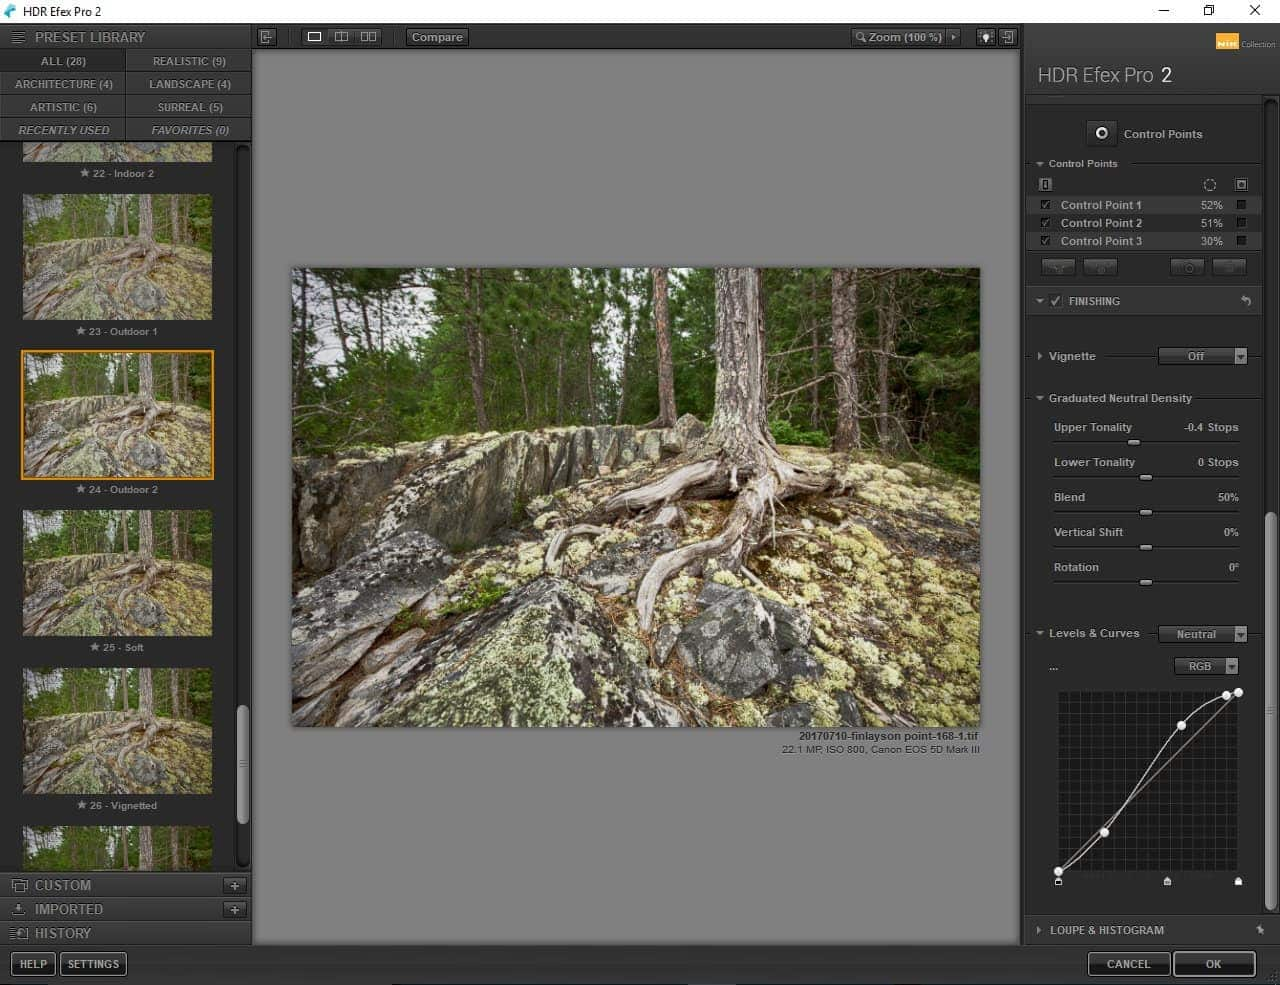
Eventually, the preset “Outdoors” was selected, and the process of customization began. Control points were added, and the curves were adjusted. A light vignette was introduced at the end to give the image some depth.
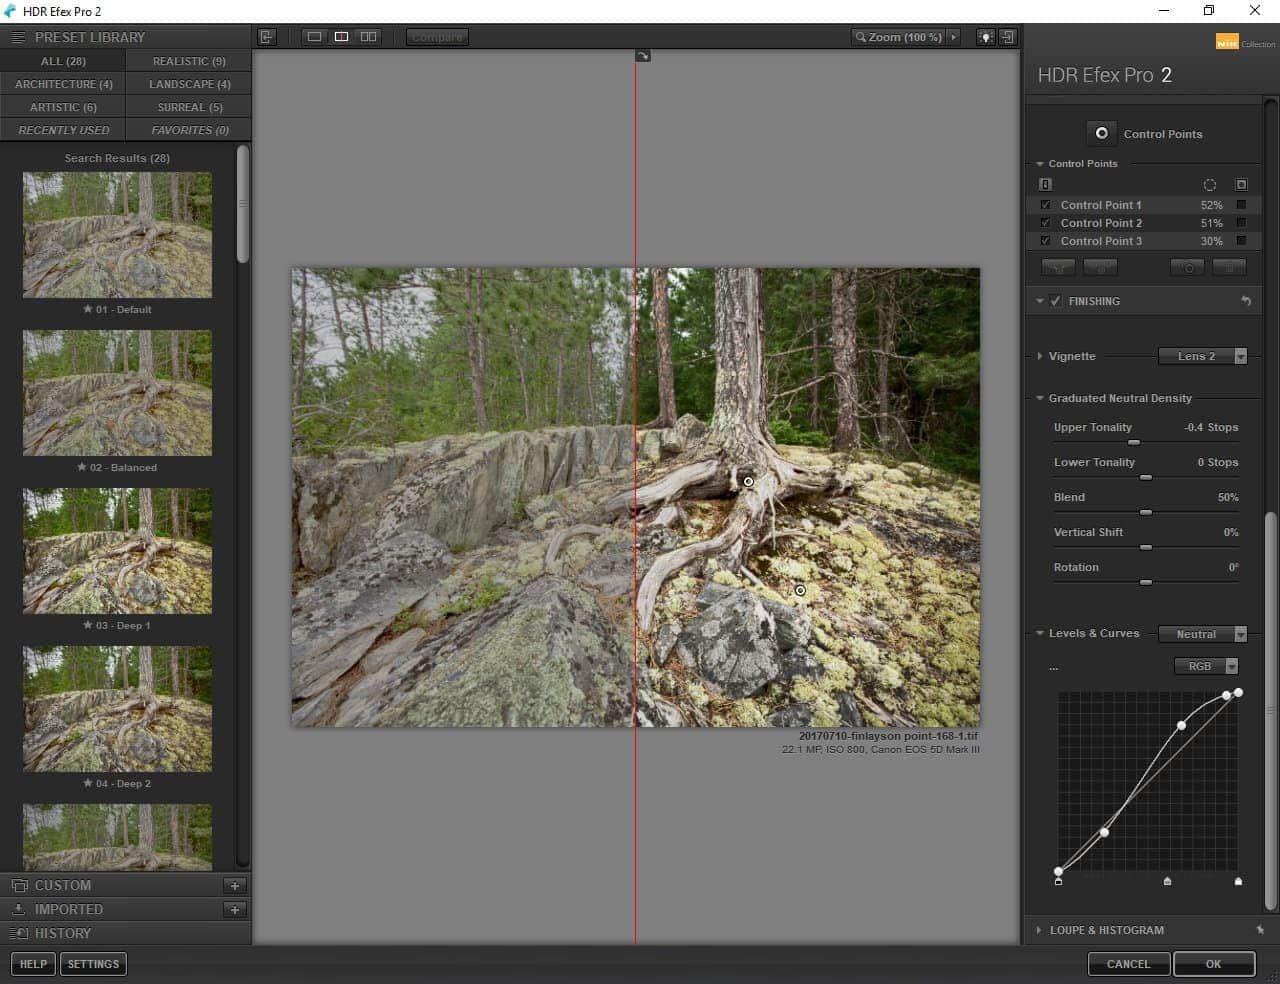
Consider the split screen view of this image. HDR Efex made the colors richer, added more detail to the photograph and created a realistic looking image.
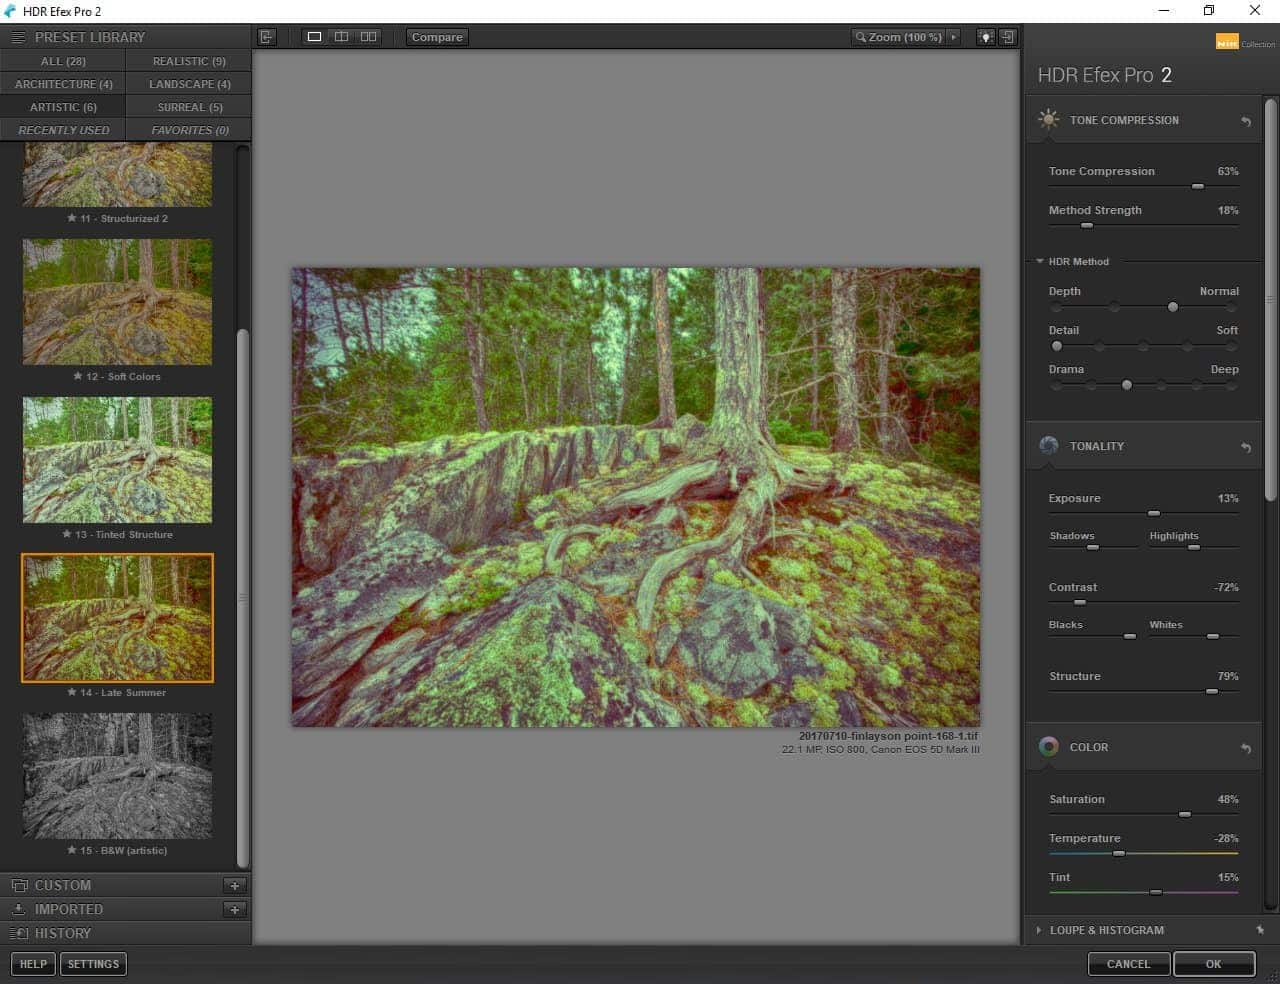
It’s also possible to take an image and work to create something less realistic. As you can see it’s possible to create very different looks with the same base image. Here the same image had the artistic preset called “Late Summer” applied. The exposure was also adjusted slightly. The look is completely different from the initial edit.
Merging Multiple Images
HDR Efex also offers the option to blend multiple exposures to create HDR images easily. This option is also easy to use and quite quick to complete. Simply select the Merge option in HDR Efex. Then select multiple exposures of the same scene to include in your post-processing. Once you are ready, choose to open the “Merge Dialogue”.
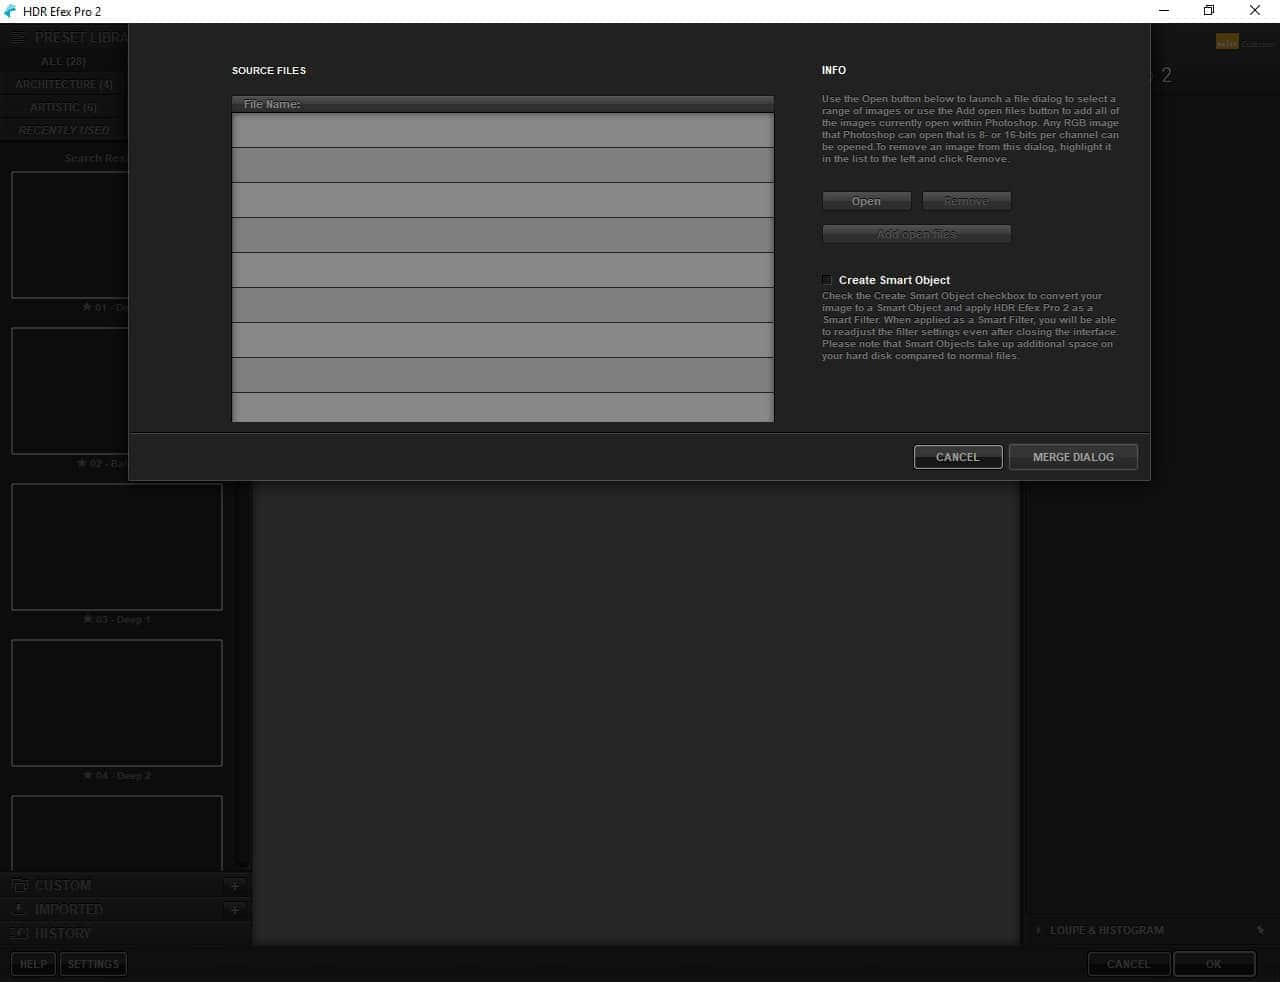
Multiple photographs are then combined. HDR offers a fantastic feature called Ghost Reduction. By checking and adjusting this feature, you can remove elements from the images that may not be consistent throughout the shot. An example may be a moving car or a person who walks through the image. Simply select the image you would like to use a reference. The program will remove all other “ghosts” from the piece.
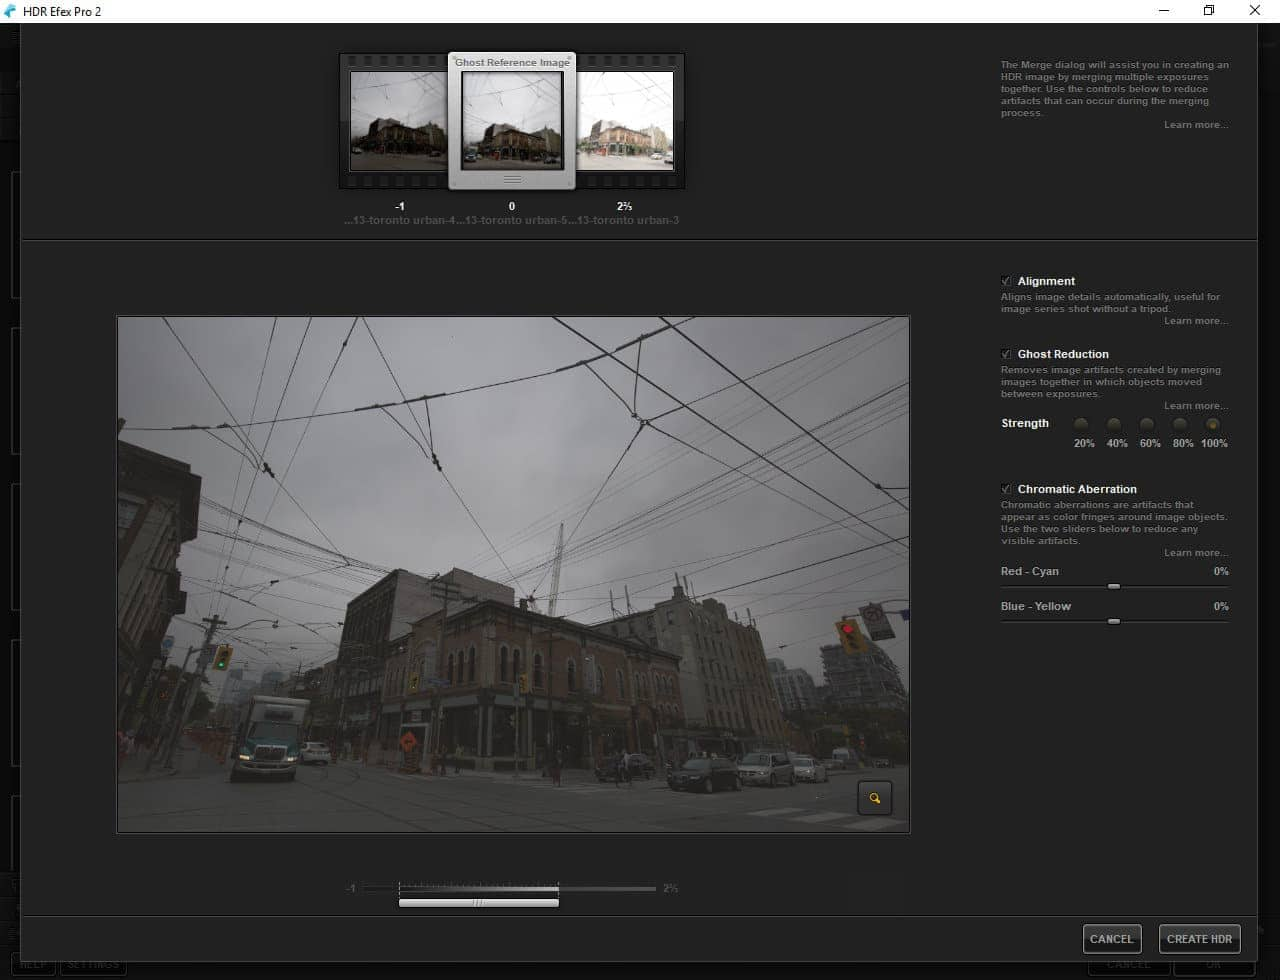
Once you have adjusted the setting within the merge options, it’s time to click on the “Create HDR” button and take your image into the customization options.
Now, time to adjust and tweak your image to your tastes. You can add vignettes, adjust curves and adjust the tint and temperature of the photograph.
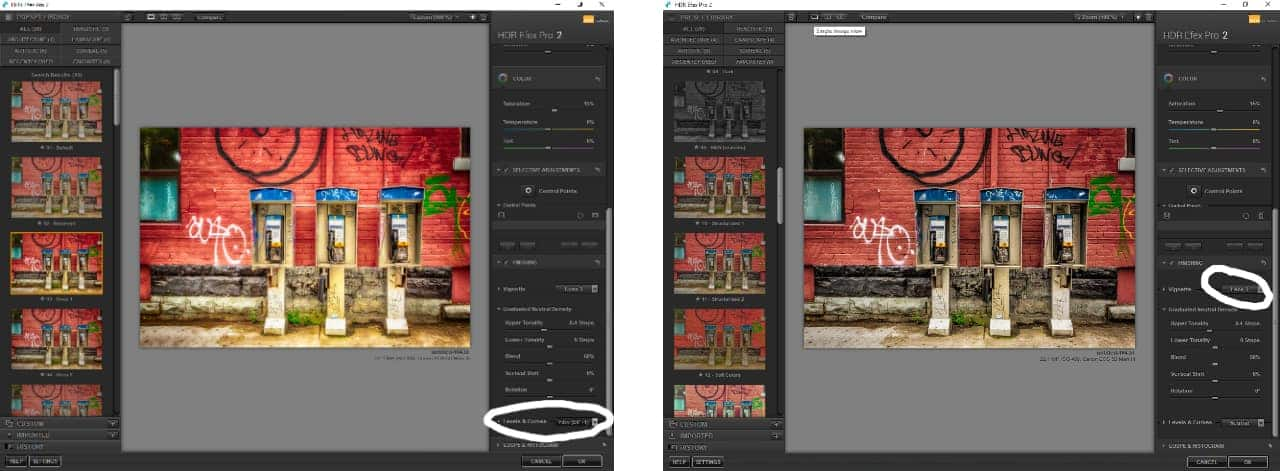
It’s also possible to select from the multitude of presets available in HDR and simply allow the program to make all the adjustments for you. HDR Efex offers so many different creative possibilities that the sky’s the limit when it comes to creating HDR images.
Some important terms to learn
Tone Compression
This term refers to the amount of shadow that is present within the image. Tone compression helps to balance out the tones within the image. In HDR Efex, moving the slider to the right brightens the shadows and compresses this information. Shifting the slider to the left makes shadows darker.
Method Strength
This slider is used to strengthen the effects you create within HDR. Reducing the effect can create a more realistic looking image. Method strength will bring out fine detail and also add a little bit more contrast. If you are working to create an artistic effect, you can adjust the setting to the more extreme settings.
Tonality
The tonality section allows you to control exposure, highlights and shadows. This controlling of the highlights and shadows can be done from the histogram. It’s always important to check the histogram which is available in the lower right-hand corner where the program reads “Loupe” this way you can adjust contrast without blowing out the highlights. It’s important to understand that tonality does not adjust the amount of detail visible within the image. These are functions also available in a non-HDR program.
Now that you’ve gained some understanding of how HDR Efex works it’s time to get creative and explore the possibilities for using HDR Efex Pro. Download the plug-ins today and share your creations with us in our photo gallery. You should also check out our other tutorials on using the Nik Collection in PaintShop Pro. Follow the links provided at the end of this article to explore the creative power of the Nik Collection when combined with PaintShop Pro. Download a free trial of PaintShop Pro today. The program is available for download without a subscription.
Exploring the Google Nik Collection
How to Use Plugins in PaintShop Pro
Using Analog Efex Pro to Get the Look of a Classic Film Camera
Using Color Efex Pro to Correct Color, Retouch and Create Effects
Using Dfine to Control Color Noise
Using Sharpener Pro to Bring out Hidden Detail







0 Comments