

This video covers following topics:
0:28 Can I run actions or scripts in PaintShop Pro? And if so, how?
1:38 How do I install and use the free version of GRFX Studio that comes with PaintShop Pro 2020 Ultimate?
2:44 White areas or objects in my images appear as yellow. How do I fix this?
3:21 I have a hard time finding extra content, like picture tubes, scripts and picture frames, when I upgrade to a new version of PaintShop Pro.
4:30 My cursor shape has changed to a cross-hair symbol, how do I change it back to normal?
5:10 How can I create shapes, such as a circle, in specific units like centimeters or inches?
6:24 How do I clip layers?
You can use the video time stamps if you only want to view a particular question and answer. Below is a written version of this session, with links to related tutorials that provide more details on some of the topics.
Resources
Download a printable PDF of the written tutorial (PDF, 872 KB)
Find the PaintShop Pro User Guide for your version
View our full collection of PaintShop Pro tutorials to learn more
Can I run actions (scripts) in PaintShop Pro and if so, how?
In PaintShop Pro, actions are called scripts. Scripts are like mini-programs that will automatically apply a series of effects or adjustments to your photos.
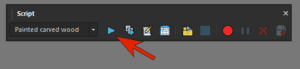
Scripts are run from the Script toolbar, which you can open by going to View > Toolbars > Script.
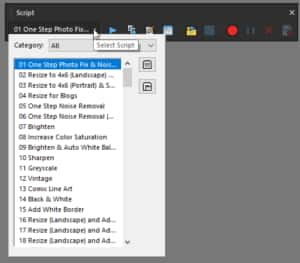
All you need to do is choose the script you want and click the Run button.
PaintShop Pro includes a number of scripts that are already installed. To get more scripts, go to the Welcome Screen, click Get More, and filter the list to show only Scripts.

Learn more about using scripts in this full tutorial How to Use Scripts.
How do I install and use the free version of GRFX Studio that comes with PaintShop Pro 2020 Ultimate?
The Corel edition of GRFX Studio is included with PaintShop Pro 2020 Ultimate. To launch it on an open image, go to Effects > Plugins > AutoFX Software > GRFX Studio Corel Edition.
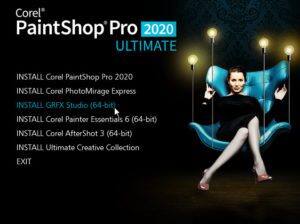
If it is not listed under the Plugins menu, you can install and activate GRFX Studio manually. In Windows go to C:\ Program Files (x86) \ Corel \ Corel PaintShop Pro 2020 Setup Files and open the Autorun.exe file. On the window that opens, click to Install GRFX Studio.
How to Activate GRFX Studio Corel Edition:
- Open GRFX Studio Corel Edition either from the shortcut on your Desktop, or by clicking Start > GRFX Studio Corel.
- Enter your email address in the field and click Continue.
- Enter your activation code from the email and click Activate Software.
- GRFX Studio will confirm the activation with a message Activation successful! Click OK and now the plugin should be available in the Effects > Plugins menu.
Learn more about GRFX Studio in our full tutorial How to Use GRFX Studio.
When I open PaintShop Pro, white spaces on the screen appear as yellow. How do I fix this?
The first thing to check is whether PaintShop Pro is identifying white correctly. Use the Eyedropper tool on the Materials palette to sample a yellow pixel you think should be white.
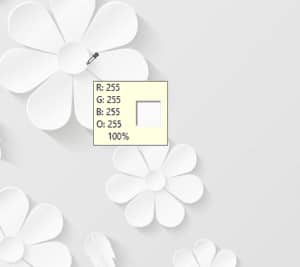
If the RGB values are all 255, which is white, then PaintShop Pro is working fine but you have a display issue. This is often caused by a loose connection between the monitor and computer, so check that first.
If your monitor connection is fine, the second check is to make sure your video drivers are up to date.
I have a hard time getting extra content, such as scripts or brushes, to appear in the right place when I upgrade to a new version of PaintShop Pro.
All your extra content such as scripts, picture tubes, picture frames, brushes, etc. should work not only in the version that was active when you purchased the content, but in later versions as well.
The easiest way to import all your old content into your new version is to choose File > Import > Content from Previous Versions. This brings in everything from the past three releases that was installed into the default folders.
If you need to migrate content from versions that go farther back than three releases, then you can find that content and copy your files manually from the older version folders to the new version folders.
Content is usually stored in these locations (replace red fields with your name and version number):
C:\Users\YOURNAME\Documents\Corel PaintShop Pro\VERSION#
C:\Program Files\Corel\Corel PaintShop Pro VERSION#\Languages\EN
C:\ProgramData\Corel\Corel PaintShop Pro VERSION#
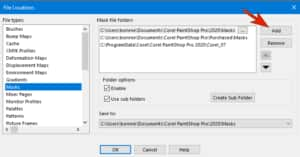
If you have content you’ve placed in locations other than the default folders, you can direct PaintShop Pro to look in those folders. Go to File > Preferences > File Locations and select the content type you want (i.e. picture frames). In the file folders list you’ll see all the folders that PaintShop Pro currently looks in to populate content libraries. Click on the 3 dots to browse and select a new folder, click Add then OK.
IMPORTANT! You must be using the Complete workspace in PaintShop Pro 2018 and higher in order to access File > Preferences > File Locations.
For some tools, my cursor shape is a cross-hair symbol. How do I change this back to normal?
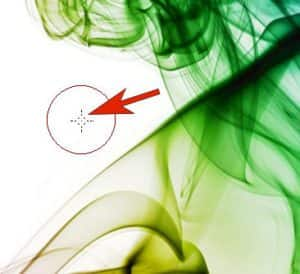
If your cursor shape has changed to a cross-hair symbol, it means that Precise Cursors have been enabled. Some users prefer this setting when they’re working in very fine detail.
With Precise Cursors, there is a cross-hair on your cursor when using the Selection tools, Background Eraser, Paint Brush, etc.
To turn this off, go to File > Preferences > General Program Preferences > Display and Caching, and uncheck Use Precise Cursors. Click OK and your cursors will be back to normal.

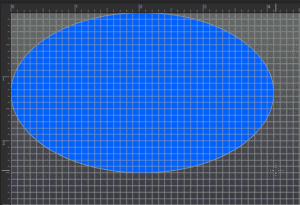
How can I create shapes, such as an ellipse, in specific units?
PaintShop Pro works in pixels – these are the values that appear at the lower right corner. But sometimes you may need to create a rectangle in inches or a circle in centimetres.
First, go to View > Rulers to display the ruler guides, which use pixels as the unit of measure.

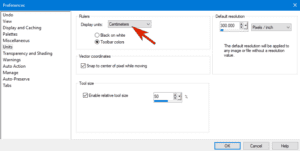
To change the units of measure, go to File > Preferences > General Program Preferences > Units. Under Rulers, change the Display Units setting to centimetres and click OK.
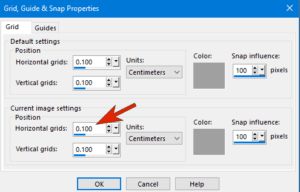
Under the View menu, click on Grid to display the grid and then click on Grid, Guide & Snap Properties. In the window that opens, go to the Current Image Settings section, and change the Units to centimeters. You can then change the settings for the Horizontal and Vertical grids. For example, if you set 0.1 for horizontal and vertical grids, this means 10 grid spaces per centimeter, or in other words, each grid square is 1mm x 1mm.
Under the View menu turn on Snap to Grid as well.
Now when you use the Ellipse tool to create an ellipse of a specific size, just click and drag to create the shape using the rulers and grid lines as guides and the shape will automatically snap to the grid lines.
How do I clip layers?
Clipping is done with a mask. There are lots of mask options, but we’ll look at just two examples.
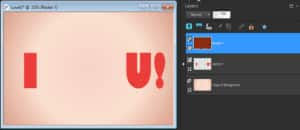
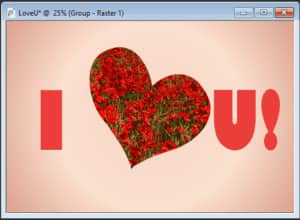
This image has 3 layers: a top layer with an image of flowers, a middle layer with text and a bottom layer with a gradient fill.
We also have another image open that is a heart shape. The goal is to clip the flowers using the heart shape.
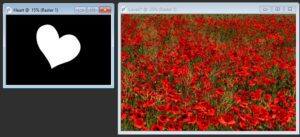
In the heart image, black is what will become blocked, and the white area indicates what will be clipped and show through.
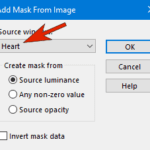
With the flower layer selected in the Layers palette, click the New Mask Layer icon and choose From Image.
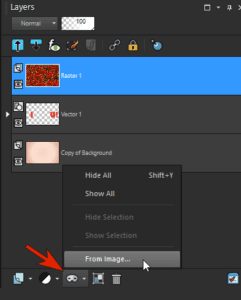
In the Source Window dropdown, choose the heart image and click OK.
Now the flower layer is clipped to the heart shape.
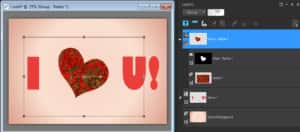
With the mask group layer selected in the Layers palette, you can use the Pick tool to move the heart flower mask into place and resize if necessary.
In the second example we have a chilly looking penguin above a beach background layer. With the Smart Selection Brush set to Add mode, select the bird, trying to be as exact as possible.
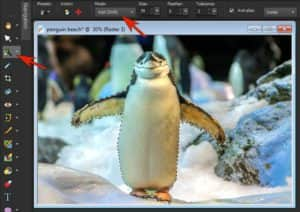
Click the New Mask Layer icon at the bottom of the Layers palette but this time choose Show Selection.
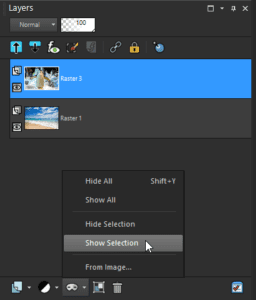
This will mask out the winter background outside of the penguin selection, allowing the beach background to show through and now this lucky penguin gets to leave the wintry weather behind.

Learn more about masking in our tutorial series Working with Masks.
