Some situations and events have always been notoriously tricky for photographers to capture… I’m talking about those times and locations where sunsets or strong backlights come into play. These scenes can be difficult because of the extreme range between the highlights and shadow areas. Unfortunately, neither film or digital sensors have ever been able to properly expose both ends of the extreme in a single capture–but fear not!
HDR (or high dynamic range) post-processing techniques allow photographers to overcome this limitation by capturing a series of exposures, ranging from properly exposed highlights up to properly exposed shadows, and then merging or combining the best of these exposures into one single image.
PaintShop Pro has a dedicated module to help with high dynamic range processing, called HDR Merge, so you can practice and quickly master this tricky technique in a few simple steps.
Selecting Your Photos
The images you capture for this technique should be taken at a regular exposure interval, usually 1 or 2 stops apart, and they should capture the range of tonalities in the scene. Even though there is an alignment function we can use later on, it is best to use a tripod to ensure that all of the exposures line up and get things as close to identical as possible in-camera.
QUICK TIP: Change shutter speed to vary exposure. Shifting depth of field may introduce artefacts.

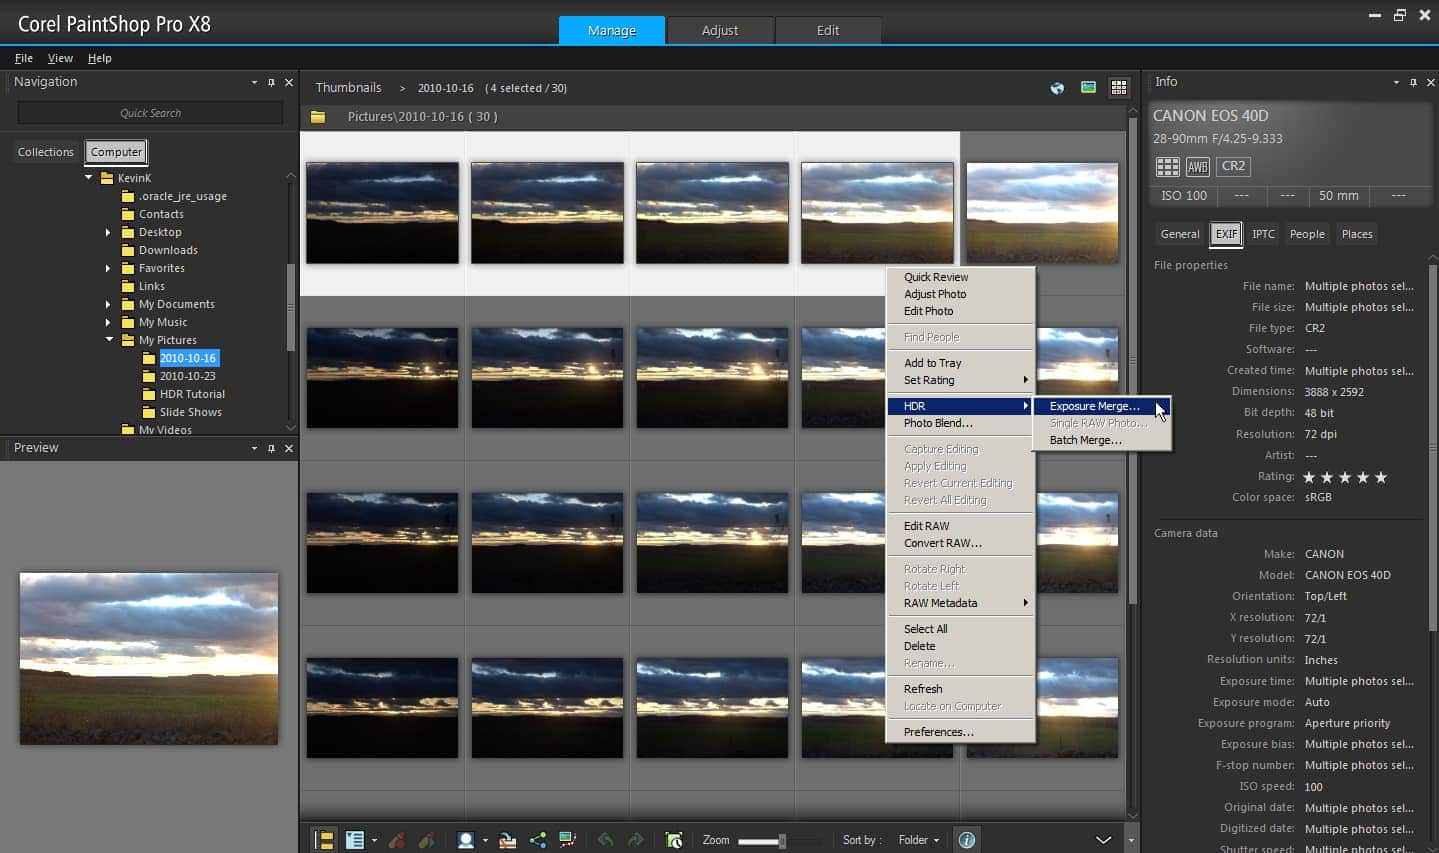
Here are the 4 bracketed exposures for a sunset scene I shot while on a recent photo nature walk.
Start in the Manage Workspace and select the exposures you will be merging (use Ctrl + left-click to select multiple photos), just as you see below. With several varying exposures selected, right-click and choose HDR—Exposure Merge. This brings up a new dialog box that will guide you through the first step of the HDR process – merging your photos.
Prepare and Merge Your Photos
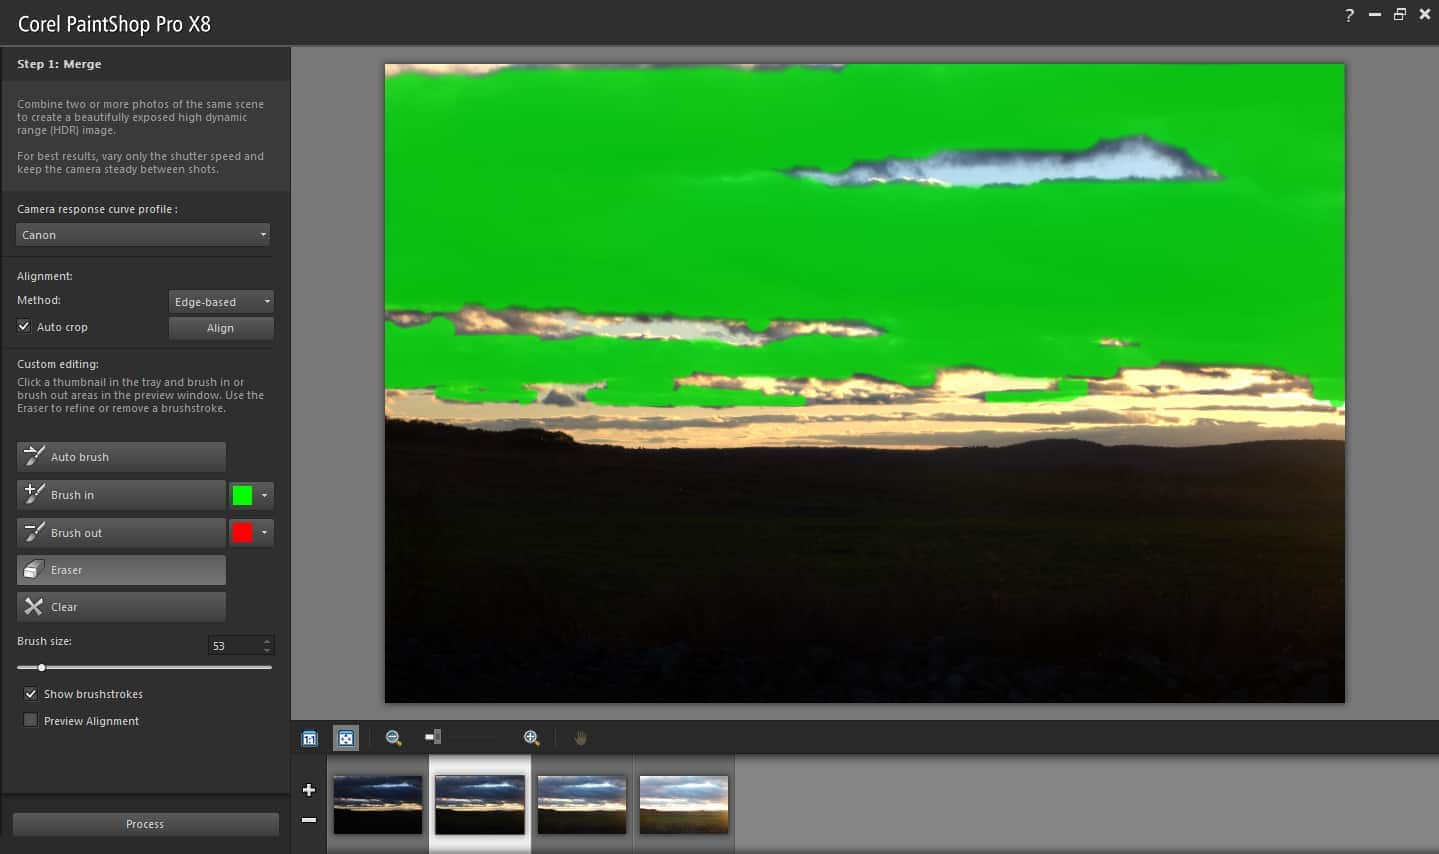
On this screen, there are a few options to set here. The first is the camera response curve. You’ll want to change this to match your camera model.
Next, select your alignment option. Your choices are to align the set of images based on their edges or to align major features. In this case the tree line forms a prominent edge and so edges will be a better choice. Click the Align button to complete the alignment.
The final step in this little process is an important feature called custom editing. This setting allows you to deal with large elements that may have moved or shifted between frames, like people walking around. In this particular case the clouds were moving.
Brush In lets you select a frame where the element is well-exposed and paint that object. The painted area from that one frame will be shown in the final merged image, while the same space is ignored in the other exposures.
Similarly, Brush Out gives you the ability to paint over items you’d rather leave out of the final merge.
In this case, I’ll select the frame with the best-exposed clouds and use Brush In to paint them into the final merge. Make sure you don’t Brush In the sky, so that can be included from darker frames where it is better-exposed.
When you’ve finished, click the Process button and you will be taken to the next step, HDR Adjustments.
Apply HDR Adjustments
This step offers a variety of adjustments to help you get the perfect high dynamic range look you are after.
You can start with the presets and work from those, but in this case I want a more natural feel to the scene and I skipped the presets.
The most helpful adjustment for this HDR image was the Temperature slider. The shadow light in this shot gave an overall blue cast to the clouds. To make the initial adjustment, use the Eyedropper tool on a neutral area and then refine the selection using the slider.
There are many other sliders to explore here, too. The 2 screenshots below show all of the sliders and settings that I used to create this particular HDR effect for this photo.
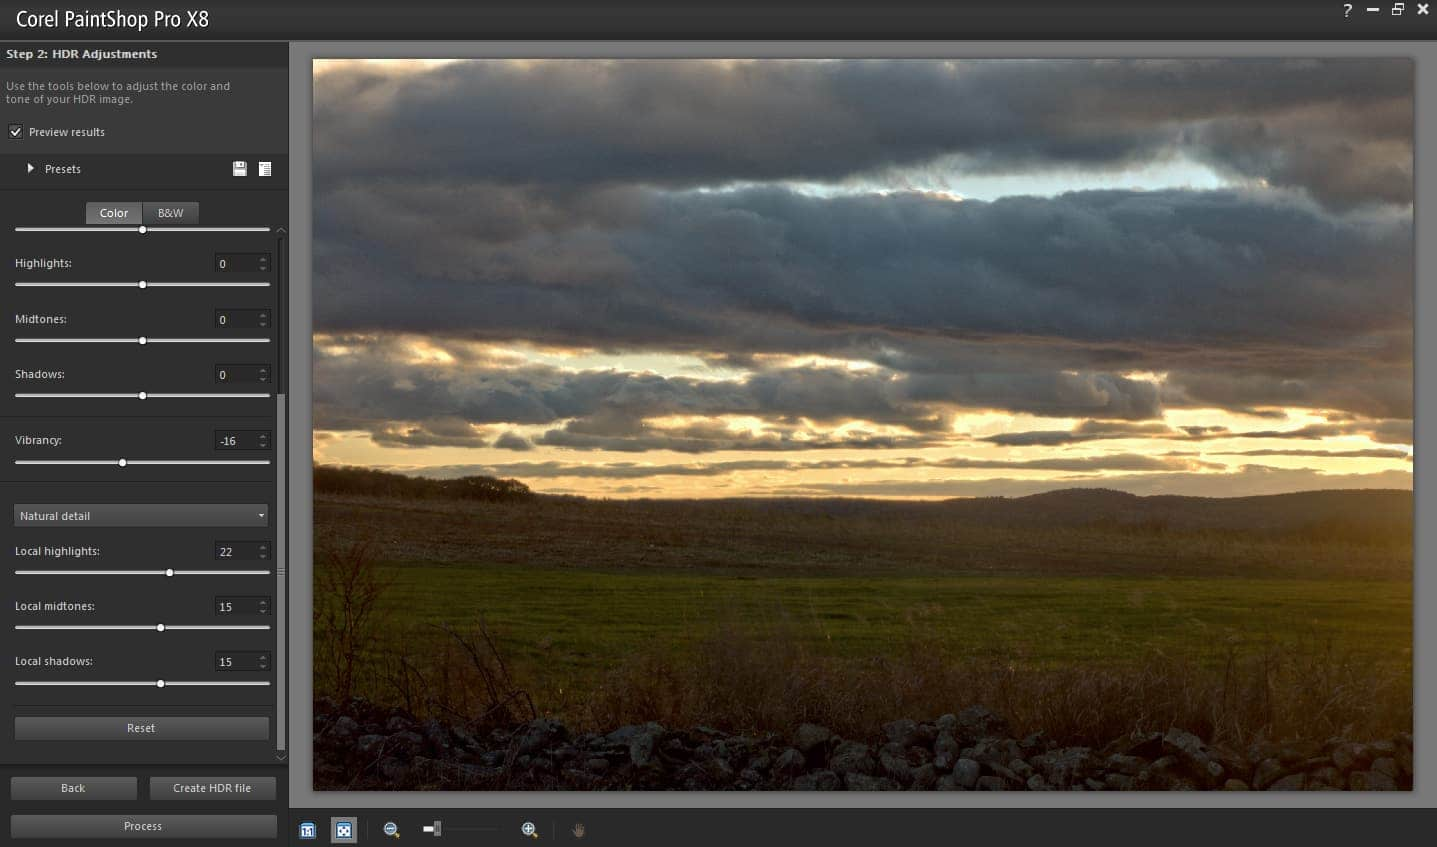
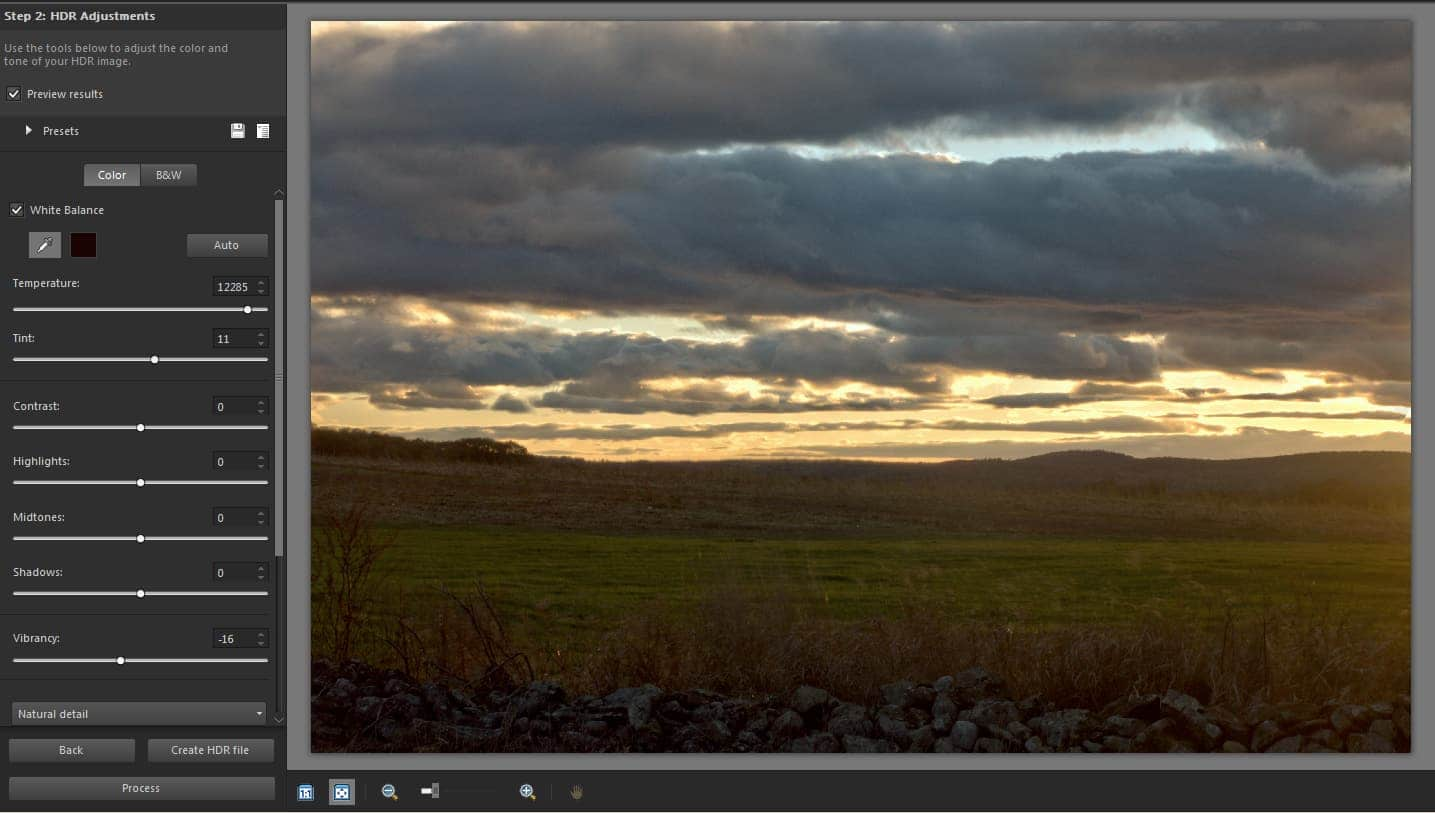
When you’re happy with the settings you’ve applied, click the Process button to lock in your changes and apply the HDR adjustments.
QUICK TIP: Found a setting combination you want to use again? Save it as an HDR Preset!
Fine Tuning and Tweaks for the Perfect Look
After clicking Process you will be taken to the third and final step, Fine-Tune.
At this stage you have the option to use many tools from the Edit Workspace to apply finishing touches to your newly merged HDR image.
You will probably want to look at all of these settings but be sure to look at High Pass Sharpen and Digital Noise Removal in particular because these automatically have default settings applied. The other settings all start at zero. For this image, I did some additional work on the white balance.
The Save and Close button will save the result as a .pspimage file, which you can then apply additional photo edits in the Edit Workspace.
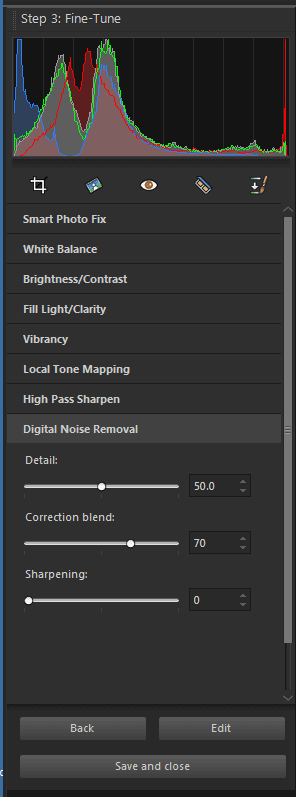
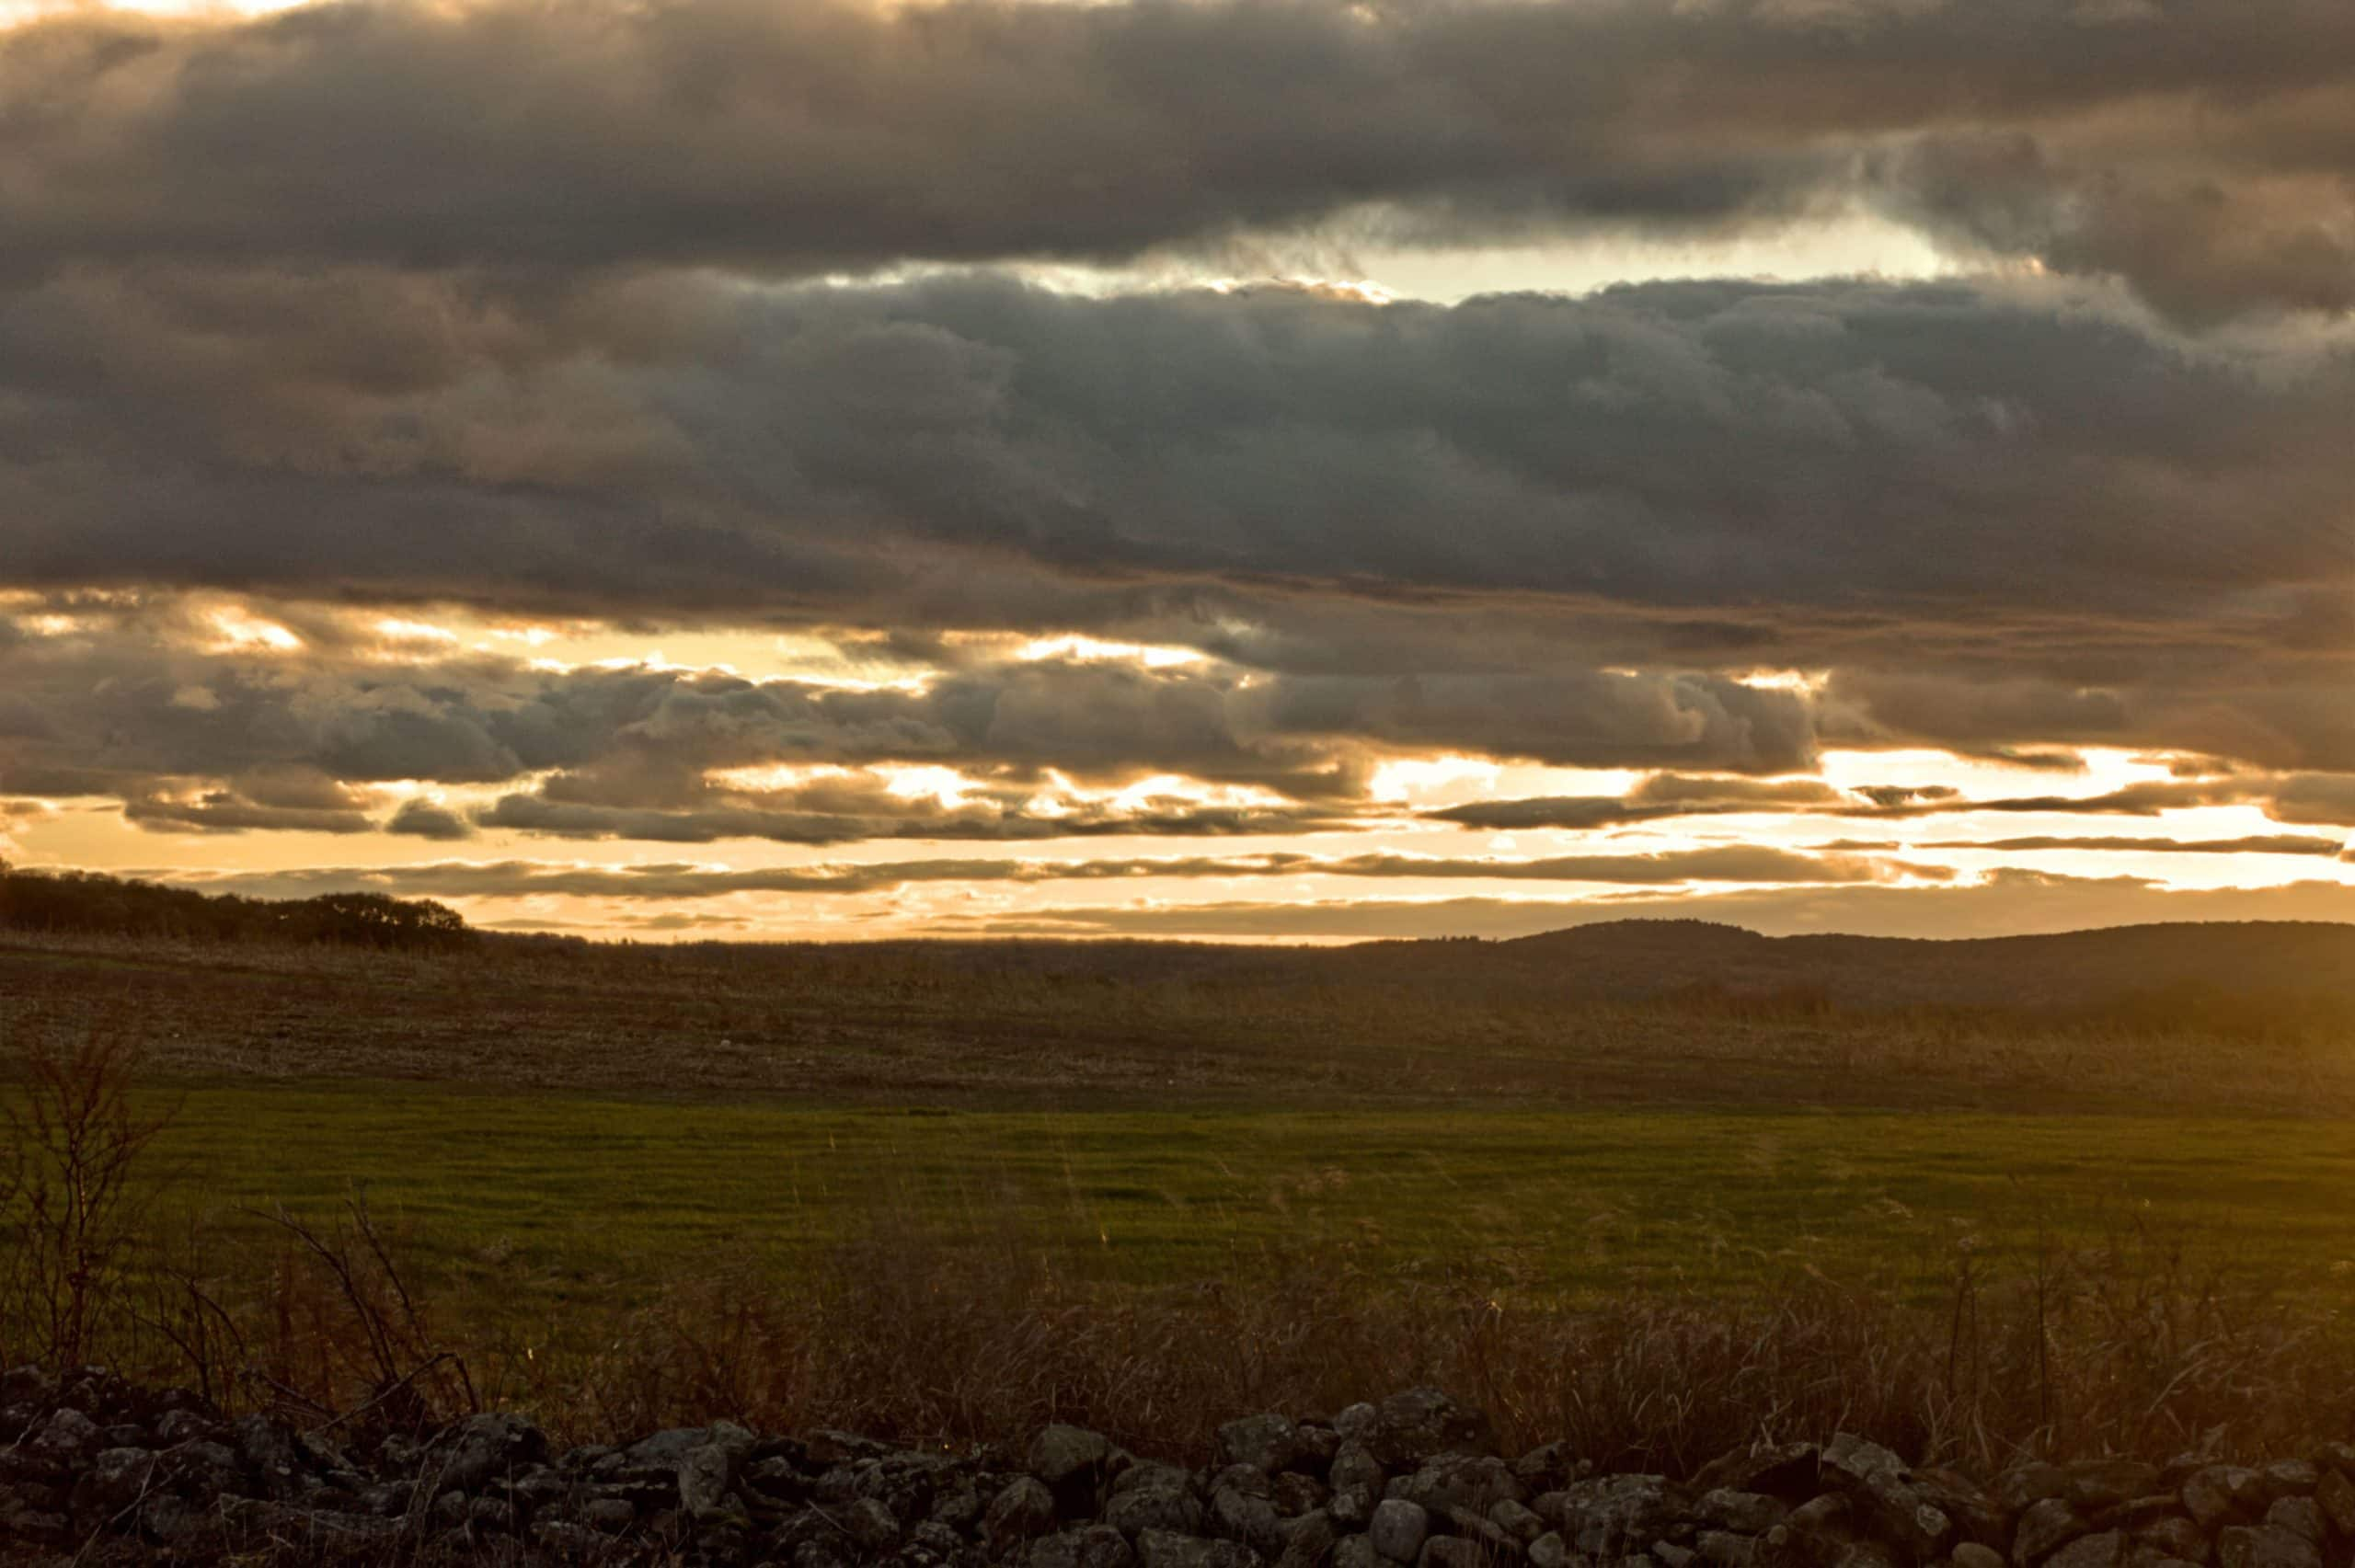
After merging my original photos, applying some basic HDR adjustments and then fine-tuning with some special tools, I was able to transform these four individual images into one stunning HDR-processed photo. PaintShop Pro offers unlimited possibilities for you to create the exact HDR-look you want for any image.
Take a look at my final results below and find your artistic expression with this powerful photo-editing tool in Corel PaintShop Pro!
Feeling Inspired? Download the Free 30-Day Trial of PaintShop Pro and discover the creative possibilities.




5 Comments