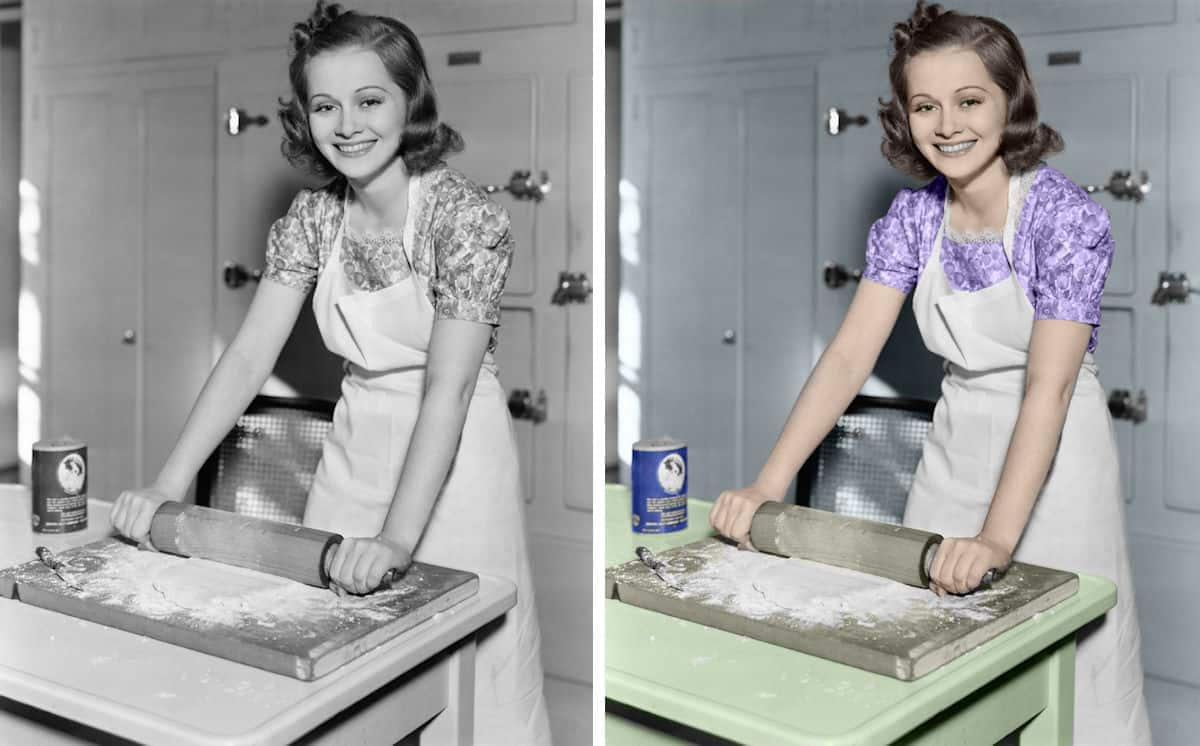
Colorizing, or adding color to, an old black and white photo is a time-honored tradition in photography. Back before color film was widely accessible, photo editors and retouchers would hand-paint the film using special dyes.
Thankfully, the whole process of adding color has become a whole lot easier these days—and you won’t make a huge mess or ruin those old family photos to do it—all with a little help from PaintShop Pro.
There are several different ways to colorize your photos, but this technique is completely non-destructive, meaning your color treatment won’t be permanent, mistakes can always be undone and you can quickly restore the original.
Ready to colorize your first photo? Let’s get started!
Our first step, as always, is to open up the photograph we’re going to be working with in PaintShop Pro. I’m using a vintage black and white photo of a young lady baking in the kitchen for this little project.
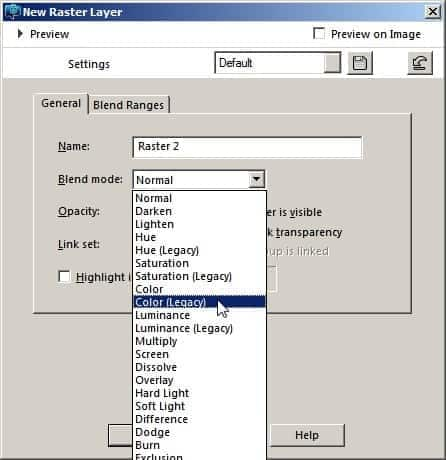
With your photo now open, head up to the Layers menu (or click the New Layer icon under the Layers Palette) and select New Raster Layer.
The little trick you need to know about, when it comes to colorizing an old photograph, is changing the new layer’s blend mode. A layer blend mode allows the contents of that particular layer to interact differently with other layers in your file.
For this project, we’ll use the Color (Legacy) mode. This blend mode makes it possible for texture in the black and white photo to be preserved, while adding the color information over top of the texture.
Note: Your image must be in RGB-8 bits per channel mode for this blend mode to be available. Check on this in Image—Image information in the menus, and if needed change it with Image – Increase Color Depth.
Next, select the Paint Brush tool and bring the hardness of the brush down to about 50.
Using a soft brush allows you to approach edges very closely and feathers the effect so it blends well with adjacent areas. Size the brush to cover the area you are coloring. I suggest using the largest brush possible to help speed up the process, but also to avoid the scalloping effect that can come from using a small brush.
Quick Tip: You can quickly change the size of a brush by holding down the Alt key and the left mouse button and dragging up and down.
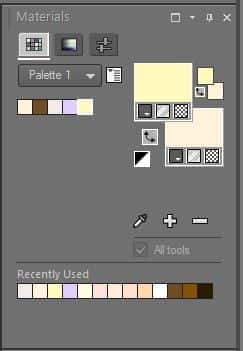
Now you will want to select the colors. This is done from the Materials Palette.
Quick Tip: Don’t see the Materials Palette? Use the F6 key or go to the View menu and select Palettes.
The Materials palette offers a few ways to select a color: Swatches, HSL map, or slider. These methods are selected just under the title bar of the pallet. You may find a color you like by scrolling up and down the swatches.
When you find one, click on the color you want and you are ready to paint.
If you happen to know the HSL, RGB, or web codes for the color you want, you can select them in the sliders section. In each case when you click the color it is set in the foreground color box.
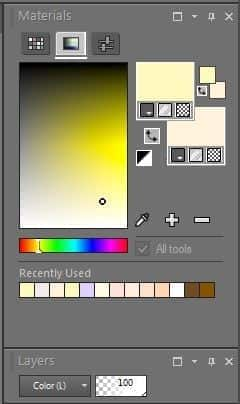
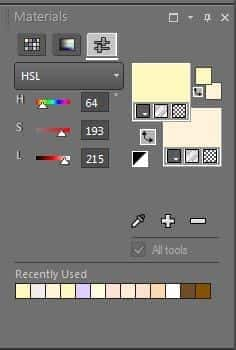
If you don’t see a color in swatches or don’t have a code you want to use, you can get a color with the HSL map or the material properties dialog.
The Material Properties dialog is accessed by clicking in the foreground (top) color box. The process is similar for each tool. Select a hue with the color wheel or the slider. Then adjust the brightness and saturation until you see just the variation you want.
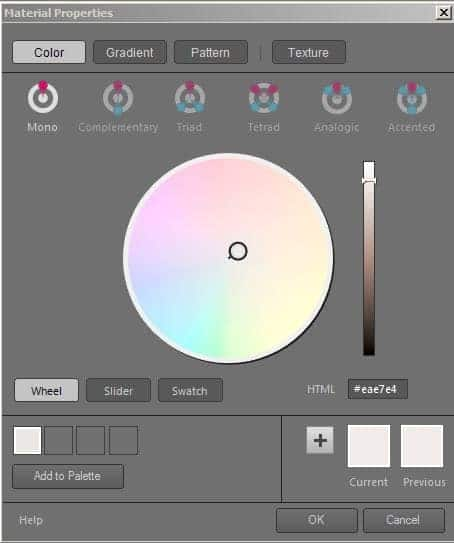
If you create a custom color in the color map or properties dialog, you may want to save it for future use by keeping your own custom palette.
If you want to, click the More Options button and select New Palette. The Add to Palette button (+ sign in the Materials palette) will let you add a color to the pallet as a new swatch. For this and similar projects, it is a good idea to save a color swatch in case you have to go back and do some touch-up work. It will be much quicker than finding the exact same color in the properties or HSL map dialog box again.
For this example, the skin tone was selected by starting with a swatch that looked close, then going into the Materials palette and bringing the selector circle closer to the center, giving a lighter, less saturated tone. The RGB values I used as a starting point were 238, 223, 214. When selecting colors for the hair and wood, I found that lighter, less saturated versions of colors I sampled from the web worked best.
If you are not experienced with color selections, it will be a good idea to color each item on its own layer, making sure to set the blend mode correctly. This way, you can adjust the opacity of each layer to help get the right effect for each color without affecting the other colors.
The actual brush work should be fairly straightforward.
Use the soft brush to approach edges carefully and you will find it fairly easy to keep color where it belongs. Zoom in and out with the mouse wheel and pan around the picture by holding down the space bar and dragging with the mouse.
Handle any mistakes either with the Eraser Tool or undo a stroke with Ctrl+Z.
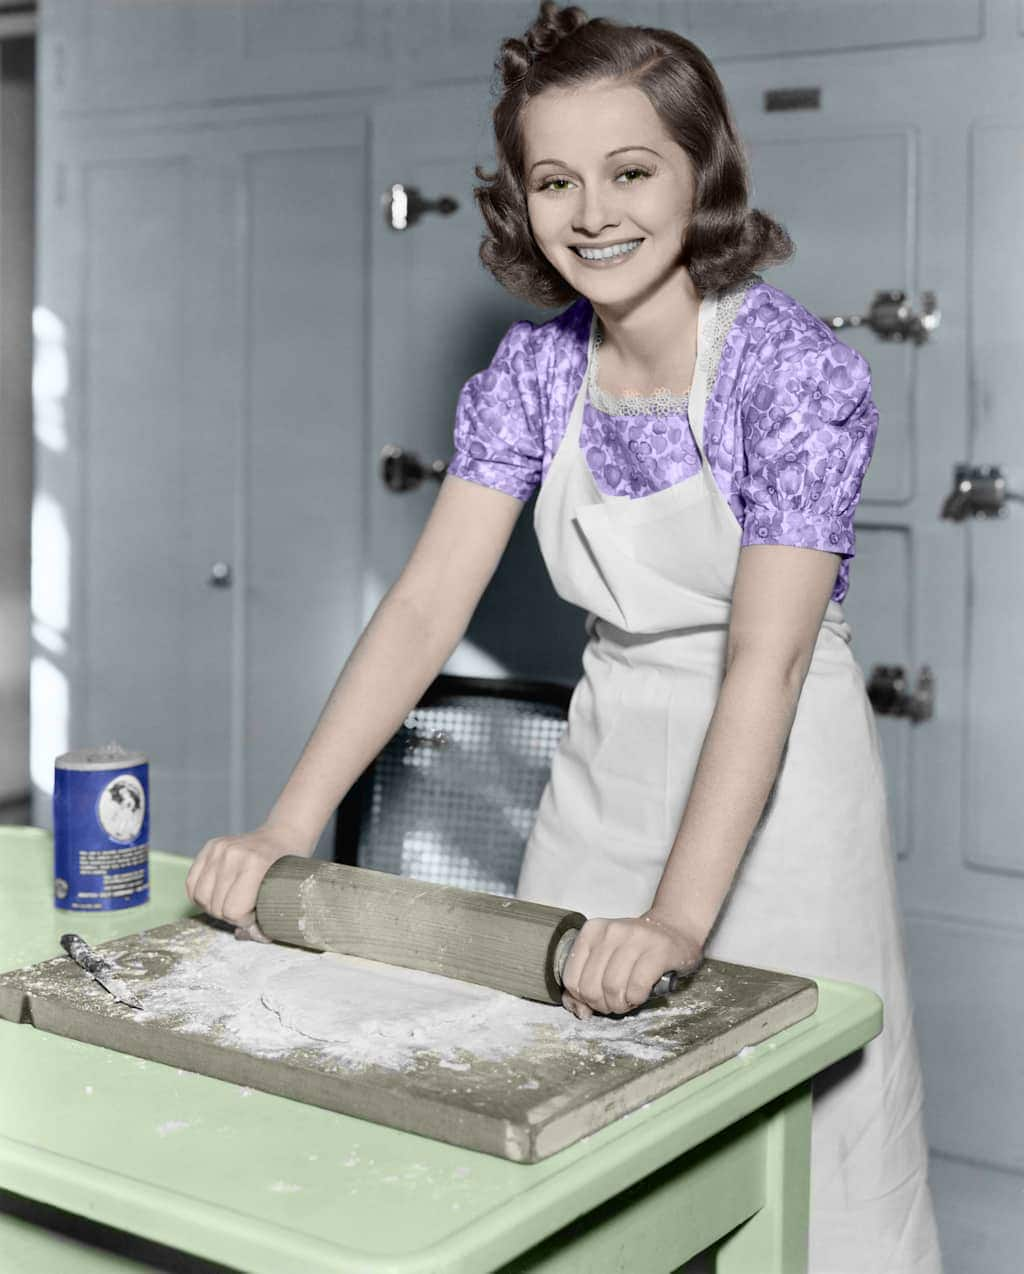
When you’re all done, you can add shading and different skin tones or colors by adding a new layer and painting directly over top. Below is my final version with a few more adjustments.
So break out those old photo albums, make your own digital copies, and have some fun colorizing your photos. It’s a great way to breathe some new life into old family photos and bring a traditional editing technique into the modern age!
Want to give it a try?
Download a free 30-day trial of PaintShop Pro today!




6 Comments