Heya folks! Bob here, back again with another PaintShop Pro tutorial! I’m dropping by this week to help you learn a little bit about sharpening your photos using the High Pass filter.
PaintShop Pro offers you more than one way to get the same results. The High Pass filter is a quick and easy way to punch up fine details, often delivering better results than some of the more complex techniques. It works so well because, like Unsharp Mask, it sharpens everywhere but the edges, which is exactly what you want.
Step 1 – Open Your Photo in PaintShop Pro
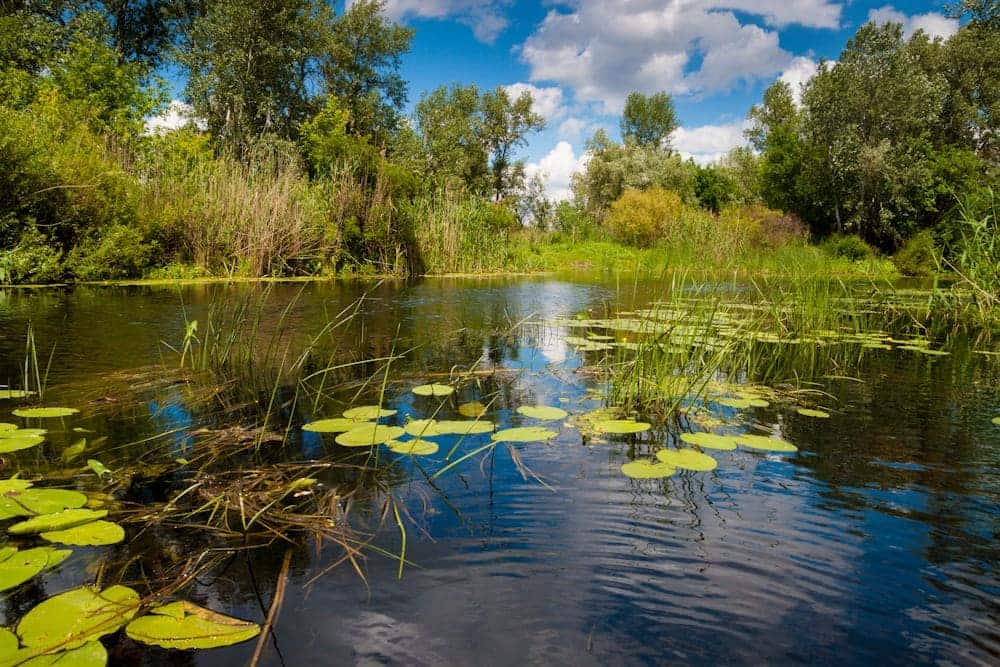
So the first step, as always, is to open up the photo you’re going to work on in PaintShop Pro. Here we have a photo of some brush by the water. This type of photo usually look better after some sharpening—so let’s get down to work.
Don’t have PaintShop Pro yet? Download the PaintShop Pro trial, free for 30 days.
Step 2 – Duplicate Background Layer
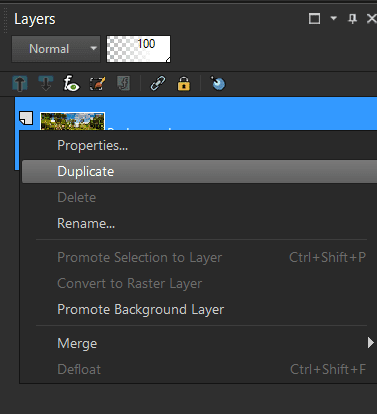
With your photo open, it’s time to duplicate the background layer. Right-click the Background in the Layers palette and select Duplicate.
Step 3 – Select High Pass Filter from Effects Toolbar
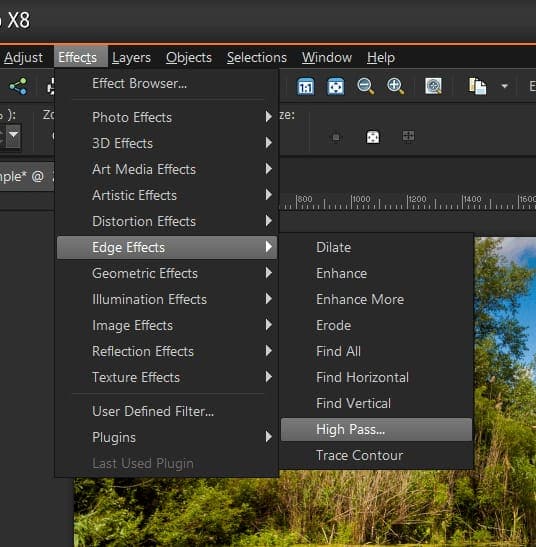
Now that you have a second layer to work on, head up to the Effects toolbar, go to Edge Effects, and choose High Pass…
Step 4 – Adjust High Pass Filter Settings
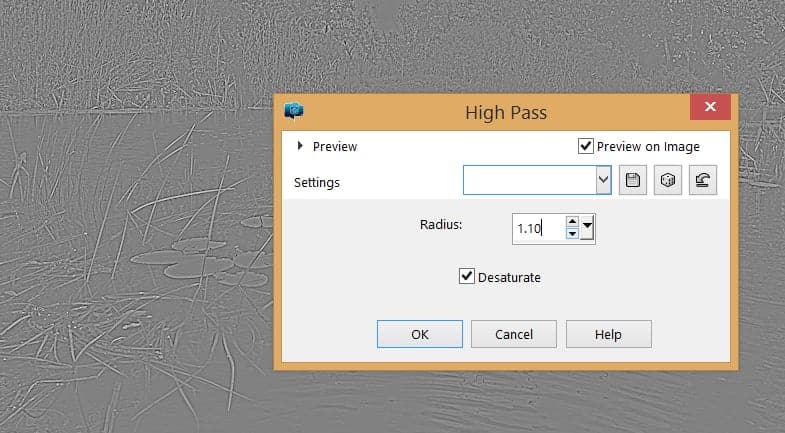
Your photo should now look gray. But don’t worry—it’s supposed to look that way.
With the High Pass dialog box open on your screen, move the Radius value up or down until there is only a faint outline of your photo, just like mine below.
As the radius number goes up, you will add more sharpening. The lower the number, the less sharpening you will see applied. Smaller values usually work best and you can make it even more precise by using decimals, too.
Step 5 – Switch Blend Mode
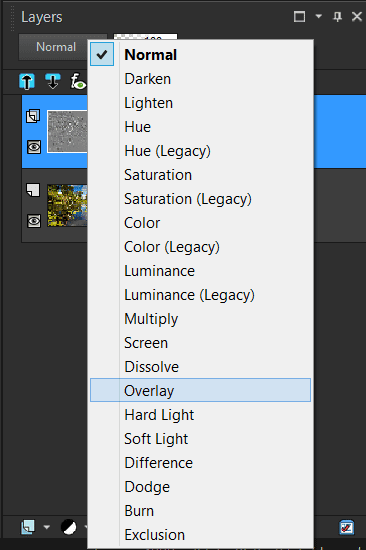
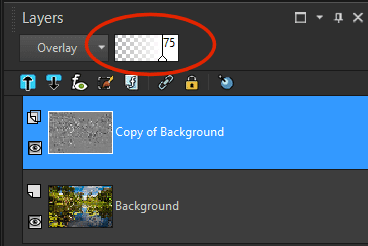
Next, you’ll need go back to the Layers Palette and change the Blend Mode to Overlay. By default, this option is set to Normal.
Try setting the blend mode to Soft Light (for less sharpening) or Hard Light (for more) to see how the High Pass filter changes.
Step 6 – Make Final Adjustments for the Perfect Look
In the final step, fine-tune the amount of sharpening by going back to the Layers palette. Move the opacity slider around until you get a final result you’re happy with.
So, what do you think? Here’s my final edit. The sharpening adjustments from the High Pass filter boosted the fine detail but the changes might be a little tough to notice because I used a smaller version of the photo.
How do you sharpen your photos?
Do you have any other methods that you like to use to sharpen your photos?
Tell me about them in the comments below.



1 Comments