Coloring books have always been fun great for kids and can really help pass the time. But did you know coloring as a grown-up actually has health benefits? Research has shown, the simple act of coloring can help people cope with anxiety or just generally beat the stress of everyday life.
But why spend money on coloring books when you can use your camera or your own image library to create all kinds of fun on your own computer with a little help from Paintshop Pro. Today, I’ll explain how you can turn your own photos into a coloring book page. So pick your favorite photo, fire up PaintShop Pro, and let’s get started!
Getting Started
Now, there are a few different ways you can get this job done and the best one may vary based on the type of photo you choose. You can try using different effects, like Pencil effect or using different Edge effects but, no matter which method you choose, it’s often best to find a photo where the subject stands out against a simple background.
If you find a photo with a great subject but think the background is a little too busy, you might want to try removing or blurring the background first before moving ahead. You don’t want too much detail, but not enough will leave the image looking a little empty.
For me, this family photo was the one I liked best for this technique.
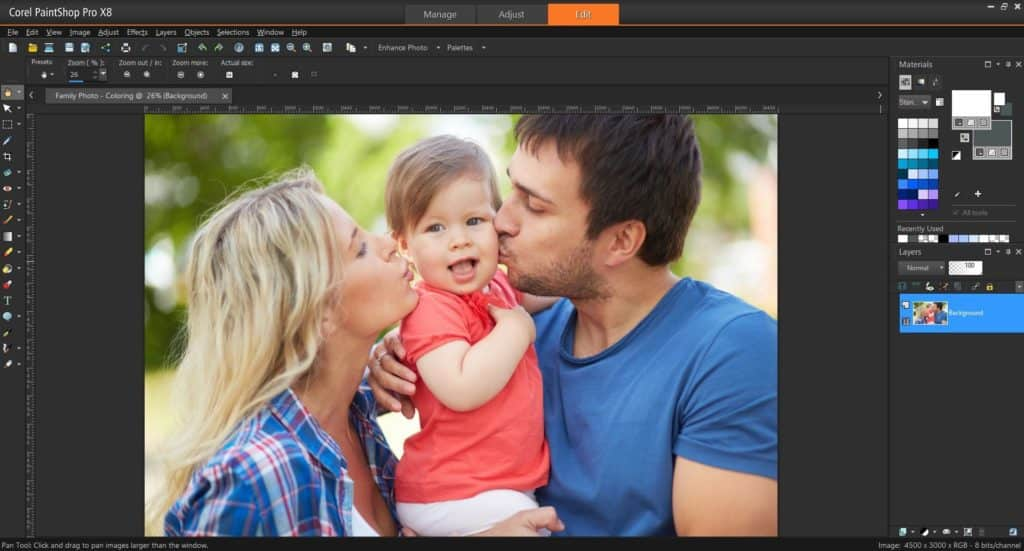
Quick Tip: Remember to Save As before you start. Give your file a new name to keep your original safe.
Step 1: Make Your Image Black & White
Since the goal of this tutorial is to ultimately turn your photo into a coloring book page, the first (and probably most obvious step) is to get rid of all the color in the photo.
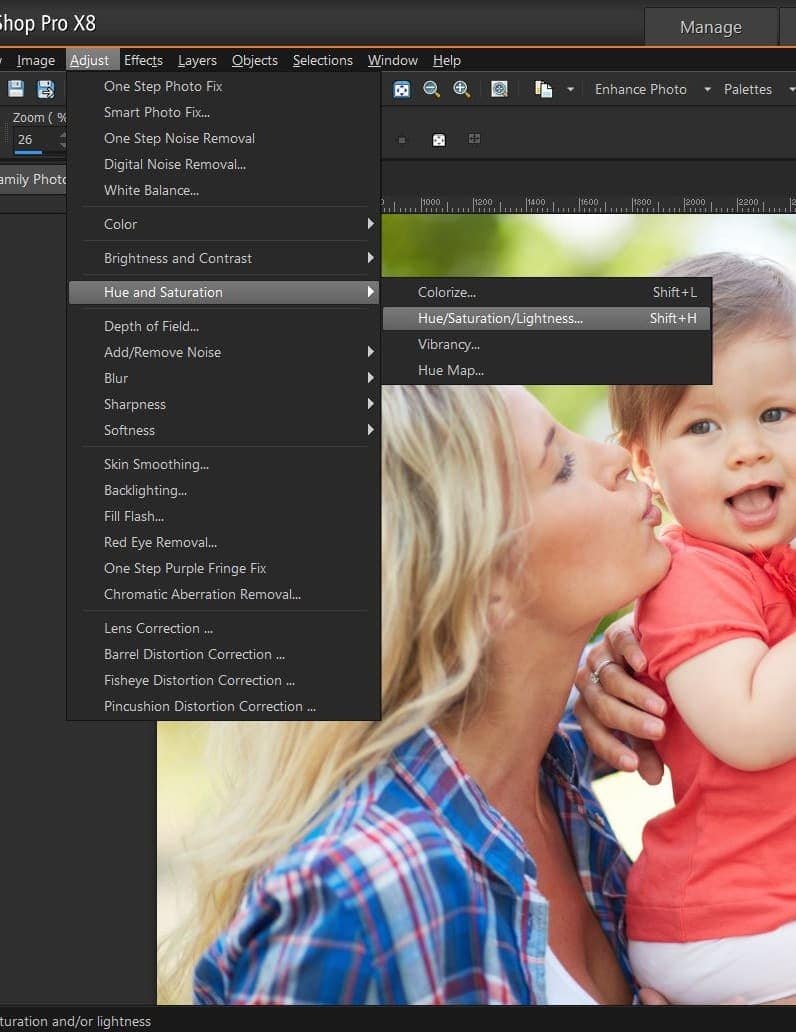
To do this, we’ll desaturate our photo. Head up to Adjust in the menu bar and then down to Hue and Saturation then select Hue/Saturation/Lightness.
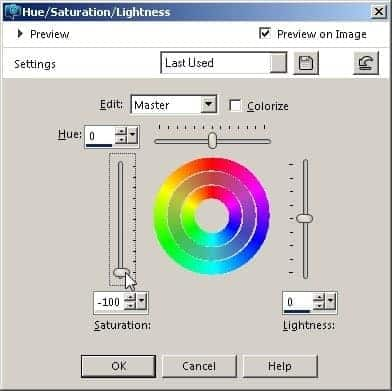
In the dialog box that pops up, pull the Saturation slider all the way down to the bottom, just as you see below.
Step 2: Duplicate Background Layer
With all the color from our photo now gone, our next move is to duplicate the background layer. Right-click the Background Layer in the Layers Palette and select Duplicate.

Step 3: Invert the New Layer’s Colors
With our two copies of the same black and white layer, the next task is to invert the colors of the new layer. To do this, we’ll create a negative of that duplicate layer.
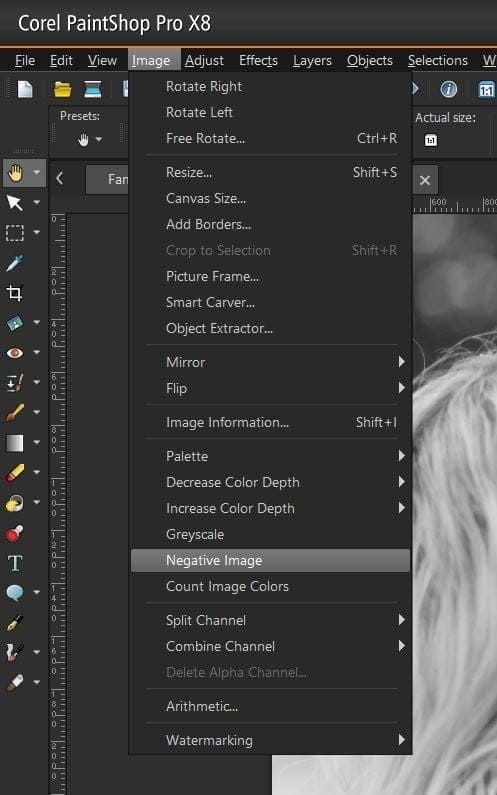
With the Copy of Background layer selected, head up to Image in the top menu bar and look for the Negative Image option highlighted below.
Step 4: Change Blend Mode to ‘Dodge’
Here’s where things get fun as we start working a little bit of PaintShop Pro magic to get the coloring book page look we’re after for your photo. These layers don’t look right the way they are now but, if you change change the way these layers interact, we can see all sorts of different results.
By default you should see the Blend Mode set to Normal at the top of your Layers Palette. To get the specific look we’re after for our coloring book, we’re going to use the Dodge layer blend mode. Just click on the drop-down that says Normal and change it to Dodge.
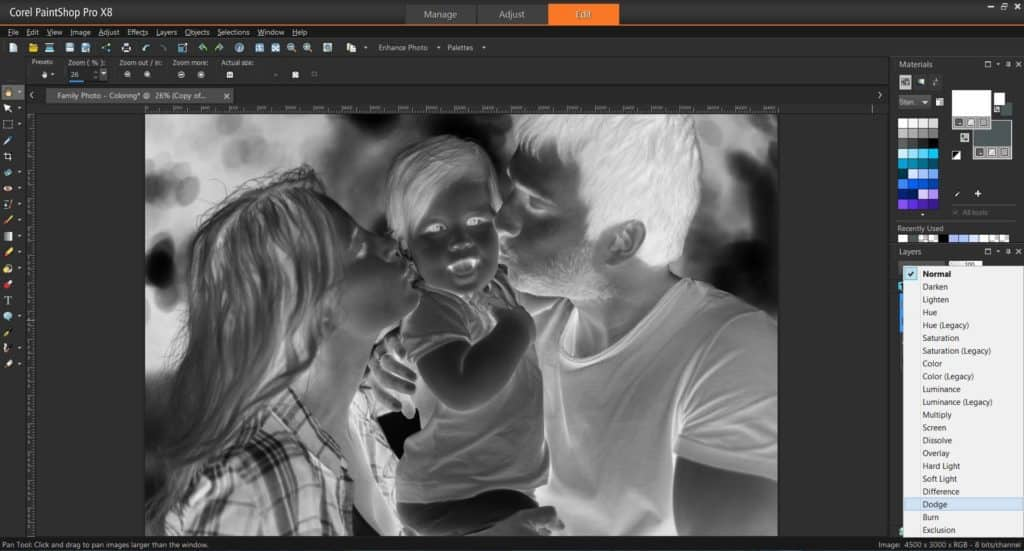
Your image will appear all white, but don’t worry. It’s supposed to look like this, so let’s move on to the next step.
Step 5: Add Blur to Top Layer
To start bringing back some of our image, we’ll need to add some blur to our topmost layer. With the ‘Copy of Background’ layer still highlighted, head back up to the Adjust menu in your top menu bar, move down to Blur, and select Gaussian Blur.
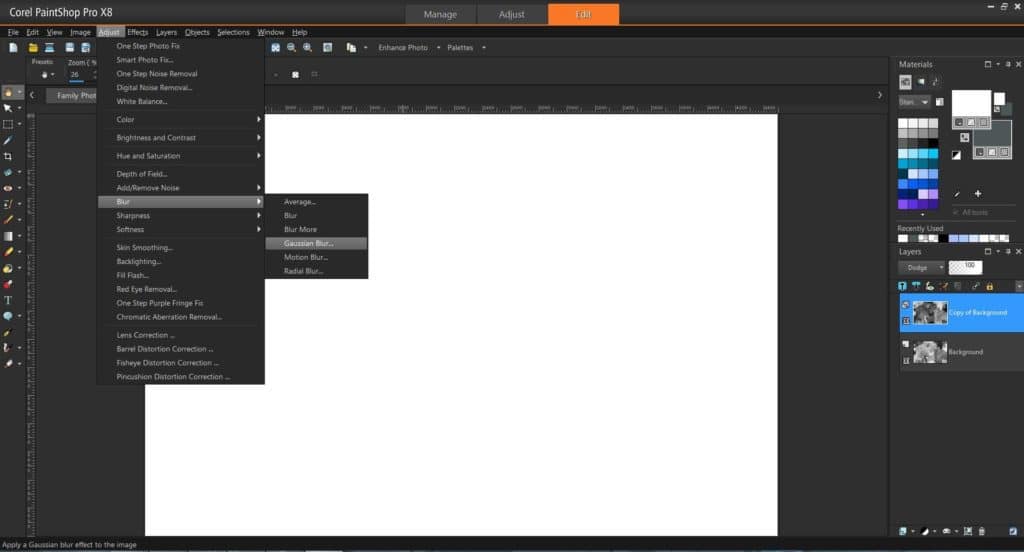
You’ll see a dialog box pop up, giving you the option to adjust the blur’s radius settings. At first, with the radius set to a low vale, the image will have a thin outline around your subject(s). Play around with the Radius value or move the slider around until you get an image with an outline that’s neither pencil-thin nor overly soft and blurry. I set mine to 30, but yours might range so test it out and see what works best.
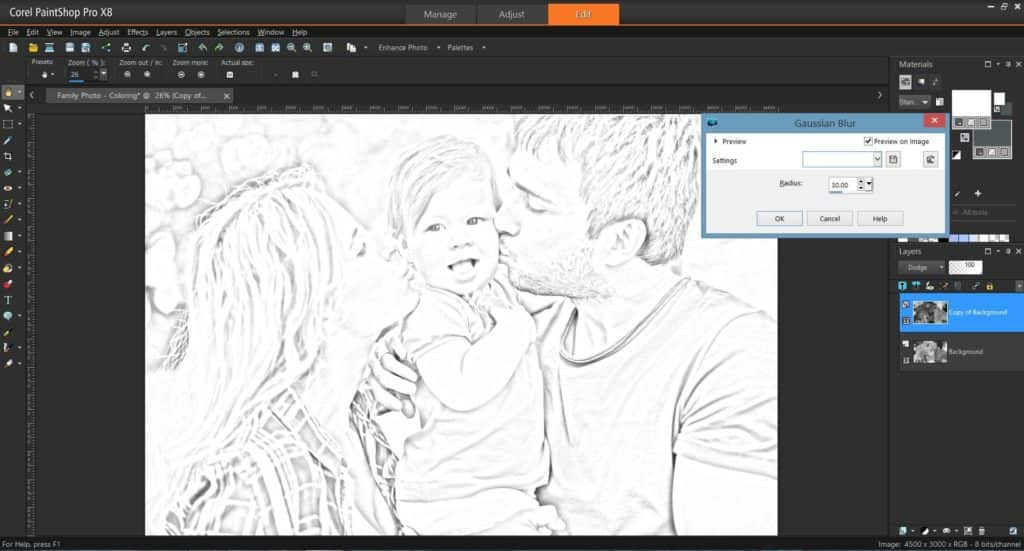
When you’re satisfied, click OK and move on to the next step.
Step 6: Flatten the Image
The next step in the process is to get rid of the individual layers while still maintaining all the changes we’ve already made. To do this, flatten your image by right-clicking on the Copy of Background layer, select Merge and then click Merge Down.
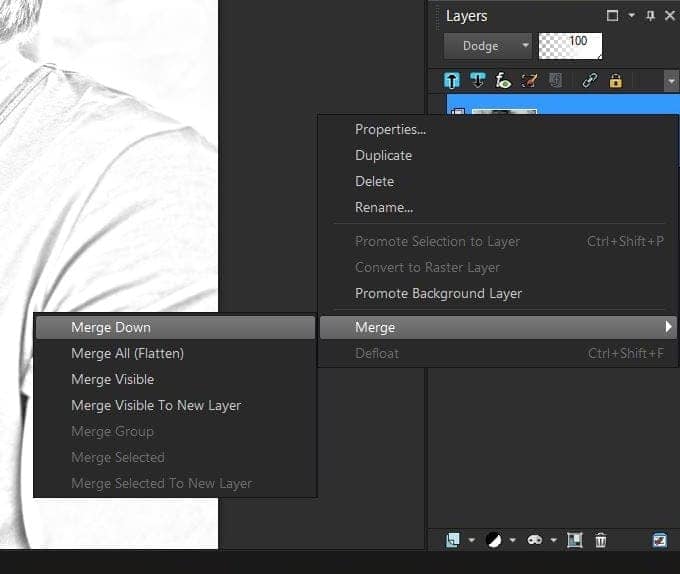
You’ll notice in your Layers Palette that there is only one layer now, which has been relabeled Background.
Step 7: Adjust Levels to Clean Things Up
You’ll now see the image we’re left with after adding the blur is definitely getting to where we want it, but we still haven’t quite turned your photo into a clean, crisp black and white page you can start coloring.
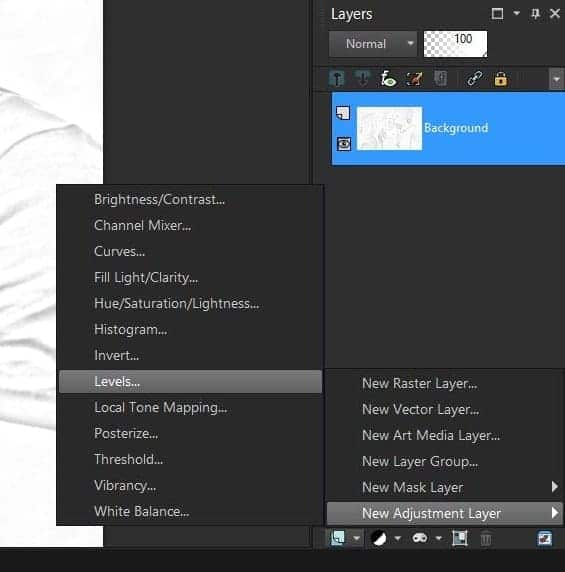
So, our next step is to get rid of those shades of gray and clean this photo up. The best way to do this is to add a new Adjustment Layer so you can manipulate the Levels.
Click the New Layer button at the bottom of the Layers Palette, go to New Adjustment Layer, then click on Levels.
Step 8: Move the Black Slider
You should now see a new pop-up in front of you that shows a graph with three sliders underneath it (one black, one gray, and one white). Move the Black Slider to the right until you see a pretty good outline of your subject(s). You’ll probably need to move it most of the way over and you should see your image get a lot darker.
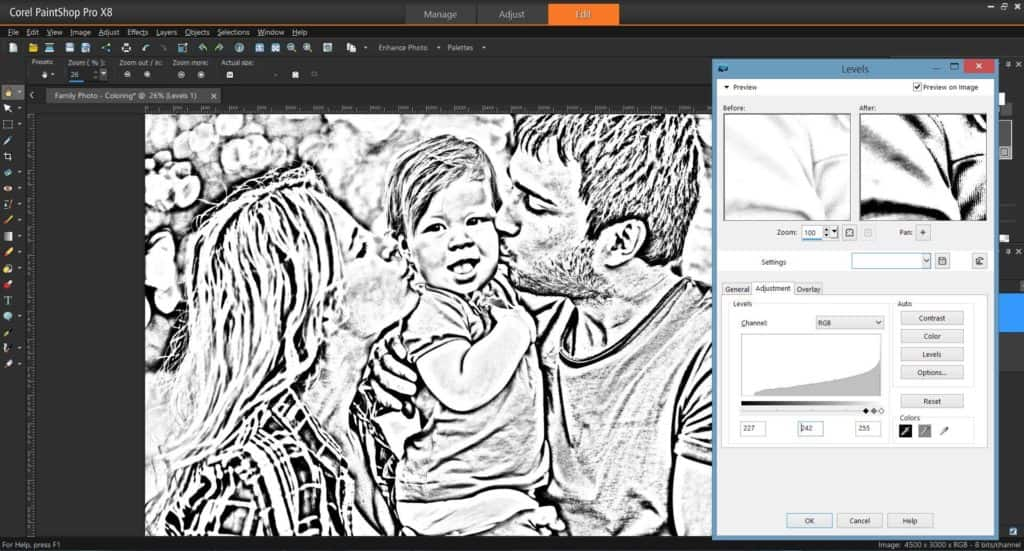
Step 9: Move Gray and White Sliders
With the black slider in position, it’s time to turn your attention to the gray and white sliders. Move both sliders as far left as you can without changing the position of the black slider and then adjust as you see fit. All the gray tones should be turned turned white, leaving a very clear outline in black and white.
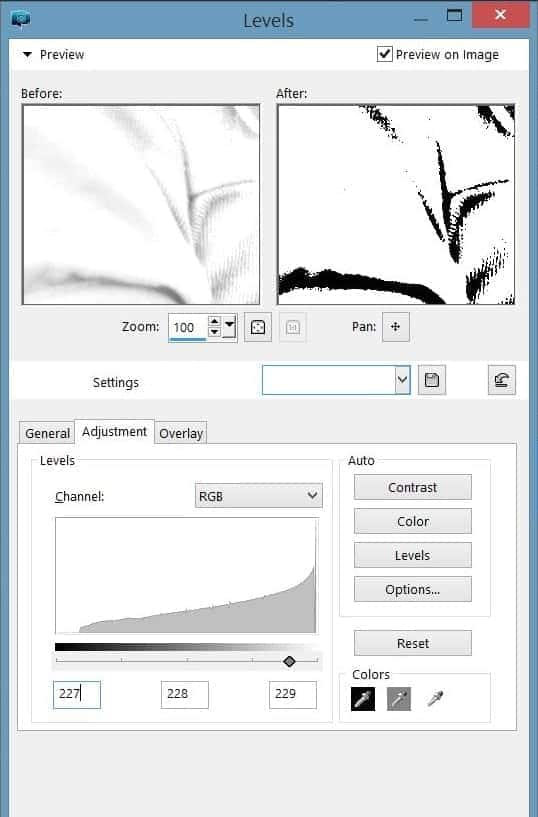
Quick Tip: Enter specific values for the black, gray & white sliders to get them closer. Values can be adjusted up to two decimal places.
Step 10: Save and Print
That’s pretty much all there is to it. All that’s left is save and print so you can get started.
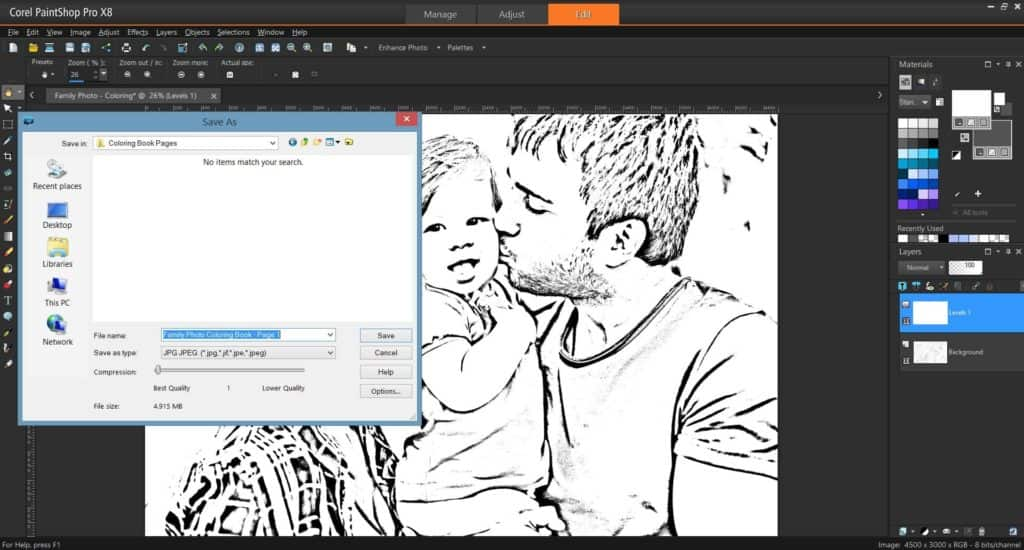
Head up to File in the menu bar and click Save As. Give your new coloring page a name and, in the Save as type drop down, select JPG JPEG.
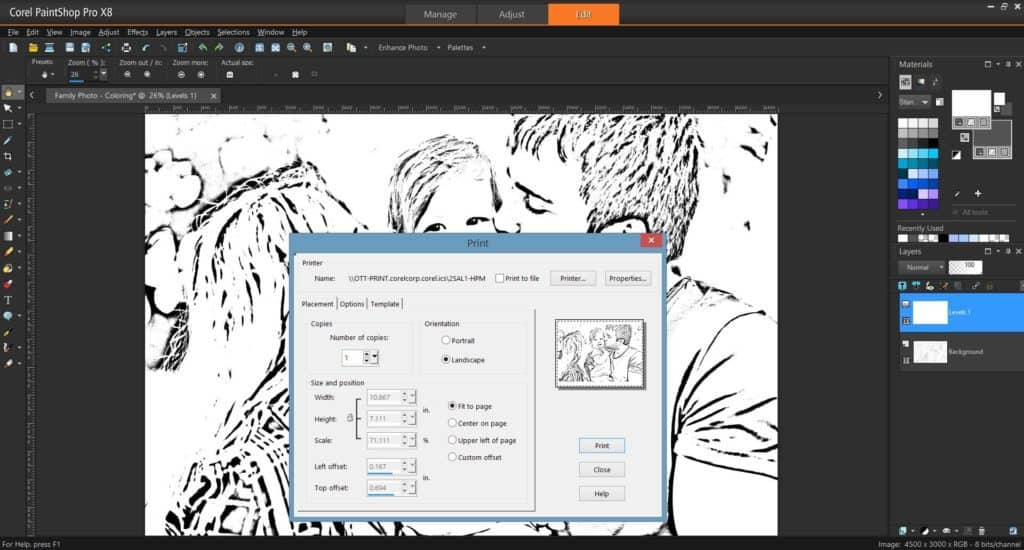
To print, go right back up to the File menu and click Print (or Ctrl + P). You’ll want a full-page print so tick the box next to Fit to page and flip the page orientation for your photo, for me it’s landscape, and then click the Print button.
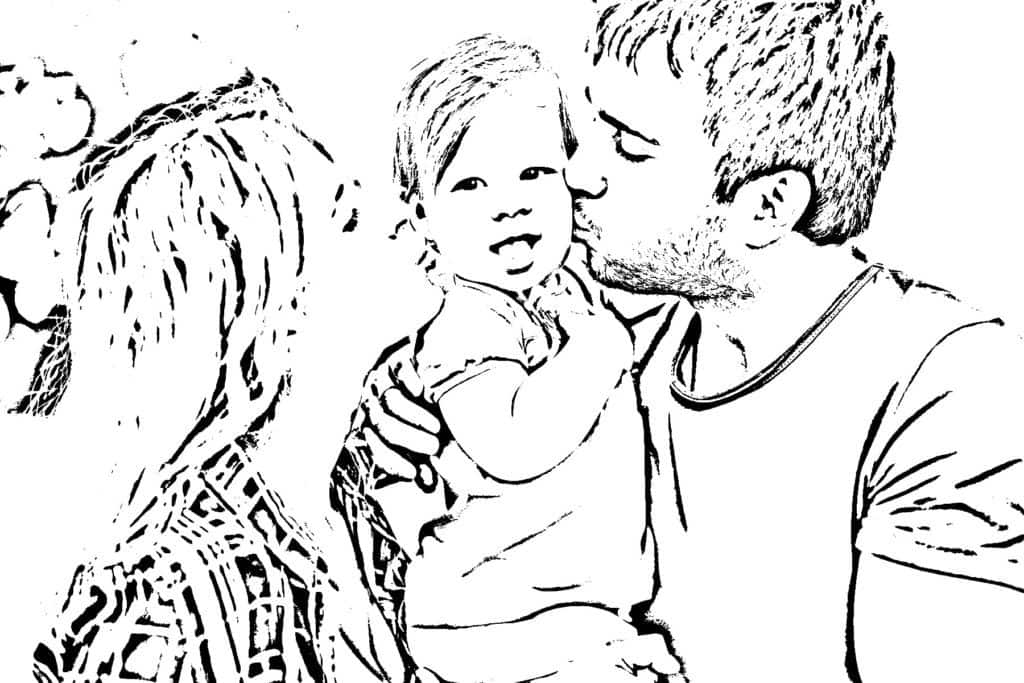
And you’re all done! Repeat these steps with a whole collection of photos and you can create your very own coloring book, filled with your photos and memories. It’s a fun and easy project that help pass the time and help relieve stress. Try it out!
Feeling Inspired? Download the Free 30-Day Trial of Paintshop Pro and discover the creative possibilities.





0 Comments