
In this tutorial, we’ll show you a hidden feature in PhotoMirage that you can use to make a back and forth animation. The technique involves adding and manipulating nodes on a standard motion arrow to change the one-directional animation to back and forth. Use it to make tails wag, hair flutter in the breeze, pendulums sway and much more.
Thanks for watching! We hope you found this tutorial helpful and we would love to hear your feedback in the Comments section at the bottom of the page. You will find a written version of this tutorial below, and a printable PDF copy to download on the Download Resources tab above.
Download your FREE 15-day trial of PhotoMirage and start creating stunning animations from your photos, digital designs and artwork in just a few simple steps.
Download these free resources:
Written Tutorial (PDF, 493 KB)
Sample Images (Zip File, 4.25 MB)
PhotoMirage resources
User Guide (PDF, 4 MB)
Keyboard shortcuts (PDF, 518 KB)
PhotoMirage Tutorials
Tools and resources
PhotoMirage animation software
With PhotoMirage you can effortlessly transform any image into a captivating animation in only a matter of minutes.
PhotoMirage free trial
Download your FREE 15-day trial of PhotoMirage and start creating stunning animations from your photos and images.
PhotoMirage gallery
Visit the PhotoMirage gallery and upload your animations. Browse the gallery for inspiration and see what other users are creating.
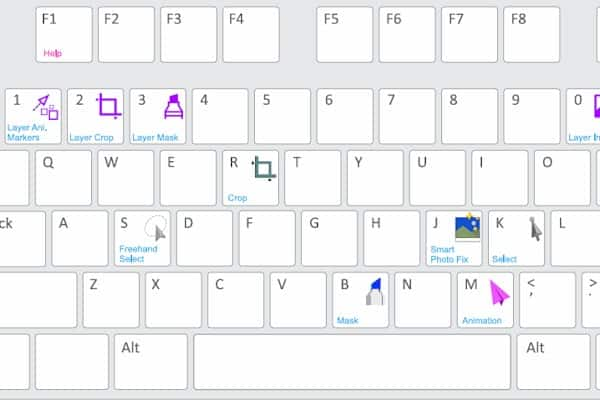
Keyboard shortcuts
Shave time off your most frequently performed tasks with this handy reference sheet for all the PhotoMirage keyboard commands.
How to Make a Back and Forth Animation
In this tutorial, we’ll show you a hidden feature in PhotoMirage that you can use to make a back and forth animation.
Click on any of the images below to view full-size.
Creating a Standard Animation
Open PhotoMirage, and on the main screen click the Open button to upload an image that you want to animate. In this example, we’re using a photo of a goldfish.
- Click on the Anchor points icon and plot anchor points around the area(s) that you want to remain static (in this case the fish’s body, so that the animation won’t extend past its tail).
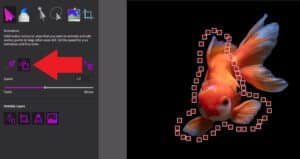
- Click on the Motion Arrow icon and draw an arrow on the part of the image you want to animate (in this example, the fish’s tail).
Click on the Play button to preview what this looks like as a standard, one-direction motion animation.
How to Make a Back and Forth Animation
Hold down CTRL on your keyboard and then click in the middle of the motion arrow you’ve just created. This adds a little square node to the arrow.
Carefully click on this node and drag it in the direction you want to make the animation follow.
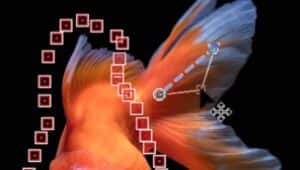
Press Play again to preview the difference between this motion and the last one.
- Make adjustments to the motion by clicking on the tail of the motion arrow and dragging it in a different direction.
Repeat this process with other motion arrows to make a back and forth animation across multiple parts of your image.
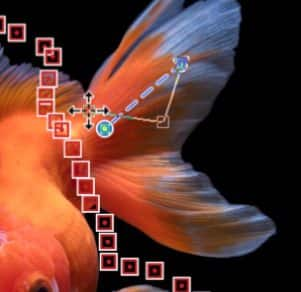
Press Play to preview and you’ll see that both the tail fins are moving back and forth independently, giving the illusion that the fish is swimming around!
How to Animate Straight and Wavy Hair
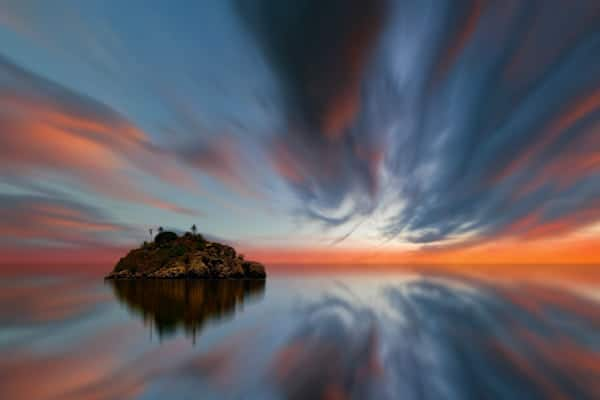
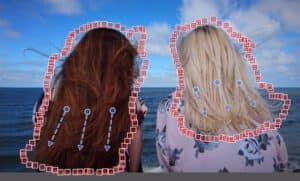
In this next example, we have a photo of two different women facing the water with their hair blowing in the wind.
- First, add anchor points around both women separating them and restricting the movement to just their hair and not the background or their bodies.
- Add three short motion arrows facing downwards at the bottom of the blonde woman’s hair.
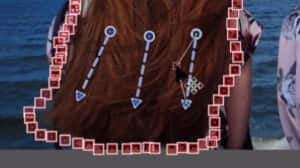
- Then add three motion arrows to the brunette woman’s hair as well.
- Hold down CTRL on your keyboard and click on the middle of the motion arrows to create a node.
- Drag the node to the left so it will make a motion going from left to right.
- Repeat this with all three arrows.
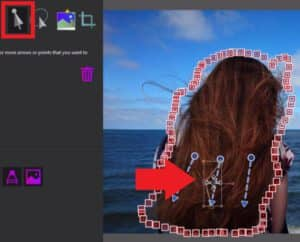
Note: As you create more motion arrows, it will appear as though your motion arrow has been reset as now all the arrows look the same. But they will still follow the motion pattern we created.
You can tell this by clicking on the Select button and dragging a box around one of the motion arrows to select it. When you move this arrow around, you can see the outline of the back and forth motion we just created.
- Add more back and forth motion arrows to create a fuller effect over all the woman’s hair.
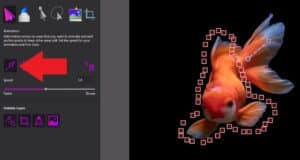
Remember that you can adjust the speed of the animation by adjusting the speed bar to the right or left.
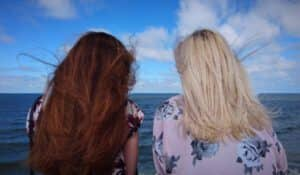
Press Play to preview your animation.
The blonde woman’s hair follows a simple downwards motion, while the brunette woman’s hair has a wavy back and forth motion.
These are just a couple of the fun ways you can experiment using this feature on your photos with PhotoMirage!
Download your FREE 15-day trial of PhotoMirage and start creating stunning animations from your photos, digital designs and artwork in just a few simple steps.
