
PhotoMirage has a number of Export Presets that make it really simple to share your animations on a variety of social media sites. In this tutorial we’ll first show you how to save your animation projects in the PhotoMirage file format (.cpm) for future editing, so you can pick up where you left off on your works in progress. Next we’ll explore the Export Presets, which will save your animations with the proper dimensions and loop durations specific to each social media site like Facebook, Instagram, YouTube and more. You can also set your own export parameters for file type, image size and loop duration to fit your needs, or share as an animated GIF via email. It’s time to start sharing your animations with the world!
Thanks for watching! We hope you found this tutorial helpful and we would love to hear your feedback in the Comments section at the bottom of the page. You will find a written version of this tutorial below, and a printable PDF copy to download on the Download Resources tab above.
Download your FREE 15-day trial of PhotoMirage and start creating stunning animations from your photos, digital designs and artwork in just a few simple steps.
Download these free resources:
Written Tutorial (PDF, 329 KB)
PhotoMirage resources
User Guide (PDF, 4 MB)
Keyboard shortcuts (PDF, 518 KB)
PhotoMirage Tutorials
Tools and resources
PhotoMirage animation software
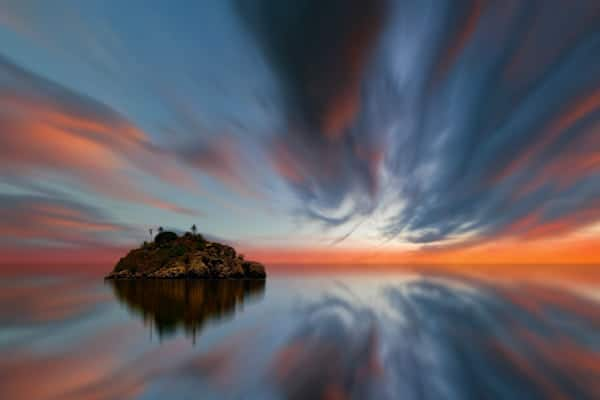
With PhotoMirage you can effortlessly transform any image into a captivating animation in only a matter of minutes.
PhotoMirage free trial
Download your FREE 15-day trial of PhotoMirage and start creating stunning animations from your photos and images.
PhotoMirage gallery
Visit the PhotoMirage gallery and upload your animations. Browse the gallery for inspiration and see what other users are creating.
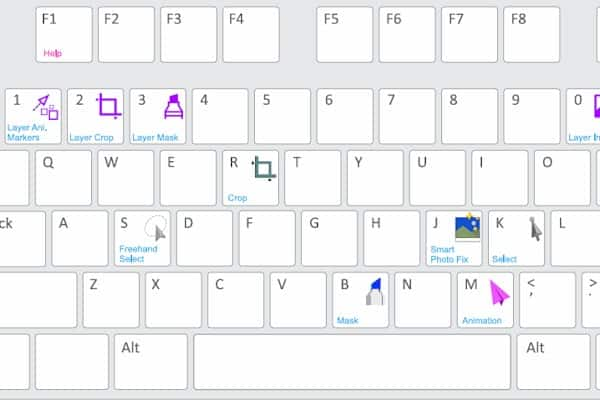
Keyboard shortcuts
Shave time off your most frequently performed tasks with this handy reference sheet for all the PhotoMirage keyboard commands.
How to Save and Export Photo Animations in PhotoMirage
As you work with an image in PhotoMirage, it’s a good idea to save it regularly before you export. But what’s the difference between saving and exporting?
Saving your project creates a .cpm file, which is a file format specific to PhotoMirage, and lets you open up the project another time and make changes to your animation setup. Exporting makes all those changes permanent and creates a gif or video file containing your animation.
In this tutorial, we will go over how to both save project files, and export finished animations.
Saving Project Files
Note: saving a project file is currently only possible in the full version of PhotoMirage. If you are using PhotoMirage Express, this menu option is not available. You are still able to export animations however! Skip ahead to Exporting Photo Animations to see how this is done.
To save a new project, click on File > Save As… then navigate to the folder where you want to save your project, type in a name in the File Name field, and click Save.
To save an existing project, all you need to do is click File > Save to update the file with your latest edits.
Exporting Photo Animations
Once your animation is complete, click the Export icon  in bottom Control bar or go to File > Export.
In the Export window there are a number of settings that you can adjust, including File Type, Image Size, Loop Duration, Quality and more. PhotoMirage has several preset export options for you to choose from, optimized for different social networks. Each preset has a fixed loop duration and size.
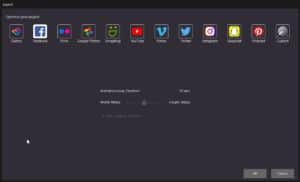
Using a Custom Export
There is also a Custom option at the far right if you need more control. Use this export option to select the output format, image size, loop duration, framerate, Codec, and final image quality. It also gives an estimate of the file size you will end up with using these settings.
Matching Export Resolution
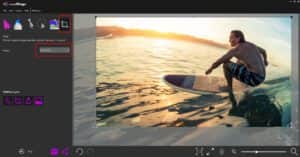
If your animation does not already match the export resolution, you will see the error message below. This means PhotoMirage will automatically crop or stretch the image to fit whatever option you select.

There are two ways to avoid this. The first option is to uncheck the ‘Size image to fit frame’ box (found in all export presets). If this box is unchecked and the resolution is not a match, PhotoMirage will add black bars to the sides or top of the image rather than cropping your image.
The better option is to make sure the crop resolution and export resolution match. Select the Crop Tool and use the dropdown menu to select the same social media preset that you want to export to.
Let’s prepare an export for Facebook. Select Facebook from the Crop Preset dropdown list.
The cropped region of your image will change shape slightly. Reposition it as needed to make sure you are exporting the right part of your image.
Now go back to the Export menu and select Facebook. The warning message is gone, meaning that when we click OK, PhotoMirage will export exactly what we see in the cropped region.
Exporting Photo Animations
Now that the crop and export resolutions match, click OK to export your image. Navigate to where you want to save the finished animation, give it a name in the File Name field, and click Save.
Export Via Email
If you are planning to share you file via email, click on the Email  icon (just to the left of the Export icon), or navigate to File > Email.
NOTE: This sharing option will only work if you have Microsoft Outlook or another email client that supports the MAPI standard.
From the email menu, select whether you would prefer to embed the animation in the body of the email, or include it as an attachment.
Then, use the dropdown to select your preferred image size for the animation. These are all smaller than files exported using the social media presets, as size limits on emailed files can be quite restrictive.
That’s it! You now know how to save project files for future edits, and export finished photo animations using Corel PhotoMirage.
Download your FREE 15-day trial of PhotoMirage and start creating stunning animations from your photos, digital designs and artwork in just a few simple steps.
